

The difference between a small pantry that works and one that slowly fills with duplicates you forgot you owned comes down to shelf depth, not square footage.
A 10- to 12-inch shelf keeps every jar visible; anything deeper buries ingredients behind cereal boxes until you buy a second bag of what you already have.
I learned that the hard way, reading through dozens of builds where the same regret kept showing up. The right fix depends on whether you are renting and working a weekend, or owning and ready to cut into walls.
1. Clear Containers for Visibility
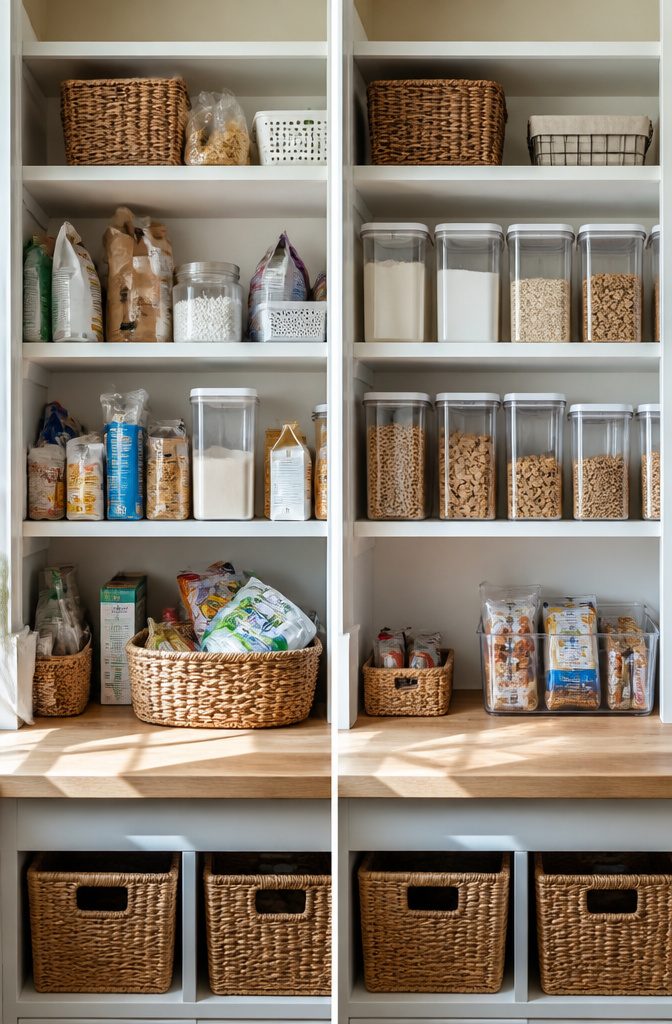
Opaque bins hide what you already own, and in a small pantry that means buying a second bag of flour while the first sits untouched behind a cardboard box.
Clear containers end that waste by letting you read stock at a glance.
I decant the staples that live here permanently: flour, sugar, oats, the oversized carton of goldfish that shrinks to half its width once the crackers move into a slim cereal keeper.
Snack bars and loose chip bags go into one labeled bin the kids can dig through, which eats less shelf real estate than five upright boxes.
What stays in original packaging is anything temporary or already tidy: zip-bag protein powder, oats in a canister, items that rotate out before the month ends.
The visual payoff is quieter than you’d expect. Strip the printed cardboard and the same shelf suddenly feels organized without any actual reconfiguration.

BPA Free Material: Our storage bins are made of premium BPA free, durable, shatter-resistant, clear plastic. Food Safe. These organizer bins are crystal clear, allows you to find the contents quickly.

✅Functional Storage for Any Space: You can use these pantry bins for various things throughout your home to organize and make your life easier. They are fit to pantry organization,ideal for cabinet, kitchen, fridge, bathroom,under sink, closet,laundry room and RV.The clear organizing bins to store drinks, snacks, cans, meat,body face wash, cleaning supplies and daily necessities.

Set Of 6 Pantry Storage Organizer – Bask in the glory and take pride of your weekly grocery haul, with this minimalist shatter-resistant, square storage containers, each measuring 11 x 6 x 7.4 Inches.
2. Floor-to-Ceiling Shelves
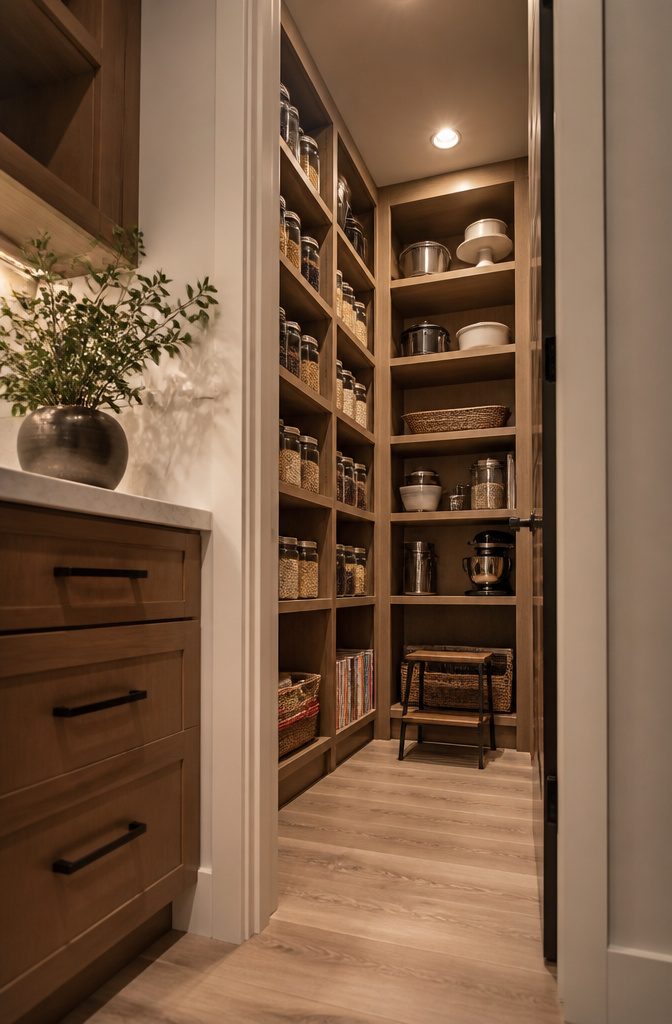
The wall above most pantry doors sits empty, and that gap is where a small kitchen wins or loses. Floor-to-ceiling shelves use every inch of vertical height, turning the same footprint into roughly double the storage.
I would put the daily stuff at eye level and waist height, then rotate seasonal bakeware and the appliances that clutter counters up to the top shelf where they stay accessible but out of the way.
A foldable step stool lives in the corner so reaching that top row never becomes a reason to leave it empty.
Adjustable shelving matters more here than in a tall closet, because cereal boxes and oil bottles do not share one friendly height.
The KraftMaid Multi-Storage system adds door-mounted sections for small items that would otherwise steal shelf space. One choice to make early: pull-out drawers below the shelves, or stationary supports with baskets on them.
The pull-outs cost more and eat a few inches of depth, but they keep the back row from becoming a graveyard of expired cans.
Without them, flat stacking bins and a metal bin for chips or protein powder do most of the same work for less.

【Matrial】Industrial pipe shelving features a sturdy metal pipe brackets ,Painted black matt, Hardware Only,No plank Included.
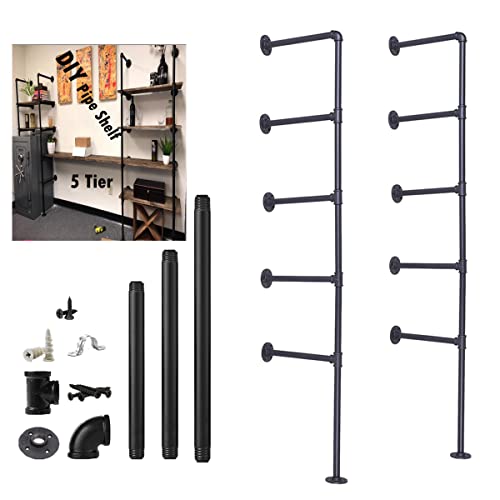
Material:100% Iron, Painted black matt, Hardware Only,No plank Included.

The package Include all necessary fittings(Pipes, T fittings, elbow fittings, Screw and Anchors),Not Include wood planks
3. Two 12-Inch Lazy Susans Side by Side
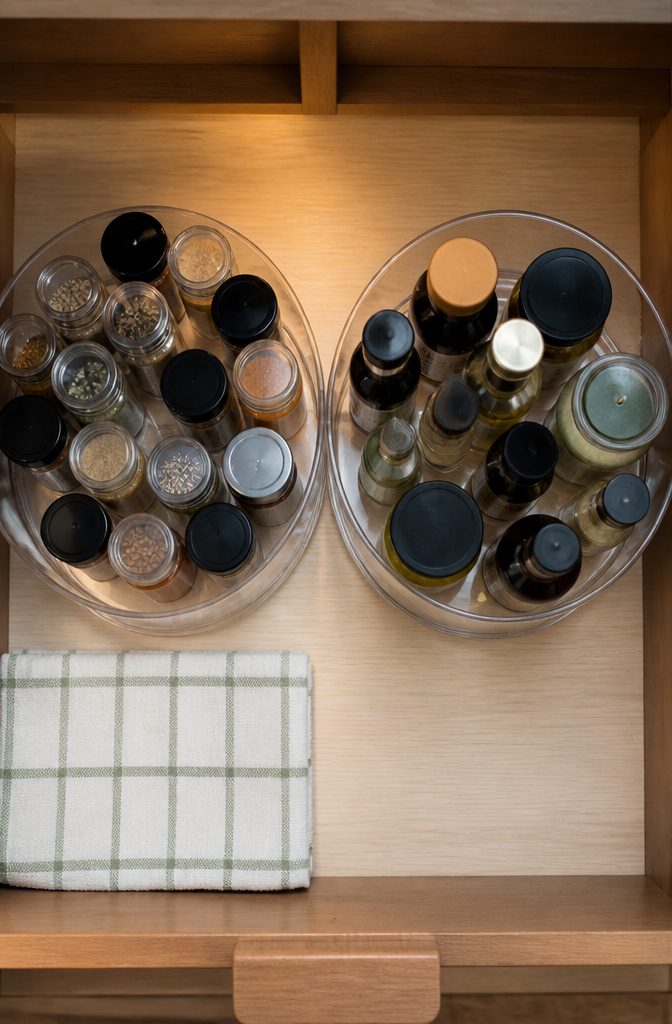
Two 12-inch acrylic lazy Susans line up neatly on a standard pantry shelf, and that pairing is what turns dead space into storage you can actually use.
The diameter matters because anything larger starts crowding the neighboring shelf or sticking past the front edge, and anything smaller leaves gaps where jars tip or roll.
Side by side, they fill a shelf depth of about 24 inches without overhang, which is exactly the footprint that sits in the blind corner or the back half of a deep cabinet where bottles of vinegar and sauce otherwise disappear.
The rotation lets you see every label at once instead of pulling out three jars to reach the one behind.
Acrylic keeps the weight light, so the shelf itself does not sag, and the rim on most models stops round bottles from sliding off mid-turn.
If your pantry has a 10- to 12-inch shelf depth, one Susan still works, but the side-by-side setup is what claims the full width of a standard 24-inch shelf and makes deep-space access feel intentional rather than apologetic.

YOUR ITEMS, YOUR WOOD – YOU SUPPLY IT: Supply 3/4" thick wood (e.g., 1x4 to 1x10 pine or plywood, sold separately) for custom-fit shelves that match your items.

Elegant Design: Enhance your living spaces with delta's black 5-tier, set of 10 wall shelf brackets, offering a clean and minimalistic design that seamlessly fits into any decor style. Add your own wood shelf for a sophisticated, modern shelving system.

Easy to Use: Simply fix the clip in the appropriate position on the pilaster shelf wall column. effortlessly maintain your space with our premium Pilaster Shelf Clips, designed for easy installation and breezing usage
4. Over-the-Door Organizers
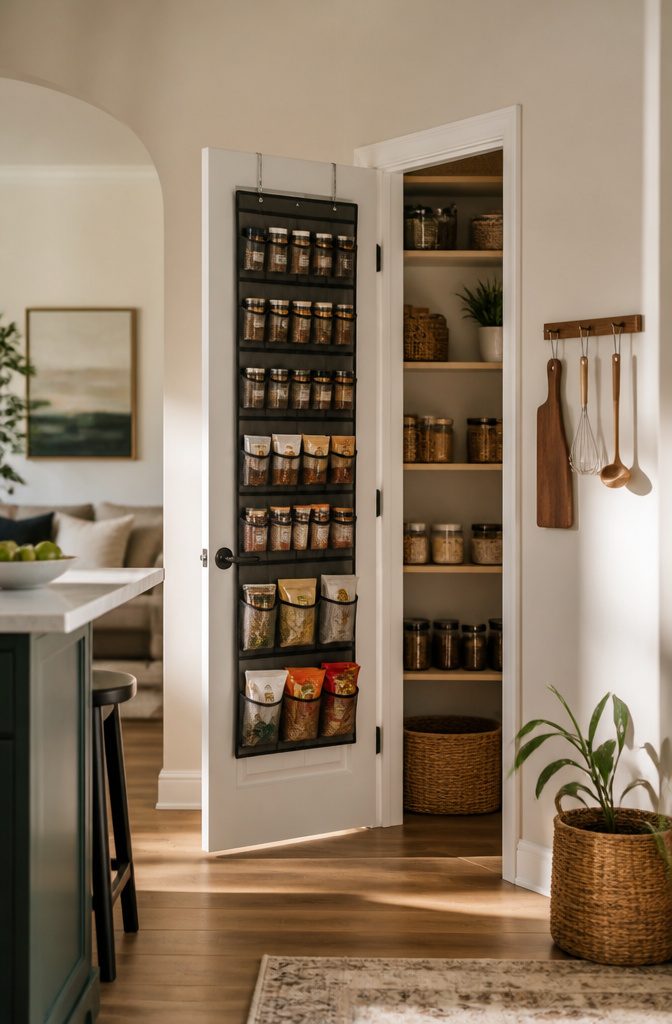
The back of a pantry door is dead space until it isn’t.
An over-the-door rack turns that vertical real estate into storage without swallowing a single inch of shelf or floor space, which matters when your kitchen is already working overtime.
What belongs here is anything light and frequent: spice jars, snack bags, the packet of rice you reach for twice a week.
Keep it under roughly a pound per hook or pocket so the door swings easy and the hinges don’t complain.
Heavy bottles and bulk flour stay on fixed shelving where the structure can take it. Balance the load left to right, or the rack will list every time you open the door.
I learned the hard way that not every door can handle this. A hollow-core door on a rental pantry flexed enough to make the rack rattle.
Solid doors or a cabinet-style pantry door hold steady. In a narrow walk-in where 10 to 12 inch deep shelves line both sides, that door-mounted layer becomes your grab-and-go zone, the stuff you need without stepping fully inside.

Effortless Access with 360° Rotation: Imagine easily accessing items using our 12 inch Lazy Susan turntable for cabinet, even in hard-to-reach areas, without knocking jars over. It brings convenience to your daily routine

【Easy to MoveTurntable Organizer】the Fridge Lazy Susan with handles on both sides to ensure that you can easily lift and move,the 3.5-inch high edge can prevent items from tipping over and ensure the spinning safety of taller Sauce,Condiment,SeasoningLazy Susan

[ Please Note ] - The lazy susan is large enough for 12 cans of coke (refer to the 2rd image). Please read the lazy susan dimensions and measure your tabletop or closet space before ordering in case it doesn't fit. Overall Size - 12" x 1.55". Available Size - 11.1"
5. Labels Everyone Can Read
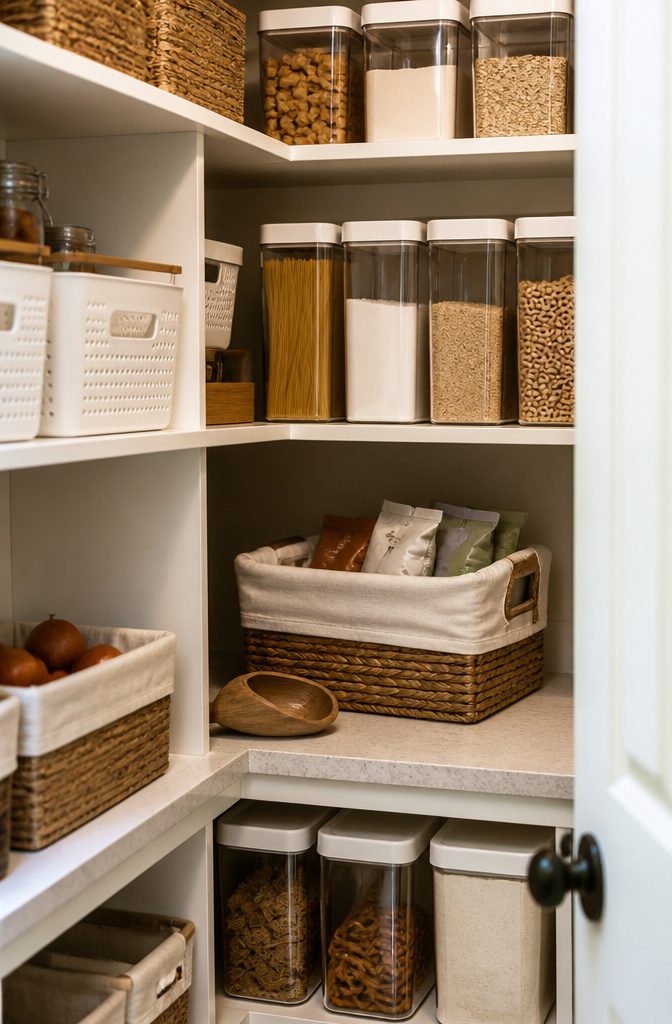
A label maker sitting in a drawer for years still works fine. That is the first thing to know about pantry labels: the tool does not need to be fancy.
What matters is that the label goes on before the system is even a day old, because the person who did the organizing is rarely the only one putting things back.
Labels are for the people who did not build the system. A container of pretzels or goldfish decanted into a clear bin looks obvious to the person who filled it.
To a partner grabbing a replacement bag from the store, unmarked storage is just a guess. A printed category, "snacks" or "sweet treats" or "dinner ingredients," removes the guesswork and the follow-up question across the house.
Chalk labels and chalk pens solve the problem of changing your mind. Printable labels applied directly to containers do not peel off neatly when a household switches from one favorite snack to another.
Wiping and rewriting beats scraping and reprinting. The same applies to baking supplies where gluten-free and regular flours look identical once they are out of the bag.
Expiration dates written directly on decanted containers are worth adding even when the household has only one cook who knows the system by heart.
The cook who remembers where everything sits may still forget how long that flour has been in the bin.

2-Pack Large Capacity Storage:Includes 2 pull out cabinet organizers to maximize cabinet space and organize more in less time. Each organizer measures 15.7"L × 11.8"W × 7.9"H (40 × 30 × 20 cm), providing ample storage for spices, bottles, cans, snacks and other pantry essentials while keeping your kitchen neat and clutter-free.

IMPORTANT NOTICE: Our cabinet pull out shelves are not suitable for cabinets with lips.Before ordering, please measure your cabinet dimensions correctly using the method shown in the picture.If your deep cabinet has a lip, please choose from our other drawers options designed for cabinets with a lip available in the store

【Important Note】This kitchen cabinet organizer is designed for frameless cabinets only and will not fit cabinets with frames around the doors
6. Zoning by Category
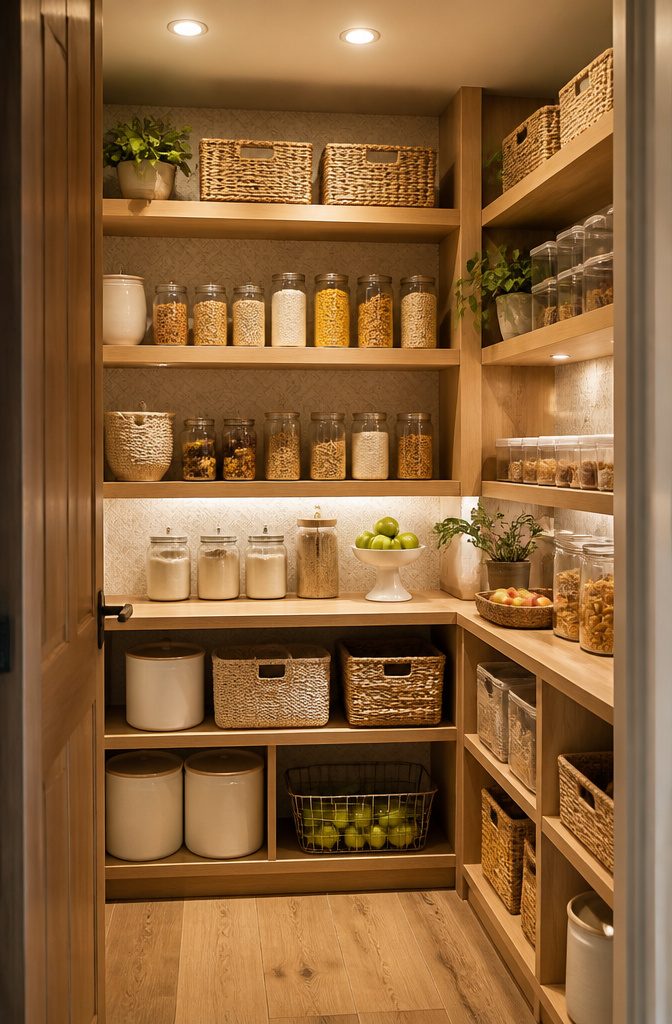
The magazine fantasy of a pantry sorted by pasta shape and spice origin lasts about three days in a real kitchen.
What actually holds up is grouping by the moment you reach for something: breakfast, baking, weeknight dinner, snacks. A grocery-store layout works because it mirrors how you cook, not how ingredients look on a shelf.
I tried the pretty version once, flour and sugar in matching canisters with handwritten labels.
By month two I was digging past the sugar for the brown sugar, then shoving the canisters aside to find baking powder I’d stashed who-knows-where.
Now flour, sugar, and every other baking supply live in one zone, and that zone is the shelf I have to bend or stretch for, because I bake maybe twice a month.
Breakfast gets eye level: cereal, oatmeal, pancake mix. That is the stuff my hand finds without my brain engaging.
The real test is what happens when the system is half-ignored for a week. Categories based on actual habits still point you in the right direction; categories based on type or aesthetics dissolve into chaos the first busy Tuesday night.
Snacks need more real estate than baking in my house, so snacks get more space.
The only rule is that every zone has to be visible from the door, because in a small pantry, out of sight means a duplicate purchase by Friday.

PORTABLE & STACKABLE – Built-in, easy-grip side handles make it easy to transport from place to place. These plastic storage bins are perfect for pantry organization and storage or kitchen organization. These clear stackable storage bins are great for anywhere in your home.

Large Storage Bins for Any Spaces-- A set of 6 XL organizer bins, make it easy to organize and declutter messy kitchen, cabinets, closets, pantry, bedroom, dining room, laundry room, nursery, garage or sink, and make your life easier.It can hold a variety of items including snacks, drinks, spices, cleaning supplies, cosmetics, perfumes, canned foods, personal care items, office supplies, crafts, medications, bottles, books, meeting all of your storage needs.

Make Storage More Simple — If you are struggling with your packets and want something to organize them, our food packet organizer bins will be a great choice for you. They are perfect for organizing snacks, spice packets, gravy packets, seasoning packets, tea packets, instant food packets, and other packets.
7. 10 to 12 Inch Deep Shelves
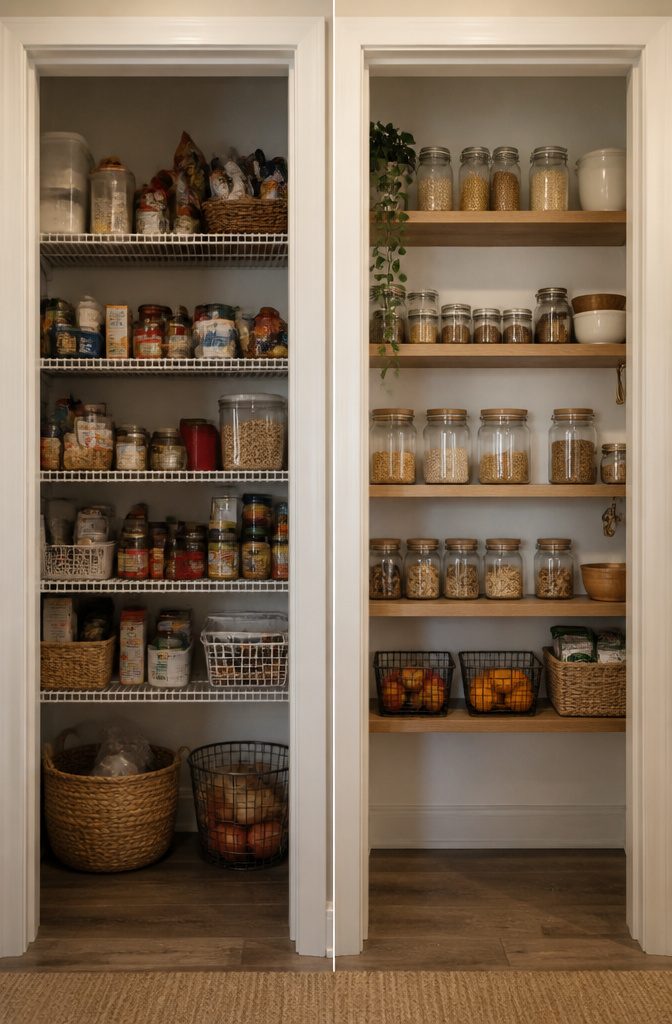
10 to 12 inch deep shelves keep everything in a small pantry where your eyes can find it.
Anything deeper turns into a storage pit: bags of rice, cans, spice jars all migrate to the back row and stay there until you move out.
I learned this reading through dozens of pantry builds where the same regret showed up. A shelf at 16 or 18 inches sounds generous on paper.
In a closet-sized pantry, those extra inches cost you visibility, not gain you space. You wind up buying duplicates of what you already own because the original is buried behind three cereal boxes.
Shallow shelving also buys you walking room in a narrow footprint. The tradeoff is real: you lose the depth for big baskets or small appliances.
If you need those, the better move is mixing shelf depths rather than running the whole pantry deep. Keep the daily stuff, the cans and jars and pasta boxes, on the 10 to 12 inch shelves where they belong.

【Classic Farmhouse Arch Accent】Showcasing a graceful arched design, this tall storage cabinet features 4 doors with a recessed panel frame, accented by 4 polished handles. The natural wood grain texture enhances its elegant appeal, while the rounded handles offer a smooth and secure grip—seamlessly blending practicality with modern farmhouse charm.

7-Tier Shelves Capacity - This tall bookshelf maximizes storage by utilizing vertical space, offering ample room without occupying much floor area. Perfect for those with limited space but plenty of storage needs. Product dimensions: 82.7 x 23.6 x 9.3 in

7-Tier Shelves Capacity - This tall bookshelf maximizes storage by utilizing vertical space, offering ample room without occupying much floor area. Perfect for those with limited space but plenty of storage needs. Product dimensions: 82.7 x 23.6 x 9.3 in
8. Pull-Out Drawers for Deep Cabinets
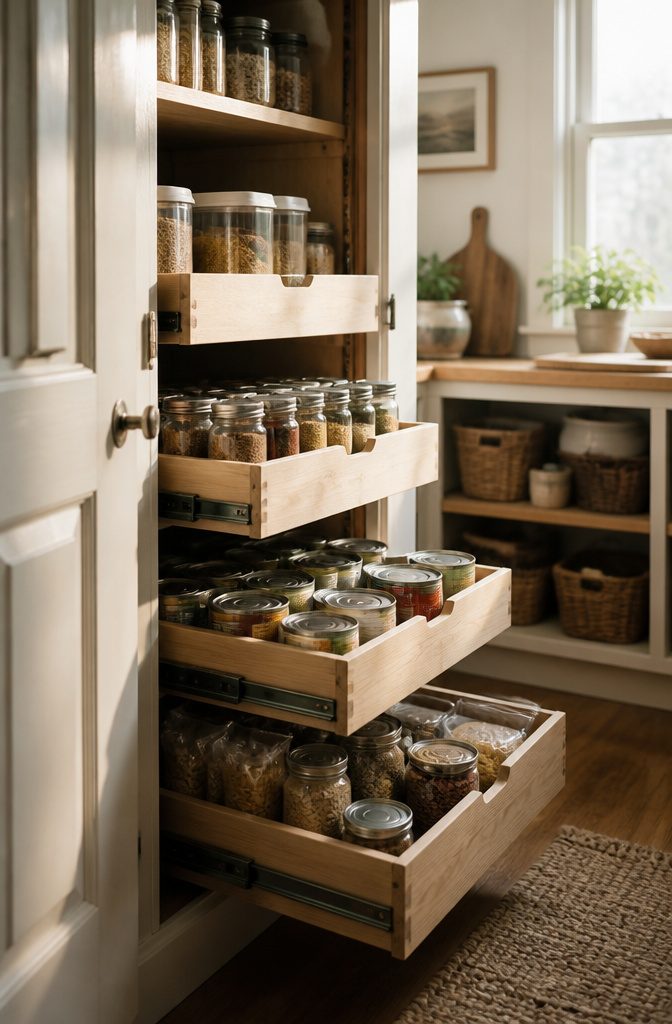
Deep cabinets in a small pantry tend to hide what you own. The back third of a fixed shelf becomes a graveyard for duplicate spices and cans you forgot you bought.
Pull-out drawers fix this by bringing the entire depth forward to your reach, which matters more than total cubic footage when you are cooking dinner and need the cumin now.
I spent a while reading through pantry builds before I understood when the drawer kit is worth the money and when it is not. The kit saves the project if you want slide-out storage without building from scratch.
But shallow fixed shelves at 10 to 12 inches deep keep jars and cans visible without any moving parts, and they cost less. The choice depends on what you store.
Canned goods, bottles, dry ingredients, and snacks move well on pull-outs. Bulk groceries and small appliances sit fine on deeper fixed lower shelves where you reach in occasionally, not daily.
If your pantry is a former closet with unusual depth, set the upper shelves back so you can see them, and reserve pull-out drawers for the lower cabinet where the bending and digging happens.
That split approach uses the space without turning every shelf into hardware.

Sturdy Shelf Pilaster: Our metal shelf standards with silver coated finish, the high quality alloy steel has excellent oxidation resistance and rust resistance, stable and sturdy than normal shelf storage. The super long metal shelving design allows you to put more items
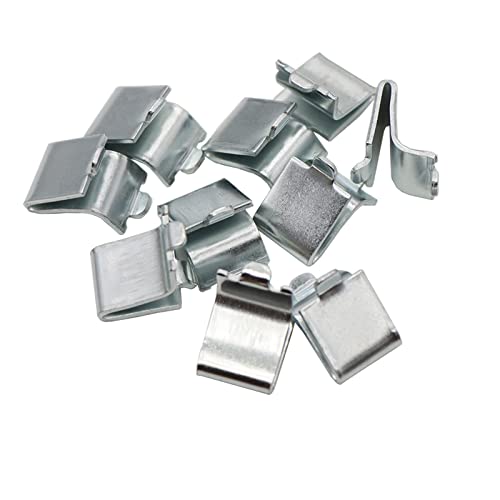
Made of high-strength steel, galvanized coating
Made of high-strength steel, galvanized coating
9. Stacking Bins
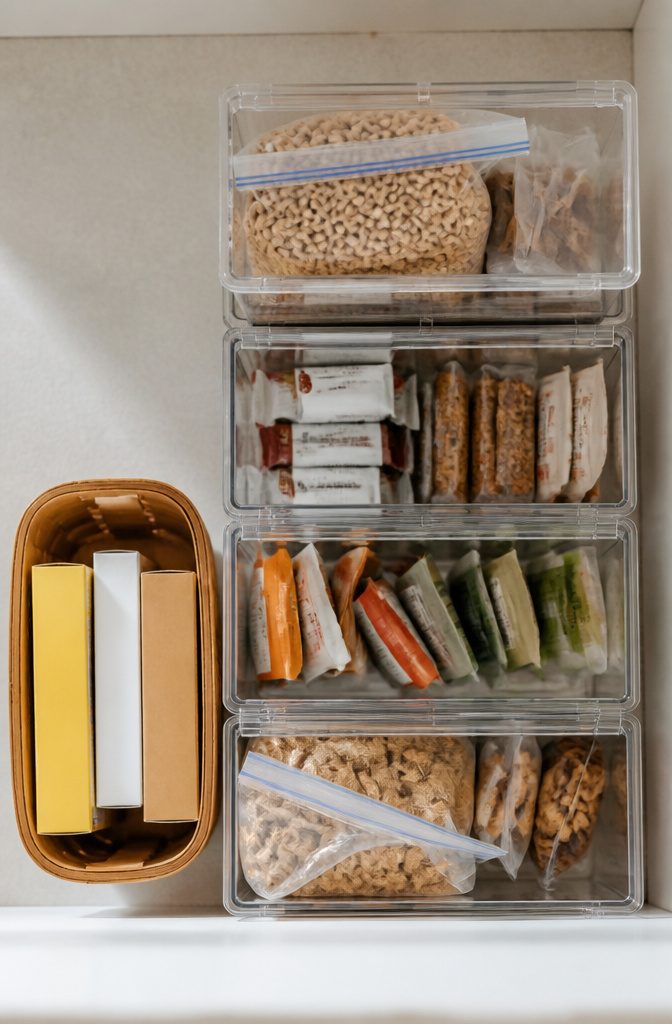
Stackable bins turn a single shelf into two or three usable surfaces, which matters when a small pantry has no depth to spare.
I group items by task: breakfast things in one bin, baking supplies in another. The bin lifts out as a unit, so I am not knocking over bottles to reach the back row.
What belongs in a bin are loose packets, pouches, and anything that slumps or scatters.
Cereal bags, snack bars, and backstock pouches stay upright and contained. Clear sides or a quick label on the front means I see the count without lifting the lid.
What I leave loose are the tall boxes and cans that already stand on their own; a bin around them just steals height I could use for a second layer above.
The same goes for anything I grab daily. A bin with a lid adds one motion too many when I am reaching for the same item every morning.
The Korken jars from IKEA sit on my counter, not in a bin, because their whole point is visibility.
In the pantry, bins earn their space by hiding clutter I do not need to see. The trick is matching the container to the problem: loose items get a bin, visible staples get clear, and self-supporting shapes stay bare.
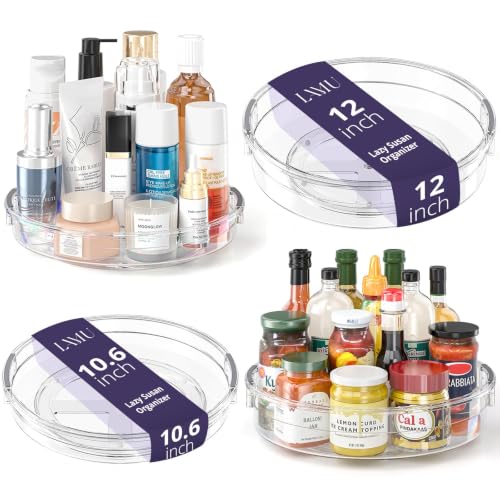
PRACTICALITY SIZE COMBO: This 4 pack lazy susan organizer set includes two 12 in high-edge turntables and two 10.6 in turntable organizer. They keep your essentials organized and within easy reach on cabinet

SHIPMENT CONTAINS: 2-pack of clear 12-inch diameter, 2-tier lazy susan turntable organizers for kitchen cabinet and countertop organization

EASY VISIBILITY: With a gentle, one-handed push, the iDesign Linus Lazy Susan makes it easy to grab your most reached-for items at eye level or simplifies access to items when stored on upper shelves or deep cabinets; Set of 2
10. Battery Lights for Dark Corners
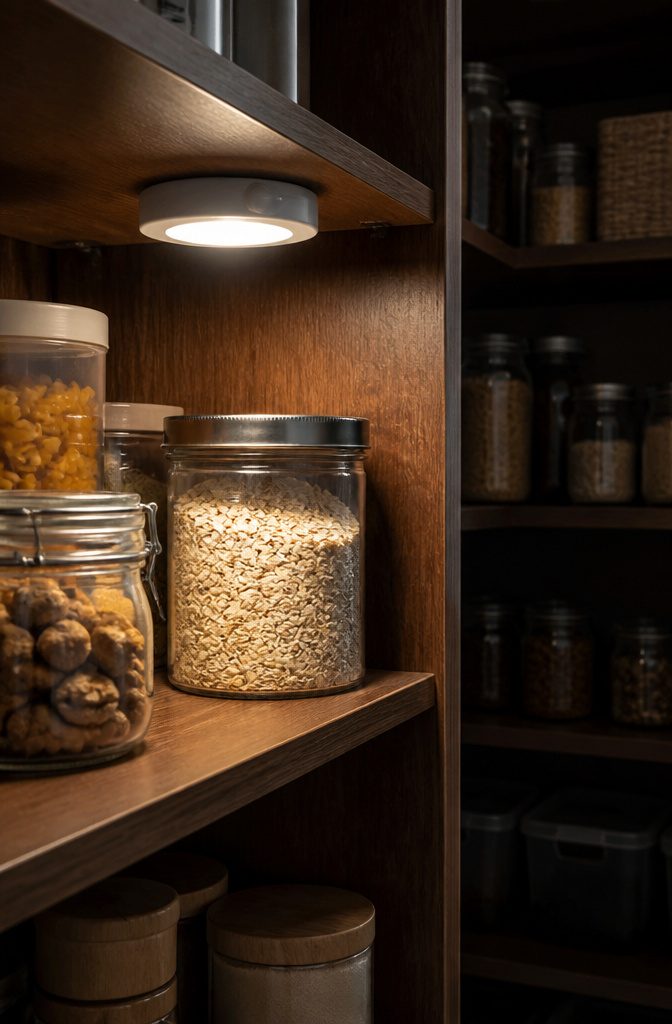
Battery-powered lights are the only lighting a weekend pantry project needs, and the right ones install in minutes without messing with drywall or a breaker panel.
Rechargeable LED strips or puck lights mount with adhesive backing or small screws and peel back off when the lease ends, which is the scenario most renters face.
Motion-sensor fixtures deserve the real attention here.
A strip placed on the door frame or upper shelf turns the pantry on when you step in and off when you leave, which saves the hunt for a switch with an armful of groceries.
Rechargeable motion-sensor LEDs hit the sweet spot between convenience and no-commitment installation.
What does not fit a weekend timeline is anything that runs on house wiring. Hardwired under-cabinet fixtures, junction boxes, or switches involve an electrician, permits in many jurisdictions, and a timeline that stretches past a single weekend.
Comparison shop your own situation: if you own the home and the breaker panel is nearby, that route eventually pays off.
For a quick, budget-conscious fix in a rental or first home, battery lights solve the dark corner problem the afternoon you bring them home.

【Important Note】This kitchen cabinet organizer is designed for frameless cabinets only and will not fit cabinets with frames around the doors

【Rust-Proof Stainless Steel】Our cabinet pull out shelves are built with premium, commercial-grade stainless steel, even hold up 60lbs. This material is not only exceptionally hard and rigid but also guarantees outstanding rust and corrosion resistance, ensuring the drawers look new and perform flawlessly for years to come, even in a humid kitchen or pantry environment.
【Important Note】This kitchen cabinet organizer is designed for frameless cabinets only and will not fit cabinets with frames around the doors
Start With a Full Purge
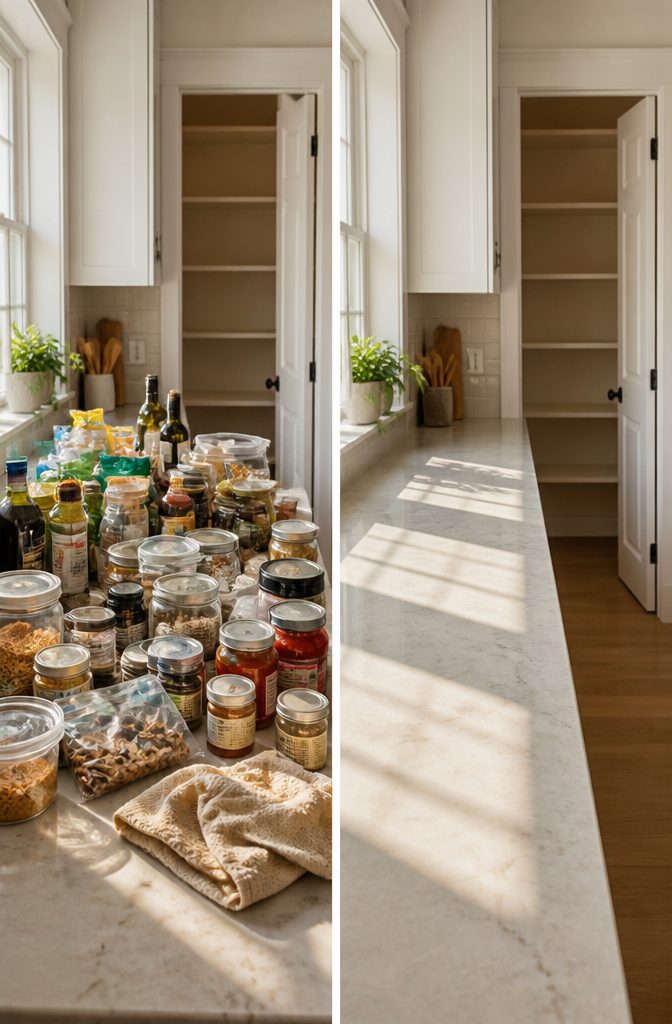
Pull everything out before you touch a single basket.
The half-empty spice jar from 2019 and the quinoa bag you opened eighteen months ago are not going back in, and the purge decides whether your new system lasts a week or a year.
I lay it all on the kitchen counter, check dates on anything sealed, and toss anything past them.
Opened dry goods like rice or pasta that have sat untouched for more than a year go too; they do not improve with age.
Wipe the shelves while they are bare. Only then do you know what you actually need to store, and only then can you plan zones that fit real habits rather than aspirational ones.
What Fits in a Kitchen Pantry
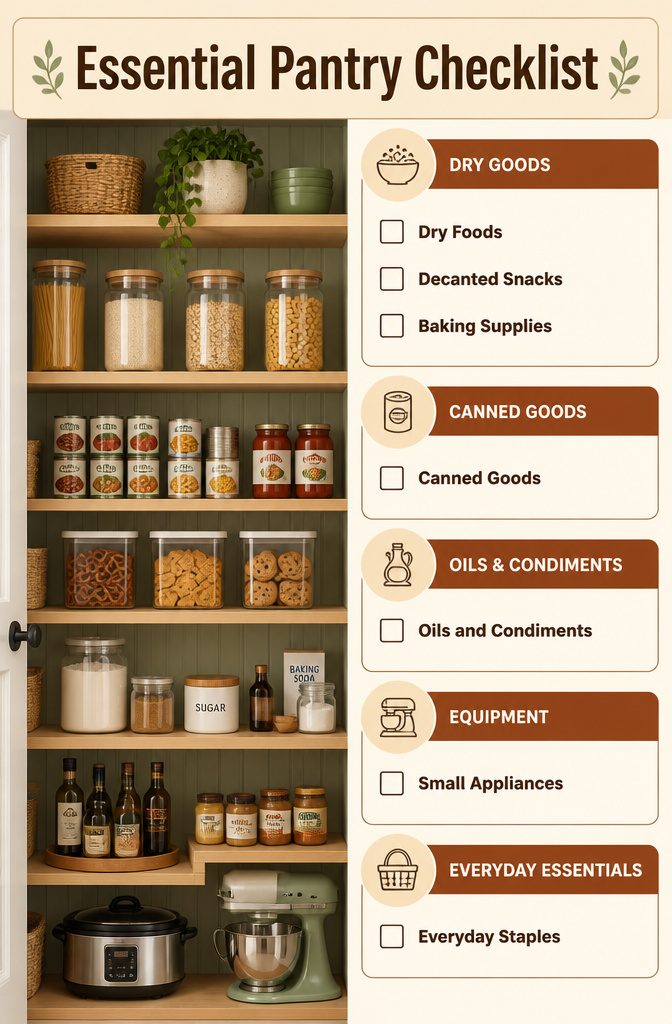
Dry foods, canned goods, snacks, and the occasional small appliance all have a place in a kitchen pantry. The real question is what belongs there versus somewhere else in the house.
I started out treating my pantry like a catch-all for anything kitchen-related. The slow cooker and stand mixer lived there, along with backup paper goods and extra dishware I had nowhere else for.
In a small space, that approach filled the shelves fast. Bulk storage and backup household basics belong elsewhere if your square footage is tight; the pantry should hold what you actually reach for between grocery trips.
Small appliances you do not use daily can stay, but only if you have the depth. I eventually moved my entertaining pieces and overflow dishware to a cabinet in the dining area instead.
The pantry kept everyday staples, decanted snacks and cereals, oils, and baking supplies. That shift meant I could see everything at a glance without shifting a stand mixer to reach the rice.
The test is simple: if you use it weekly and it is dry or sealed, it stays. If it is backup stock, bulky, or used twice a year, it earns its space somewhere else.
A Quick DIY Shelf I Tried
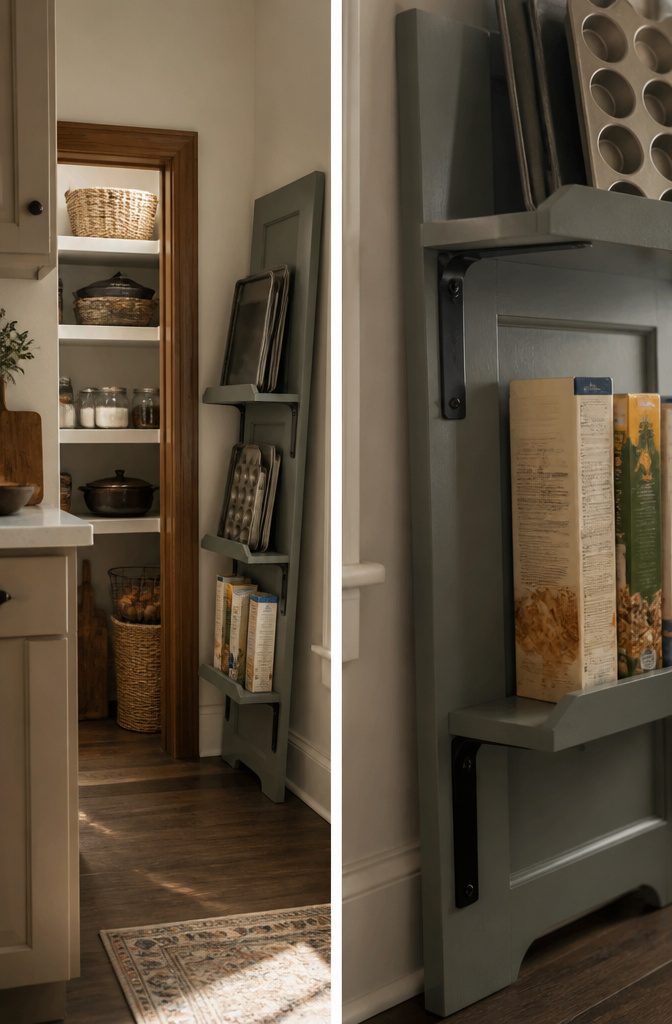
The narrow gap beside my refrigerator was dead space until I cut an old hollow-core door into three 24-inch lengths and painted them with leftover trim paint from the hallway project.
Two L-brackets per shelf, anchored into the studs, held the whole thing. The first brackets I bought were too small, rated for 25 pounds; the shelf pulled away from the wall within a week when I loaded it with cans.
I replaced them with 75-pound rated brackets and the unit has held for two years now.
The door cost nothing, the brackets ran about fourteen dollars total, and the paint was already on hand. It stores baking sheets upright, cereal boxes flat, and the flour bin I use twice a week.
Wallpaper and Paint for a Space You Actually See
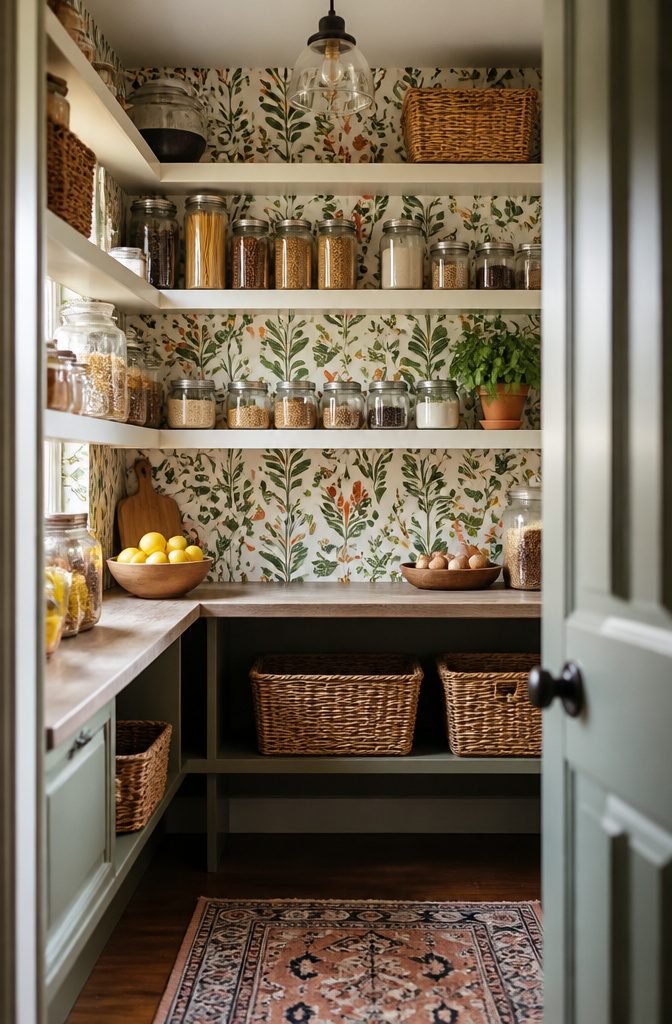
The back wall of my pantry is the only surface anyone sees when the door swings open, so a little color there does more work than it should.
I used peel-and-stick wallpaper in a blue botanical pattern, which let me test the look without asking my landlord for permission or keeping it past a lease.
Peel-and-stick comes off clean, or clean enough that I have not lost a deposit yet.
High-gloss paint is the other route. It bounces light around a tight box and reads as intentional rather than leftover.
A green high-gloss sheen caught my eye for exactly that reason. The catch is the prep: gloss shows every ridge and brush mark, so the wall needs sanding and a steady hand that wallpaper mostly forgives.
I keep that pantry door closed ninety percent of the time.
The wallpaper still mattered. Opening it to grab pasta and seeing something finished rather than beige drywall makes the kitchen feel like one room instead of a main space with a storage closet tacked on.
If the door stayed open, I would paint. Since it does not, the lower-stakes option wins.
Frequently Asked Questions
How can I maximize storage in a small pantry?
Use vertical space with floor-to-ceiling shelves, install over-the-door organizers, and add stacking bins or pull-out drawers to claim dead space.
Clear containers and lazy Susans keep items visible so nothing gets lost in the back, while shallow 10- to 12-inch shelves prevent buried duplicates.
What should be stored in a kitchen pantry?
Dry foods, canned goods, snacks, and small appliances you use weekly belong in a kitchen pantry. Backup stock, bulky items, and anything used only a couple times a year should live elsewhere so the tight space stays functional.
How deep should pantry shelves be?
10 to 12 inches is the practical depth for a small pantry. Anything deeper turns the back row into a graveyard of forgotten items and duplicate purchases, while shallow shelves keep everything in view and preserve walking room.
What is the best way to organize kitchen pantry storage?
Group items by how you cook, not by type: breakfast at eye level, baking supplies together on a less convenient shelf, snacks where everyone can reach.
Clear containers end the guesswork, and labels let anyone in the household put things back correctly.





