
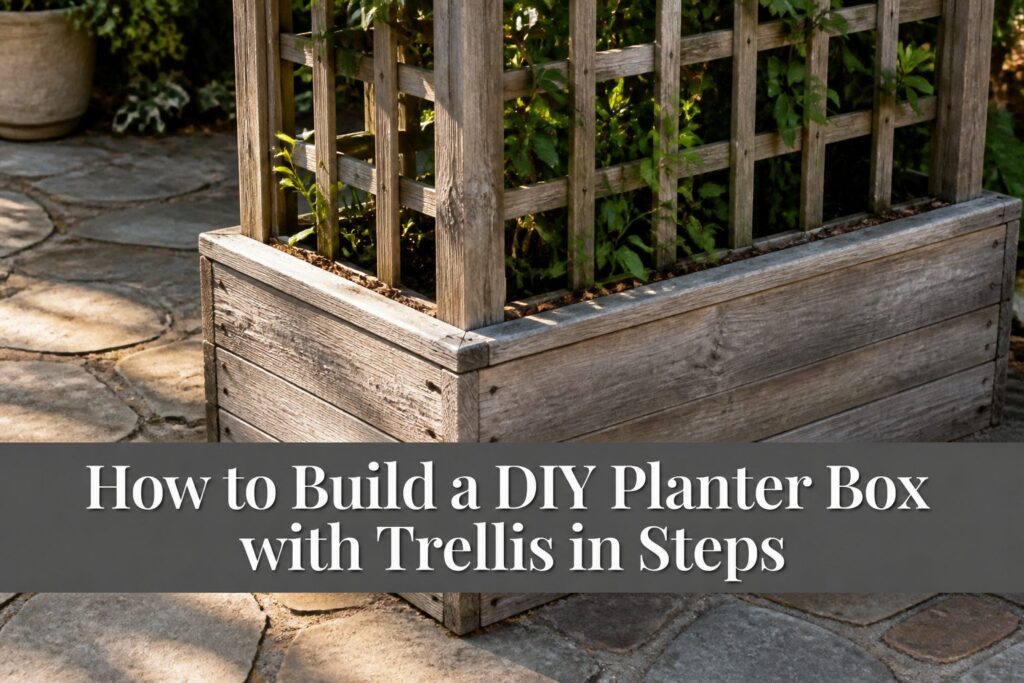
A finished cedar planter box with trellis costs about $50 in fence pickets and one Saturday of work, though that figure doubles fast if you buy dimensional lumber or a miter saw instead of borrowing one.
The stage that ruins most builds is squaring the box after cutting, because a corner even slightly out of true throws off every piece that follows and leaves the trellis leaning by August.
Cedar weathers to gray without the warping that sends pine to the curb after two wet seasons, but only if you pre-drill every hole; the wood splits if you look at it wrong.
1. Gather Materials and Tools
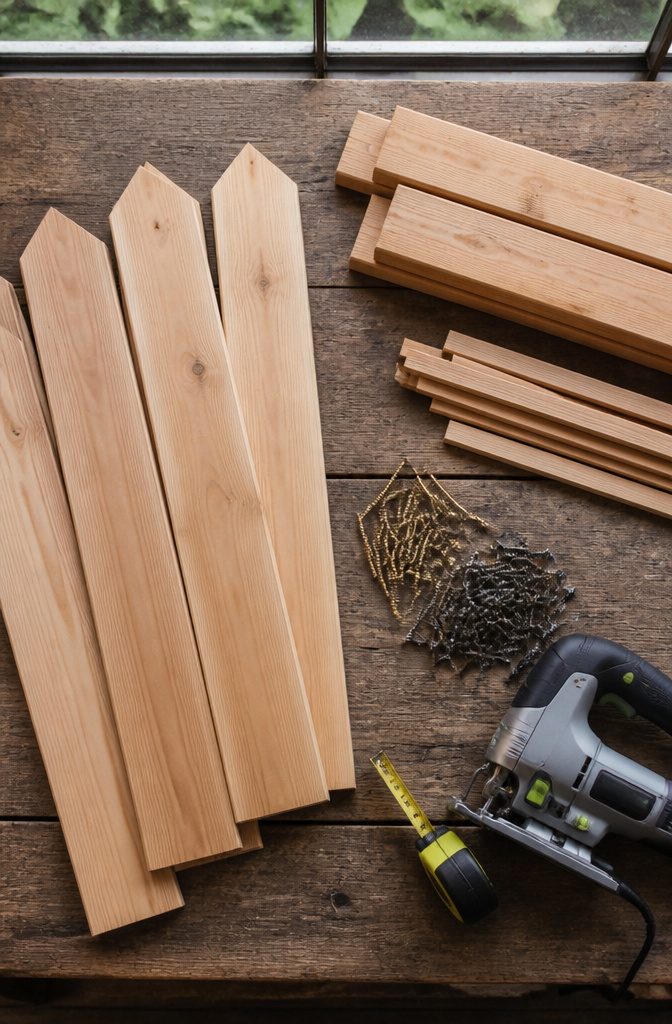
Cedar fence pickets are the material that decides cost and lifespan here. A 1" x 12" x 6′ board runs about $3 and forms the box walls, while 1" x 2" x 8′ strips become the trellis supports.
You will want 1 ¼", 2", and 2 ½" exterior wood screws in three sizes; the shorter ones secure the lattice without splitting it, and the longer ones anchor the box corners through the full inch and a half of thickness.
The trellis itself is a 2′ x 8′ wood lattice sheet, with landscape fabric to line the box and an optional plastic window box liner if you would rather lift the whole root ball out come winter.
A saw, drill, and measuring tape cover the cutting and joining. A jigsaw helps with the lattice if your saw cannot manage the thin crosscuts.
Cedar costs more than treated lumber upfront, but it carries no chemical treatment and weathers to gray without the warping that sends pine planters to the curb after two wet seasons.
The total spend lands between $50 and $375, with the low end assuming cedar fence pickets and tools already on hand, and the high end covering the full lattice sheet, all new fasteners, and a liner.
2. Cut the Wood
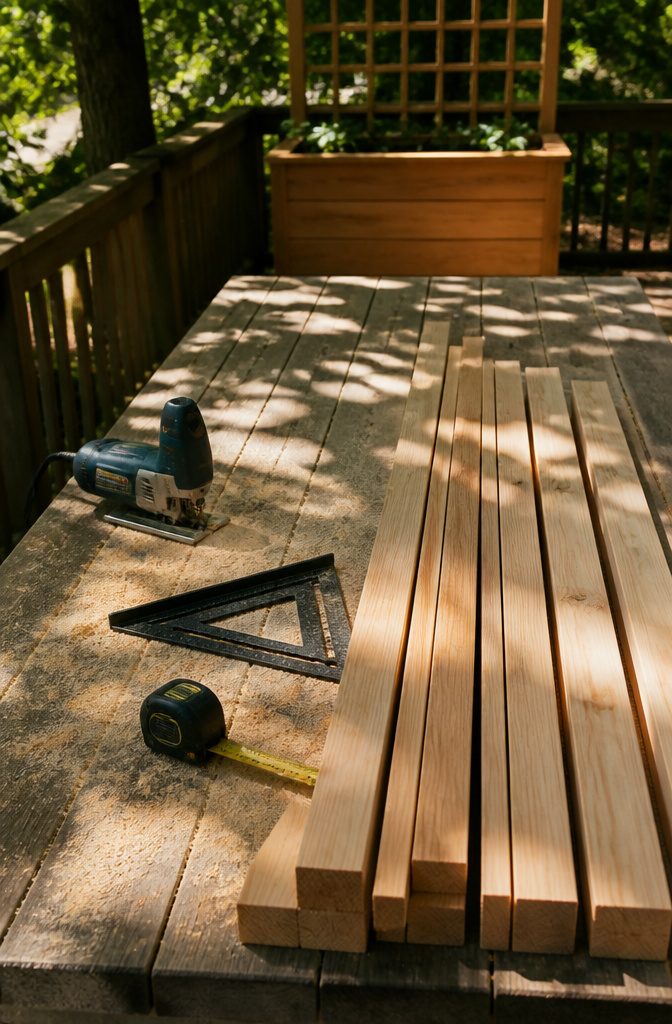
Accuracy at the cutting stage saves grief later, especially with planter boxes where a corner out of square throws off every piece that follows.
I work to finished dimensions of 15 inches deep and 41 1/2 inches wide for the box, with an overall height of 49 inches once the trellis goes on. The 1" x 12" boards form the sides and base; the 1" x 2" boards become the trellis supports.
Screw length matters more than people think.
Two-inch screws suit the 1" x 12" stock and the corner connections, while 2 1/2" screws are what you want for joining the 1" x 2" trellis frame where you need the extra bite. Anything shorter risks stripping out; anything longer punches through.
I check each cut against the tape before the blade touches wood, and I square corners with a carpenter’s square as I go, not after.
The front panel runs 48 inches and the sides 24 inches in the builds I trust, but the principle holds: measure twice, cut once, and let the numbers do the work.
3. Assemble the Planter Box
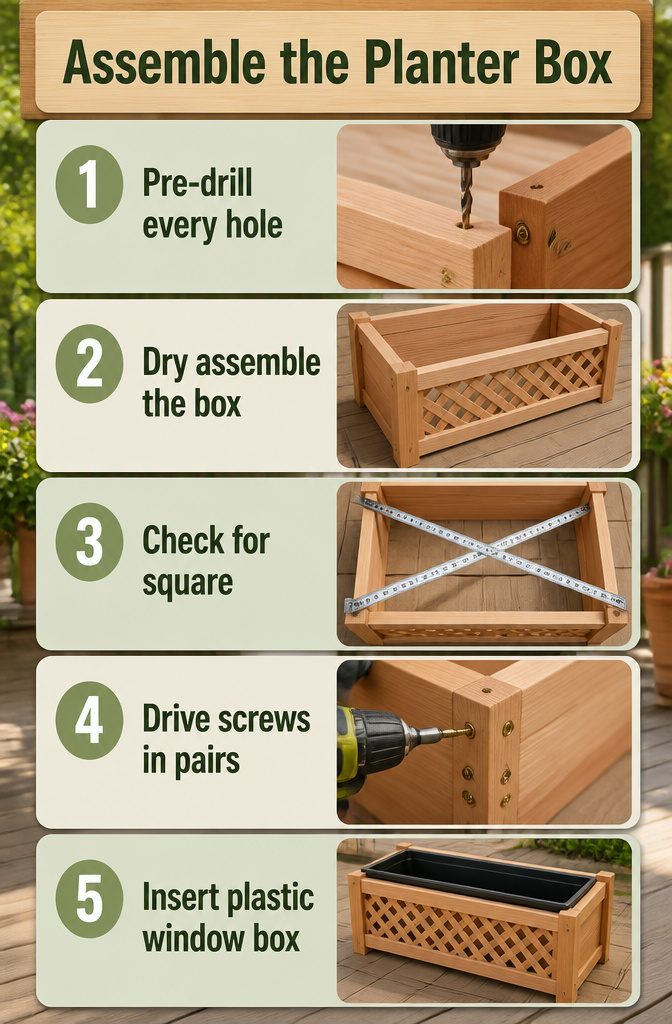
Cedar splits if you look at it wrong, so pre-drilling every hole is non-negotiable. I use a bit slightly smaller than my screw shank and run it through the outer board only, stopping short of the piece I’m joining into.
For the 1" x 12" boards at the corners, 2" exterior wood screws give enough bite without poking through. The lattice is thinner and softer, so I drop down to 1 ¼" screws there; anything longer just risks blowing out the back face.
I assemble the box dry first, clamping front and back panels to the sides so I can check for square by measuring corner to corner.
Once the diagonals match, I drive the screws in pairs, working opposite corners so nothing racks out of true.
A plastic window box dropped inside keeps soil off the wood and buys you years; landscape fabric works too, but only if you’re sealing the box. Unsealed wood against damp dirt is a rot guarantee.
4. Add the Trellis Frame
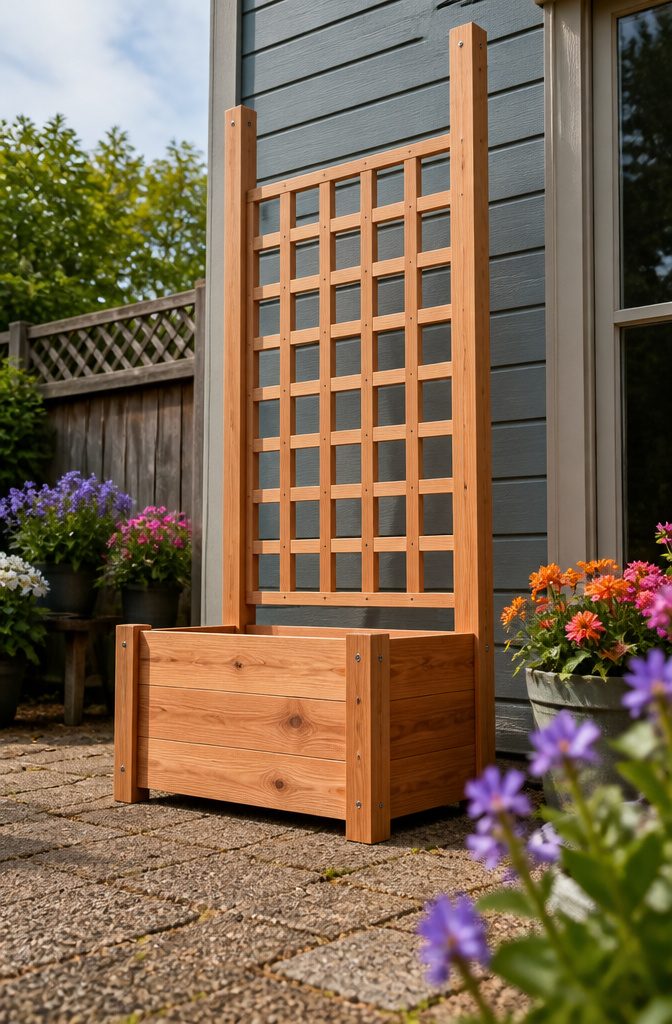
The trellis frame is what keeps this build from sagging sideways the first time a squash vine climbs it.
Two 1" x 2" supports run up the back of the box to a 49-inch total height, and they have to be dead plumb or the lattice bows and the whole thing catches wind like a sail.
I use 2 1/2" screws where those supports meet the box, not the shorter ones, because the frame takes the load and the pullout strength matters more than it looks like it should.
Lattice panels at 2′ x 8′ are the fast option; screw them to the supports with 1 1/4" wood screws.
The lattice wood is soft enough that I drill pilot holes even when the screw packaging says I should not have to, because splitting it means buying another panel.
Horizontal slats spaced for climbing plants to grip are the substitute if you want a cleaner look or the store is out of stock, but they take longer to cut and align.
Level the supports with a real level, not your eye.
Lattice tempts you to eyeball it, and by August that slight tilt means your clematis trains at an angle and the whole piece looks like it is leaning into the wind.
Straight framing is the difference between a planter that ages well and one that looks handmade in the wrong way.
5. Finish the Planter
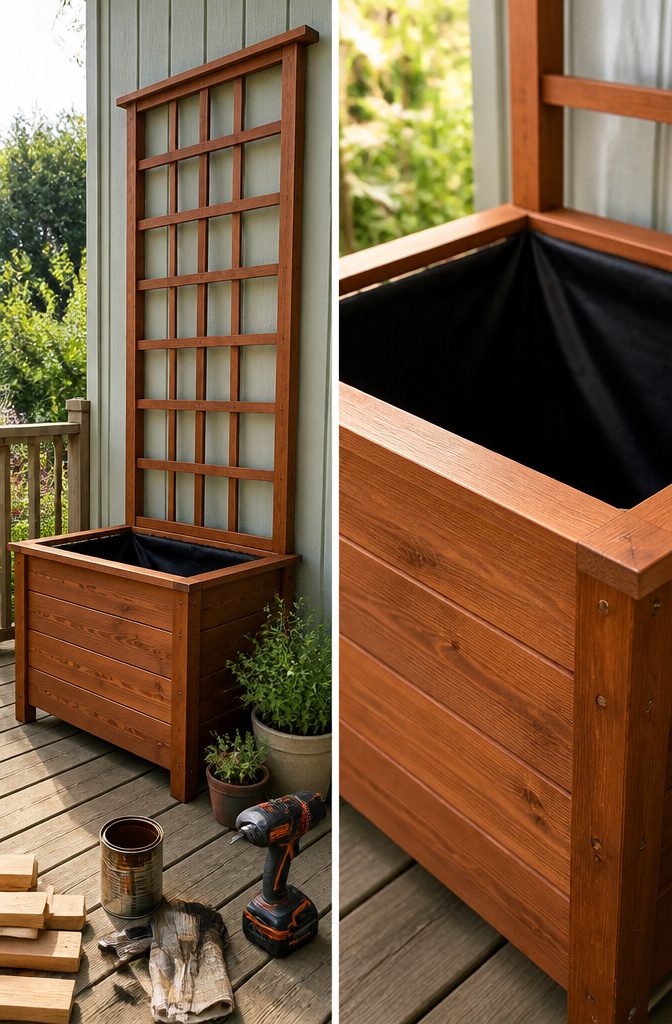
Sanding the edges smooth matters more than people think. Rough cuts wick water upward like a wick in a lamp, so I run medium-grit paper over every exposed corner before any finish goes on.
Oil-based stain on cedar gives the longest service; the wood’s natural oils and the stain’s penetration work together instead of flaking apart.
Paint on any wood looks crisp at first, but plan on touch-up every two to three seasons as moisture finds its way in.
Landscape fabric inside the box is what separates a two-year planter from a five-year one. Without it, soil presses directly against the wood and rot starts from the inside where you cannot see it until the boards soften.
The fabric holds soil while letting water drain, and that combination with your finish is the actual longevity of the build.
Spread it before you fill, fold it at the corners, and cut slits if you have internal supports it needs to wrap around.
6. Fill With Soil and Plant
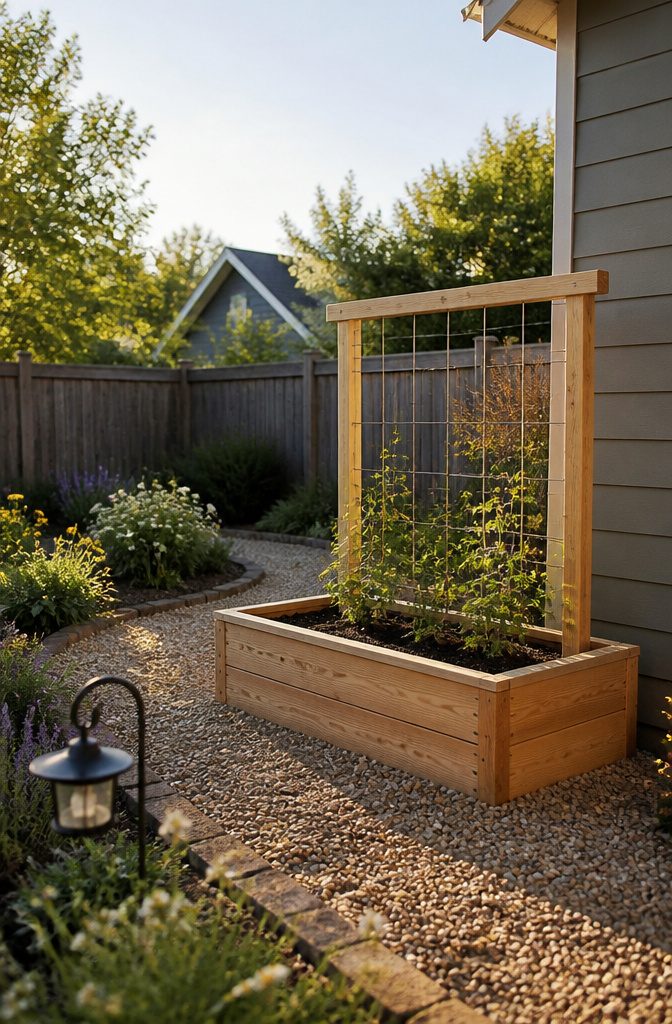
The cleats you installed earlier set your soil depth, and that choice matters more than most people think.
Eight inches is the floor for healthy root growth on vegetables and flowering vines, not a generous target. Peas, beans, and other climbers that twine around the trellis need room to anchor below ground before they can anchor above it.
Anything less, and by July you will be watering daily just to keep them alive; shallow soil grows shallow roots, and shallow roots mean thirsty plants the moment the weather turns.
A trellis this size handles light climbers fine, which is why I point people toward edibles like snap peas or pole beans, or annual flowering vines like morning glories if your spot gets full sun.
What it will not handle is weight without warning.
A mature wisteria or heavy grapevine will pull the frame over in a season or two. Build for what you are planting now, and plan to reinforce or replace if your ambitions grow heavier.
Cedar or Treated Lumber
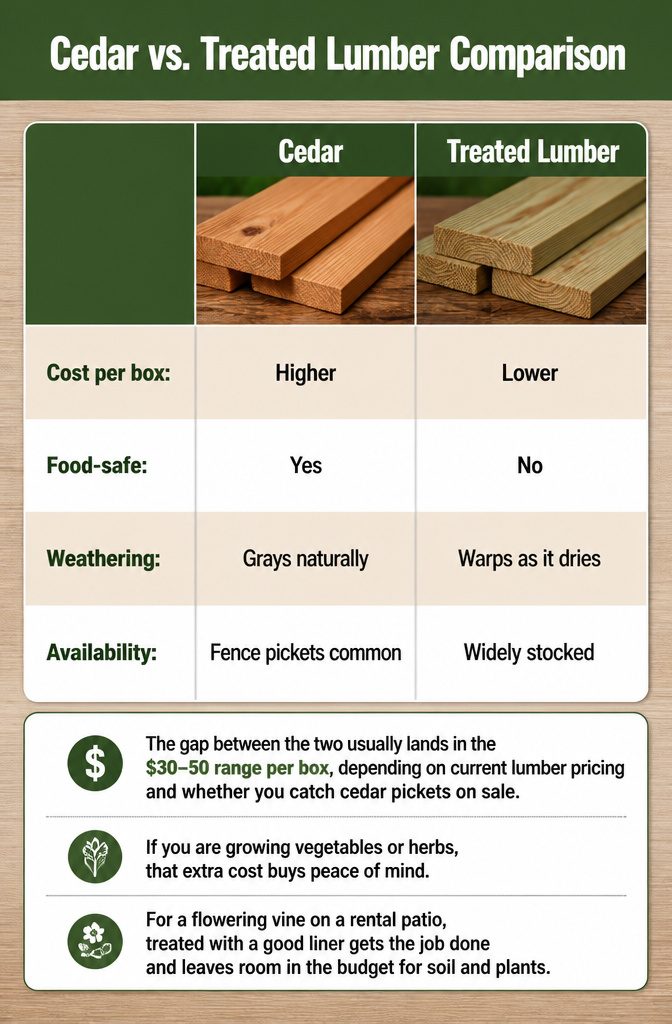
Cedar fence pickets run about $3 per board and need no chemical treatment to resist rot, which is why I reach for them on any planter that will grow food.
Treated lumber costs noticeably less and holds up fine structurally, but the preservatives leach with every watering cycle and the boards warp more as they dry out after the first wet season.
For ornamentals on a tight budget, treated works if you line the box interior with plastic sheeting or landscape fabric to create a barrier. Cedar left unfinished weathers to a soft gray; treated stays greenish until painted or stained.
| Attribute | Cedar | Treated Lumber |
|---|---|---|
| Cost per box | Higher | Lower |
| Food-safe | Yes | No |
| Weathering | Grays naturally | Warps as it dries |
| Availability | Fence pickets common | Widely stocked |
The gap between the two usually lands in the $30–50 range per box, depending on current lumber pricing and whether you catch cedar pickets on sale. If you are growing vegetables or herbs, that extra cost buys peace of mind.
For a flowering vine on a rental patio, treated with a good liner gets the job done and leaves room in the budget for soil and plants.
Lattice or Slatted Trellis
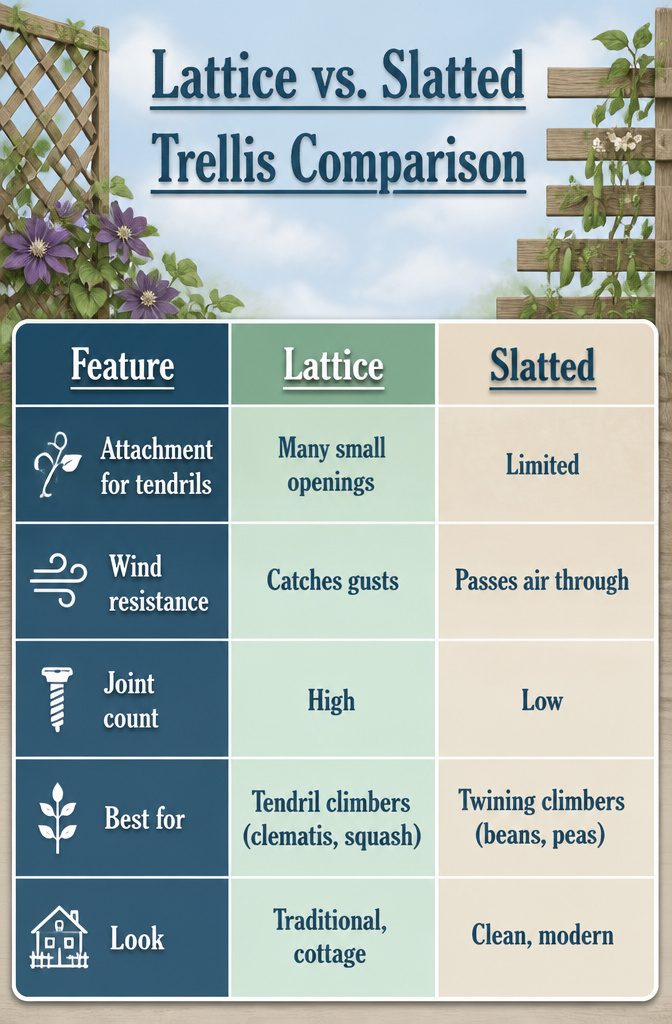
Lattice gives climbing vines hundreds of small openings to grab with tendrils, which is why it still dominates garden centers for clematis and morning glory.
Those same openings turn the trellis into a sail when wind hits it broadside, so an exposed balcony or corner lot needs extra bracing at the base, maybe concrete feet you did not plan on pouring.
Horizontal slats run simpler. You rip two or three boards, space them evenly, and the joints are just the upright posts.
Air slips through the gaps, and beans or peas still climb by wrapping their stems around the slats rather than clinging. Fewer joints means fewer points where screws loosen after a season of wet and dry cycles.
| Feature | Lattice | Slatted |
|---|---|---|
| Attachment for tendrils | Many small openings | Limited; best for twining stems |
| Wind resistance | Catches gusts | Passes air through |
| Joint count | High | Low |
| Best for | Tendril climbers (clematis, squash) | Twining climbers (beans, peas) |
| Look | Traditional, cottage | Clean, modern |
I default to slats unless the spot is sheltered by a fence or wall and the vine is something fussy like passionflower.
Lattice looks softer and more romantic, but slats last longer and go up faster. Choose based on what you are actually planting and whether your yard gets afternoon wind.
What the Build Costs
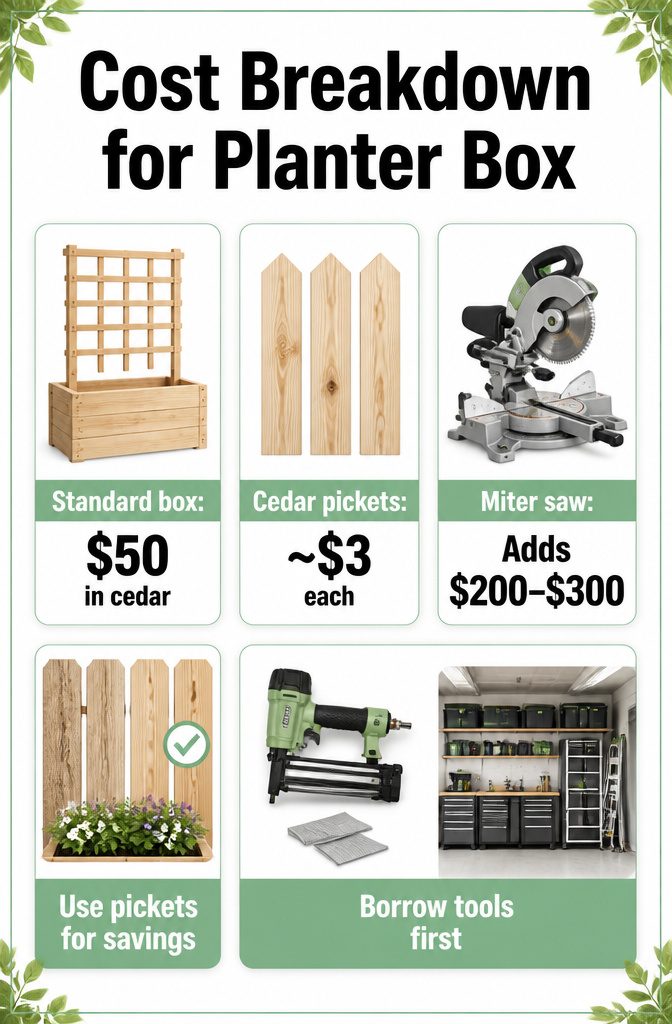
A standard 41 1/2-inch box with trellis runs about $50 in cedar fence pickets if you borrow the tools, or roughly double that in dimensional cedar. Treated lumber sits lower still, though it will not last as long against soil contact.
- Cedar fence pickets run near $3 each at most big-box stores, which is where the $50–$75 builds come from; dimensional cedar boards for the same footprint push closer to $150.
- A miter saw purchase adds $200–$300 to the first project, so the $375 ceiling is really a tool-and-materials bundle, not the wood itself.
- The savings are in the fence aisle, not the trim aisle: pickets are thinner and rougher on one face, but for a planter interior that does not matter. I face the smooth side out and call it done.
- One Saturday with a borrowed brad nailer and a buddy’s saw beats buying equipment you will pull out twice a year. If you do not already own the tools, build this project first, then decide what deserves shelf space in your garage.
Frequently Asked Questions
What kind of wood should I use for a planter box?
Cedar is the best choice for a planter box because it resists rot without chemical treatment and weathers to gray without warping.
Treated lumber costs less but leaches preservatives and warps after wet seasons. For food gardens, cedar is the only safe option; for ornamentals on a budget, treated lumber works if you line the interior with plastic or landscape fabric.
How deep should a planter box be?
Eight inches is the minimum depth for healthy root growth in vegetables and flowering vines.
Shallow soil grows shallow roots, which means plants need water daily once summer heat arrives. Peas, beans, and other climbers especially need room to anchor below ground before they can climb the trellis above it.
What plants can I grow on a trellis?
Light climbers like snap peas, pole beans, and morning glories grow well on this size trellis.
Annual flowering vines and twining edibles handle the frame fine. Avoid heavy woody vines like wisteria or mature grapevines; their weight will pull the frame over in a season or two.
Is it cheaper to build or buy a trellis?
Building a trellis as part of a DIY planter box with trellis costs less than buying both pieces separately, since the frame uses simple 1×2 boards and a standard lattice sheet.
A store-bought planter with attached trellis usually runs $150 to $300 in cedar, while building your own lands between $50 and $150 in materials depending on lumber grade.
How to make an inexpensive planter box?
Use cedar fence pickets from the big-box fence aisle at about $3 per board instead of dimensional cedar from the trim aisle.
Borrow tools rather than buying, skip the optional plastic liner, and use landscape fabric instead. The total can drop to $50 if you already own or borrow a saw and drill.





