
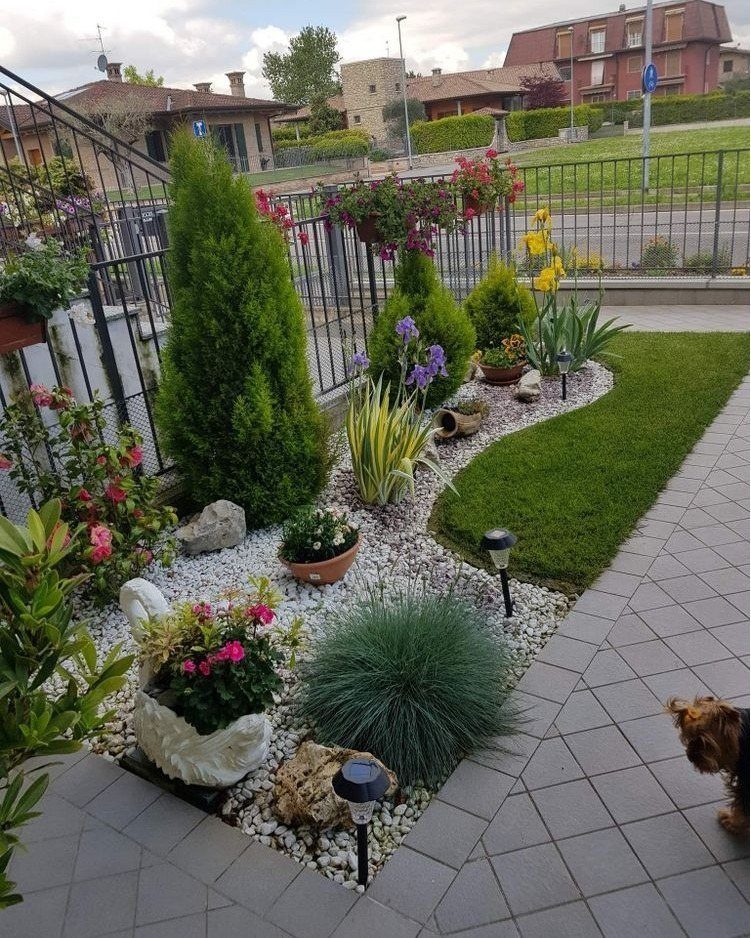
These ideas run from a bag of gravel and an afternoon to a poured concrete border that needs forms and a free weekend.
What separates the ones worth your time from the ones worth skipping is whether you own the ground you are planting in or might be moving out soon.
The flagstone path set into gravel, the lean-it garden mirror with its rusted metal frame, and the low-voltage cable run in the same trench as irrigation before the pavers go down, none of those belong to a renter; the potted plants in their loose triangle, the portable ornamental grasses in gravel, and the window box deep enough front to back do.
1. Ground Cover
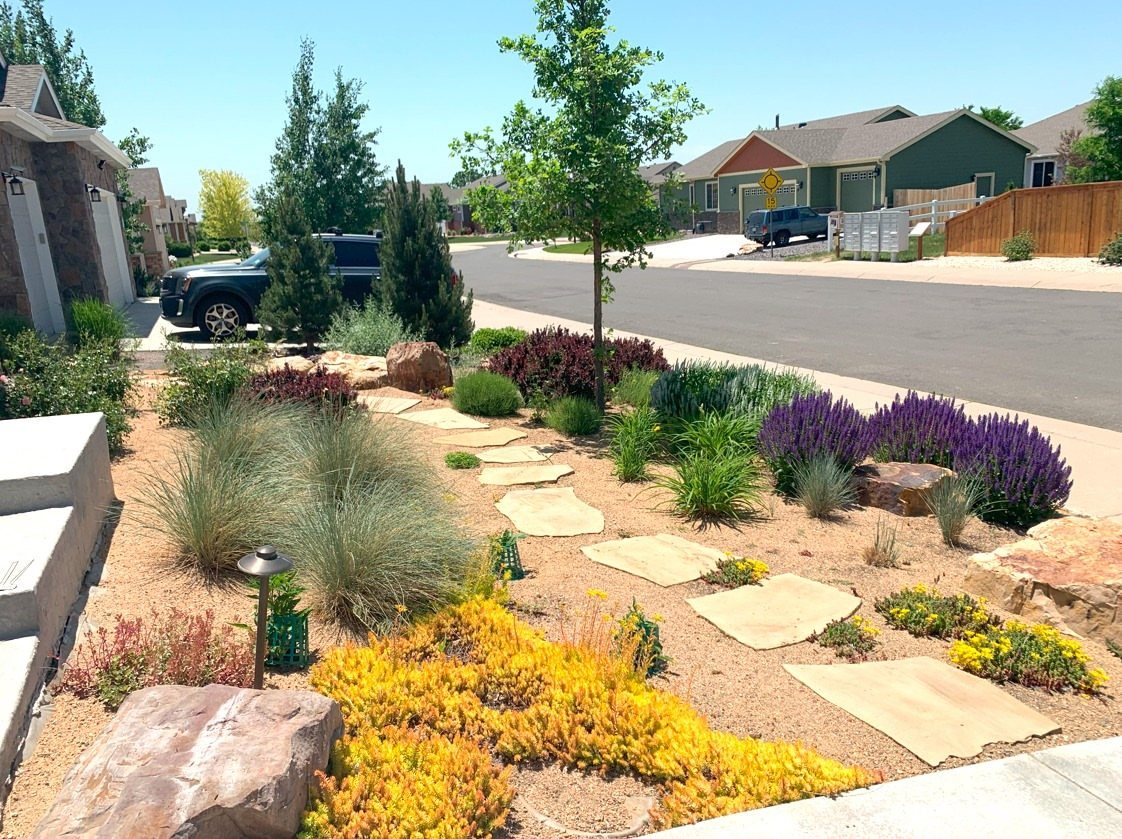
Ground cover replaces thirsty lawn with something that stays low and handles foot traffic where you need it.
For a small front yard, I would start with a flagstone path set into the gravel so you have hard surface where you walk and plants everywhere else.
The stones keep your shoes clean; the ground cover fills the gaps and crowds out weeds.
2. Use Decorative Rocks and Mulch
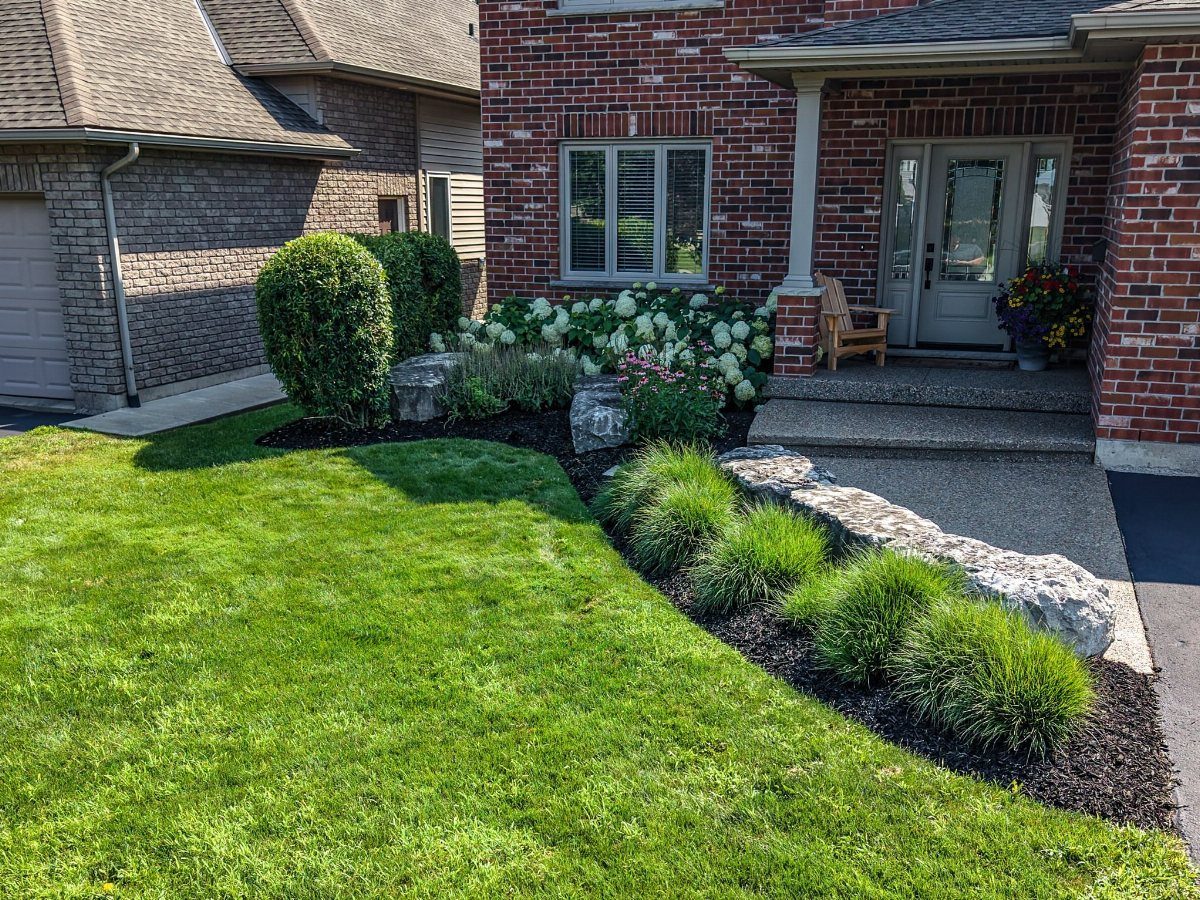
Dark mulch against brick reads as intentional, not makeshift. The boulders in this bed are doing the heavy visual lifting, giving height and shadow without any pruning schedule.
I would use rock near the foundation where drainage matters, mulch in the bed where soil improvement helps the shrubs. The contrast between the 2 is what makes the layering work.
3. Small Trees Near the Entry
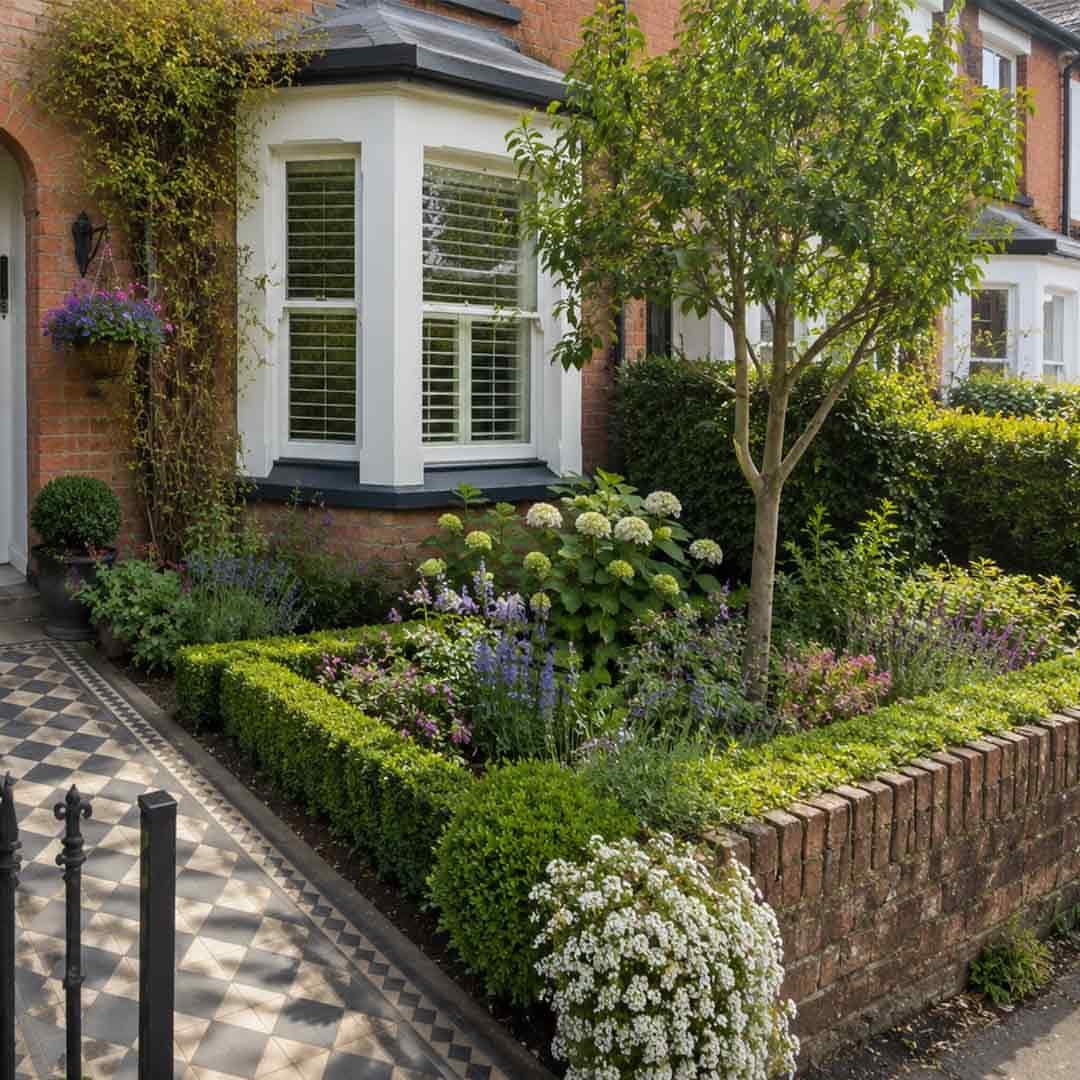
A single slender tree at the entry draws the eye up and gives the house a sense of arrival that shrubs alone cannot manage.
The boxwoods and hydrangeas fill the middle layer, so the tree does not stand in empty space.
For a townhome or narrow lot, I would choose a cultivar that stays small at maturity, not something that wants to grow tall and fights the power lines.
Japanese maple, crape myrtle, or columnar hornbeam all keep their manners in tight quarters.
4. Add Potted Plants
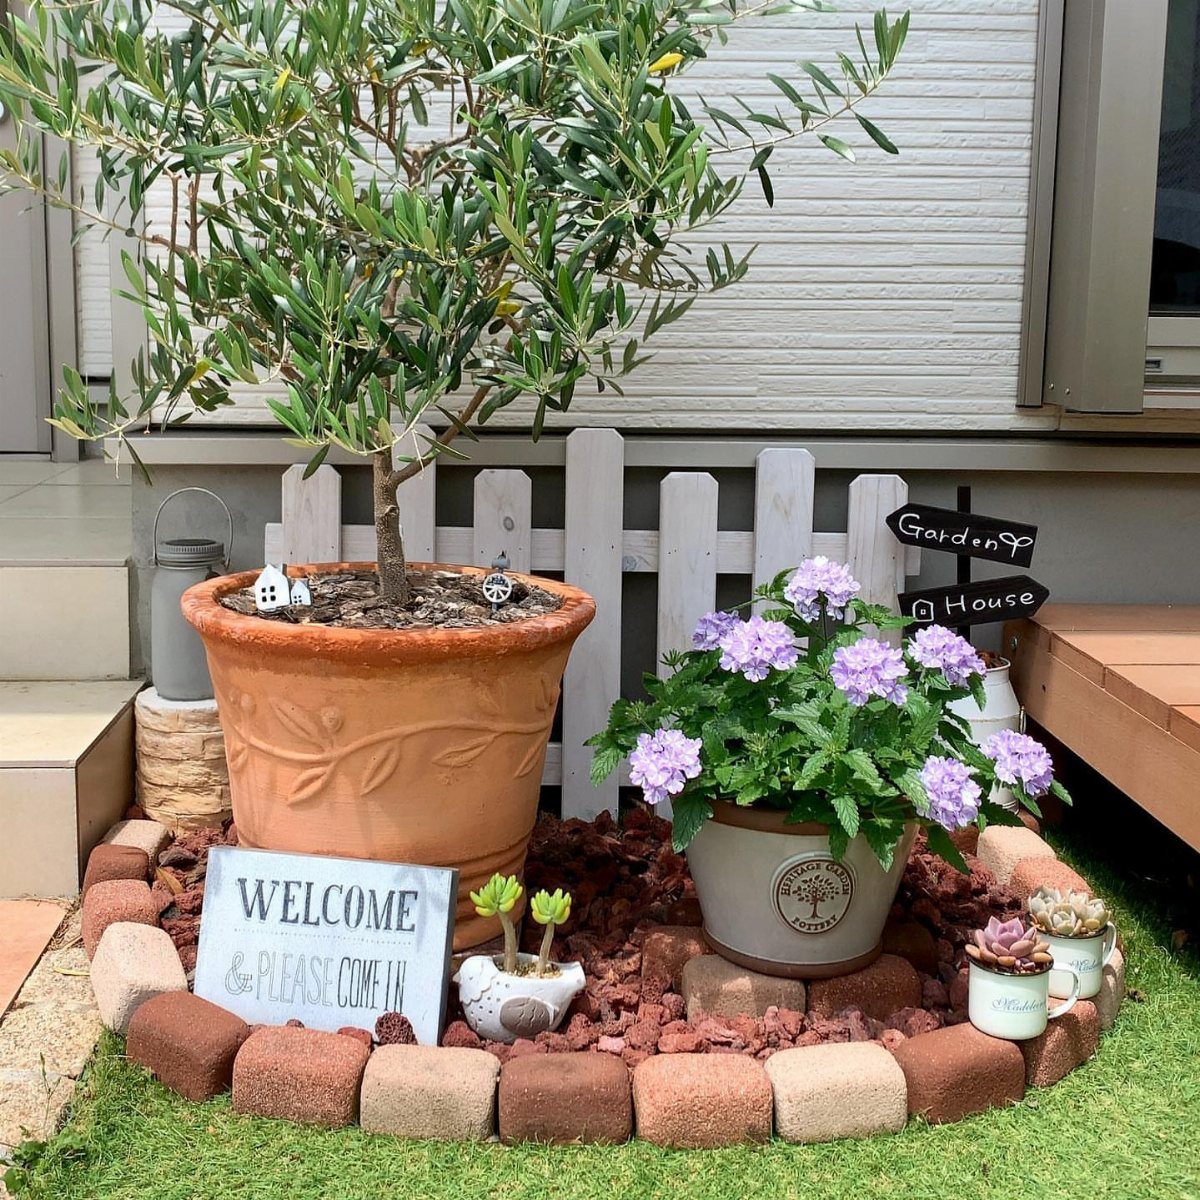
Pots let you move color where you need it and swap out what fades without digging.
Curved brick edging and volcanic rock give this bed a finished look even when the pots are still in nursery trays.
I would set the largest pot first, slightly off-center, then arrange smaller ones in a loose triangle rather than a straight line.
The "WELCOME" sign works because it sits at eye level from the walk, not pushed back against the fence.
5. Landscape Borders
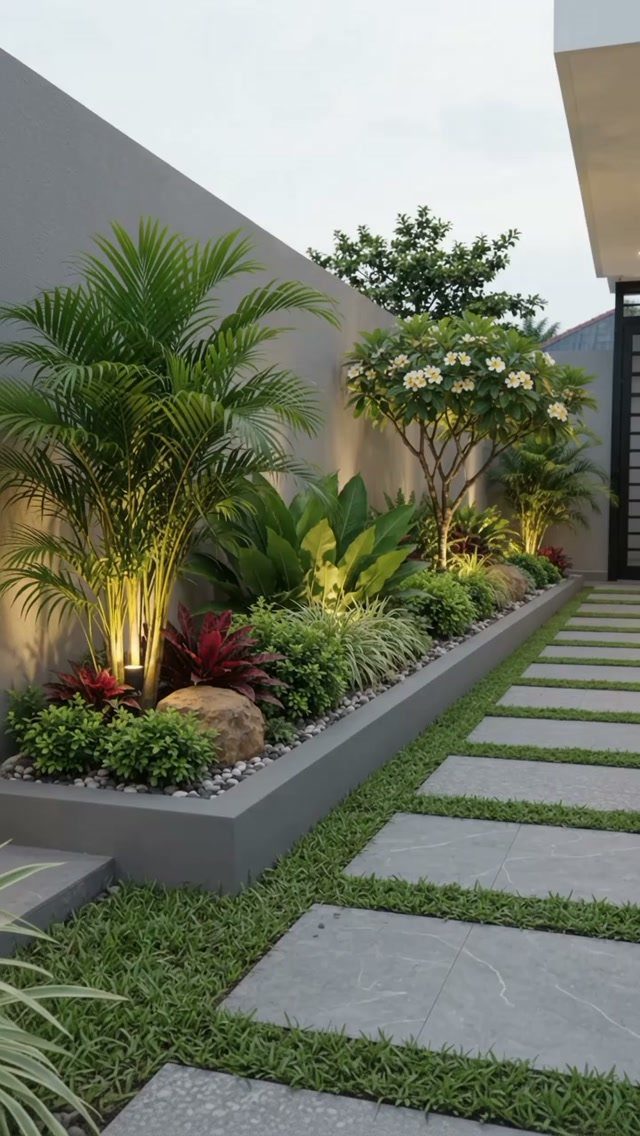
Raised concrete borders solve the problem of mulch spilling onto pavement and lawn, and the grey finish reads cleaner than timber that will gray and warp anyway.
Uplighting on the tropical plants turns a daytime border into something you see from the street at night.
The gravel alongside the walkway is doing drainage work; the grass seams between pavers soften the hardscaping. I would build this in two weekends, one for the border pour and one for planting, assuming the forms and rebar are ready.
6. Install Permeable Pathways
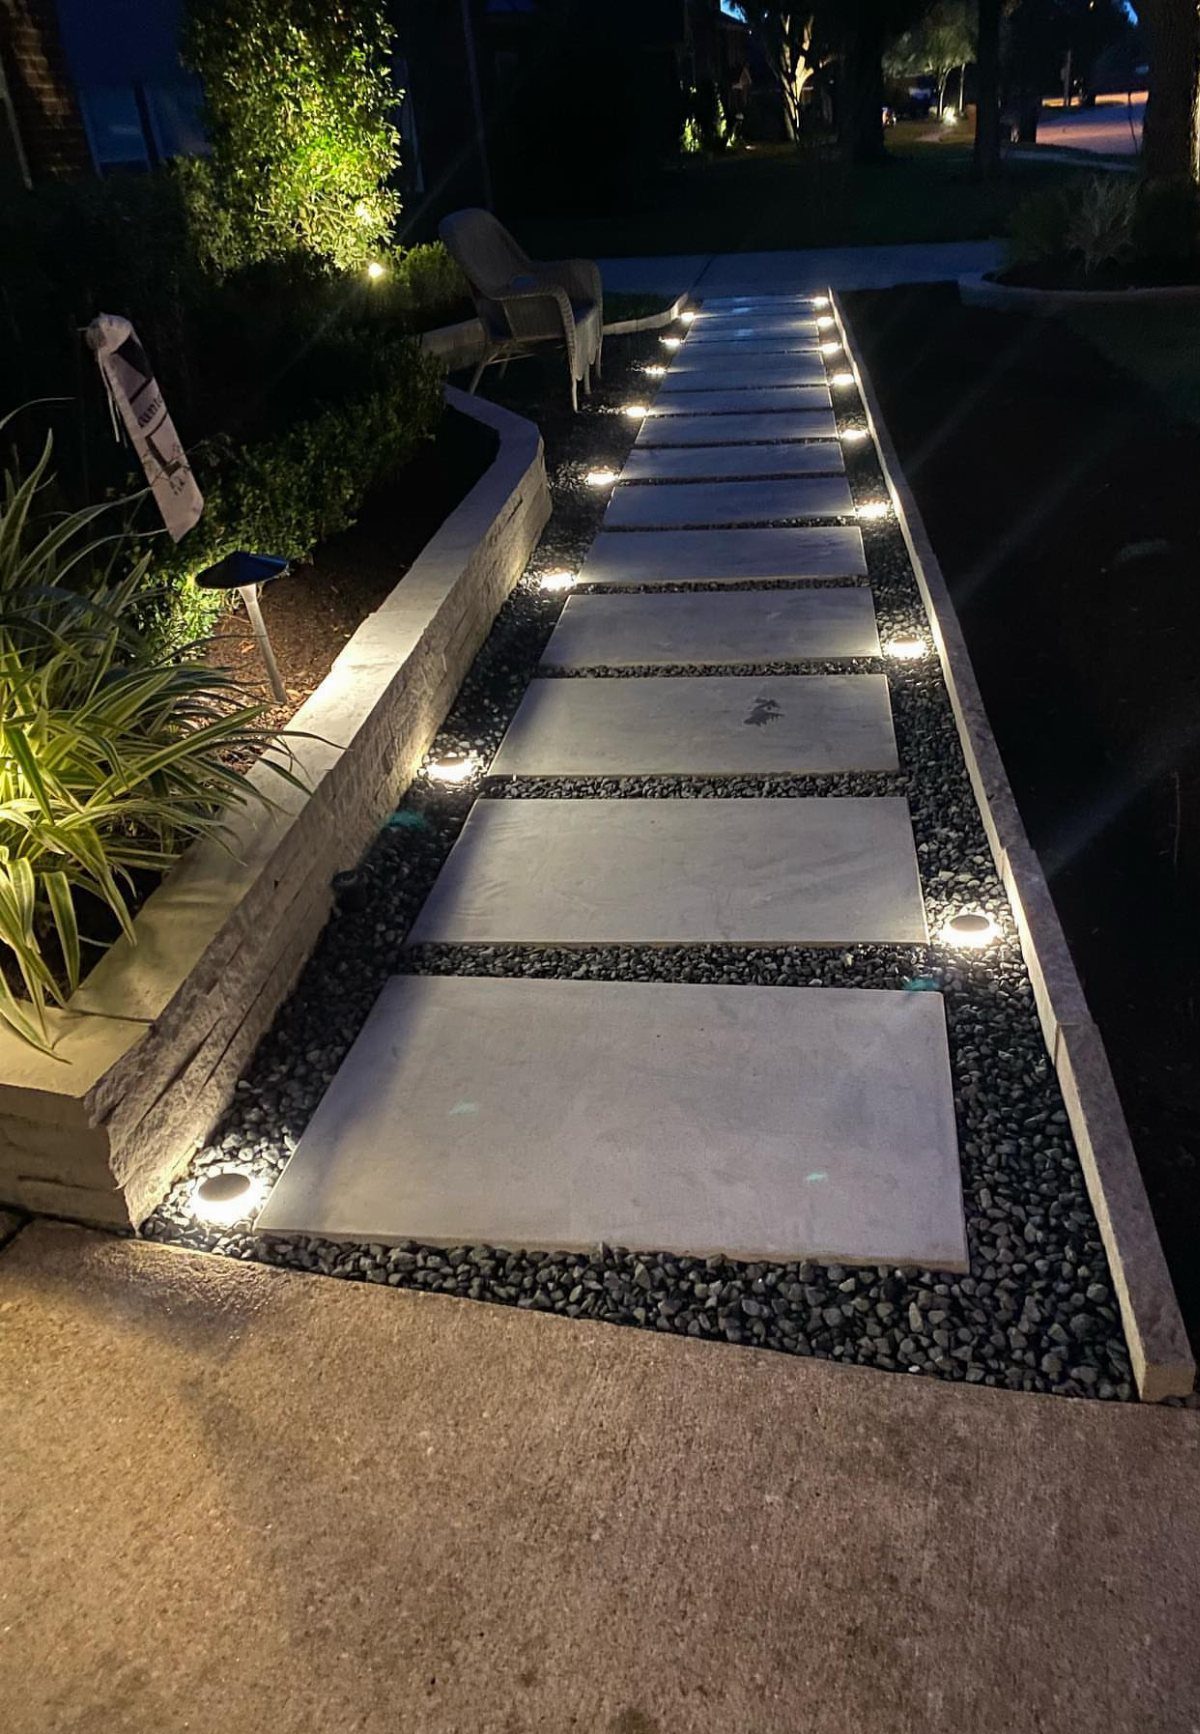
Permeable paths let rain soak through instead of sheeting off to the storm drain, which matters more than it used to in places with runoff restrictions.
The large concrete pavers here sit on dark gravel, with gaps wide enough for water but narrow enough for a heel.
Integrated lighting means no fixtures to mow around, and the glow defines the path edge after dark.
I would run conduit during construction, not try to retrofit it later; the cost difference is minimal, the headache of trenching finished work is not.
The retaining wall and garden bed sit higher than the walk, so water flows to the gravel, not the basement.
7. Use Garden Mirrors
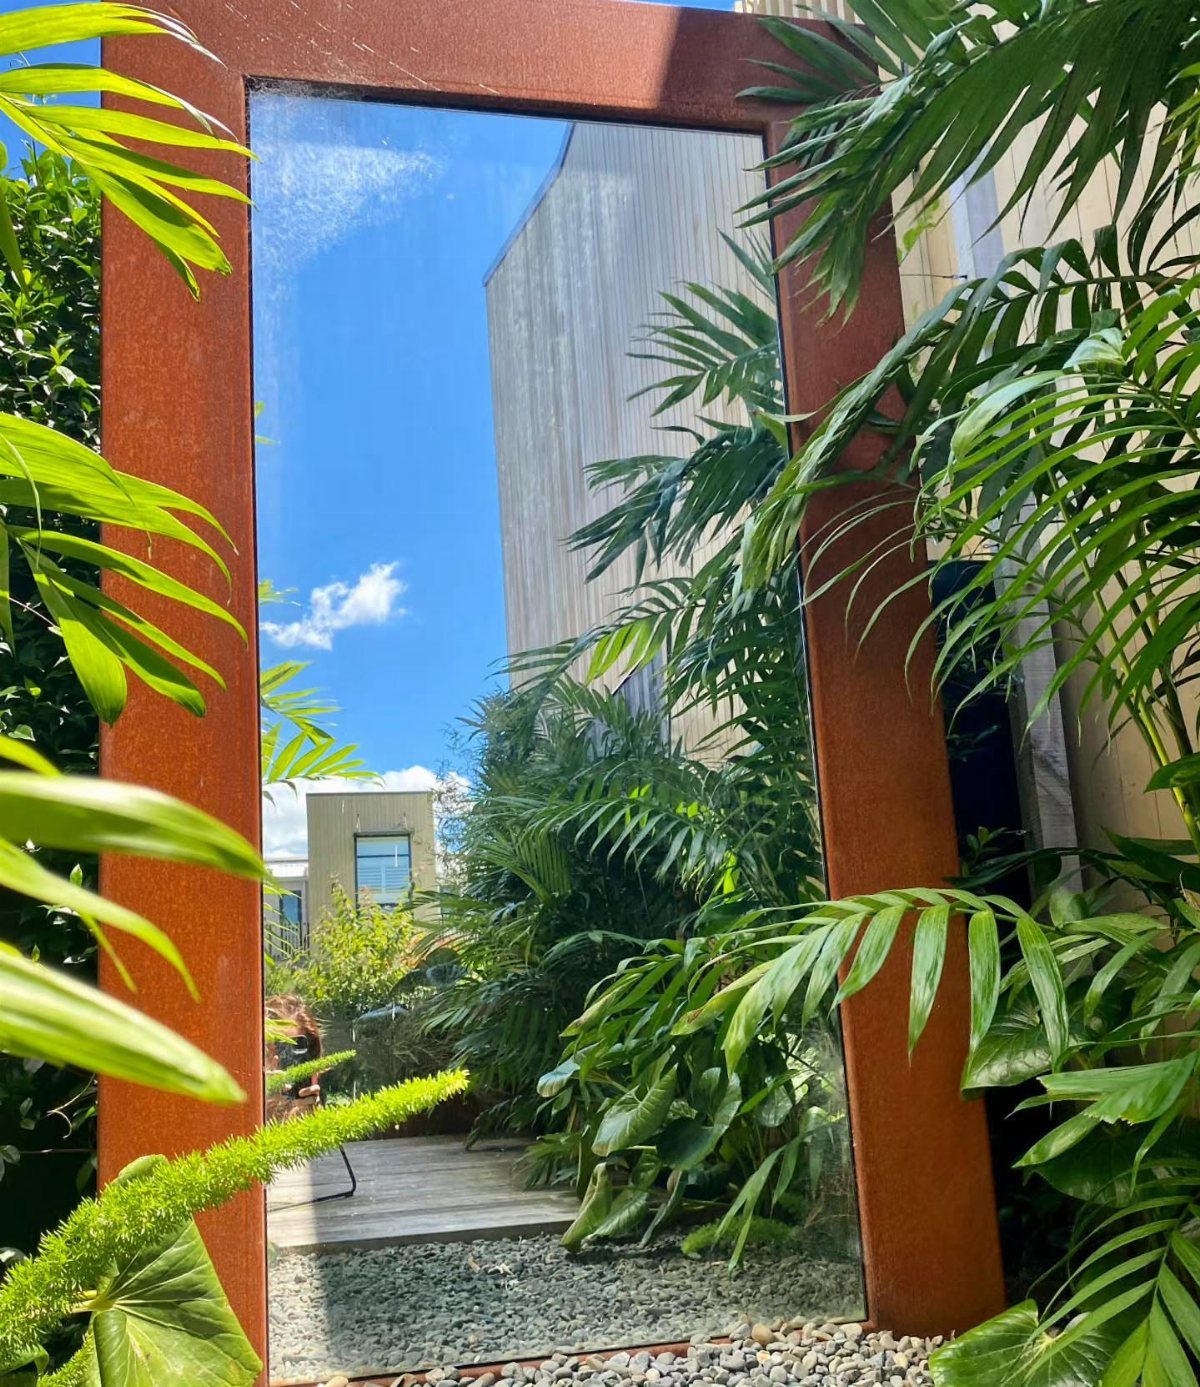
A mirror set among foliage bounces light around and doubles what green you have without planting another bed.
I would lean one against the wall rather than hang it; the frame takes on moisture and the lean lets air circulate behind.
A rusted metal finish already looks weathered, so the aging works in your favor. Choose a spot that catches sky, not the neighbor’s window, and angle it slightly downward to keep the reflection planted at your own eye level.
8. Garden Art and Sculptures
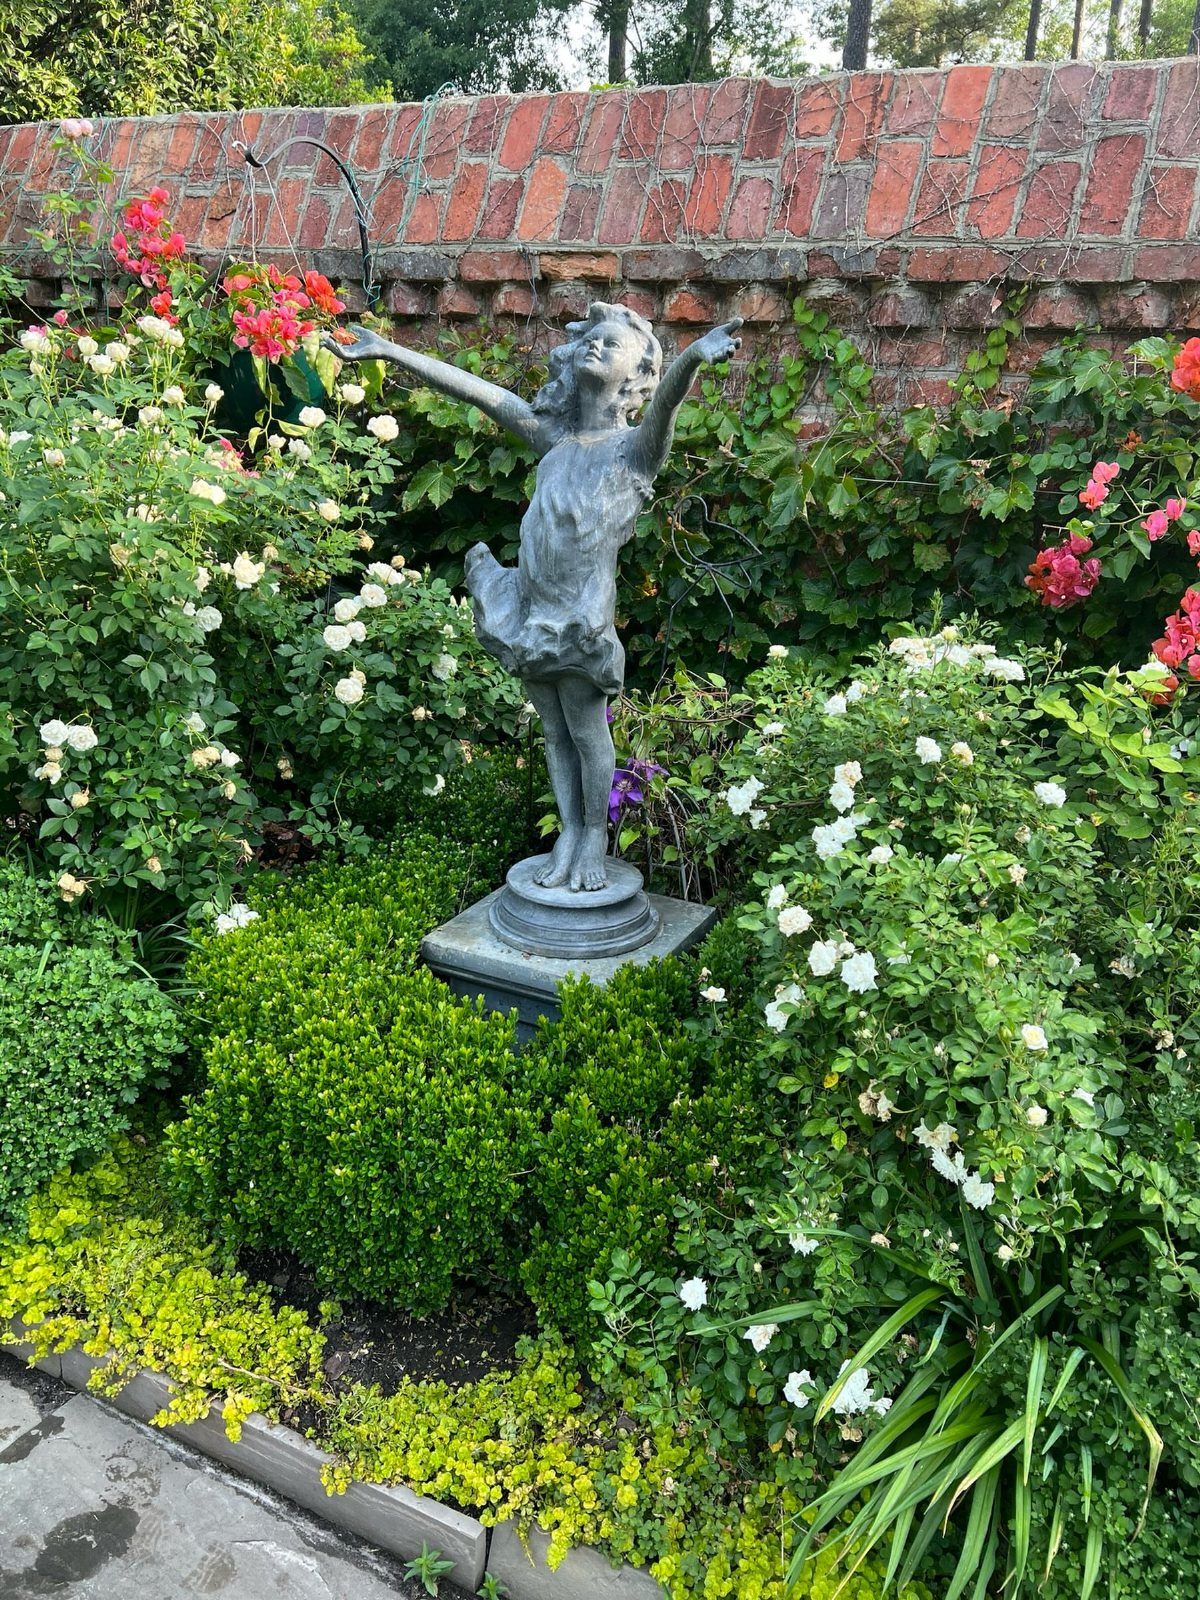
A single figure in a bed full of roses stops the eye and gives the planting a reason for being.
Stone or cast metal both survive freeze-thaw cycles; metal is lighter if you ever need to move it. I would set the pedestal before the mulch goes down, not after, so the base sits level and hidden.
Scale matters more than price: a piece too small disappears, one too large dominates the walk. This one opens her arms to the path, which is the gesture that invites.
9. Layer Plants
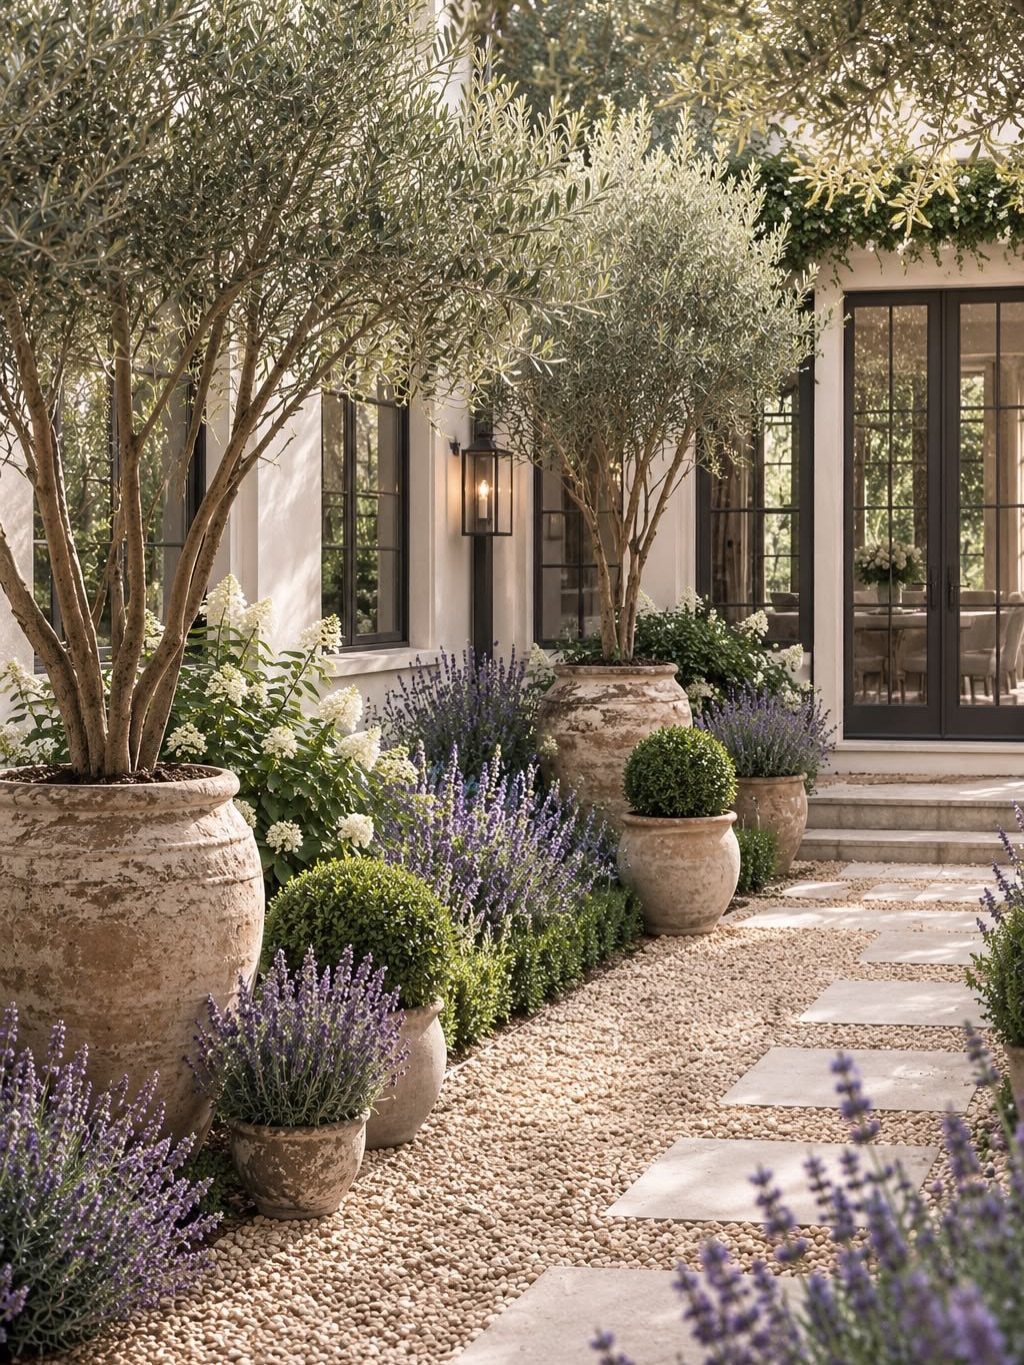
Tall olive trees, mid-height lavender, and low boxwood spheres give a narrow path three levels of green without any one layer blocking the next.
Pots make the layering portable, which suits renters or anyone still learning what thrives in their light. I would keep the terracotta unified rather than mixing glazes; the warm clay against grey gravel is doing enough visual work.
Start with the tallest element, then fill gaps at ankle height last, since those plants are cheapest to replace if you misjudge the spacing.
10. Install a Picket Fence
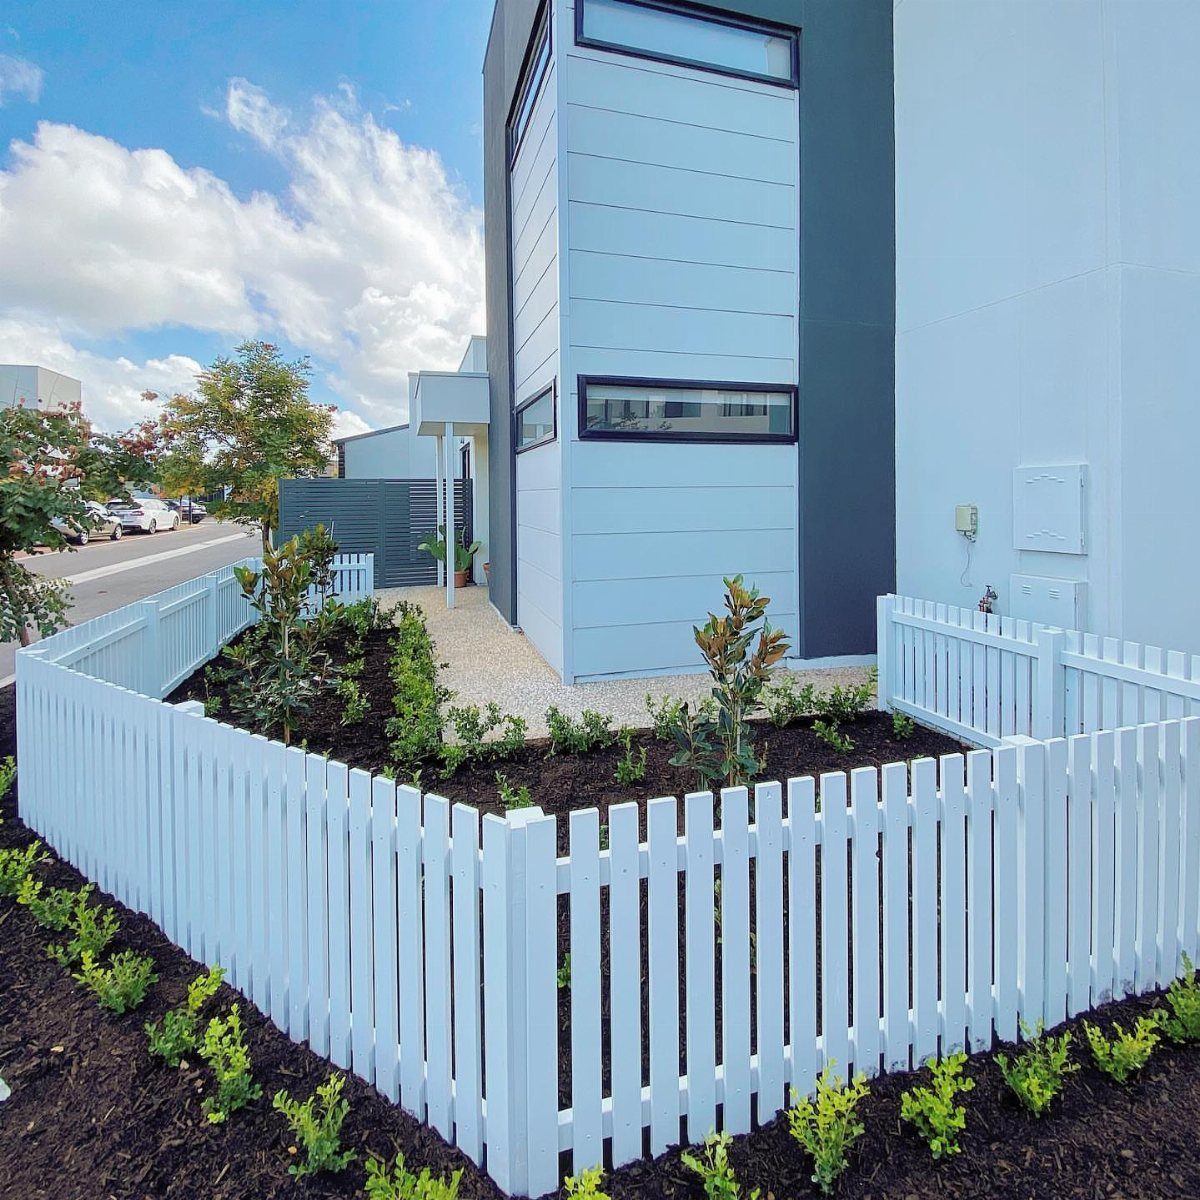
White picket defines the bed as deliberate space without walling it off from the sidewalk.
PVC or painted wood both read clean from the street; wood costs less up front, PVC drops to zero maintenance. I would keep the height low enough to greet a neighbor over.
Set the posts in concrete if frost heave is an issue in your zone, gravel if it is not; the difference is whether you are digging below the frost line or simply keeping the post upright.
11. Use Ornamental Grasses
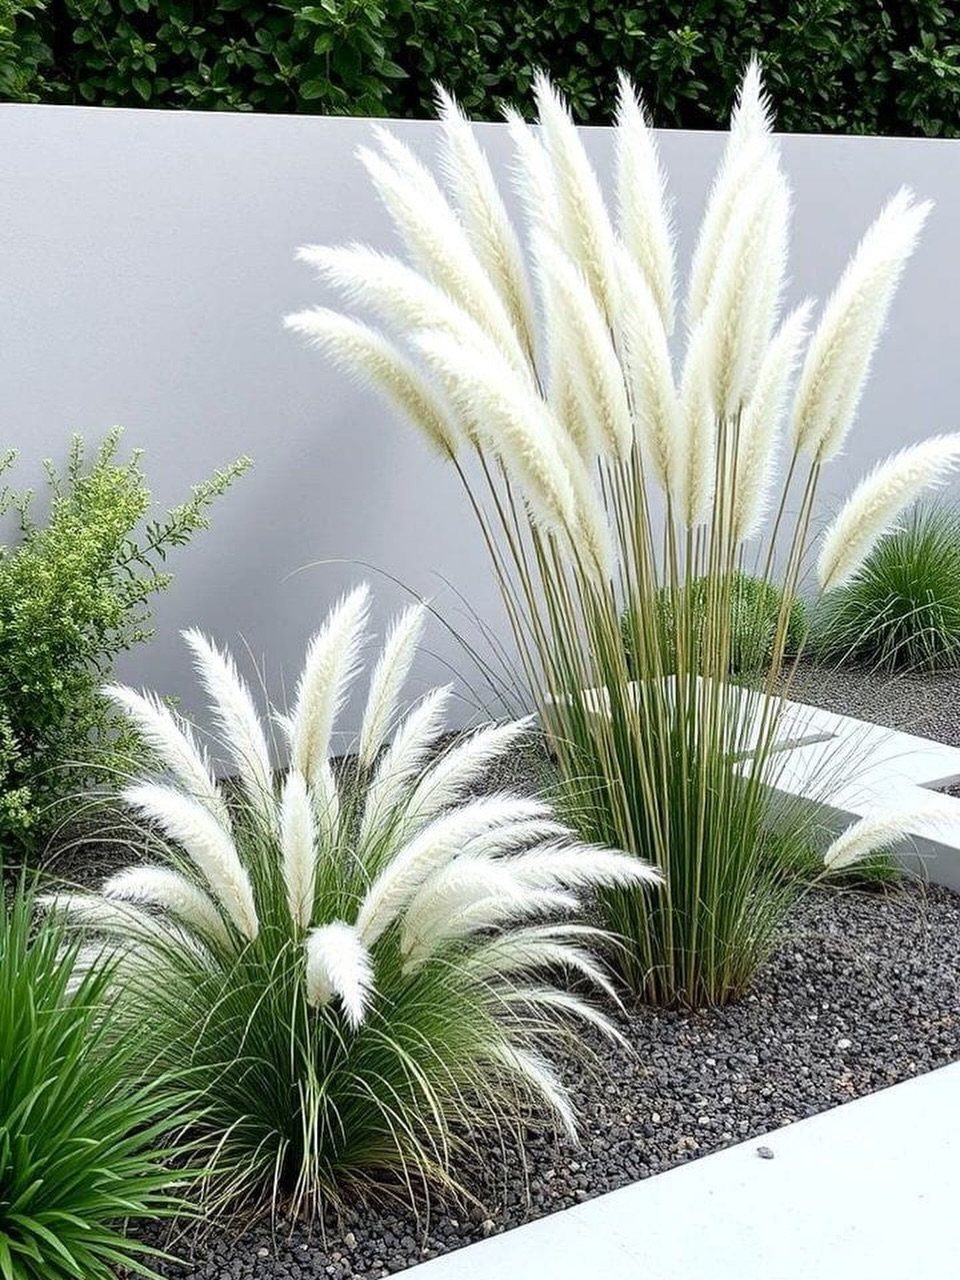
Pampas plumes catch late light and move when everything else in the bed sits still.
One clump makes a focal point, two flanking a gate frame the entry. I would plant in gravel, not lawn, since grasses want sharp drainage and shed their own mulch in winter.
Cut back to 6 inches in late February, before new growth starts but after the worst cold passes; the dried stalks do not save the plant, they only collect snow load and rot at the crown.
12. Use Window Boxes
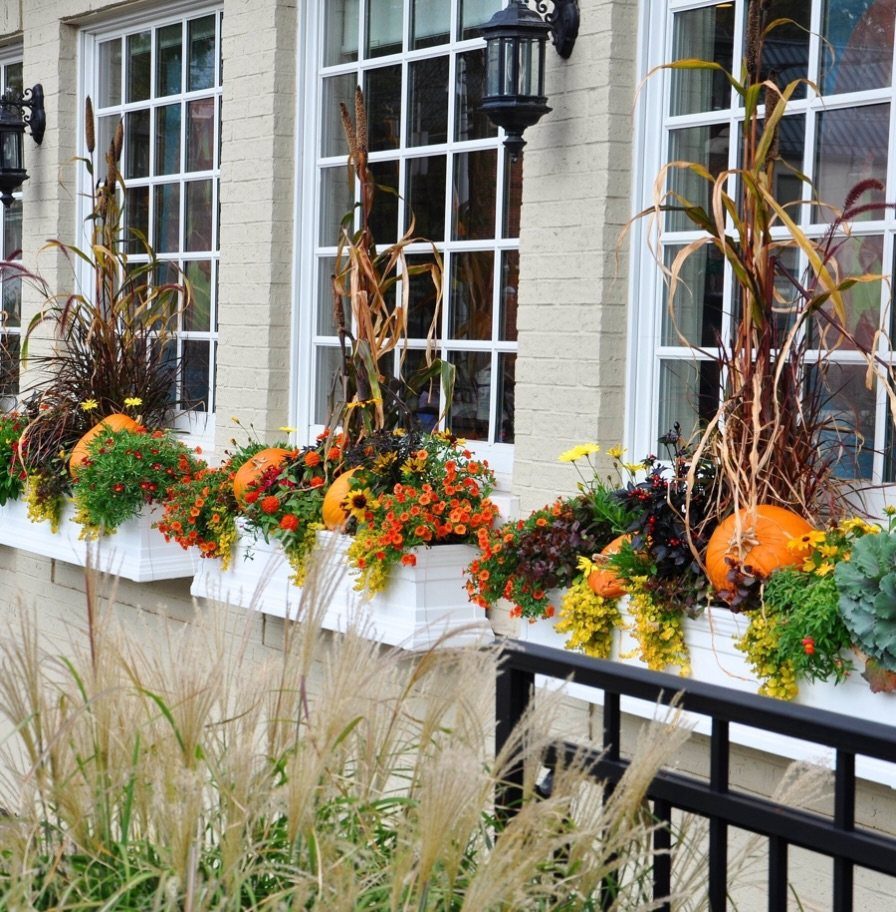
Boxes under the windows tie the facade to the ground plane in one continuous gesture.
Fall plantings with grasses, trailing foliage, and a pumpkin or two carry October without a mum in sight. I would size the box deep enough front to back; anything shallower dries out between rains and cooks the roots in August.
White painted wood against brick is a reliable combination, but the paint will need touch-up sooner if the box faces south.
13. Outdoor Lighting
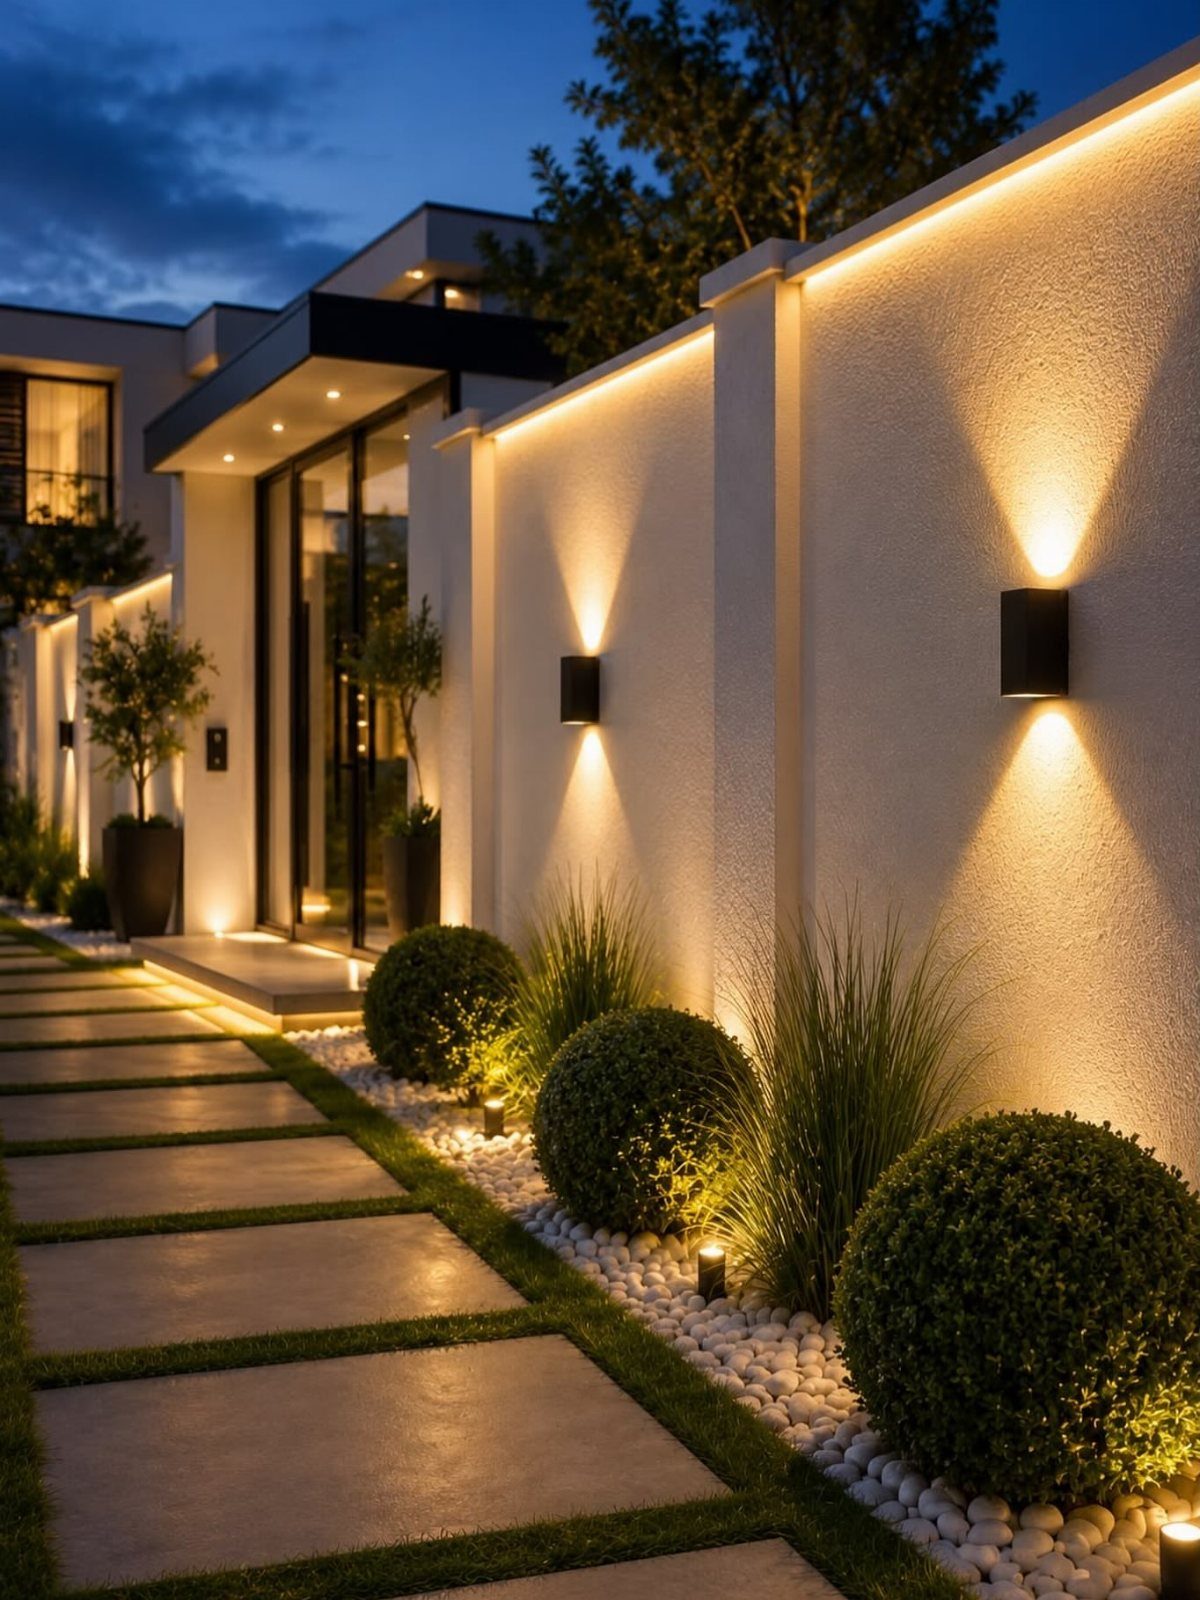
Warm light at dusk turns a utilitarian path into something you slow down for.
Sconces on the house, LED strips tucked under edges, and uplifts in the shrubs each do different work: the sconces announce the door, the strips float the walk, the uplights give the spherical bushes volume after dark.
I would run low-voltage cable in the same trench as any irrigation, before the pavers go down. Retrofit wiring through finished hardscape means lifting stone.
14. Add Bird Feeders or Baths
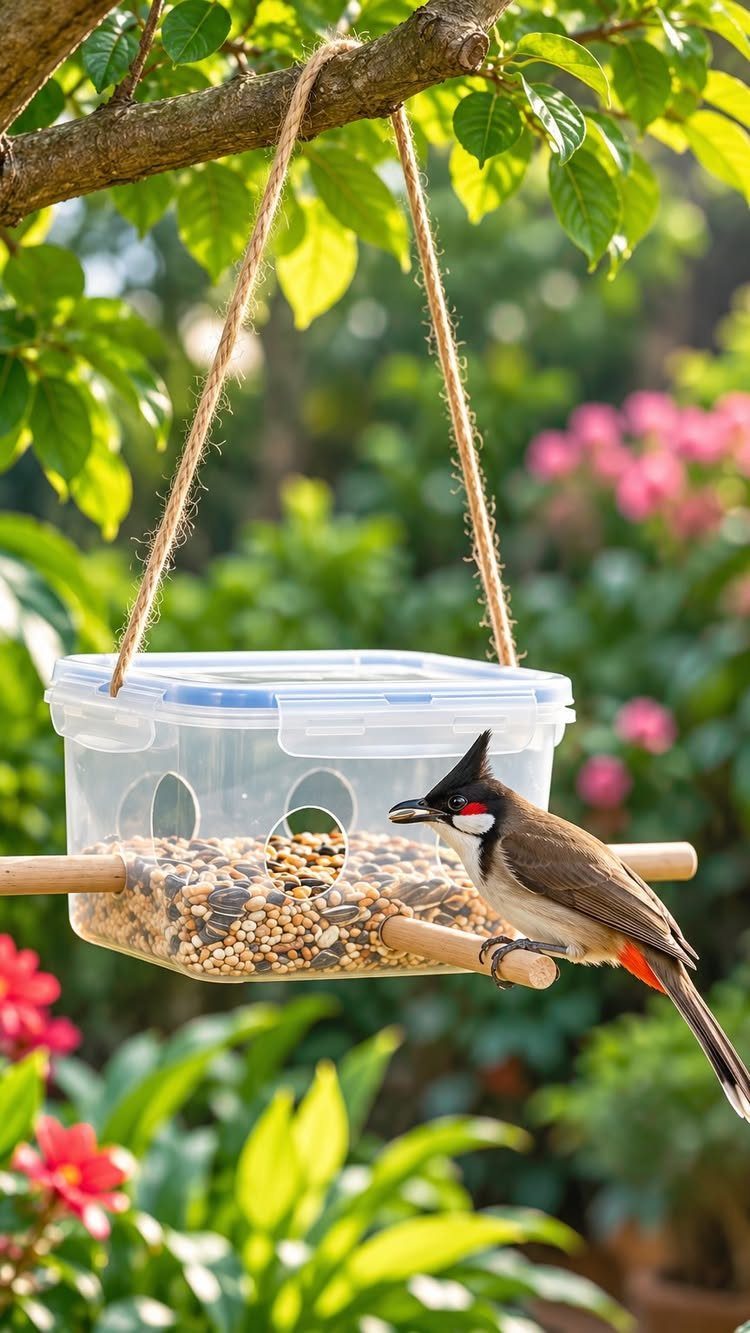
A feeder hung where you can see it from a window gives you something to watch with your coffee, and the birds do the landscaping work of movement and sound.
A clear seed bin lets you know when to refill without climbing.
I would use twine, not wire, for the hang; it is easier to replace when it weathers. A bath on a pedestal stays cleaner than one on the ground, though it needs topping off in July.
15. Curved Flower and Shrub Beds
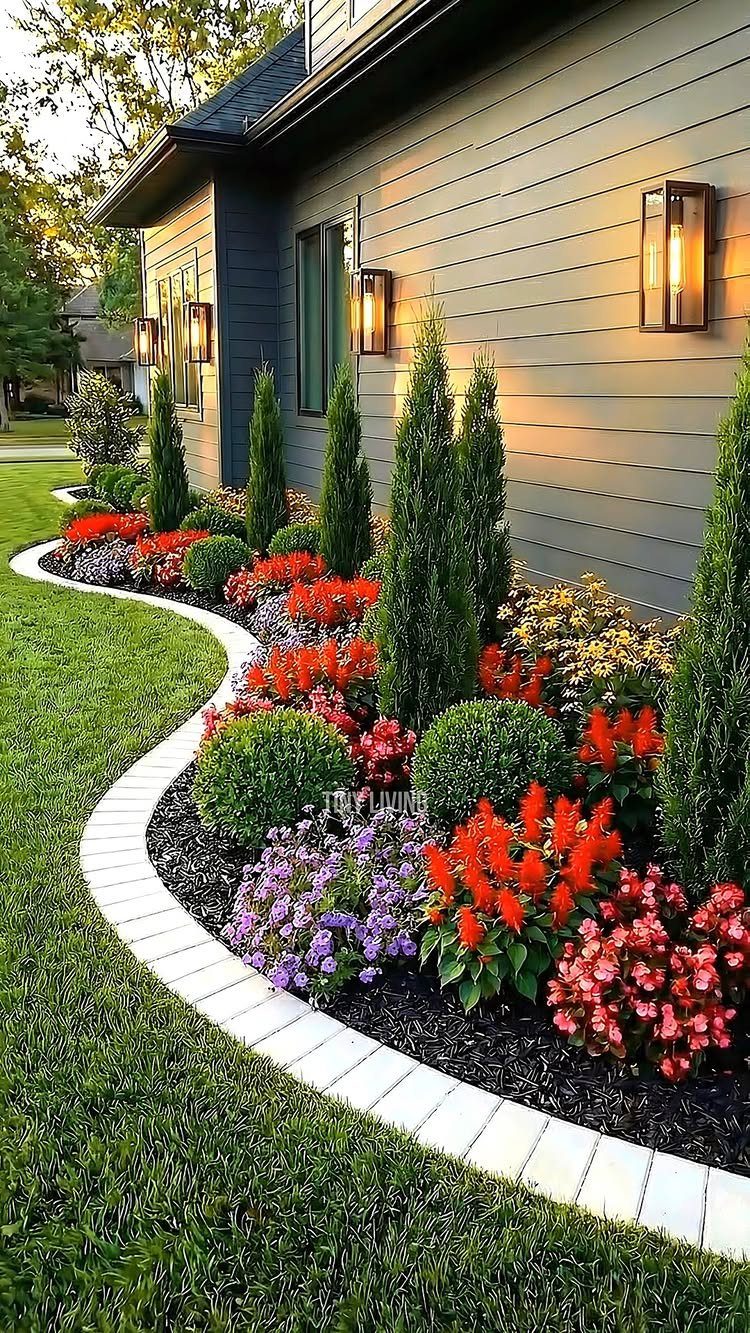
A curved bed against the foundation softens the house line and gives more planting depth than a straight run.
White pavers edge this one cleanly; dark mulch sets off the red, purple, and yellow blooms without competing.
Tall columnar evergreens at the back give winter bones, round shrubs fill the middle, and flowers carry the season. I would plant the evergreens first and work forward, since they are hardest to move if you misjudge the sweep.
In crafting front yard landscapes, Hovis finds that incorporating sculptural specimen plants alongside airy perennials that attract butterflies adds a captivating wow factor. “This dynamic combination not only creates visual interest but also proves to be an effective budget-friendly strategy, offering lasting appeal,” she says.
16. Checkered Front Walkway
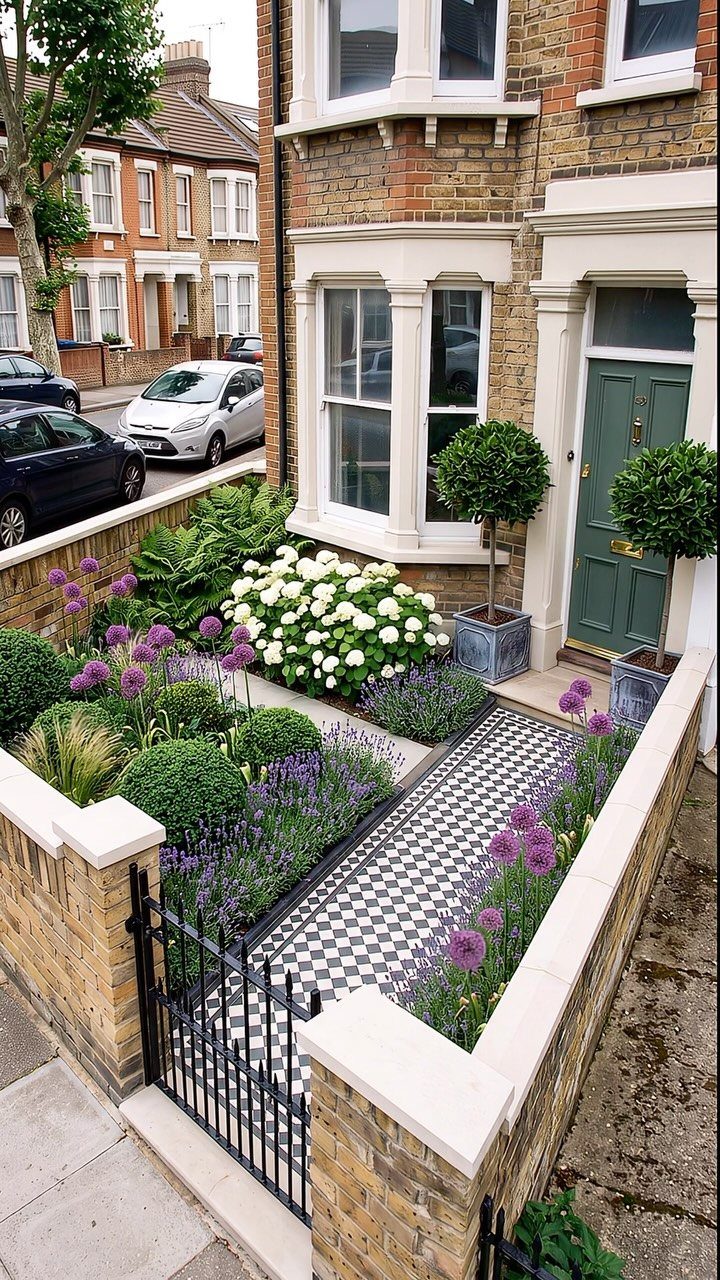
Black-and-white tile reads as deliberate pattern in a small space where plain concrete would disappear.
Checkerboard stone reads classic from the curb and works with almost any house color.
I would set the tile on a compacted sand bed with polymeric sand in the joints; cement grout stains where leaves fall and sit. The cottage planting around it keeps the formality from feeling stiff.
17. Low-maintenance Bromeliad Garden Bed
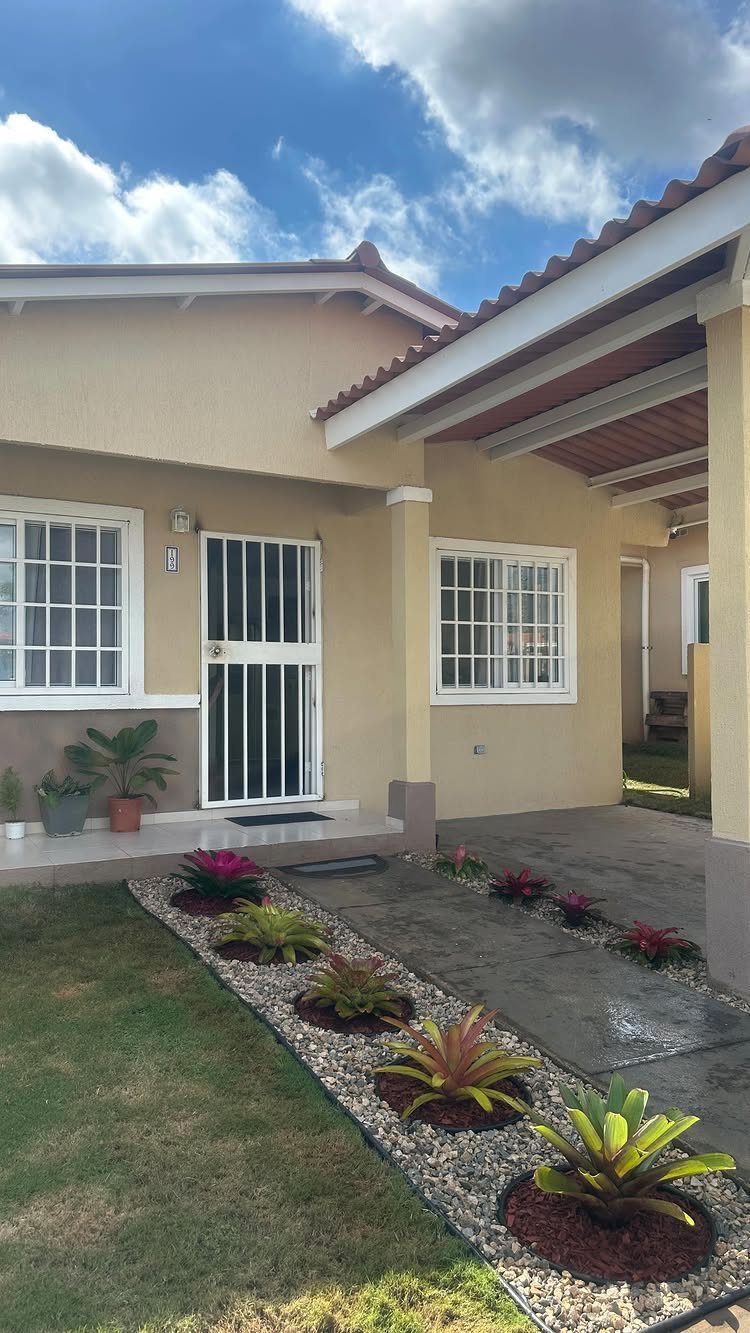
Bromeliads in gravel rings along a walk give color without the water bill of annuals.
The rosette shapes read as deliberate repetition, and the plants tolerate the reflected heat off stucco. I would mulch with pea gravel, not bark; it drains fast and does not hold moisture against the base.
A single bromeliad bed will not feed hummingbirds the way a trumpet vine would, but it also will not drop leaves on the pavers in October.
Evaluate Your Front Yard
Measure your yard before you buy anything.
A narrow lot reads wider with vertical elements like a slender entry tree or a picket fence running the property line, while a wide shallow yard needs ground cover and paths that draw the eye across rather than in.
Circulation comes first.
Lay out where people walk and where the car goes, then build planting around those lines. Your beds, borders, and hardscaping should feel like they extend the house, not sit in front of it.
An oddly shaped yard often solves itself once the walkway is set; the leftover angles become natural spots for curved beds or a mirrored corner that bounces light back into the space.
Simplify Maintenance
Native plants are the starting point for less work. They handle your local weather and soil without the watering schedule annuals demand, and they skip the chemical routine that fills a weekend.
Drip irrigation paired with the right plant choices turns a daily hand-watering habit into a monthly check.
In a small yard, that system runs off a single zone and pays for itself in the first summer if you were dragging a hose before.
Gravel mulch, permeable paths, and raised concrete borders all cut the jobs that eat Saturday mornings: weeding, edging, and resetting stone that shifted in the frost.
Enhance Curb Appeal
The entry is where effort shows. A sconce at the door, a pot or two at the step, and a clean line of border or fence frame the arrival in a few hours of work.
Low-voltage lighting does its job after dark, when most curb-appeal judgments are made anyway.
Water features or seating can sit farther out in the yard, but the entry itself carries the first impression. Keep that zone deliberate, and the rest reads as intentional by extension.
Frequently Asked Questions
How do I design my front yard?
Grab a tape measure and mark the footprint of your house, the driveway, and the path from sidewalk to door before you pick up a shovel or open a catalog.
Circulation comes first; planting and hardscaping should extend the house, not sit in front of it.
What is the best garden border edging?
Raised concrete borders keep mulch off pavement and read cleaner than timber, which grays and warps.
Steel lawn edging with a rolled top keeps a clean knife-edge between bed and grass, and that lip saves your knuckles when you run the string trimmer.
Concrete costs more than metal or plastic up front, but it lasts; natural stone gives a rougher look if that suits your house.
What are some budget-friendly ways to landscape my front yard?
Native shrubs and perennials cost less over time because they do not ask for the sprinkler timer and the fungicide spray that non-natives demand.
Ground cover replaces thirsty lawn, and a flagstone path set into gravel gives you hard surface where you walk without the cost of full paving.
A single-zone drip kit runs about $80 and saves every drop; if you have been hand-watering with a hose, the water bill drop usually covers it by August.





