
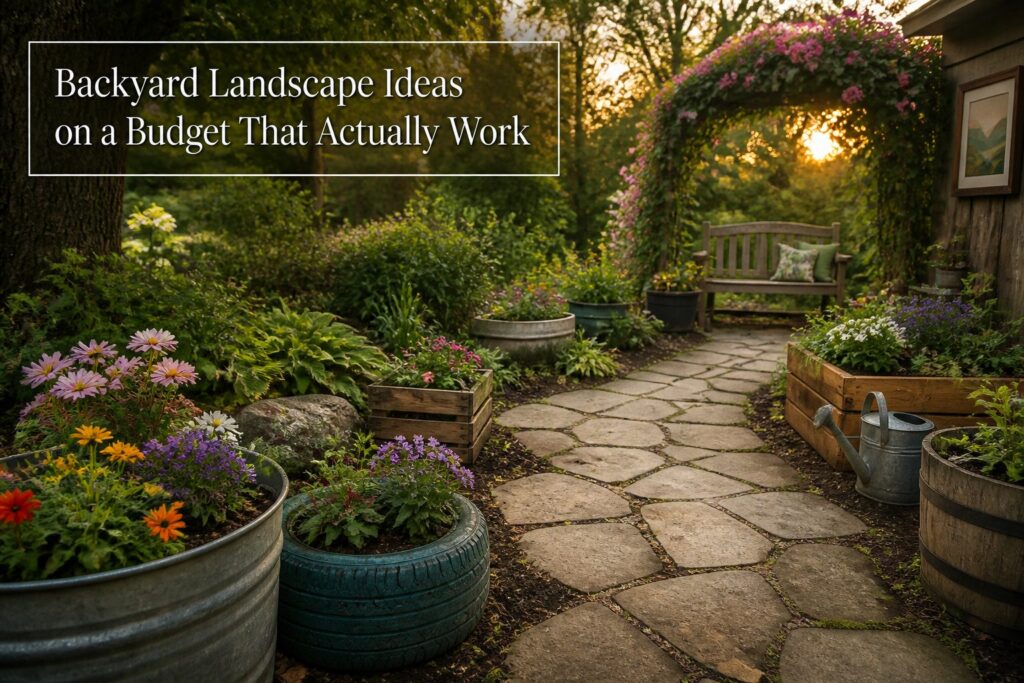
A finished backyard can run from a $20 tire planter to a $3,500 flagstone patio, and the deciding factor is almost always labor: what you can move yourself before you spend on a crew.
The articles that skip soil prep end up replanting the same bed twice at full plant cost. Eric King, a landscape architect, puts amendment first for exactly that reason.
1. Start With Soil
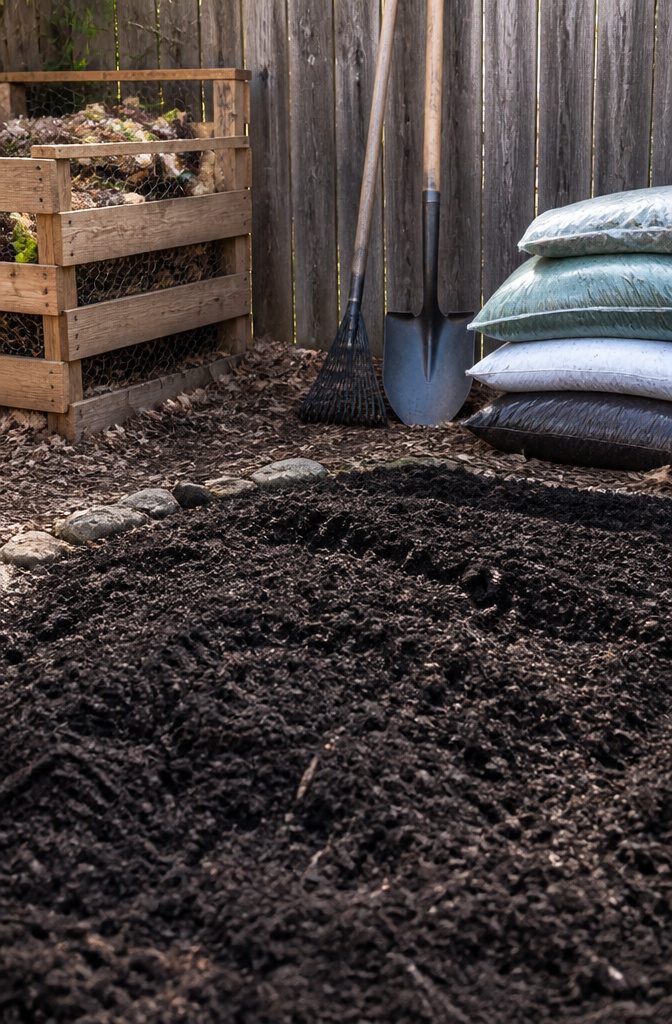
Good soil is the one place in a backyard landscape where spending a little now saves the most later.
Eric King, a landscape architect, puts soil amendments and preparation—raking, tilling, grading—at the top of the list for budget gardening because plants in improved soil grow better from smaller, cheaper starts instead of larger, costlier ones.
A bag of amendment runs a few dollars, and one application structures the bed for years. Skip it and you are replanting the same spot twice, sometimes three times, at full plant cost each round.
The composter is where this gets close to free.
Kitchen scraps that would hit the trash become the nitrogen and carbon that replace store-bought fertilizer. A neighbor’s bin works if you are still deciding on the setup, though building your own pays back within a single season.
Either way, the input is waste you already made, and the output is the amendment that feeds roots instead of just coating them.
2. Layer Your Levels
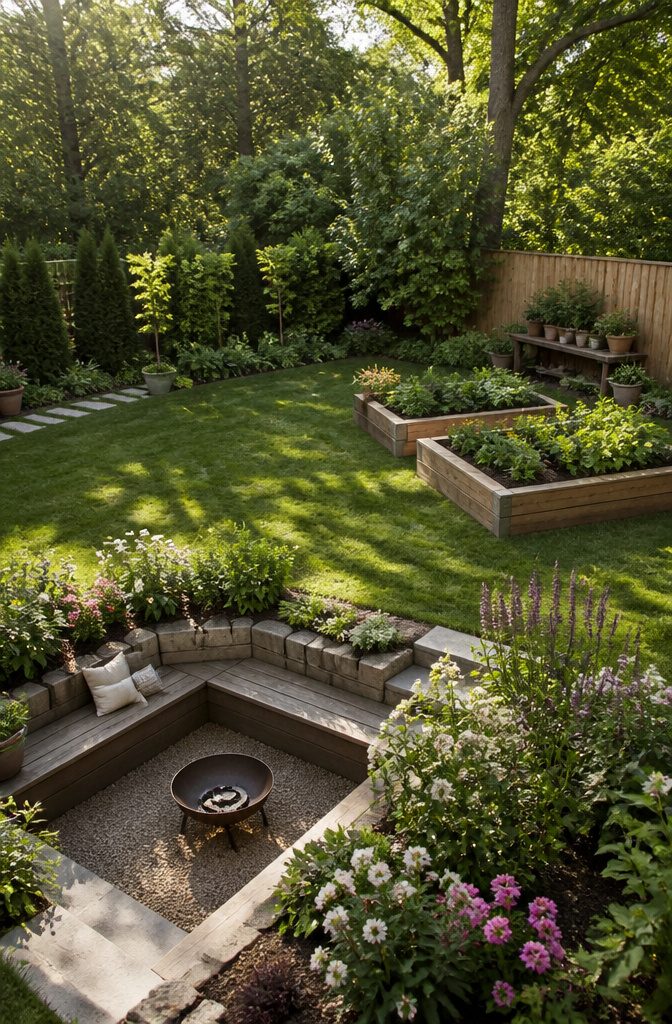
Flat ground reads as leftover space unless you break the plane. A shovel, a rake, and a free weekend are enough to do it.
Raised beds warm the soil and improve drainage, but the real reason to add them is the visual weight they bring. A row of mounded earth or timber-edged beds lifts the eye and gives the yard a backbone.
On the other side of the tool shed, a sunken seating area does the same thing in reverse: carve out a 6–8 inch depression, add a few refurbished chairs from a garage sale, and the lawn suddenly has a room inside it.
Berming is the middle path; pile soil into a low ridge, plant it with something that spreads, and you have a soft wall that costs nothing but labor.
Hardscape bids climb fast when a crew has to move dirt by the cubic yard. Doing it yourself keeps the budget in the hundreds, not thousands, and the materials are already on the property.
Two ways to play this: raised beds for structure you can garden in, or berms and sunken spots for seating and strolling.
The beds win if you want food or flowers out of the deal; the sunken corner wins if you need a place to sit that feels separated from the rest of the lawn.
Either way, the rake does more than the credit card.
3. Pick Plants That Stay Put
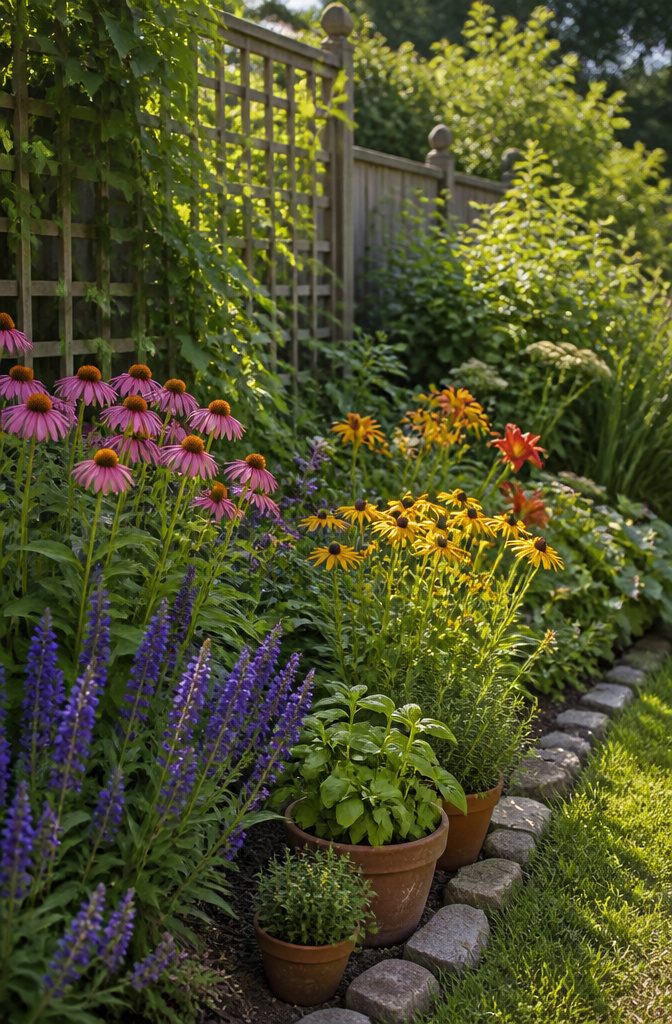
Perennials are where your plant budget stretches the farthest. They come back year after year, so by the third summer they should be well established and filling out the space you gave them.
Annuals drain money because you’re buying new color every spring; keep those to a few pots if you want bright pops that move around.
Know your hardiness zone before you buy anything. A plant rated one zone warmer than yours might survive a mild winter, but a hard freeze will kill it, and you’re out the cost and the labor of planting.
Nurseries in your area mostly stock what survives locally, but they also bring in borderline plants that look good on the shelf.
The USDA zone map is searchable by zip code, and spending two minutes there beats losing a cartload of shrubs to a February cold snap.
Native species handle your rainfall and your pests without the fuss of imports, and edibles earn back their price tag in groceries you don’t buy.
I lean toward blueberries or dwarf fruit bushes in zones where they fit, because the return is concrete and the maintenance is seasonal, not weekly.
4. Build One Destination
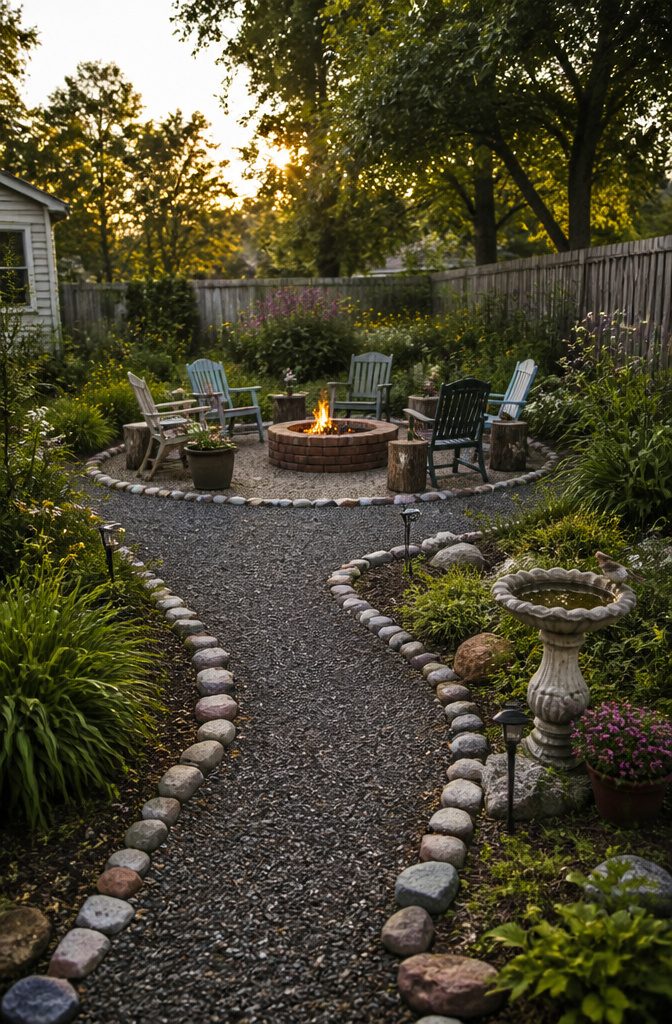
A yard without a focal point reads as leftover space. The eye bounces from fence line to fence line with nowhere to land.
One deliberate destination fixes that: a fire pit kit running $200–$700, a birdbath at $100–$200, or even a simple seating circle you mark out with chairs from a garage sale and a few bags of gravel.
The prefab fire pit kit wins on speed. Everything arrives in one box, and assembly takes an afternoon.
Gathering your own fieldstone costs less in dollars but more in days; you are paying with time and truck rental instead of cash. For a weekend project, the kit is the smarter trade.
A birdbath works at the same $100–$200 mark with zero assembly.
Place it where you will pass it daily, not tucked against the far fence where birds enjoy it more than you do. The water draws them in, and the movement turns a static corner into something alive.
One rule I follow: the destination needs a path to it, even a cheap one. A winding line of stepping stones or mulch invites the walk and makes the yard feel larger by breaking the view into stages.
Without that path, the fire pit or birdbath sits like furniture pushed to the middle of an empty room.
5. Plant a Secret Room
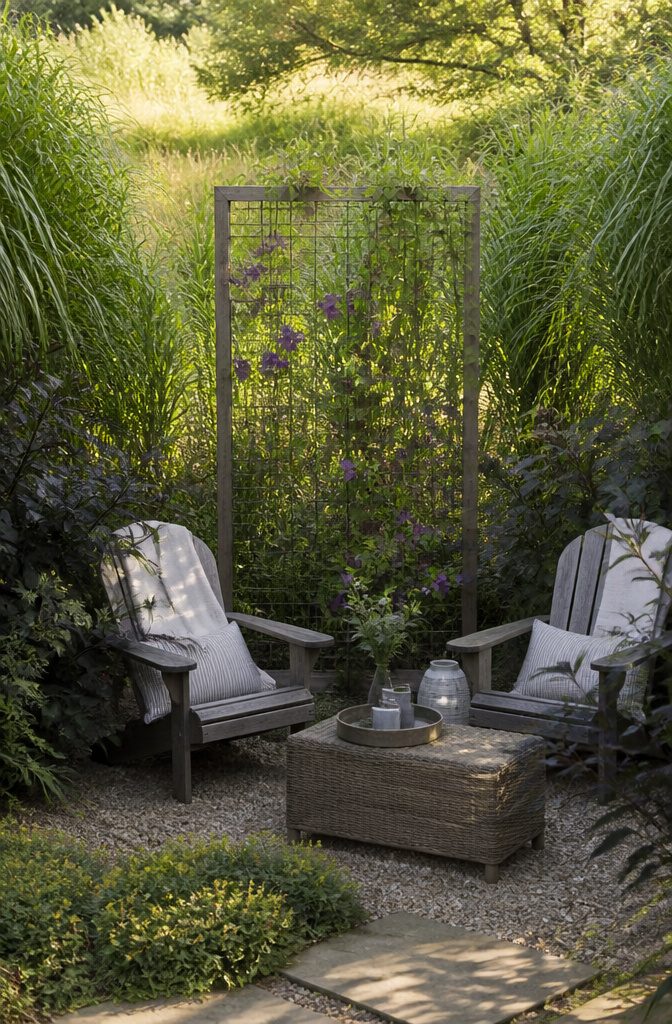
Tall grasses planted in a dense row can form a living wall that separates a corner of the yard from the rest of the view in a single season.
Switchgrass and maiden grass both push upward of 6 feet by late summer from a spring planting, and their root crowns spread just enough to fill gaps without turning into a maintenance fight.
I would skip bamboo entirely; even the clumping varieties need root barriers and yearly hacking to keep polite, which defeats the purpose of a low-cost weekend project.
For something quicker, a simple frame built from pressure-treated 2x2s and strung with galvanized wire gives climbing vines a grid to grab.
Clematis covers the structure in two years if you choose a viticella variety, and it tops out around 10 feet so you are not pruning it off the roofline.
Dutchman’s pipe works in deeper shade and fills even faster, though its flowers stay modest and green; I would use it where you want the enclosure itself to be the point, not the bloom.
Shrubs positioned at the corners anchor the room year-round.
Viburnum or elderberry grow fast enough to matter in year one and respond well to a single hard cut in early spring if they get leggy, which keeps the job free and on your own schedule rather than a landscaper’s.
You have to wait: grasses give you the screen this summer, but the shrub framework takes two to three years to read as architecture. Build the frame and plant both; the grasses carry you until the woodier plants mature.
6. Lay Gravel, Stone, or Pavers
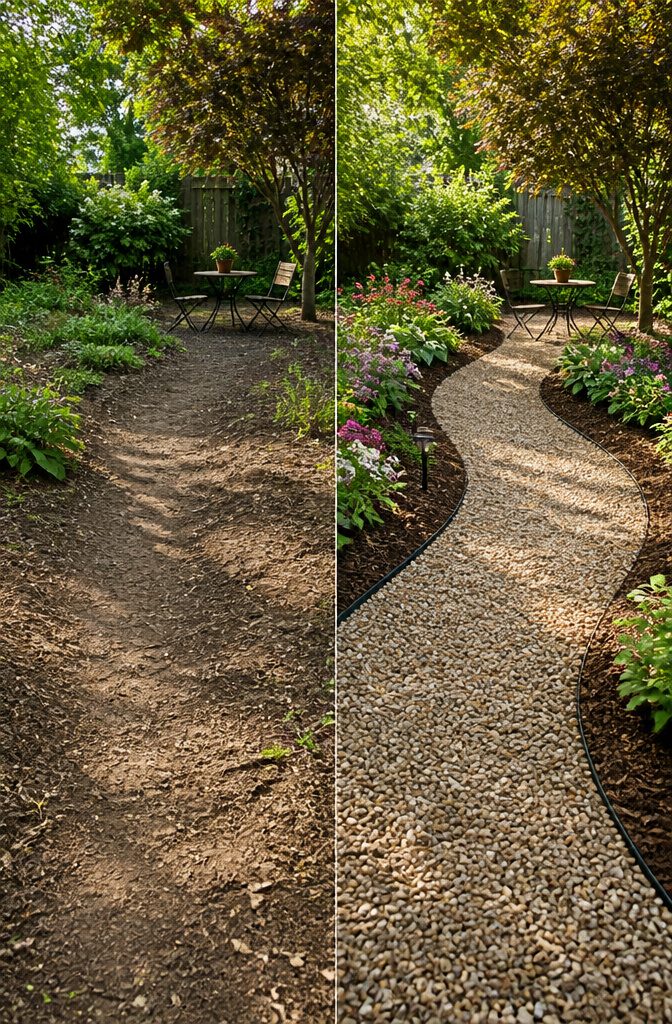
Pea gravel wins on price, and that is where I would start. A gravel walkway runs $300 to $500, which is the full weekend budget for some readers but still leaves room for the edging.
Flagstone costs more, somewhere between $1,600 and $3,500 installed, though you can cut that by laying it dry without mortar and letting elfin thyme or Irish moss fill the joints.
Pavers sit in the middle if you skip the mortar too, but they need a sand bed for leveling that gravel does not.
Drainage is where the materials split.
Pea gravel lets water pass straight through to the soil below, which matters in yards that puddle. Flagstone and pavers shed water to the sides, so you are building a little channel whether you planned to or not.
For the underlay, I skip the landscaping fabric and use flattened cardboard boxes instead.
They rot into the soil within a season, but they smother every weed seed underneath while they last, and the price is zero if you are already getting deliveries.
The gravel presses the cardboard in place; by the time it breaks down, the weeds underneath are dead and the path is established.
7. Get Crafty With What You Have
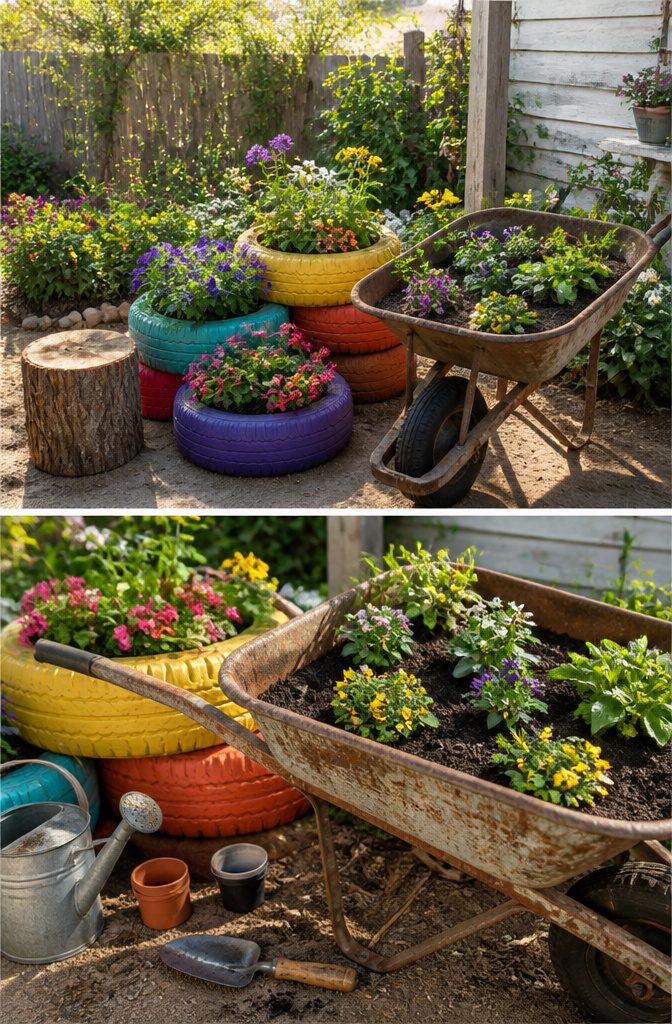
Some of the cheapest backyard landscape ideas on a budget start with things you already own. Turn them into something that holds up outside.
- Old tires stack and paint into planters for flowers or trailing plants. Fill half with soil if you hang them, or leave them on the ground for shrubs. Plan on $20–$40 per project for exterior paint and a sealant coat so the rubber does not crack and the color does not fade in two seasons.
- Pallets become seating or side tables with minimal cutting. The wood is free, but it soaks up water fast. Budget that same $20–$40 for a water sealant or outdoor-rated paint, otherwise the legs rot where they touch grass or concrete.
- Found objects like a wheelbarrow, whiskey barrel, or copper boiler pot double as planters. The flea-market price on a wheelbarrow runs about $20 if you shop around. Drill drainage holes if they are not already there, or the roots drown in the first heavy rain.
- A tree stump left in the yard makes a seat with no building at all. It will last longer if you seal the cut surface, again landing in that $20–$40 range for the can of sealant.
The real cost of free material is the weekend spent on prep. Skip the sealant and you replace the piece in a year or two.
8. Clean Before You Build
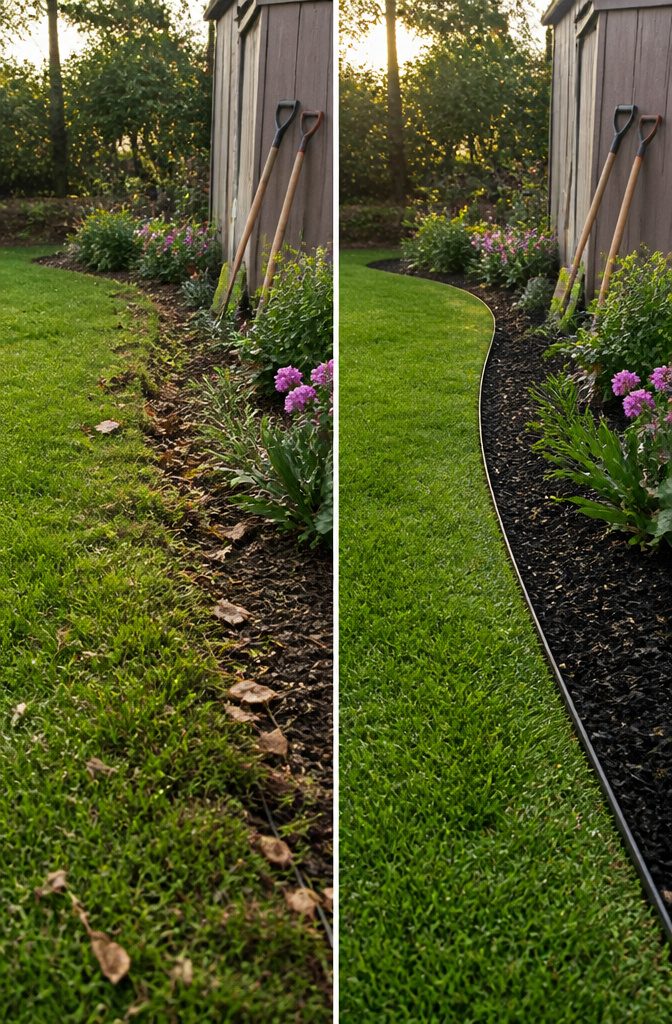
The cheapest backyard remodel starts with clearing debris, edging beds, and sharpening your lawn mower blades.
That last one matters more than people think: a dull blade tears grass rather than cutting it clean, and torn grass tips brown fast. A sharp blade gives you the clean edge that makes a basic lawn look maintained.
Steel edging runs a few dollars per foot and installs with a rubber mallet.
Hammer it in where grass meets garden bed, and you get an instant visual anchor. The line does not need to be elaborate.
A simple curve or right angle, kept consistent, reads as intention rather than neglect. That distinction is what separates a yard that looks worked on from one that looks worked over.
Jeremy Yamaguchi, who runs a lawn care company, makes this the core of his advice: mow regularly, prune consistently, and the whole property lifts. Perennials along that new edge extend the effect year to year without replanting.
The before-and-after gap here is not about spending. It is about seeing the boundary between lawn and bed as a design decision and treating it like one.
9. Hang String Lights
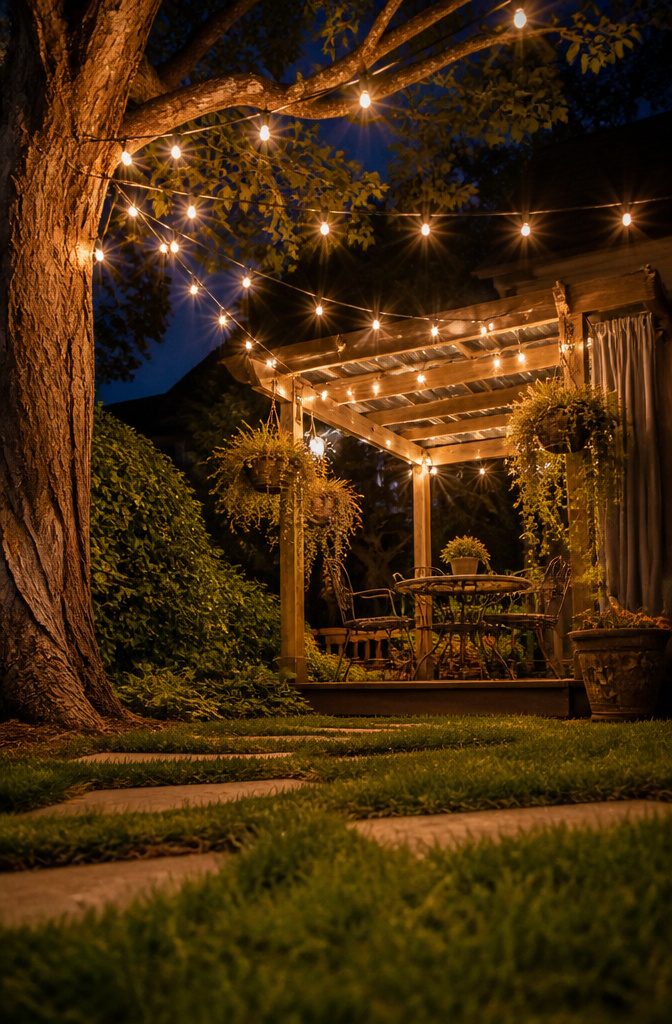
Outdoor string lights run $50 to $150 for a standard set, which puts them in reach for most weekend budgets.
The real decision is power source. Solar strands cost nothing to run and need no outlet, but they dim faster on cloudy days and the panel has to sit in direct sun.
Plug-in versions stay bright all evening and cost less upfront, yet you are tethered to the house and probably running an extension cord.
That cord is where most people stall. I anchor lights to the house eave first, then stretch them to a fence post, a galvanized steel pole hammered into the lawn, or a tree limb at least six inches thick.
Eye bolts into wood hold up for years; zip ties around tree bark eventually girdle the branch, so use tension wire or removable hooks instead.
If you are unsure about placement, dollar store solar stakes at $1 each let you test a path or a corner for a season before you commit to the real hardware.
They are flimsy plastic and the LEDs fade within a year, but they answer the layout question for almost nothing.
10. Suspend Plants Overhead
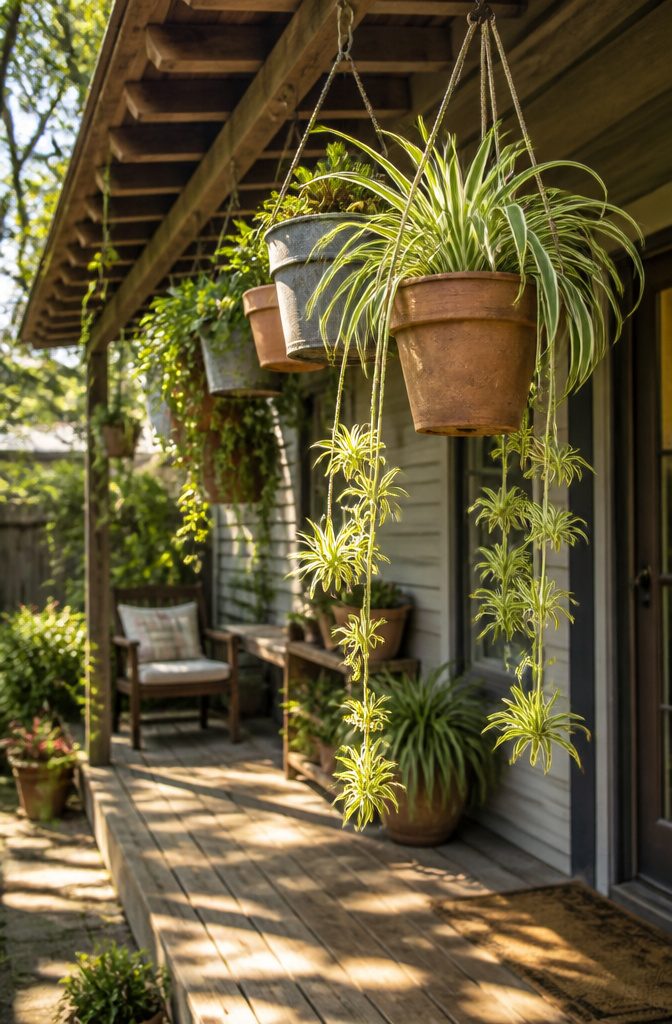
Hanging containers free up ground-level square footage you probably do not have.
I look for resin or unglazed terra cotta with a single drainage hole at least a half-inch across; sealed ceramic bowls and metal buckets without holes pool water and rot roots within two weeks.
The hook matters more than the pot. A screw-eye into a deck joist, driven at a slight upward angle, holds roughly the same weight as a toggle bolt into drywall but costs a few cents.
For trees, I use a strap rather than wire or a closed hook; cambium grows and a fixed ring girdles the limb in a season or two.
Up in the canopy, wind and sun strip moisture faster. Spider plants, pothos, and trailing succulents handle the drier air better than ferns or peace lilies, which crisp at the leaf edges and need daily checking.
I water hanging pots on a schedule two days earlier than my in-ground plants, and I still miss it sometimes.
The trade-off is maintenance access. You need a step stool or a hook you can lower on a chain; otherwise you stop watering when it gets inconvenient, and the plant dies.
11. Refresh Patio Accessories
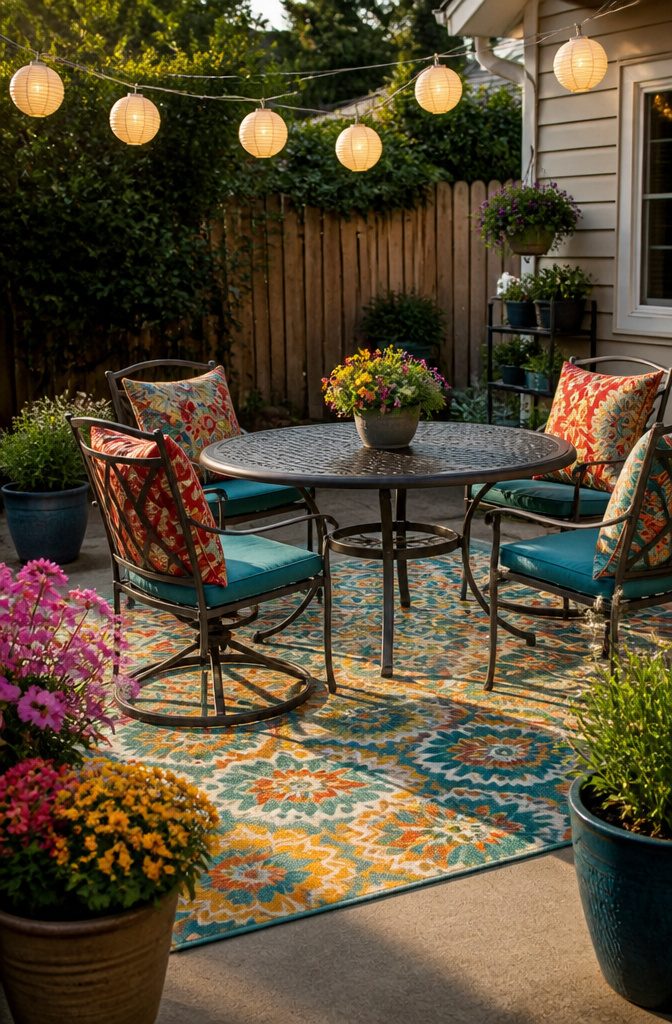
New cushions, an outdoor rug, and a painted metal table run $50 to $250 for the whole set, and they do more for a patio than replacing the furniture ever would.
I would rather spend six hours with a brush and leftover exterior paint on a rusted bistro table than hunt for a $500 lounge seat that still sags after one season. The rug defines the space.
The cushions add the color you actually want. Together they make concrete feel like a room.
For renters, this is the move that follows you. Accessories pack into a car.
A dining set does not. The rug rolls up, the cushions squeeze into boxes, and that painted table?
It is yours at the next place too. I have seen too many people treat patios like permanent installations when every landlord I have had would rather I take everything with me anyway.
Solar lanterns and citronella candles sit in the same price bracket, around $50 to $150 if you are hanging string lights overhead too.
They extend the hours you will use the space, which is the real measure of whether a patio works. Without light, you eat dinner inside.
Without cushions, you stay standing. The accessories decide if the yard gets lived in or just looked at through the window.
12. Plant a Small Tree
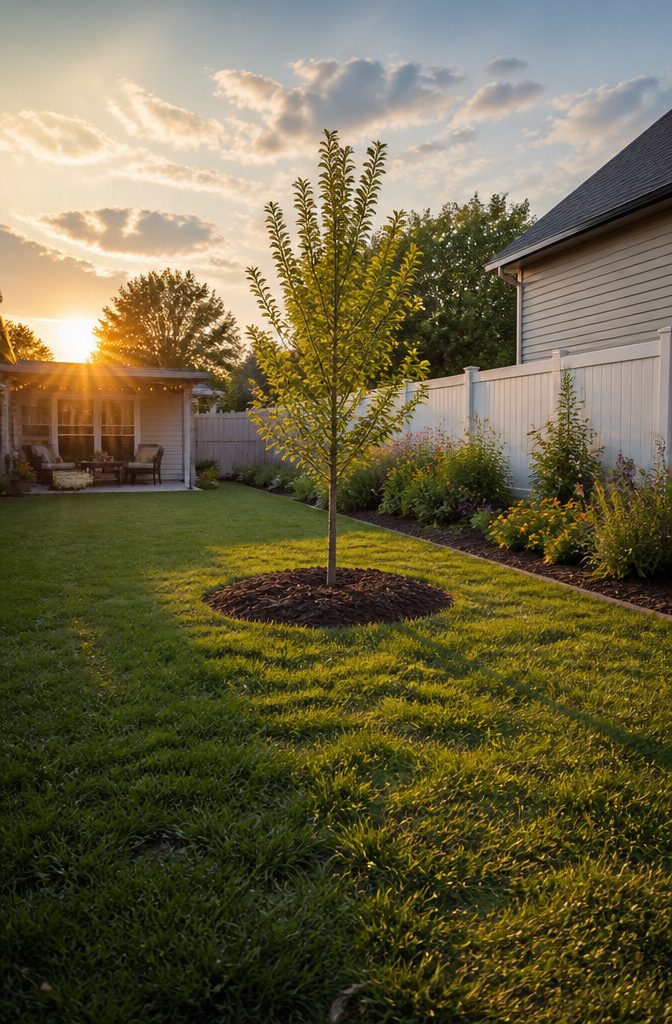
A single small tree under six feet runs $125 to $300 planted, and that upfront cost starts paying back the same summer it goes in.
Shade on the west or south side of a house can cut cooling bills by roughly thirty percent once the canopy fills out, which means the tree often covers its own price in two or three seasons of reduced AC use.
The risk is picking something that looks manageable now and becomes a problem in a decade. I skip silver maple and Bradford pear entirely; both grow fast but drop limbs and overwhelm a typical yard.
For a space you actually live in, crape myrtle and Japanese maple stay scaled to the setting without the aggressive root systems that heave patios or clog drains. Both give you structure and color within a few years, not decades.
Richard Fung made the math plain for budget-focused landscaping: buying a young sapling instead of a mature specimen saves at least $200 and often thousands, and the energy savings from one well-placed tree can reach thirty percent of heating and cooling costs.
A mature tree can add as much as $7,000 to home value.
No other front yard landscaping could be as cheap as planting a young and fresh tree.
For weekend-scale work, that means one trip with a shovel and a five-gallon sapling beats waiting for a nursery crew and a crane.
13. Mulch Your Beds
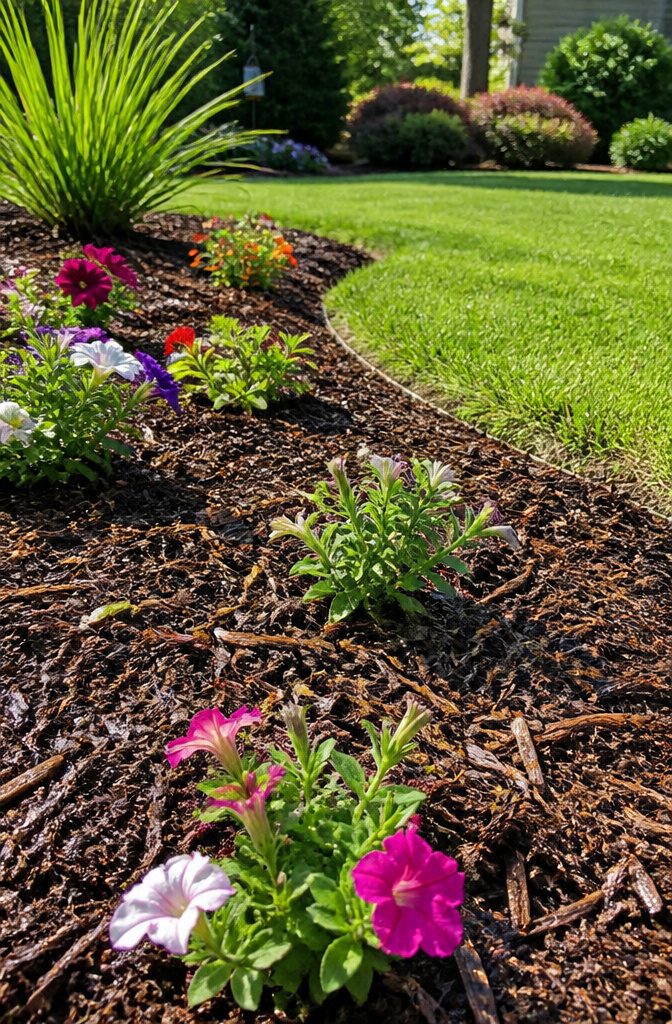
Shredded bark runs $35–$70 per cubic yard with delivery, and that single outlay buys back most of a summer’s watering and weeding.
A three-inch layer locks soil moisture in place and blocks the light weed seeds need, which means the hose stays coiled and the weekend stays free.
Wood chips cost about the same up front but behave differently down the line. Bark breaks down slower and draws less nitrogen from the soil as it decomposes, so plants stay greener without extra fertilizer.
Chips are easier to find free or cheap from tree services, and they last fine for a season or two, though they will pull nitrogen harder and need replenishing sooner.
For a bed you want to set and mostly forget, bark wins.
14. Add a Small Water Feature
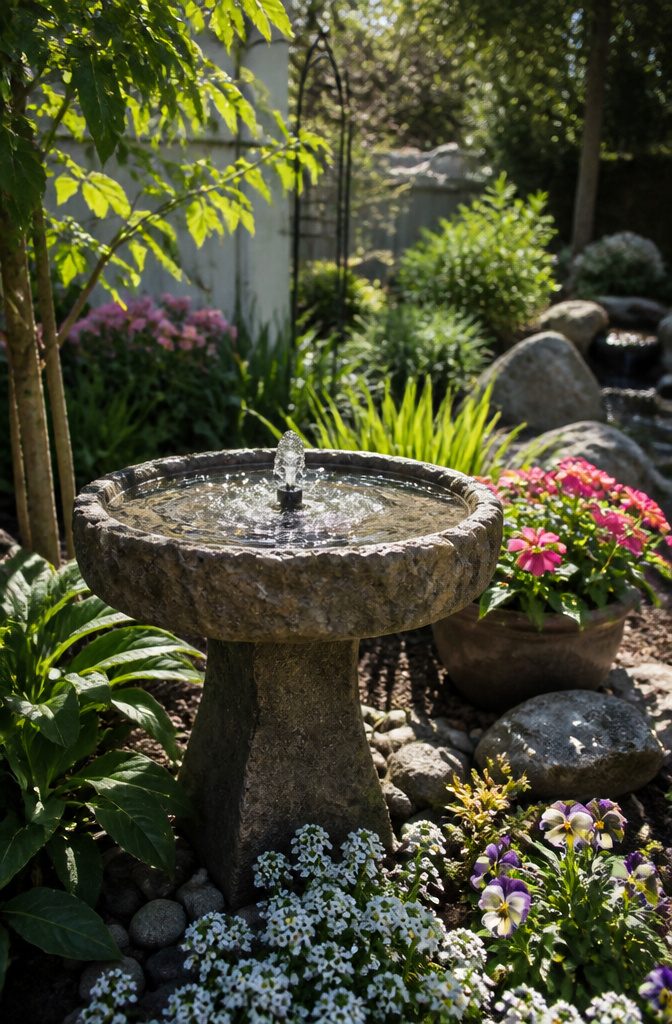
A solar fountain pump running on a $20 bubbler gives you most of the sensory hit of a water feature without the plumbing bill. The sound is what matters: moving water, however little, reads as cooler and calmer than still water.
A birdbath with a small recirculating pump sits anywhere sunny and needs no hose run from the house. The solar panel starts the flow within seconds of full sun, and the whole setup moves with you if the lease ends.
Self-contained basin kits run $100 to $600, but I would skip the larger end unless you already own the spot.
Recirculating water matters more than volume. A stone-effect birdbath in the $100–$200 range, paired with that cheap bubbler, covers the sensory effect and still leaves room in the weekend and the budget for the next project.
15. Make a Path
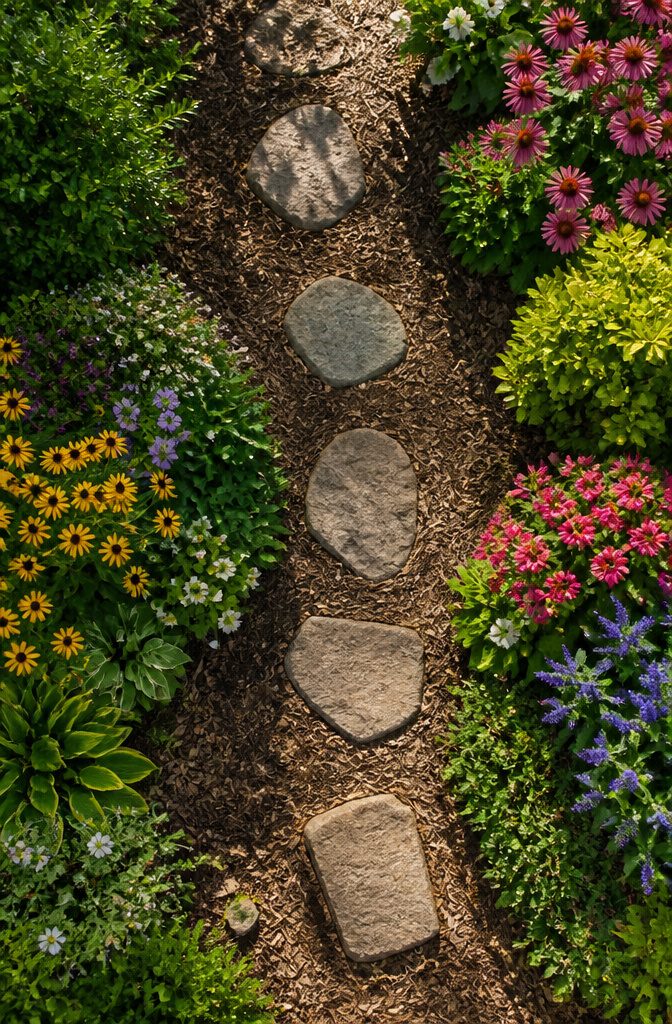
- Pick your path type before you buy anything. Stepping stones pressed into lawn suit flat yards and casual routes; mulch channels between raised beds keep your feet dry and define the garden edges. Either way, space stones or boards about 24 inches center to center, which matches an adult walking stride without the staggered hop of gravel paths.
- Mark the line with a hose, then cut sod or lay cardboard to kill the grass underneath. For mulch paths, a weekend gets you from layout to finished if the beds are already built; stepping stones need an extra half-day because each one sits slightly below grade and the lawn needs backfilling around it.
- Tools: spade, hand tamper, level, and a tape measure. Add a wheelbarrow if you are hauling mulch; for stone, a rubber mallet helps seat each piece without chipping.
- Set the rhythm by eye after the first three stones. Too tight and you shuffle, too wide and you leap. Twenty-four inches lets a person walk naturally and still mow over the gaps in a lawn path.
- Expect to spend $10 to $30 per stone if you buy prefabricated slabs, or roughly $35 to $70 per cubic yard for delivered mulch. A winding thirty-foot path in mulch runs about one yard; the same length in stone needs twelve to fifteen pieces.
16. Paint the Fence
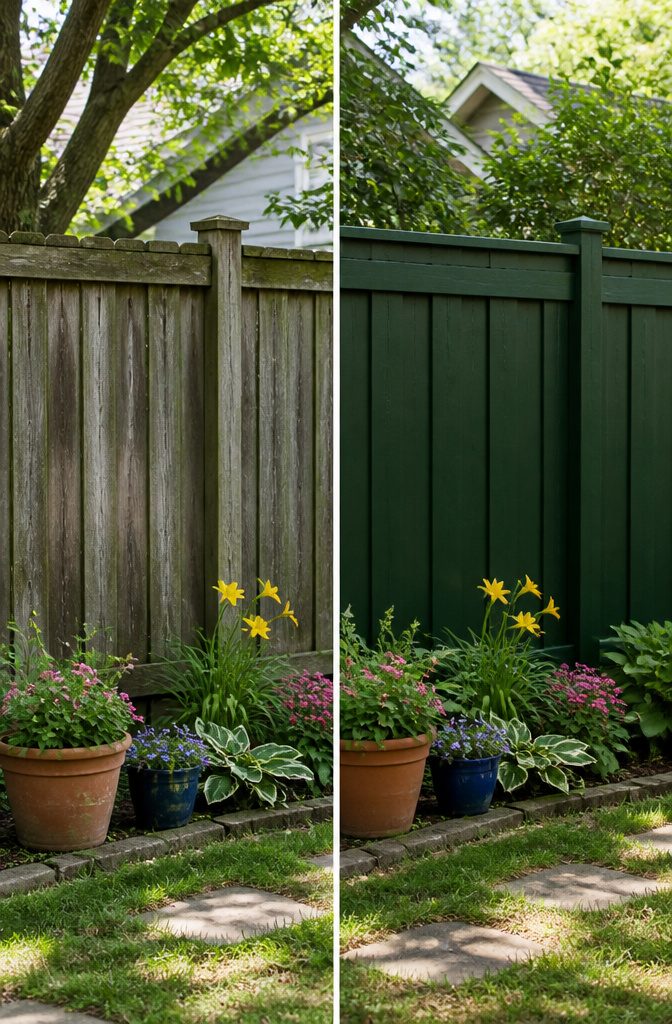
A fresh coat on tired fencing runs $200 to $650 if you do the work yourself, and that range covers everything from a quick spray job on a short cedar boundary to brushing two coats across a hundred feet of weathered pine.
Paint sits on the surface and eventually flakes, so I reach for solid-color stain instead whenever the wood still has some life in it.
Stain penetrates, which means no scraping blistered film five summers from now, just a pressure-wash and another coat when the color fades.
Dark colors recede visually. A deep charcoal or forest green fence drops back against the plantings, and that depth makes the planting bed in front of it read larger than the same border would against raw wood or white.
Dark stain shows dust and pollen faster, so budget an afternoon with the hose every few weeks through peak season if you want it to stay crisp.
17. Build a Small Coop
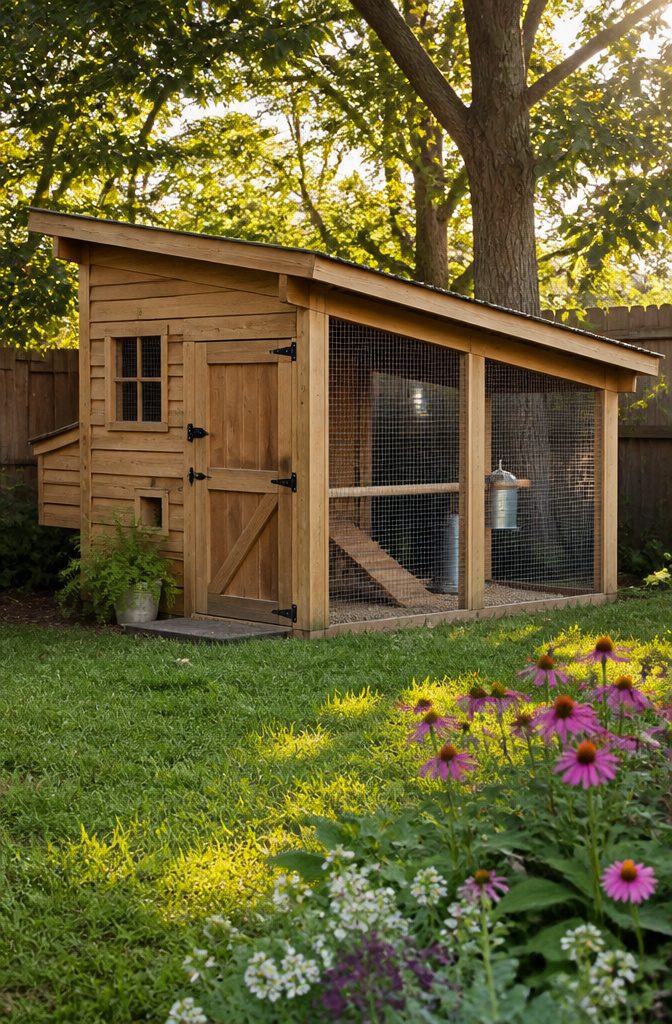
A small coop made from 2 x 4s and plywood sheeting runs about $120 to $150 if you build it yourself, and the footprint can be as tight as 4 x 6 feet for three or four hens.
That is enough to keep a suburban household in fresh eggs once the birds settle in, which takes roughly four to five months from chick to first lay.
I would not call this a pure landscaping project, but it changes how you use your yard in a way no planting bed can match.
The weekend timeline is real if you keep the design simple: a box, a sloped roof, and a hardware-cloth run.
Where this idea breaks is zoning. Many suburbs and nearly all HOA agreements restrict poultry outright or ban roosters and require setbacks from property lines.
Check your municipal code before you cut a single board. I have seen coops built and then ordered dismantled because the owner skipped that step.
It is worth the trouble only if your code allows it, and if you are willing to commit to daily feeding and locking the birds up at dusk.
For renters, this is almost certainly a no-go; for a first-home owner with a fence and a little patience, it is the cheapest living addition you can make to a backyard.
18. Start an Edible Garden
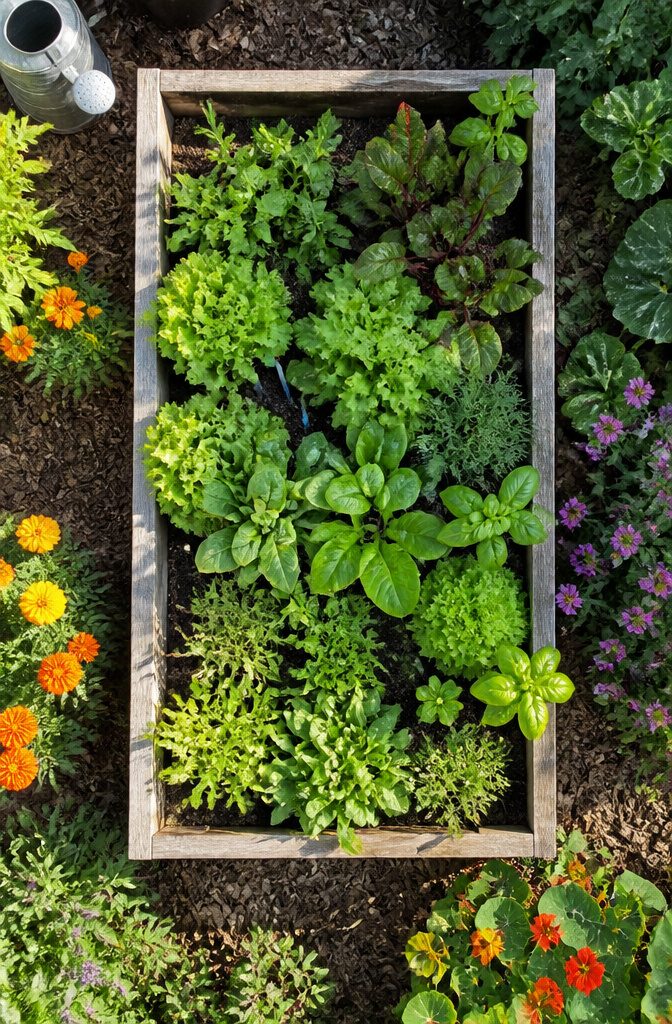
Raised beds repay the weekend you spend building them with soil that warms faster in spring and drainage that forgives a rainy week. A basic kit runs $30 to $80, which undercuts the $300 to $900 a contractor might charge for lumber construction.
If you have scrap wood or a free pallet source, the kit still wins on time; if your weekend is free and your lumber is too, building your own keeps the project under $15 in screws and corner brackets.
Leafy greens and herbs repay fastest. Lettuce, spinach, basil, and cilantro go from seed to plate in four to six weeks, while tomatoes and peppers ask for three months of patience before the first fruit.
Berries are a middle ground, yielding in year two but persisting for seasons after.
The soil inside a raised bed sits above the native ground line, so it absorbs sun and sheds cold-night air more readily than in-ground planting.
That difference matters most in short growing seasons or for gardeners tired of waiting until Memorial Day to set out tomato seedlings.
Start the bed now, fill it with compost and topsoil, and you are planting two to three weeks earlier next spring without buying a greenhouse or grow lights.
Lighting That Works
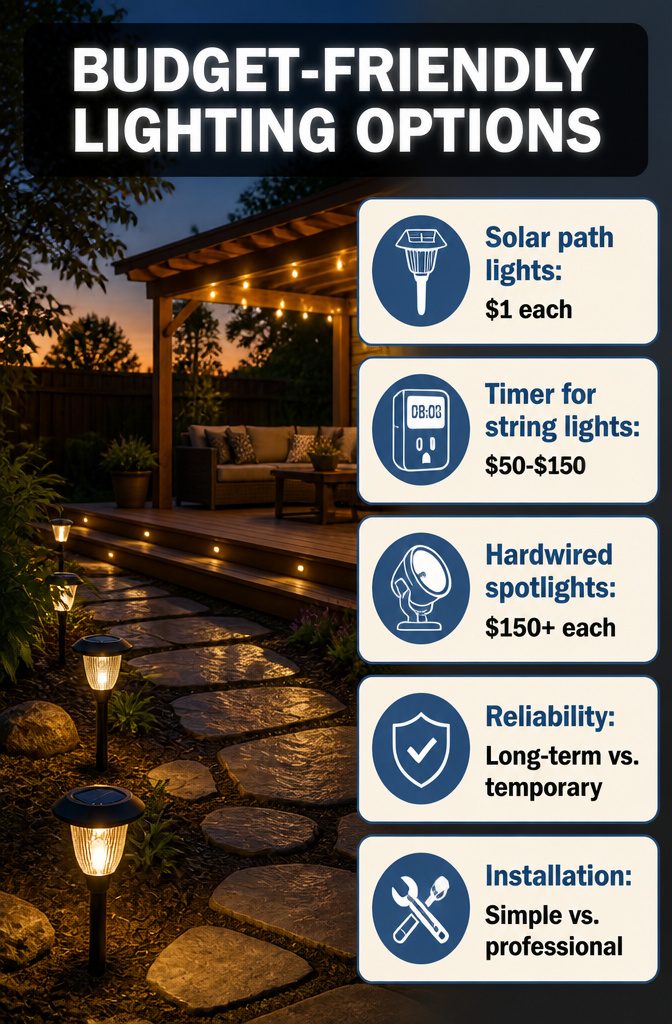
Solar path lights are the cheapest entry point at about a dollar per stake if you catch the right aisle, and they install in the time it takes to push them into the dirt.
The downside is what you’d expect: a dimmer glow, batteries that weaken after a couple seasons, and no control over when they come on.
A timer on a plug-in string light setup fixes that last part for around $50 to $150, giving you actual hours of light instead of hoping the day’s sun was enough.
Hardwired spotlights built into patio stone or deck framing are the only option that looks intentional and stays bright. They also run $150 and up per fixture before the electrician’s bill, which puts the total past what most weekend budgets allow.
For renters or anyone not staying past the next lease, stick with solar stakes and a timer strand. If you’re building the patio from scratch and staying five years, the hardwired route pays for itself in reliability.
What Weekend Projects Cost
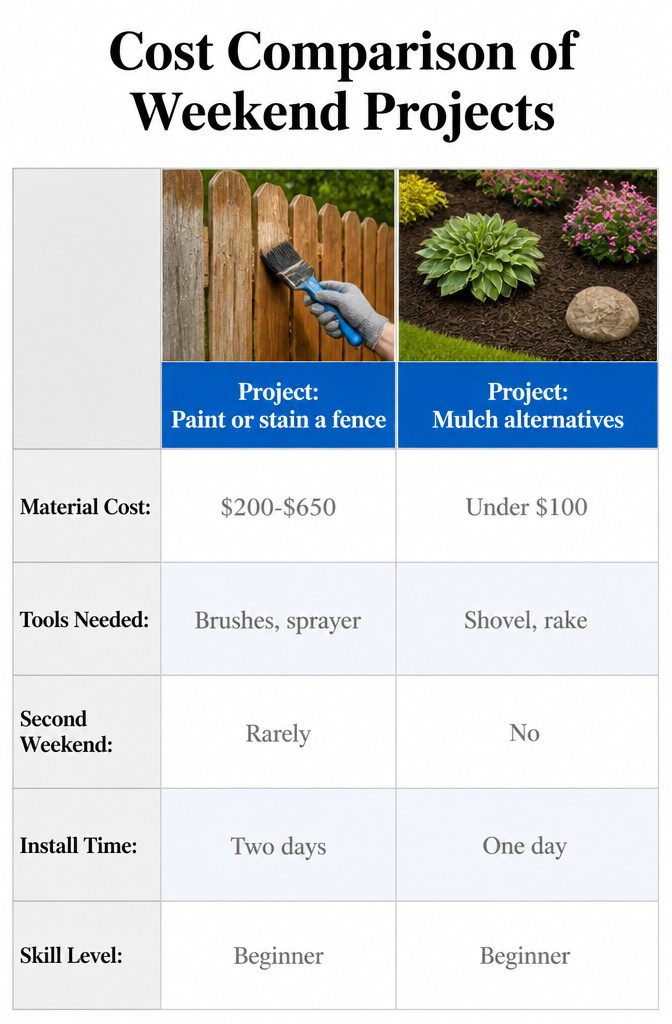
Most weekend backyard projects fall into a narrow cost band once you strip out labor.
The ones you can actually finish in two days rarely need more than a shovel, a drill, and a borrowed wheelbarrow. I sorted the common options by what drains the wallet versus what drains the calendar.
| Project | Material Cost | Tools Needed | Second Weekend? |
|---|---|---|---|
| Paint or stain a fence | $200–$650 | Brushes, roller, sprayer if you have one | Rarely |
| Mulch or mulch alternatives (pine needles, shredded leaves, pebbles) | Under $100 if you source clippings or leaves; stone runs higher | Shovel, wheelbarrow, rake | No |
| Install a small tree (seedling) | ~$100–$200 | Shovel, stake, mallet | Sometimes, for watering rhythm |
| Convert a structure (potting shed refresh) | ~$360 for doors; paint extra | Basic carpentry, paint supplies | Likely, for drying and hardware |
| Raised beds with ornamental edibles | n/a | n/a | n/a |
The fence repaint sits at the top of that material range but wins on speed: one coat Saturday, one coat Sunday, done. A seedling under $200 beats a mature specimen at $1,000 if you can wait two seasons for presence.
The shed conversion is the outlier; French doors and exterior paint look transformative, yet the second weekend of touch-ups and trim alignment is almost guaranteed.
Frequently Asked Questions
What is the cheapest way to remodel a backyard?
Start by cleaning up what you already have: mow with a sharp blade, edge the beds, and clear debris. That single step costs almost nothing and makes a basic lawn look maintained.
From there, work with the dirt already on the property rather than hauling it in; berms, raised beds, and sunken seating areas need only a shovel, a rake, and a weekend.
Can I increase my home’s value with a backyard remodel?
Yes. A mature tree can add up to $7,000 to home value, and a well-placed small tree under six feet pays for itself in two or three seasons of reduced cooling bills.
Shade on the west or south side of a house can cut AC costs by roughly 30 percent once the canopy fills out, so the upfront $125 to $300 often covers itself quickly.
What are some creative backyard landscaping ideas on a budget?
Turn old tires into painted planters for about $20 to $40 in exterior paint and sealant. Stack pallets into seating or side tables with the same budget for water sealant so they do not rot.
Use found objects like wheelbarrows or whiskey barrels as planters; a flea-market wheelbarrow runs about $20. A tree stump left in place becomes a seat with no building at all, though sealing the cut surface helps it last.
Do it yourself backyard landscape design?
Yes, and the savings are substantial. Moving dirt yourself with a shovel keeps hardscape budgets in the hundreds rather than the thousands a crew would charge by the cubic yard.
A DIY gravel walkway runs $300 to $500, pea gravel needs no sand bed, and flattened cardboard boxes smother weeds for free instead of buying landscaping fabric.
A simple coop from 2x4s and plywood costs $120 to $150 if you build it yourself versus paying a contractor.
How to landscape a sloped backyard on a budget?
Break the plane with berms, raised beds, or sunken seating areas; all three use soil already on the property and cost nothing but labor.
Berming piles dirt into a low ridge planted with something that spreads, giving you a soft wall.
Raised beds warm the soil and improve drainage while adding visual weight. A sunken seating area carved 6 to 8 inches deep, plus a few garage-sale chairs, turns a slope into a room.





