
These 17 plans run from a Saturday afternoon sandpaper rack to a full timber bench that outlasts the decade, most landing between a few hours and a single weekend with lumber already dry.
The one that belongs in your shop depends on whether you need storage you can see, surfaces you can work on, or pieces you can sit at, because each category demands different joinery and different patience.
The Cordless Drill Charging Center and Sandpaper Disc Storage Rack are where I’d begin; the materials run cheap enough that a mis-cut won’t sting, and the joinery you learn there pays forward into every bigger build.
1. DIY Work Table
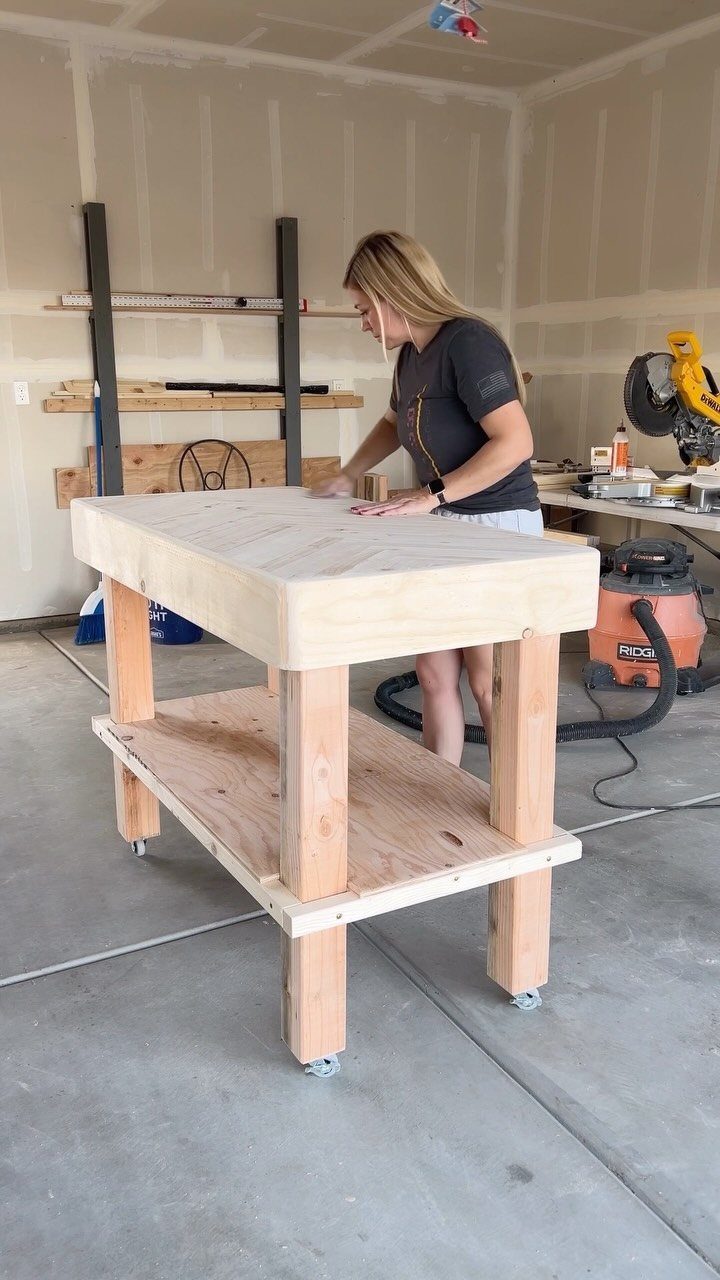
A work table on casters gives you a bench that rolls where you need it, then locks still while you saw or sand. The lower shelf keeps your most-used tools within reach without cluttering the top.
For a first build, stick to 2x4s for the frame and 3/4" plywood for the surface; you will spend less than a trip to the big-box store on lumber and an afternoon cutting and screwing it together.
The wheels are the single part worth buying rated for real weight, 4-inch locking casters at minimum.
I would build the shelf close to the floor, high enough to clear most shop vac hoses but low enough that a full sheet of plywood does not teeter when you slide it on.
A router is a good alternative if you don’t have a biscuit joiner. This bench can be completed in a weekend and costs between $100 and $500 to build, depending on your choice of wood.
2. Tool Storage Wall Cabinet
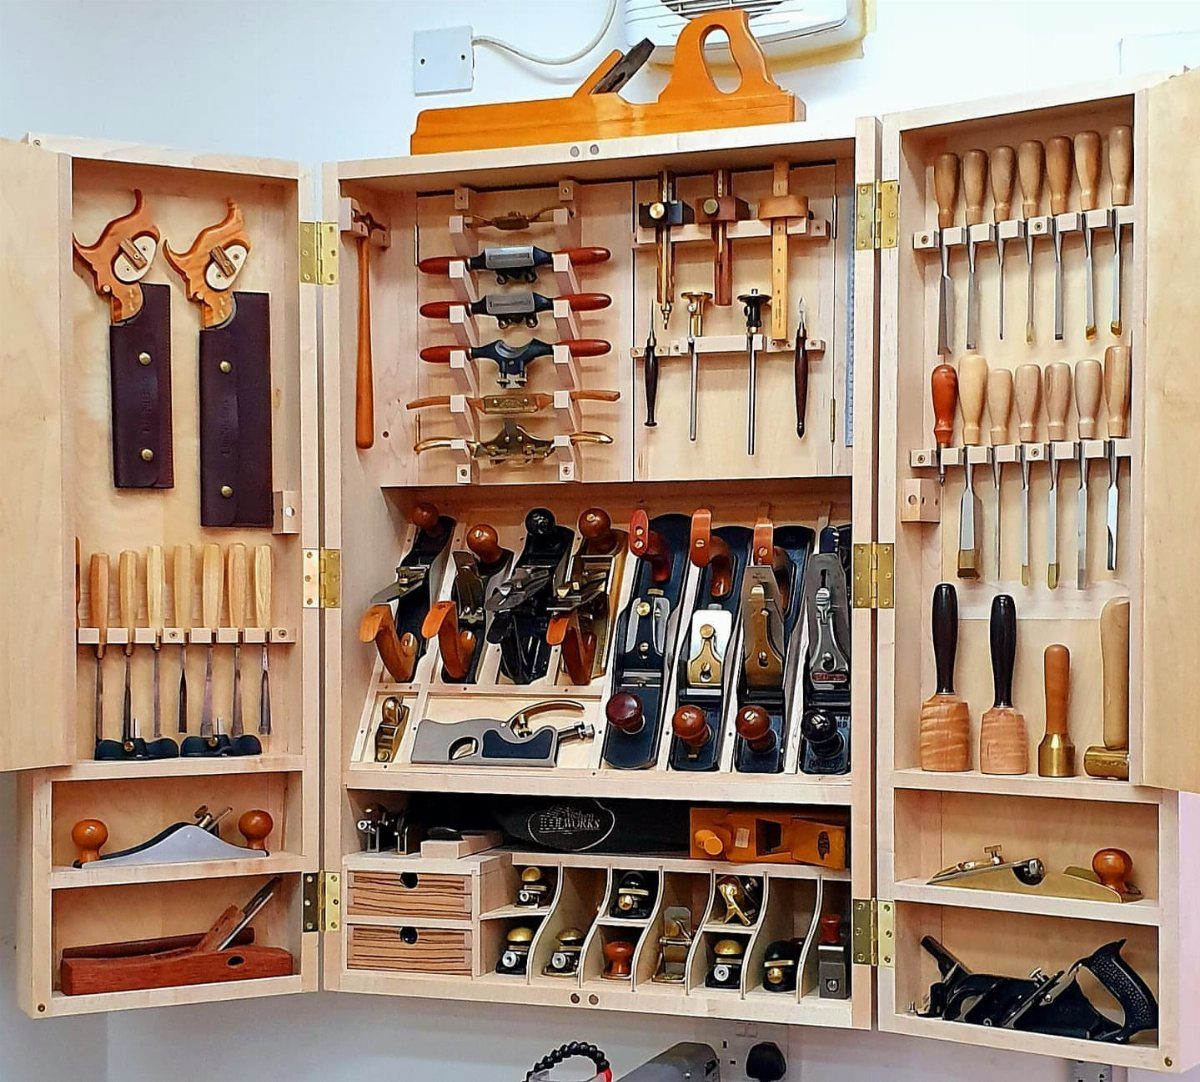
Hand tools left in drawers go dull and get lost; hung where you can see them, each one has a slot and a reason.
This cabinet keeps the wall shallow, just deep enough for driver bodies and bit cases, so it does not crowd your bench space.
Pine or poplar works fine for the carcass; the racks inside are what matter.
Cut narrow dado grooves for chisels, shallow shelves for planes, and a row of pegs for saws. A magnetic strip across the back catches metal rules and marking gauges that otherwise disappear.
Build it with a simple frame-and-panel door when you are ready; open like this is faster to make and faster to use.
3. DIY Garden Cart
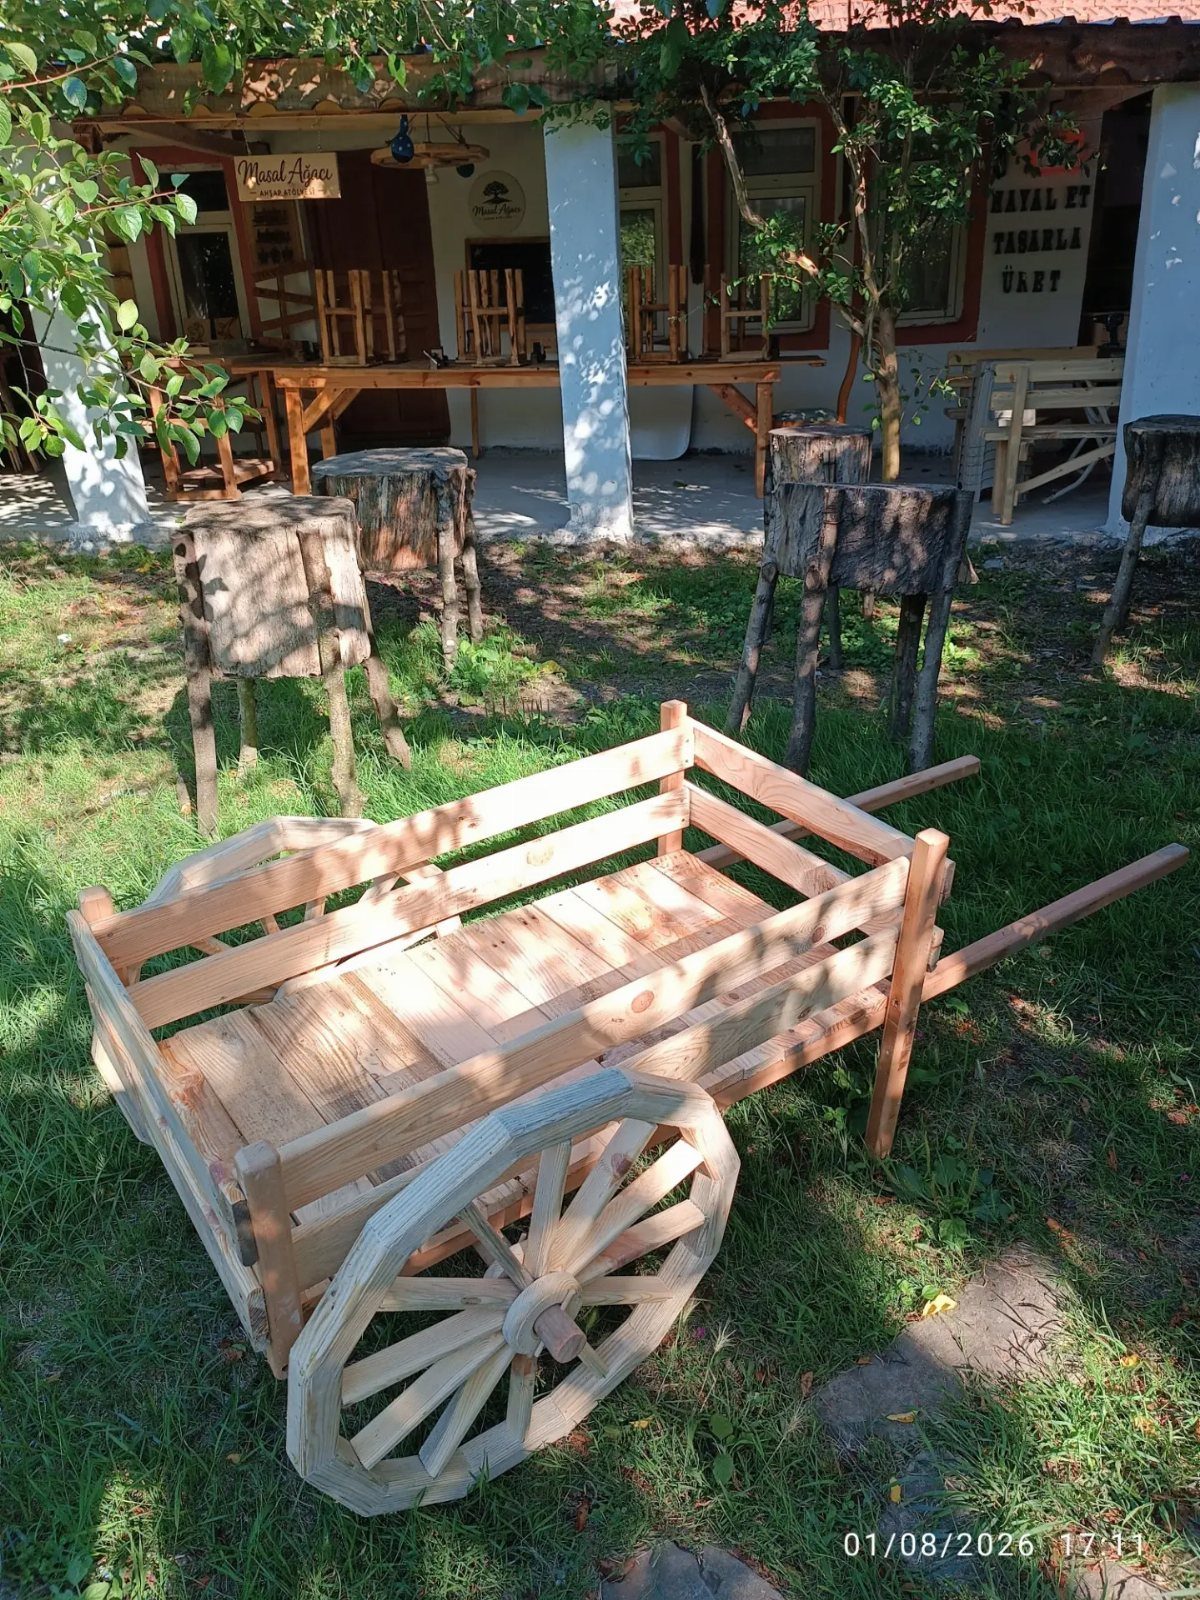
Spoked wooden wheels and a box frame give you a cart that rolls over grass and roots where a wheelbarrow tips.
The wide wheelbase carries flats of seedlings or a bag of compost without the single-point balance that exhausts your shoulders on a slope.
I would use oak or white ash for the wheels if you have access to a lathe; otherwise, solid pneumatic casters bolted to a 2×6 frame get you the same stability with less tooling.
The box sits low, at hip height instead of lifting overhead.
Paint the box with exterior latex and it will outlast raw pine by years.
4. Kid’s Bookshelf
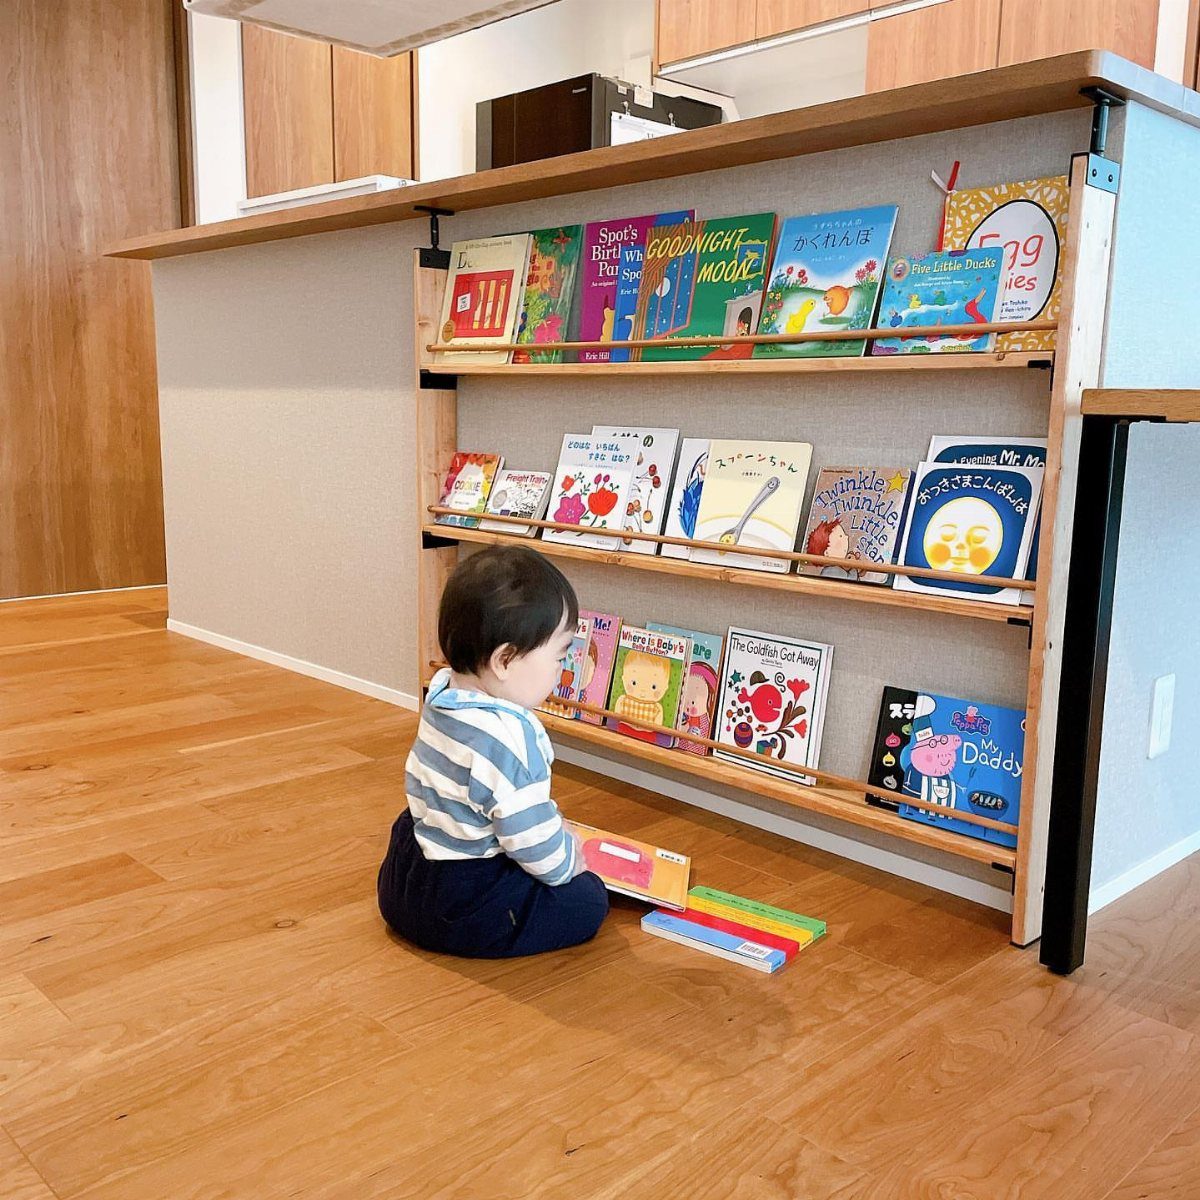
A book display with the covers facing forward lets a toddler choose by picture, not spine, which is how they browse until first grade.
Mounted under a counter or at 18 inches on a wall, it keeps books off the floor and in reach of small arms.
3 tiers of 1×3 ledges, each just deep enough for a stack of picture books, hold most without wasting wood on a full box.
I would round every edge with a small roundover bit; the time it takes is less than one trip for stitches. Screw through the back into studs, not drywall anchors, because climbing happens.
Paint it to match the trim or leave it bare; either way, the books supply the color.
5. Wooden Doormat
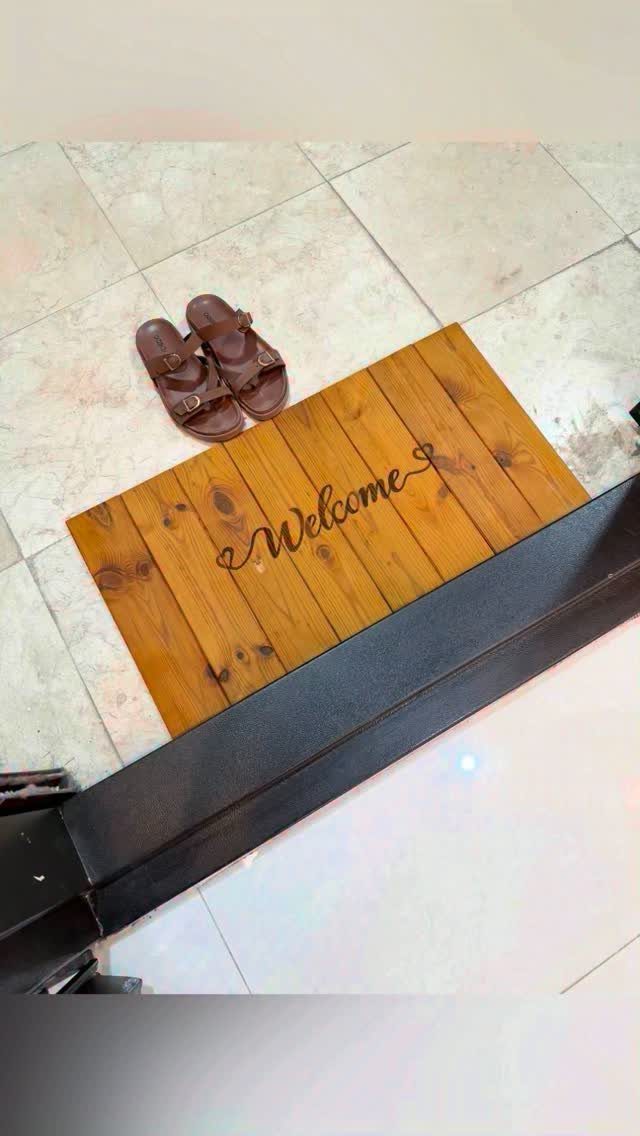
Slats of cedar or white oak, spaced an eighth inch apart, let water drain and grit fall through instead of collecting in a fabric mat that mildews. The stencil is optional; the function is in the gaps.
Rip 1x2s to a uniform width, drill 2 holes through each end, and rope through the stack like a ladder.
Knot the rope tight and the slats stay put; loosen the knots to roll it up for porch sweeping. I would treat the wood with penetrating oil, not film-forming polyurethane, so it gray evenly and never peels.
At standard doormat size it covers most door swings without catching the storm door.
6. Cordless Drill Charging Center
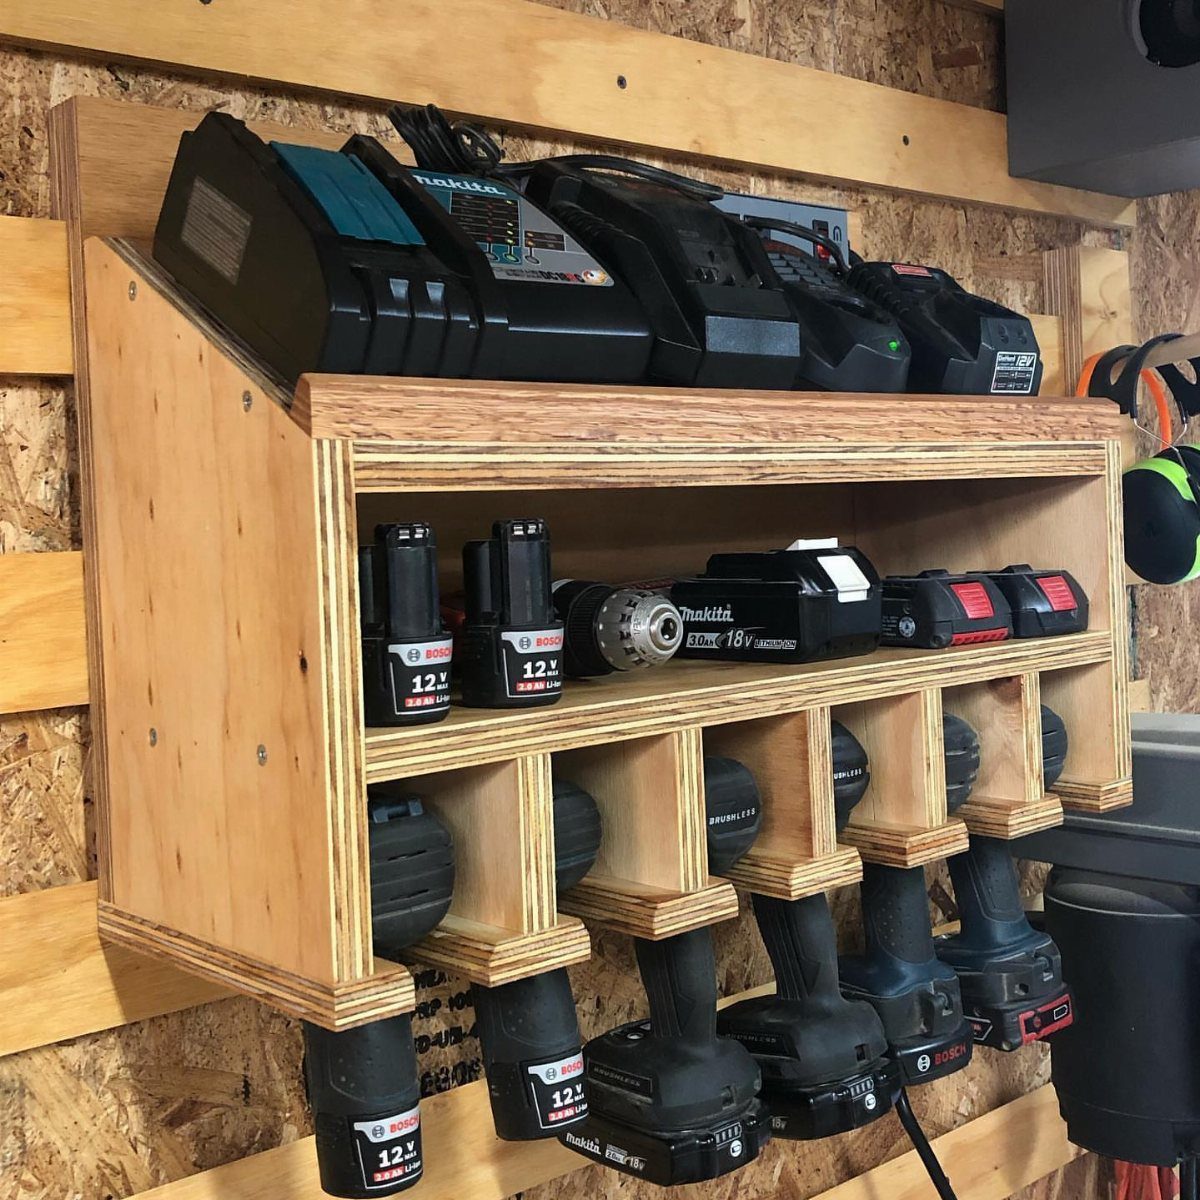
Drills hang by their chuck and handle slots, with the weight resting on the housing so nothing stresses the trigger or battery mount.
The middle shelf for spare packs and the top shelf for chargers puts the full cycle in one vertical foot of wall.
Build it from plywood with dados for the shelves; the weight adds up when you load it with drills and batteries.
I would keep the charger cords on a small power strip mounted to the side, not draped across the tools, and label each bay for the brand if your shop runs multiple voltages.
A cabinetmaker I follow added a shallow drawer underneath for bits; if your wall space allows, that is the upgrade I would make next.
7. Sandpaper Disc Storage Rack
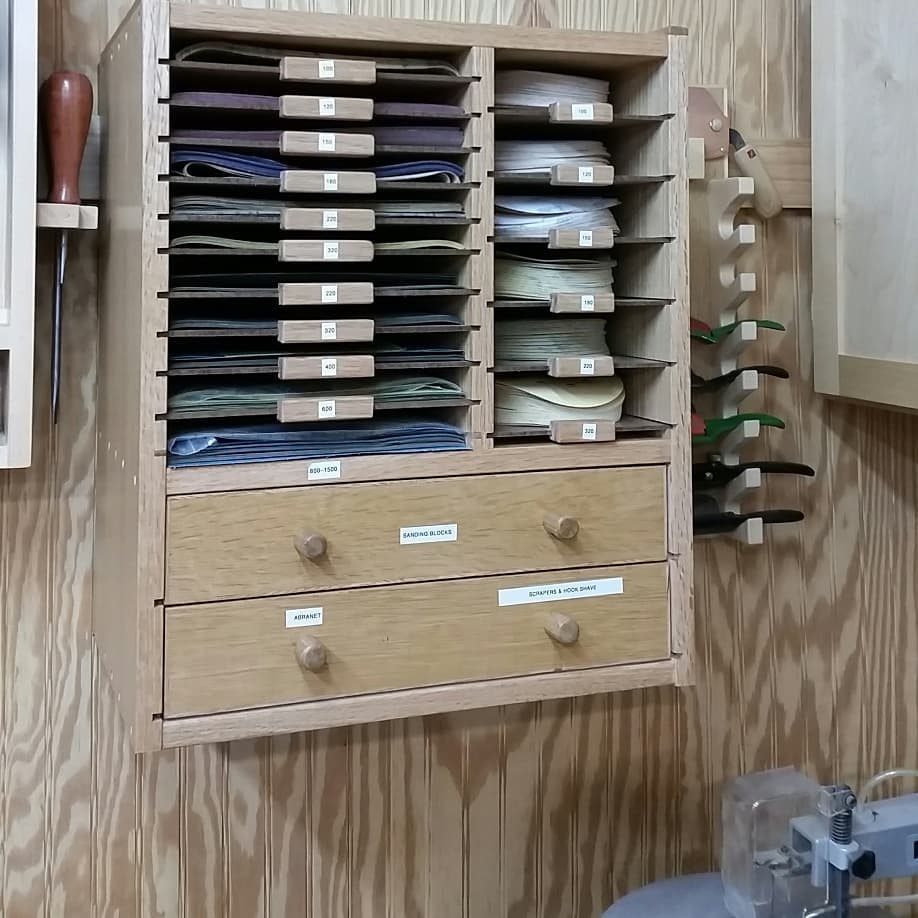
Round discs and rectangular sheets, sorted by grit, slide into thin slots where you can read the numbers without pulling half of them out. 2 shallow drawers underneath hold sanding blocks and mesh sheets that do not fit the slots.
Cut kerfs just wider than your thickest disc, spaced to clear the labels. I would build it shallow enough to mount behind a door or beside the bench without blocking the aisle.
A shop-made rack beats the cardboard boxes that always rip at the corners.
8. Easy Timber Bench
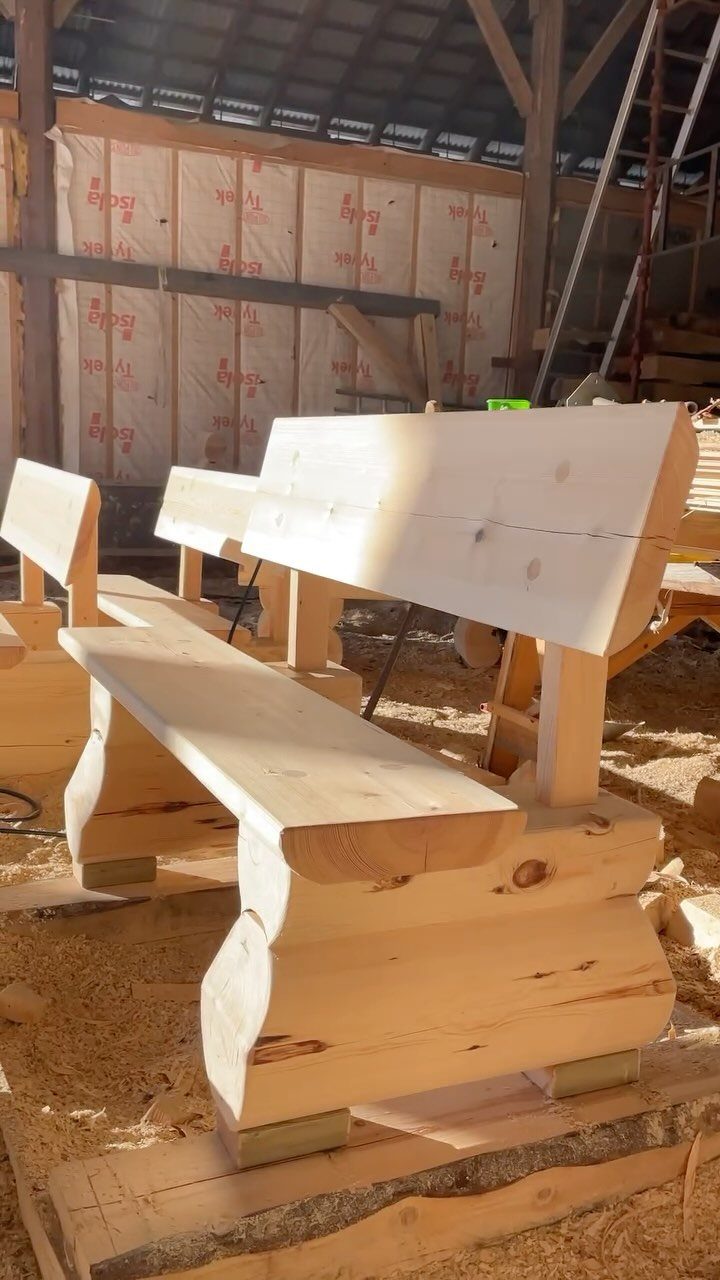
Thick timbers and a simple backrest give you a bench that survives boots and weather without the fuss of cushions or covers.
The mass keeps it planted in wind and the flat top doubles as a place to set a tray or a pair of pruning shears.
White oak or black locust resists rot without pressure treatment; cedar works if you accept a softer surface that dents.
Join the legs to the seat with through-bolts, not screws alone, because seasonal swelling will loosen anything threaded into end grain.
I would leave it unfinished and let it silver. A coat of oil every few years darkens it evenly; paint traps moisture and peels where the sitter’s jeans rub.
9. Raised Planter
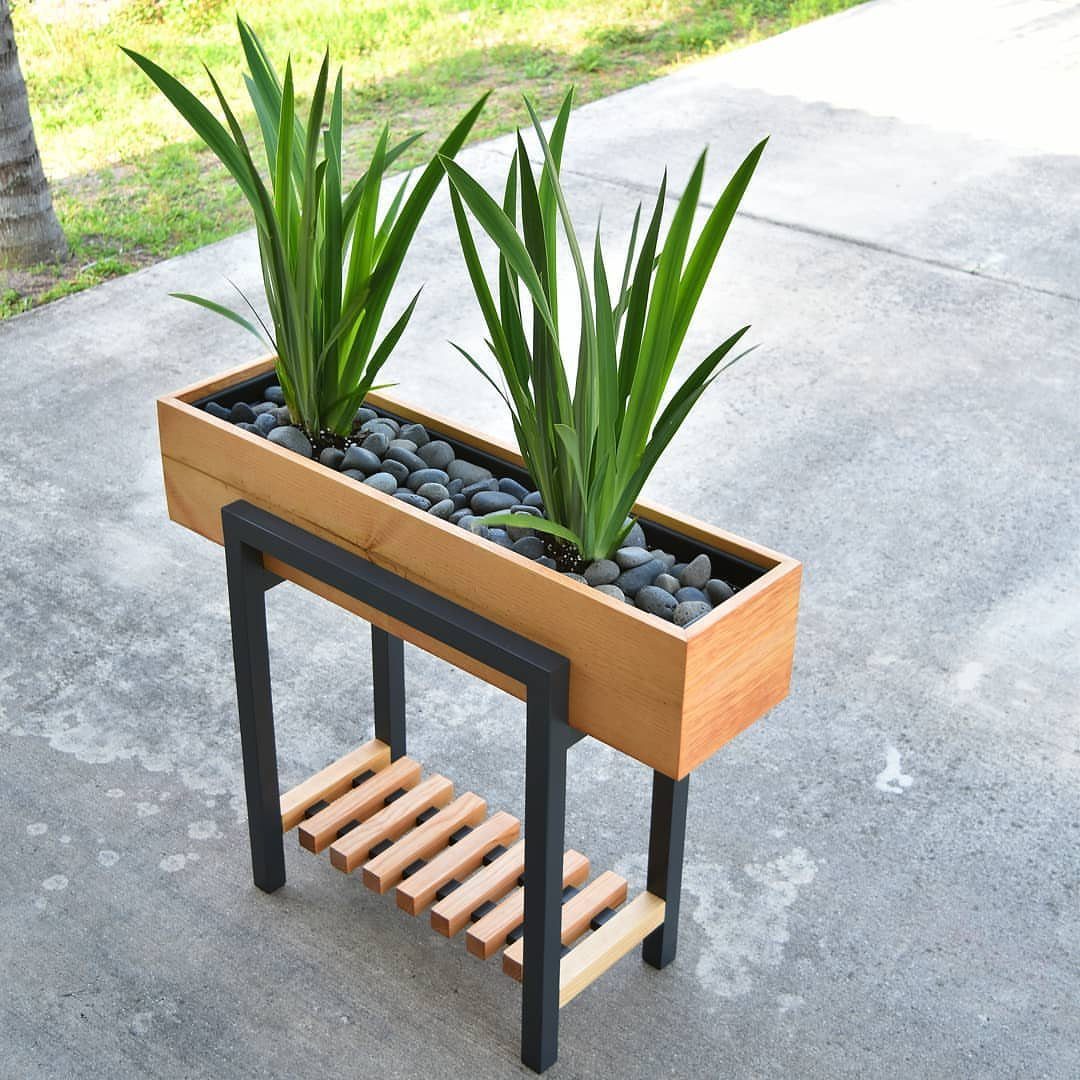
A box on legs lifts soil to waist height, which saves your back and keeps rabbits from the lettuce without a fence. The slatted lower shelf catches tools and empty pots that otherwise clutter the deck.
Build the box from cedar or a rot-resistant composite; the legs are 4x4s set in simple lap joints with carriage bolts.
I would line the inside with landscape fabric, not solid plastic, so water drains but soil stays put. Fill with a light mix, not garden dirt, because the weight adds up fast and roots need air.
A metal frame gives a cleaner look than all-wood legs; either way, level it before you fill or the water pools on one end.
10. Cornhole Boards
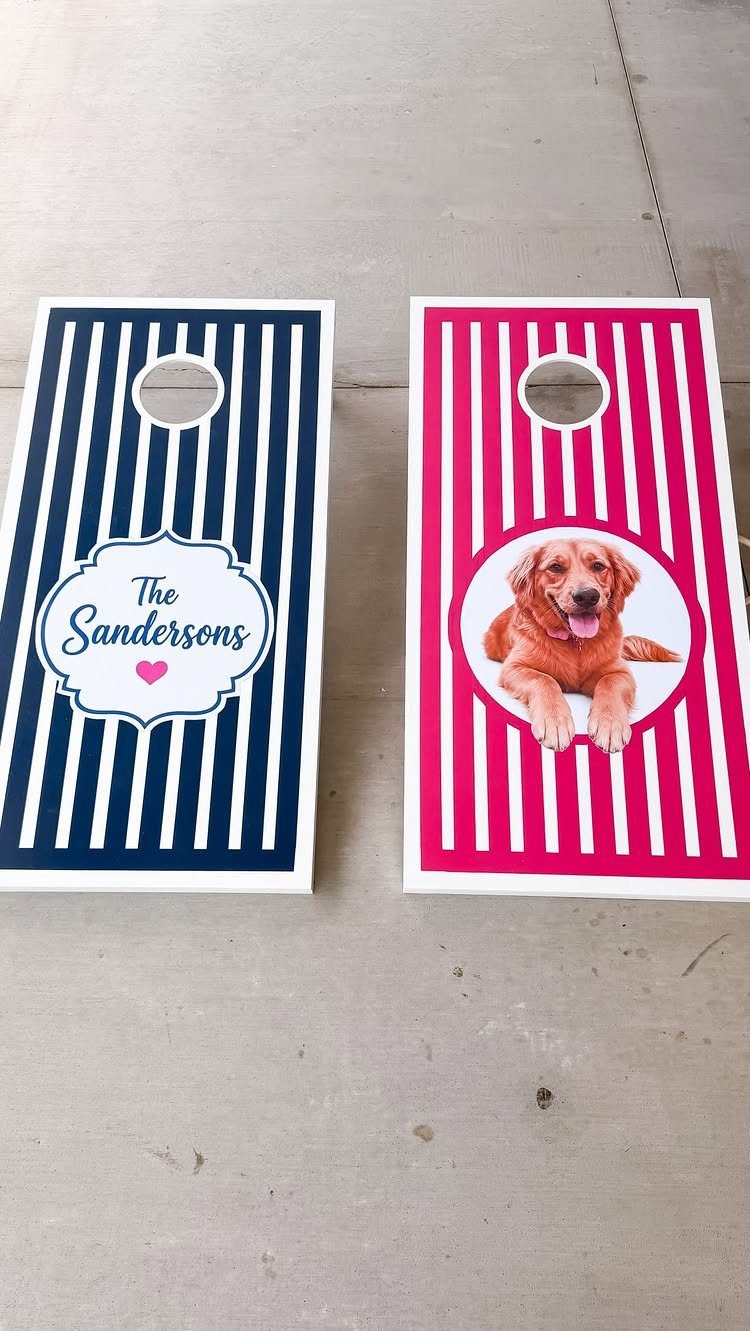
2 boards, a slope, and a hole: the rules fit on a napkin, but the build still rewards care.
Regulation boards have the hole closer to one end than the other, with the back raised higher than the front so the surface tilts; use plywood smooth enough for a true slide.
Paint the base, mask your stripes, and add a name or a dog with vinyl or hand-cut stencils and exterior latex.
I would seal the edges with primer before color; end grain drinks paint and leaves a dry halo. Use birch plywood, not OSB, because moisture swells the flakes and the bags catch.
Carry them by the legs, not the surface; a dent in the playing field lasts seasons.
11. Classic Wooden Picnic Table
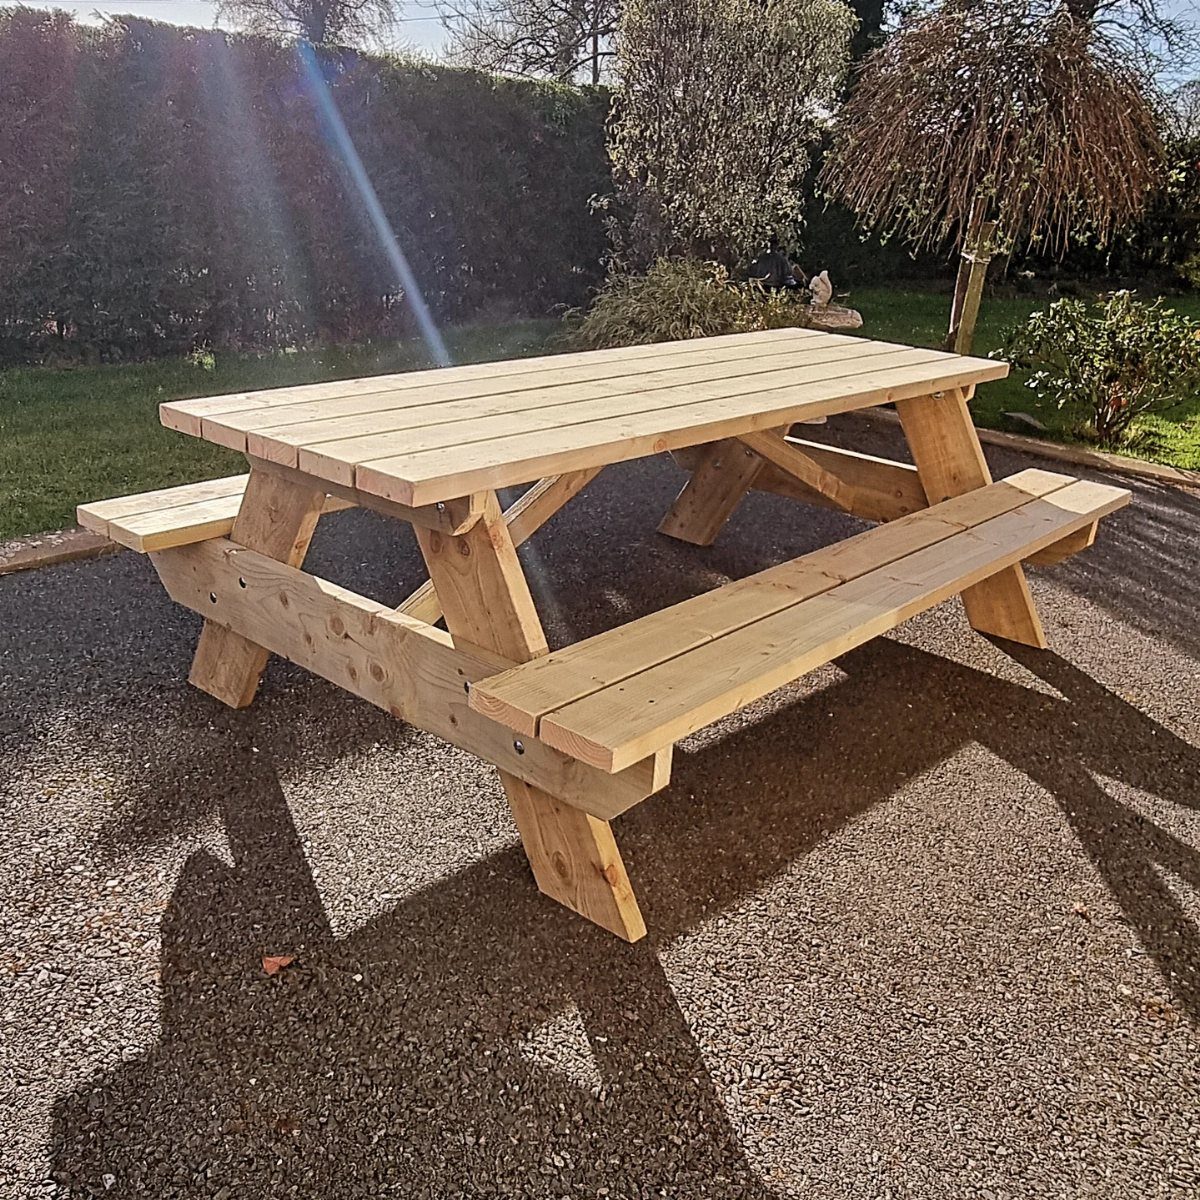
Attached benches mean no chasing chairs across the yard and no storage after Labor Day; the whole unit stays where you built it. A wide top seats adults without elbow wars and holds platters as well as paper plates.
Pine 2x6s or 2x8s for the top, pressure-treated 4x4s for the legs and frames; the lumber runs less than a cookout’s worth of groceries.
I would countersink every screw and plug the holes with matching dowel, or switch to carriage bolts for the visible joints.
Anchor with timber screws into the gravel, or leave it floating to drag into shade.
12. Wall-Mounted Hardware Organizer
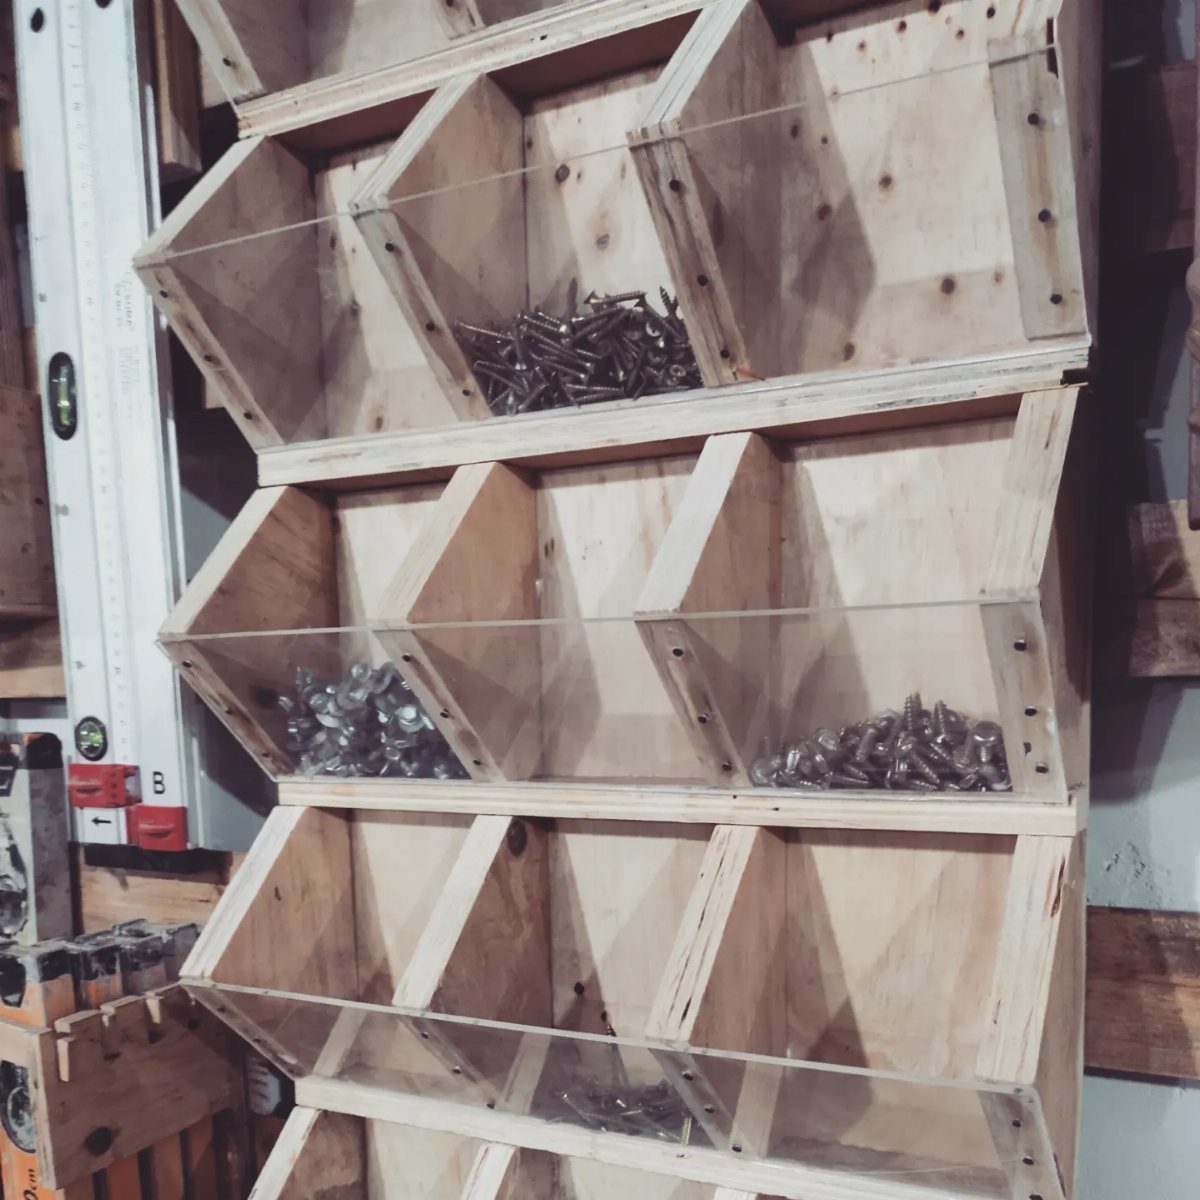
Angled bins with clear fronts let you read the contents without pulling every tray; the slope feeds fasteners forward as you take them. Plywood boxes, stacked and screwed to a cleat, turn wall space into inventory you can actually see.
Build each bin with a false front of acrylic or thin polycarbonate; screws through the sides hold it and let you swap labels.
I would keep the bins shallow, no deeper than your hand, because a bolt rolls to the back and stays there in a deep box. Sort by thread or by project; the system only works if you refill it.
A level on the same wall is not decoration, it is a reminder that straight matters here too.
13. Round Two-Tier Side Table
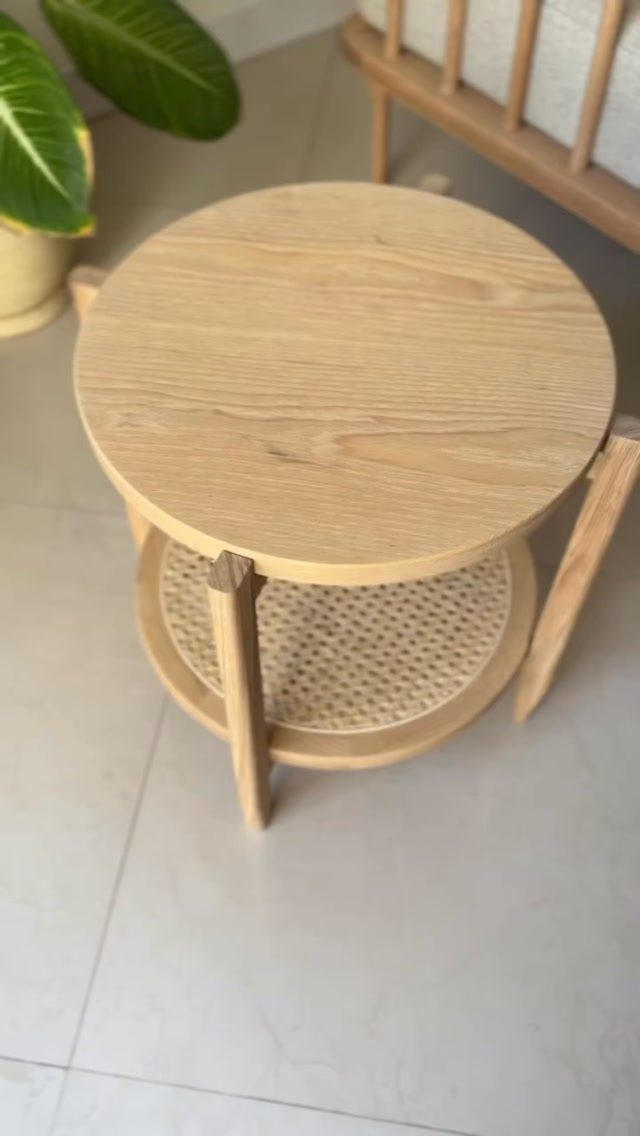
Tapered legs and a round top give this table a smaller footprint than a square one, which matters in tight seating where every inch of walkway counts.
The cane shelf underneath breathes better than solid wood; a stack of magazines or a basket still reads as light.
I would build the top from 3/4" birch plywood, edge-banded clean, and wrap the lower ring with cane webbing tacked into a groove. 4 legs at a slight splay stay steady without the complexity of stretchers.
The cane weathers to honey-brown in sun; oil it once a year or let it age.
14. Slatted Wooden Coffee Table
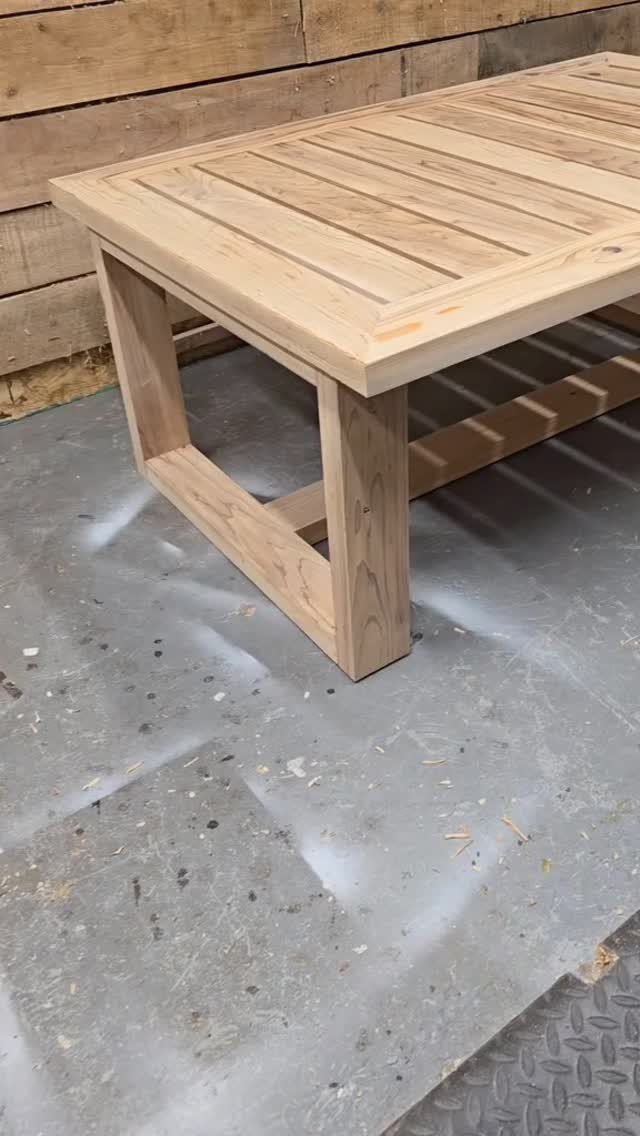
Gaps between slats let crumbs and pollen fall through to the deck or floor below, which beats wiping a solid surface after every outdoor evening. The open top also dries fast after rain.
Rip 1x4s or 1x6s to uniform width, space them with nickels for consistency, and screw from underneath so no fastener shows on the surface.
The leg frames are simple rectangles, half-lapped or pocket-screwed together; I would notch the top slats over the frames so they cannot slide.
Build it in white oak or teak if it lives outside year-round; pine works for a covered porch and costs far less.
15. Two-Tier Corner End Table
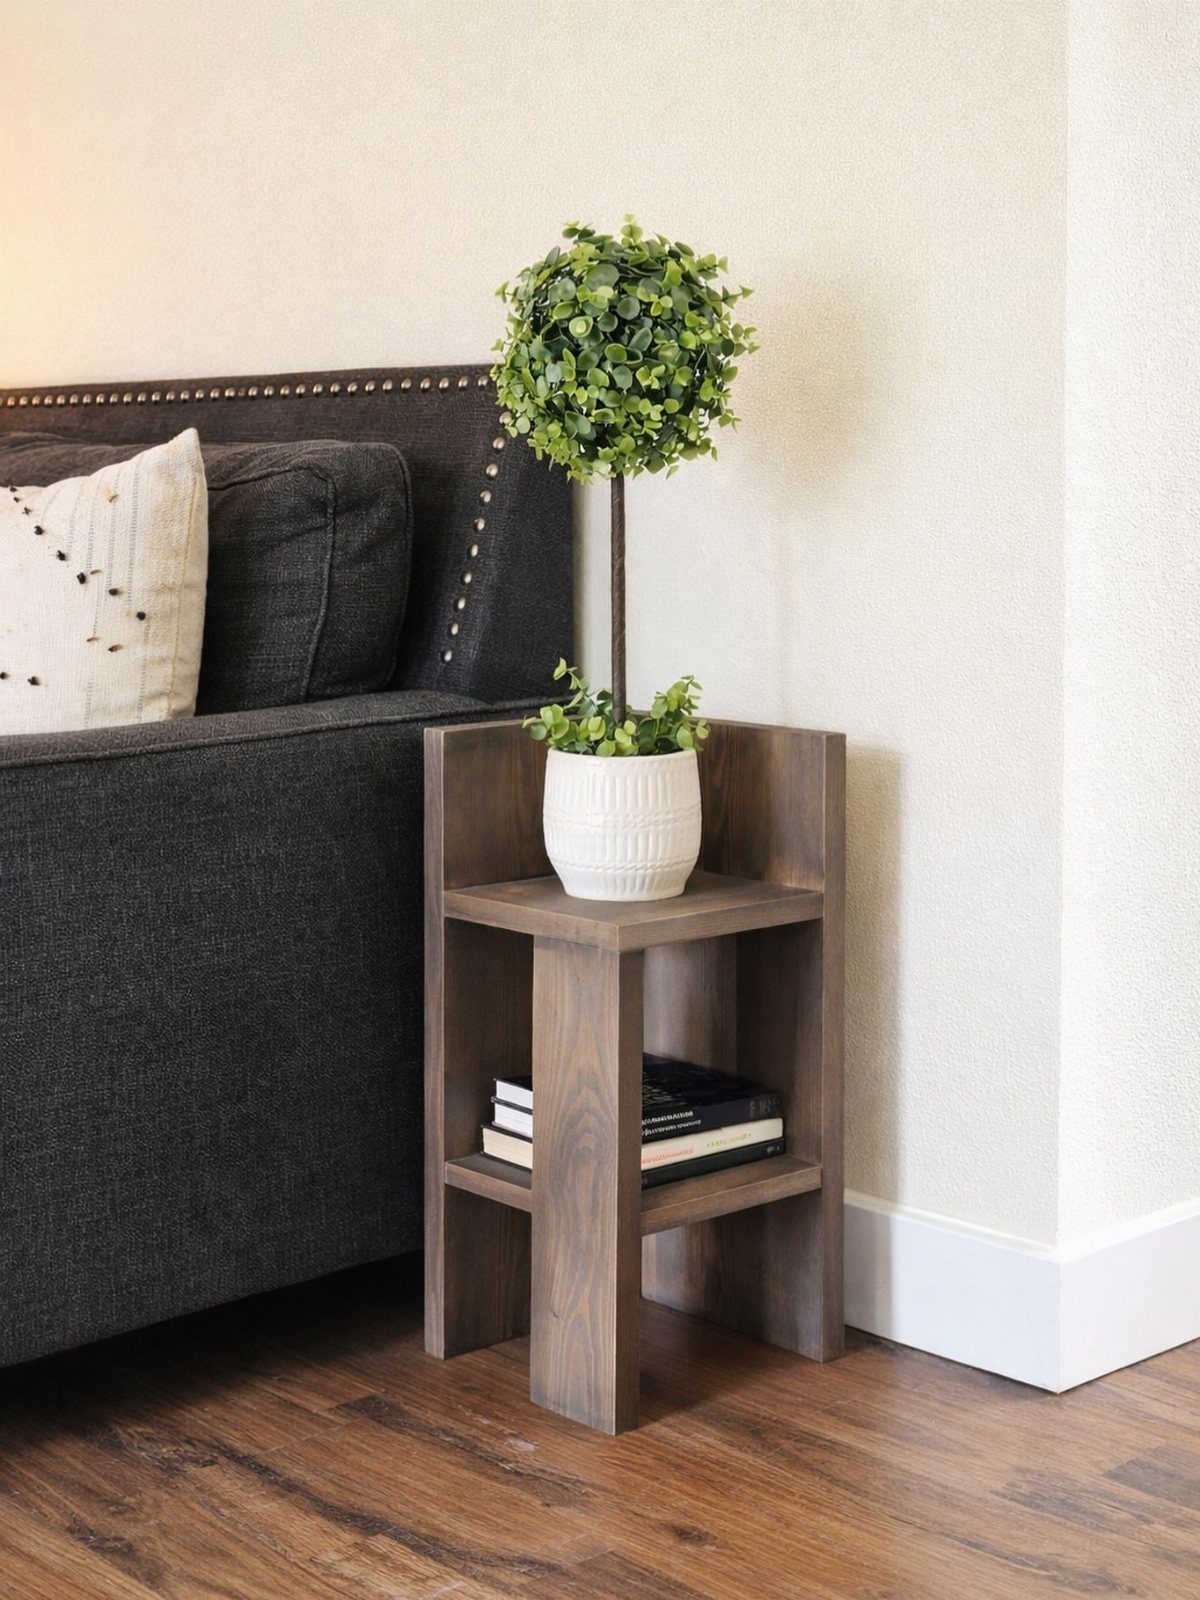
A triangular top hugs the dead space where 2 walls meet, turning a spot that collects dust into usable surface for a lamp and a drink.
The lower shelf stays open, so books or a basket remain visible and reachable from the sofa.
2 shelves of plywood or MDF, banded with iron-on veneer, keep the weight light enough to move for vacuuming.
I would cut the corner square and true, not guess it; walls are rarely square, but the table should be. Three legs or a small apron frame support it without the bulk of four.
Dark stain hides the plywood edges better than paint, which pools in the grain.
16. Double Bench with Built-in Table
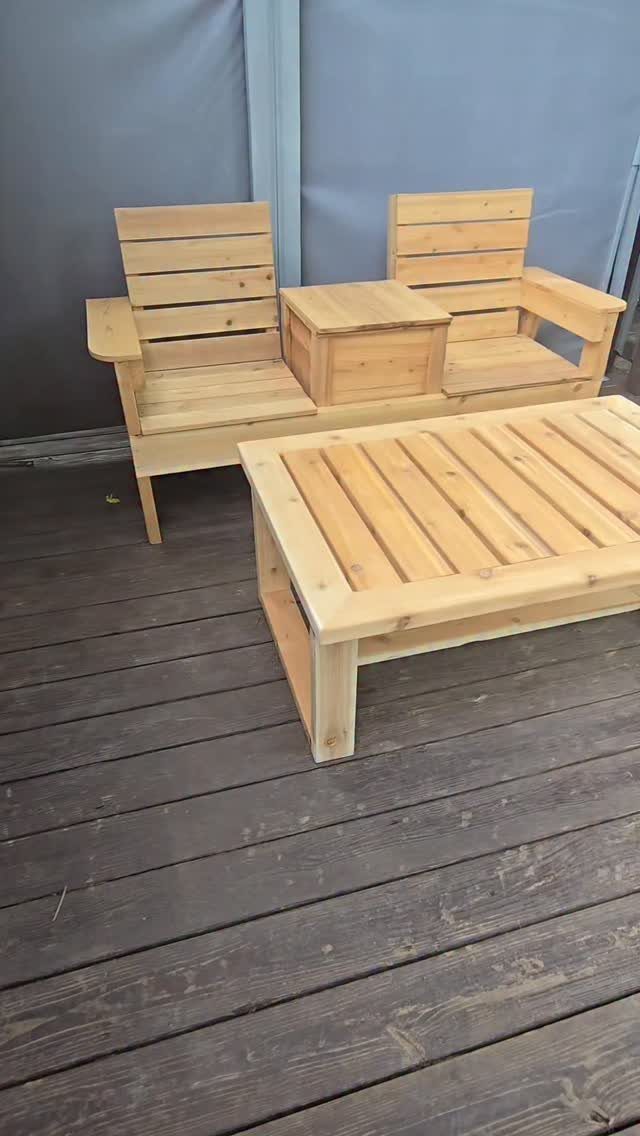
2 seats and a shared surface between them keep conversation close and drinks within arm’s reach of both sitters.
The built-in table means no level ground needed for a separate piece; the whole unit stays put on a slightly uneven deck.
Build the frames from 2x4s, the seats and tabletop from 5/4 decking boards with gaps for drainage.
I would hinge the center tabletop or cut a hole for an umbrella; otherwise, midday sun limits how long anyone stays. Storage underneath the table, if the design allows, swallows cushions when rain threatens.
White oak or ipe lasts decades; cedar softens and dents but smells good doing it.
17. Modern-Style Birdhouse
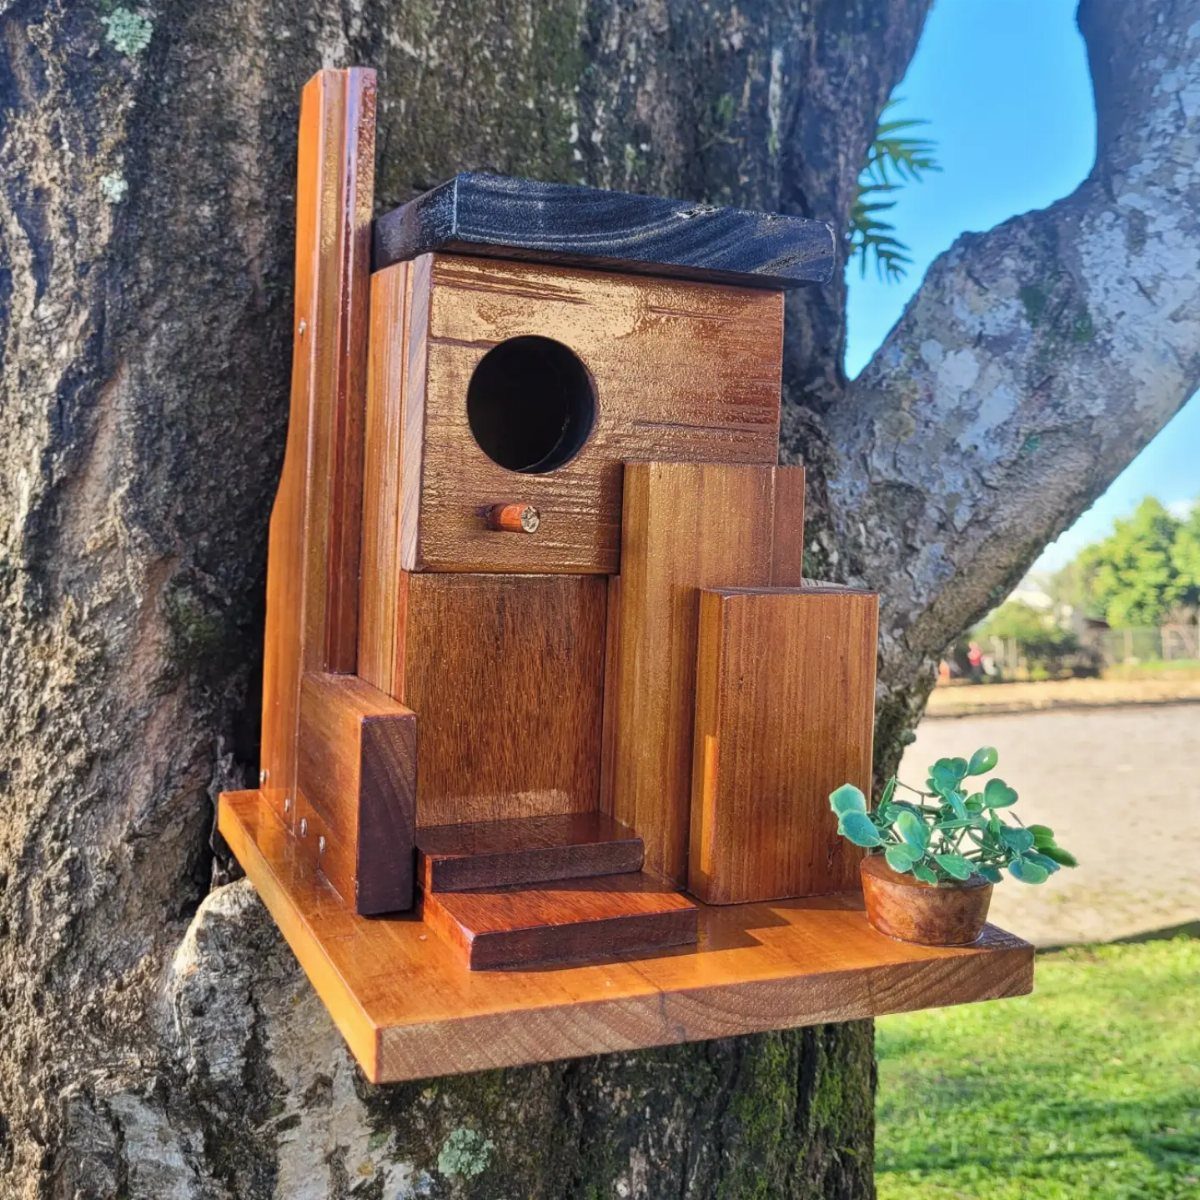
Flat planes and a clean roofline read as design rather than craft-fair whimsy, which suits a yard where the birdhouse hangs where humans see it. The geometric blocks add shadow and depth without fussy trim.
Cut the body from a single 1×6 or 1×8, rip the roof angle on a table saw, and assemble with brad nails and exterior glue.
The entrance hole, sized for chickadees or wrens, needs a backer block inside so young birds do not fall against the wall.
I would mount it on a metal stake; bark grows and tilts the house, and the screws loosen as the trunk widens.
Leave the wood raw or oil it; paint peels and traps heat that can kill nestlings in July sun.
Tools for Beginners
A miter box, drill, and a few hand tools will handle most beginner builds. Those three get you through straight cuts, holes, and assembly without a shop full of equipment.
Add a random orbital sander as soon as you have a project with visible surfaces.
Hand sanding a tabletop or a bookshelf takes hours and still leaves waves; the sander flattens and smooths in minutes. Sandpaper grits multiply fast: 80 for shaping, 120 for smoothing, 220 for finish, and half a dozen in between.
A wall rack keeps them sorted and within reach. Keeping them sorted by number saves more time than it costs to build the rack.
Buy the sander first, then build the rack. That order matters; the sander earns its keep on every project after, while the rack only organizes what you already own.
Free Plans Availability
Free step-by-step plans beat a photo and a guess at dimensions every time. The plans include clear instructions meant for someone who has not yet built a drawer or cut a dado.
Video tutorials run alongside several of them, which helps if you have never watched a table saw blade rise through plywood or heard the change in pitch when a drill bit breaks through the back side.
Seeing the motion once prevents a dozen mistakes in your own shop.
Free plans have a trade-off: nobody reviews your cuts or catches your math. Check every measurement against the material you actually have, lumber varies by more than the plans can allow for.
Build the Sandpaper Disc Storage Rack or the Cordless Drill Charging Center first; the mistakes cost little and the skills transfer straight to larger projects.
Project Complexity
These builds finish in a weekend, from lumber on the rack to something standing in your shop or yard. That timeline assumes Saturday morning for cuts and assembly, Sunday for sanding and finish, with Sunday evening for hardware and mounting.
The Work Table, Kid’s Bookshelf, and Sandpaper Disc Storage Rack can finish in a single day if you buy lumber already straight and dry.
The Garden Cart and Raised Planter take longer mostly for paint or sealant to cure, not for the woodworking itself.
A weekend build has one natural limit: glue and finish need hours you cannot force.
Plan for drying time by building in stages, shelf on Saturday morning, assembly Saturday evening after the joinery sets. Rushing a wet finish into use ruins the surface and costs another weekend to strip and redo.
Frequently Asked Questions
What are some easy woodworking projects for beginners?
A rolling workbench, a small bookcase for a kid’s room, and a wall rack for sandpaper discs each come together in one Saturday with nothing fancier than crosscuts and a drill driver.
The work table teaches frame construction, the bookshelf shows how to round edges and mount to studs, and the rack introduces kerf cuts and spacing. Each builds skills that transfer straight to larger weekend projects.
What tools do I need to start woodworking?
Most beginner projects only ask for a miter box and backsaw, a cordless drill, and a small set of chisels and clamps; that covers straight cuts, pilot holes, and glue-up.
Hand sanding a tabletop eats an afternoon and still shows ripples; a random orbital sander levels the same surface in under 10 minutes and leaves it ready for finish.
Where can I find free woodworking plans?
Free step-by-step plans with clear instructions are available for every project in this collection, including video tutorials for several builds.
Free plans online are drawn for nominal lumber sizes, so a 2×4 often measures 1-1/2 by 3-1/2 inches; I check every dimension against the actual boards before I cut.
The sandpaper rack and a charging station for cordless tools are where I send anyone nervous about waste; the material costs almost nothing, and the joinery repeats on bigger pieces later.





