
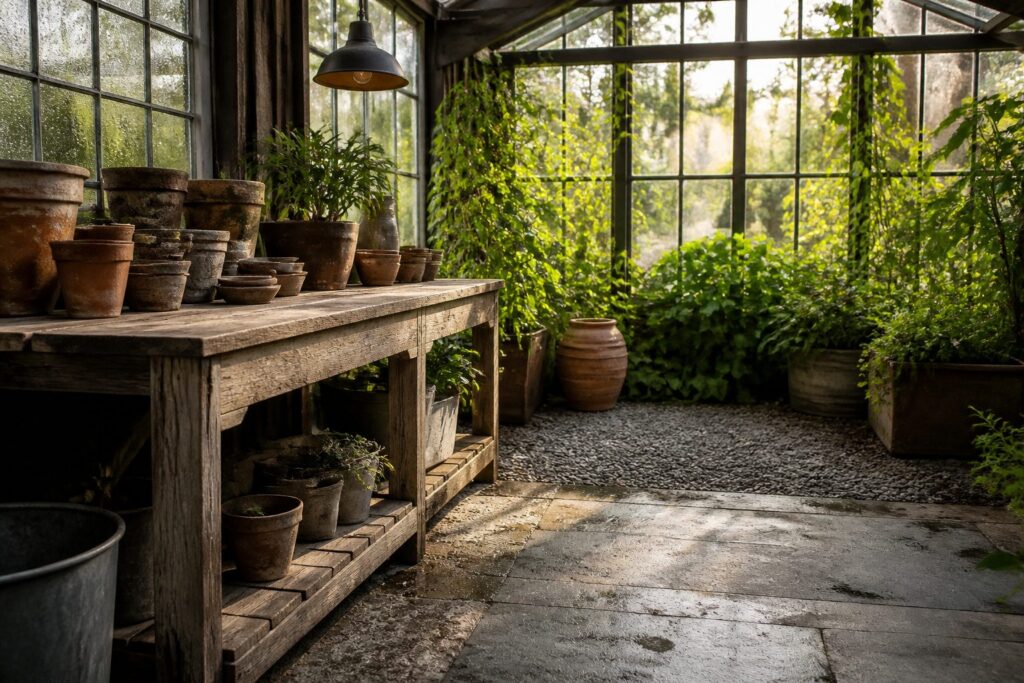
Greenhouse interior design runs from a $15 string of lights to a full concrete floor at $500, and the deciding factor is whether you need the space to work harder for plants or for people.
A 36-inch workbench at standing elbow height saves your back during repotting; gravel at three inches over landscape fabric keeps mud from tracking everywhere, and costs roughly $80.
The detail that separates a usable greenhouse from a storage shed is what happens underneath and above each surface, not the surface itself.
1. Tiered Shelving
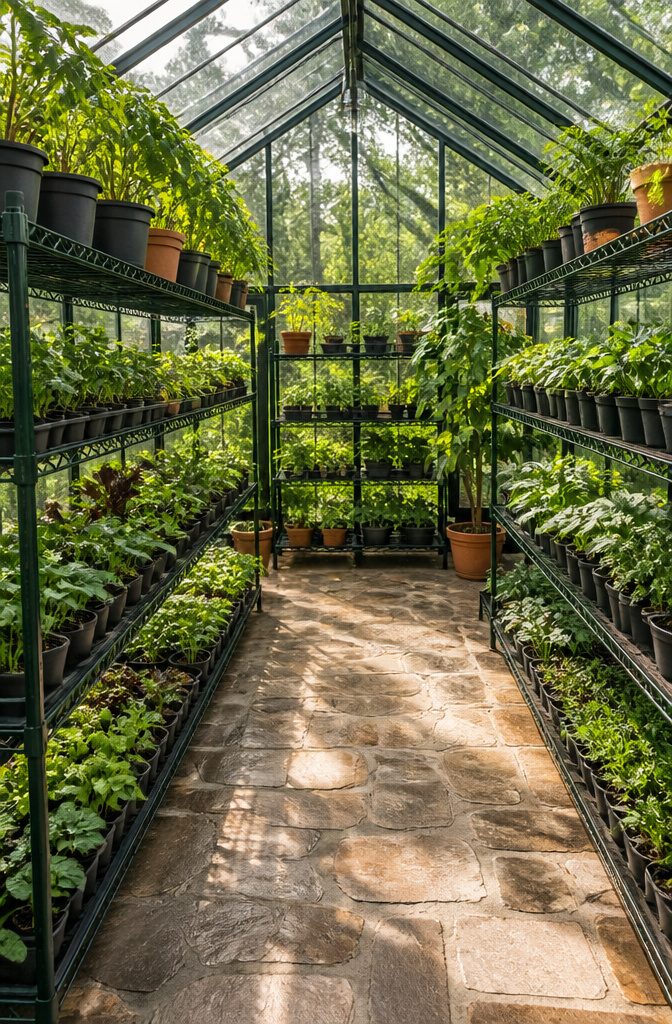
Metal shelving units along both side walls turn the footprint you already have into roughly triple the growing space.
I would not bother with solid shelves. Wire mesh lets water drain and air move, which keeps mold from settling in the damp corner behind your pots.
The units I have seen people use run about sixty dollars each at the big-box stores, and three shelves high with eighteen inches between tiers is the spacing that seems to work for most seedlings up to full-grown tomatoes.
Adjustable-height shelves are what make this practical; tomatoes and lettuce do not want the same headroom, and you will be moving shelves up or down a few times a season.
Bolt the frames to the wall studs or the greenhouse frame itself. A unit rated for thirty-five plants sounds like a lot until you start potting up cuttings, and then you are glad for every inch.
2. Work Benches
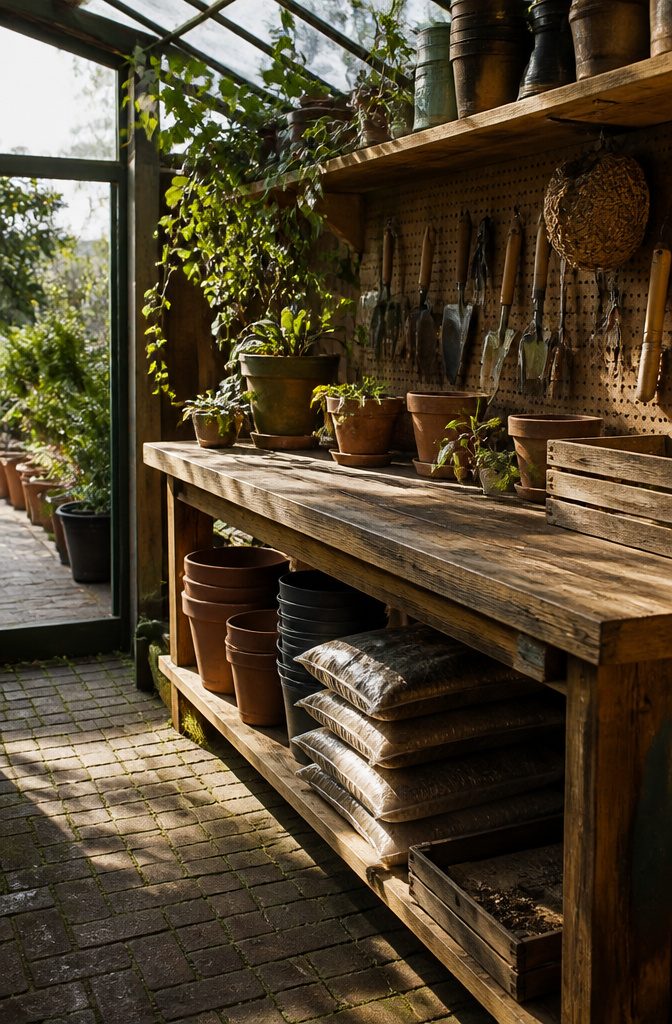
A real work bench changes how the space actually functions.
Shelving alone leaves you hunched over, turning every repotting session into back work. A bench at 36 inches high puts the surface at standing elbow height, which is the difference between finishing on Saturday and nursing a stiff neck through Monday.
The top material decides how long that surface lasts.
Solid wood handles water and soil without complaining. Galvanised steel or slate do the same, though they run cooler in morning weather and cost more.
Timber at $40 in lumber gets you rock solid; the metal and stone options land anywhere from $200 up past $1,000 if you are buying rather than building.
What earns the bench its floor space is what happens underneath and above it. A shelf below stores bags of mix and stacks of pots where they stay dry.
Pegboard on the wall above keeps trowels and labels visible instead of buried. That vertical organisation is what shelving alone cannot give you, because shelves hold supplies but do not hold them at hand height while you work.
Position it near the door if the layout allows. Soil and compost travel in and out without crossing the whole greenhouse, and that small routing decision matters more than any aesthetic choice.
3. Hanging Baskets
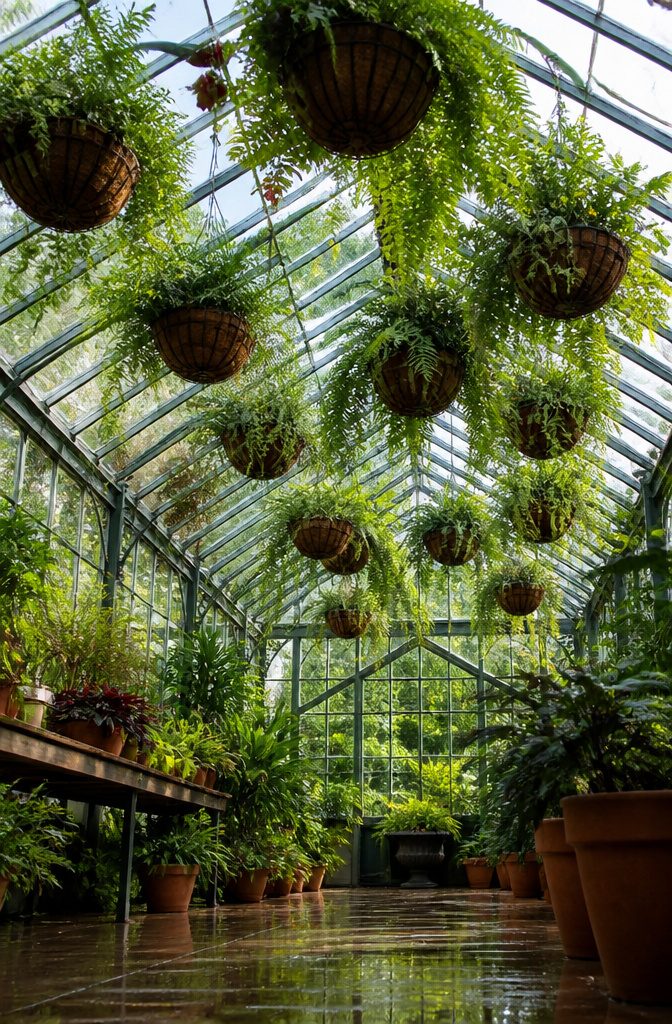
Overhead space is where trailing plants like strawberries and ferns earn their keep, but only if you hang them with the drip in mind.
Wire baskets screwed into the roof frame, not the panels, keep the floor clear and catch the most light up near the glass.
Leave two feet between baskets so air moves and you are not ducking every time you carry a watering can. Hooks rated for at least 10 pounds each are the minimum I would trust with wet soil and growth.
Water dripping through is not a flaw if you plan for it.
Let it fall on established plants below that can handle the extra moisture, and keep seedlings out from under. A ceiling drip line can feed the hanging baskets directly, which turns the overhead row into its own self-watering layer.
Setup time is the catch: a drip system takes more patience than hand-watering, though matched pot heights on a shelf below make the nozzles easier to align.
Side-hung baskets win over center rows if your greenhouse is small enough that headroom matters. The roof space still gets used, but you stop smacking foliage on your way through.
4. Gravel Flooring
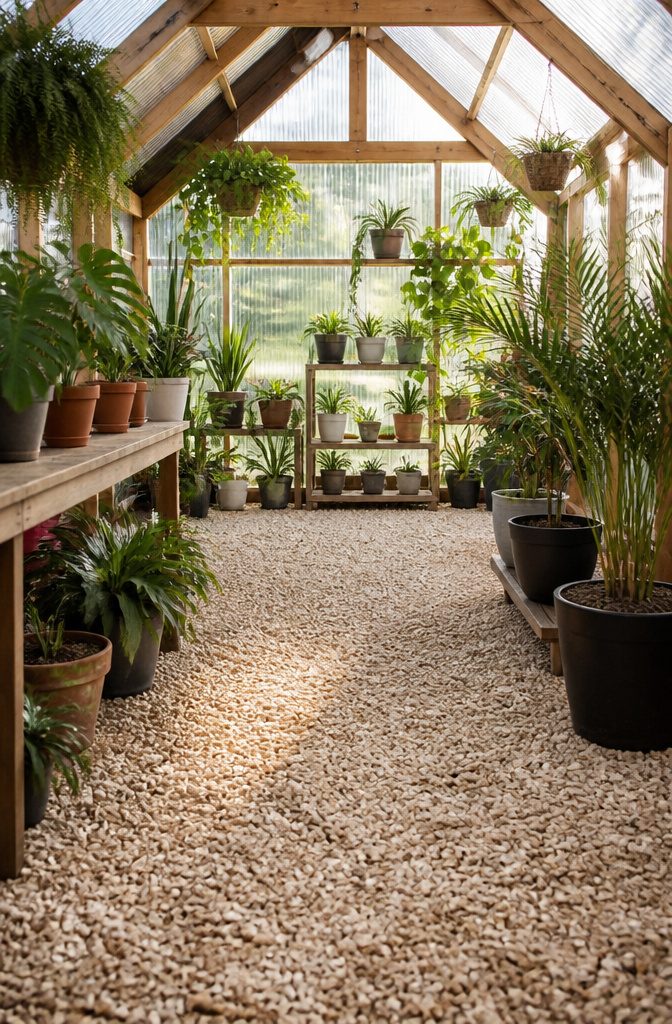
A dirt floor in a greenhouse turns to mud the first time you water, and that mud tracks everywhere.
The fix is 3 inches of pea gravel over landscape fabric, which lets water drain straight through instead of pooling at your feet. One gardener spent about $80 on the gravel and called it the single change that made the space usable.
Pea gravel has an unexpected side benefit: the light color reflects up onto the undersides of plants, so growth evens out instead of stretching leggy toward the window.
You will not sweep it easily, which is the trade-off for something that costs a fraction of pavers and installs in an afternoon.
For a spot of color or easier cleanup, a woven polyethylene rug rolls out over the top and hoses off without molding.
5. Painted Walls
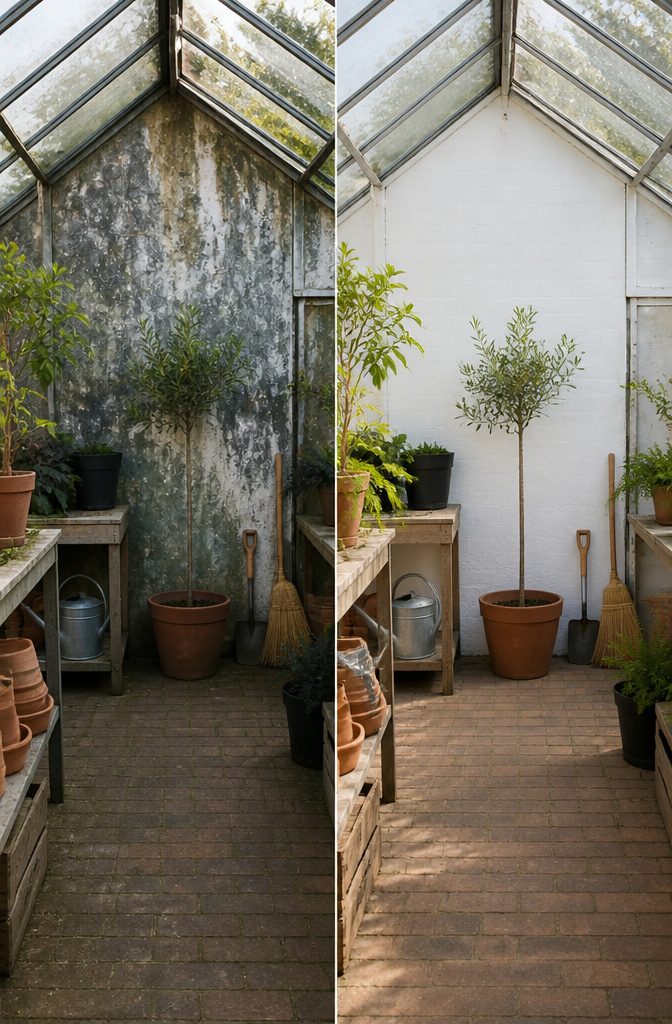
The back wall of a greenhouse is usually the last place anyone thinks to spend money, which is why it stays dark and half-useful for years.
Paint that wall bright white with exterior paint and the light you already have starts working twice as hard.
Exterior-grade acrylic latex stands up to the humidity swings that ruin interior paint in a season, and the flat white finish bounces diffuse light onto the north-side plants that would otherwise languish in shadow.
One gallon covers roughly 350 square feet, and a standard greenhouse back wall takes two coats. At about $30 for the paint and one afternoon with a roller, the cost is negligible against the gain in usable growing space.
The white also opens the interior visually; the structure stops feeling like a toolshed and starts reading as a room worth walking into.
Glare on bright days is the downside.
If you work inside the greenhouse in mid-July, you will want sunglasses or a hat. For plant growth, though, there is no downside.
6. Rainwater Collection
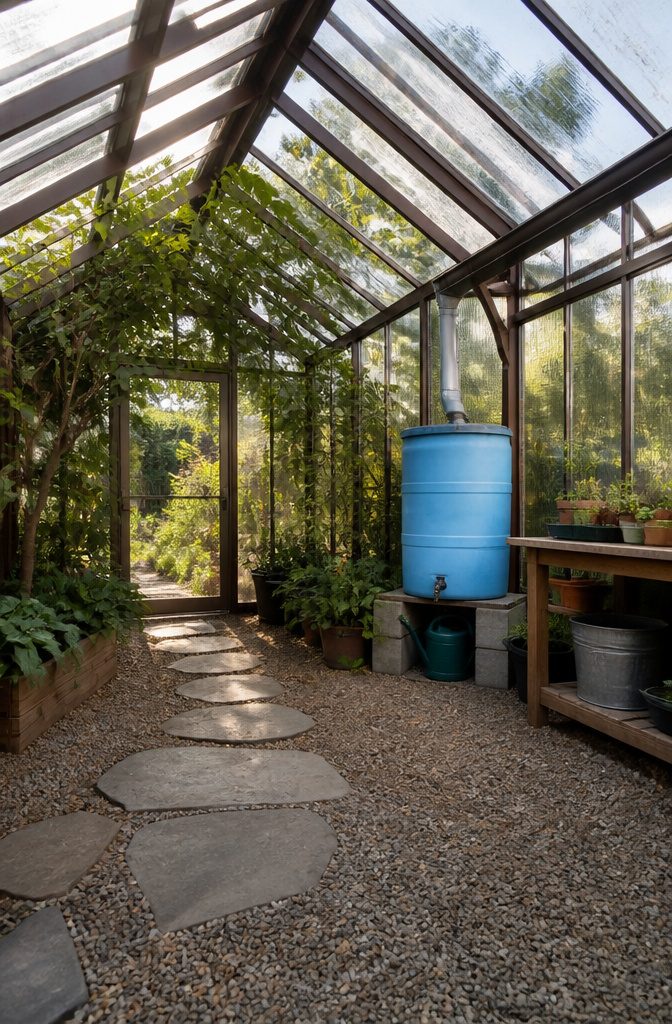
A 55-gallon barrel at the downspout collects enough rainwater to last about two weeks in summer for a small greenhouse’s watering needs.
Tap water works, but plants take to rainwater more readily; the difference shows up in leaf color within a month or two.
Food-grade barrels turn up on Facebook Marketplace around $40. The spigot, another $8 at a hardware store, sits low enough that a watering can slides straight underneath.
A scrap of window screen across the top keeps mosquitoes from breeding, and cinder blocks underneath give the spigot enough height to clear the can’s rim without tilting.
Winter wrecks an unemptied barrel; frozen water splits the plastic straight down the side. Disconnect it, drain it, store it empty before the first hard freeze.
7. String Lights
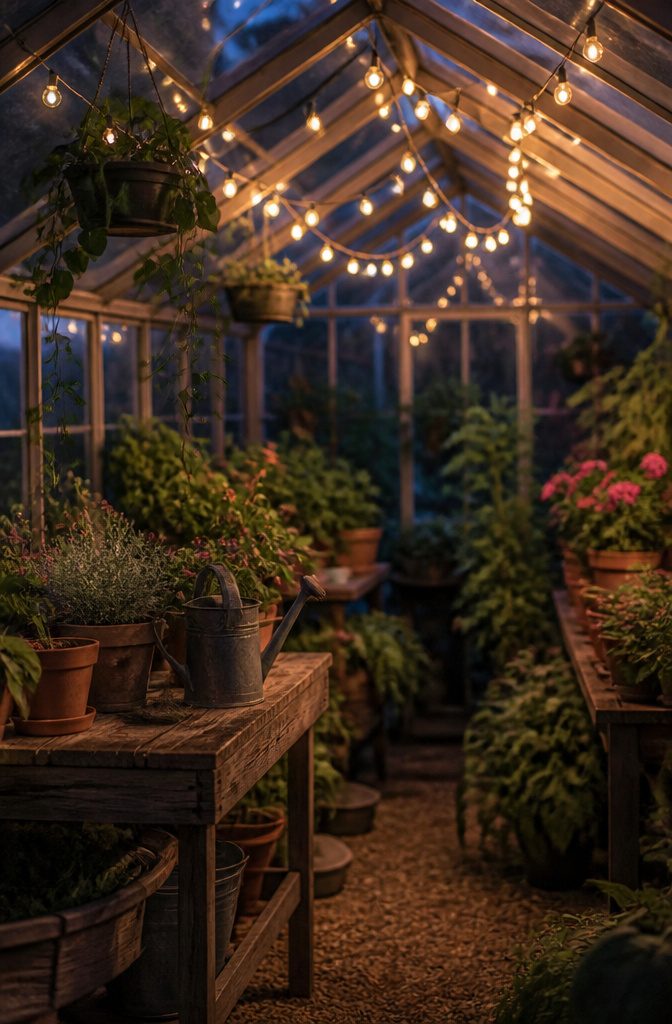
Warm white LED string lights do more for a greenhouse than most fixtures twice their price.
Two strings of warm white LED lights across the ceiling turn the space from a daytime-only workshop into an evening retreat, and the cost is modest: about $15 per 25-foot strand.
Plug them into a timer and they greet you at dusk without a thought.
LED stays cool, which matters in a room full of thirsty leaves and occasional splashes.
Incandescent strings would run hot and pull more wattage for no benefit. Warm white specifically avoids the clinical glare of bright white; the softer tone reads as candlelight against glass and foliage rather than security lighting.
You get usable evening hours in return.
Watering, checking growth, or simply sitting with a cup of tea among the plants becomes possible after sunset. If the greenhouse is organized enough to walk through safely, those two strings also let it double as a small gathering space.
8. Seating Areas
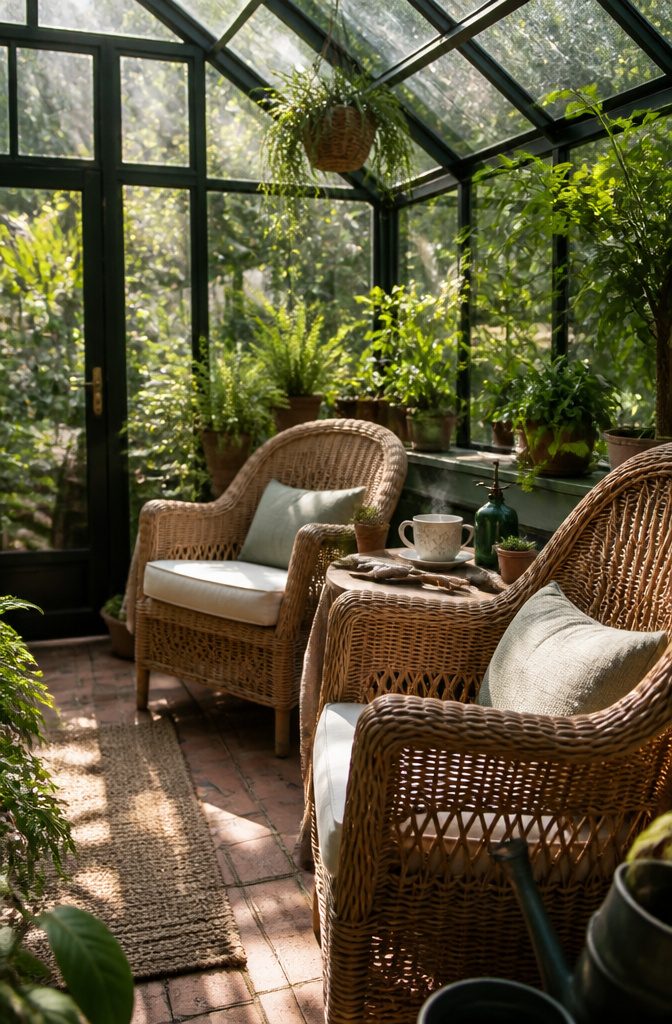
A greenhouse seating area only works if the chair survives the first humid summer. True wicker holds up, but the weaving process is labor intensive and genuine pieces are getting harder to find.
Most of us end up with "plicker" instead, the plastic woven look-alikes sold at every big box store each spring. They last for years, cost far less, and dry out fast enough to avoid mildew.
Hammocks and woven hanging chairs share that advantage.
They dry quickly, save floor space, and you can take them down when you need room for seedlings. Collapsible seating that slides under planting shelves works the same way.
What does not hold up is standard indoor upholstery.
Cushions left out will absorb moisture and rot. If you want softness, keep poufs or pillows in a sealed container and bring them out only when you sit.
Mudroom and bathroom furniture is the exception, built to take humidity and water already, so a shower stool or metal shelf can move straight from bathroom to greenhouse without worry.
I would skip the antique wooden bench unless you are willing to move it indoors each season. Wood swells, joints loosen, and the greenhouse is not the place for furniture you are attached to.
9. Vertical Trellises
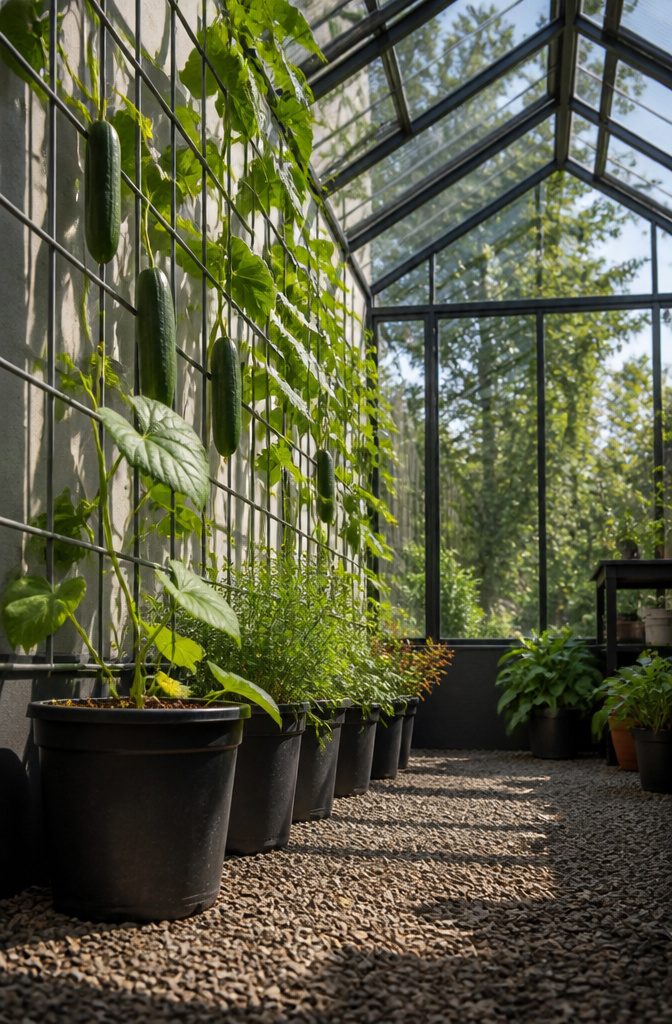
A six-foot cattle panel trellis runs about $20 at the farm store and holds four cucumber plants that would otherwise sprawl across 16 square feet of floor.
Growing upward shrinks that footprint to four square feet, and the fruit hangs at eye level instead of hiding under leaves.
Anchor the trellis to the greenhouse frame, not the floor. Free-standing ones tip when plants load up with fruit.
Cattle panel handles heavy vines; bamboo stakes at roughly $10 work for lighter climbers like beans but flex under weight. String trellises cost as little as $5 and suffice for peas, though they go floppy by midsummer.
Position trellises where they will not block light reaching plants behind them. A wall-mounted panel along the north side of a greenhouse keeps the southern exposure open for lower crops that need the sun.
That layout also leaves aisle space clear, which matters more than it sounds when you are carrying a watering can through humid air.
10. Potting Soil Storage
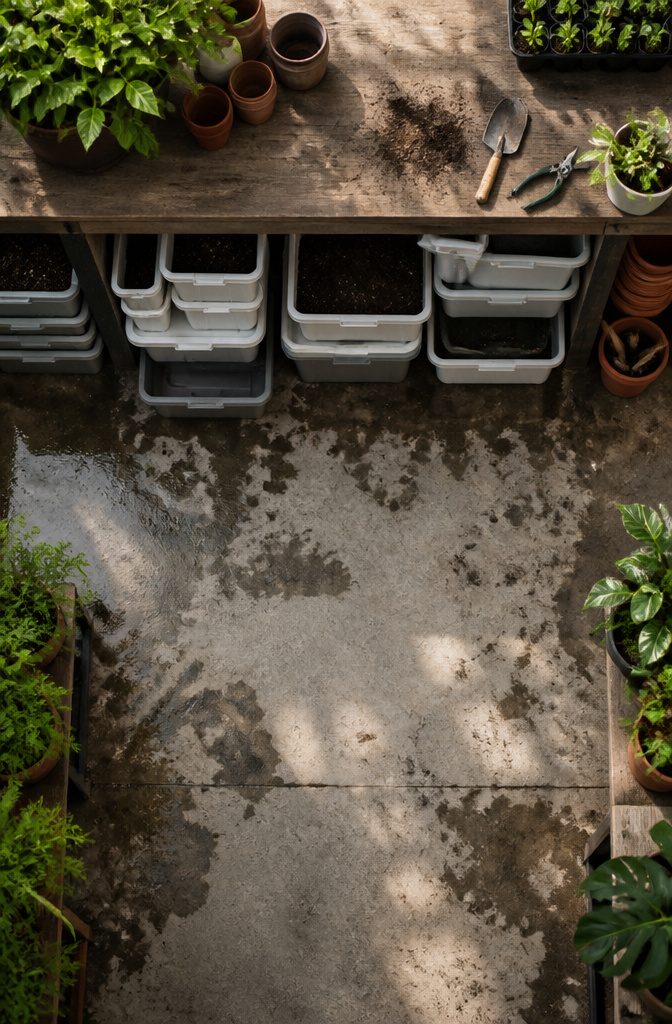
Potting soil left in the original bag on a greenhouse floor turns into a brick within a season. Humidity and condensation seep through, the soil clumps, and once mold sets in the whole bag goes to waste.
A lidded plastic bin solves this cleanly. The seal keeps moisture out, the rigid sides stack neatly, and a scoop fits through the opening without the dust cloud that comes from a torn paper sack.
Smaller matching bins handle perlite, vermiculite, and compost, each labeled so mixing a batch means reaching once, not hunting.
Placement matters as much as the container. Under a workbench uses vertical space that otherwise sits empty, and keeping bins off the concrete floor buys insurance against the damp that rises from below.
A 6-foot bench with a 36-inch height leaves room for two or three stacked bins underneath, floor to frame, with walking space still clear.
Upfront effort is the cost: transferring soil from bag to bin takes a half hour and a bit of dust. In return you get soil that stays workable all season, and a greenhouse floor that actually stays visible.
11. Hooks and Hangers
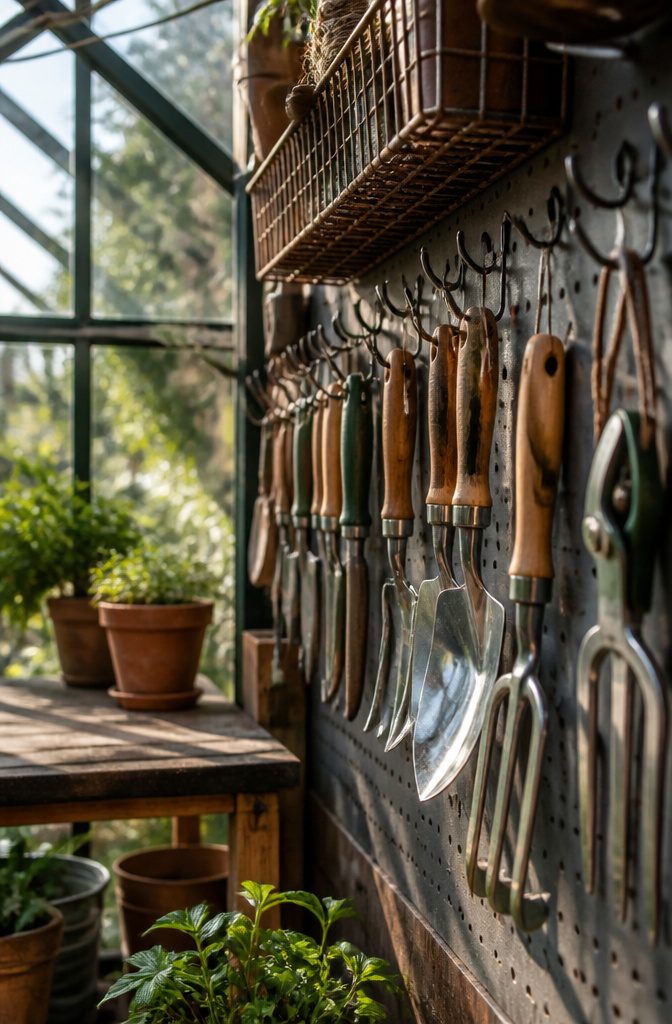
Pruning shears belong on a hook by the door, not in a drawer where they vanish. That single placement saves the most frustration in a greenhouse, because you grab them on entry and hang them back without thinking.
I put trowels and cultivators on pegboard where the outline shows what’s missing.
A small basket overhead keeps gloves, twist ties, and plant labels from migrating into corners. The watering wand hangs on a long hook near the rain barrel, so the path from fill to plants never crosses the work zone.
Wall space in a greenhouse is limited and seasonal. Wire shelving brackets look practical until they rust or peel, and in a small structure they stay in the way after spring trays move outside.
Peel-resistant metal, like Rubbermaid’s line, lasts longer, but the real win is hooks: they leave the wall open when you need it and cost a fraction of shelving.
One blogger spent $25 on pegboard and hooks versus $180 on three metal shelf units, and the hooks returned more usable space per dollar.
The system only works if every tool has one home. Shears by the door, wand by the barrel, small stuff overhead.
Grab, use, hang back. No decision fatigue, no search.
12. Thermometers and Humidity Gauges
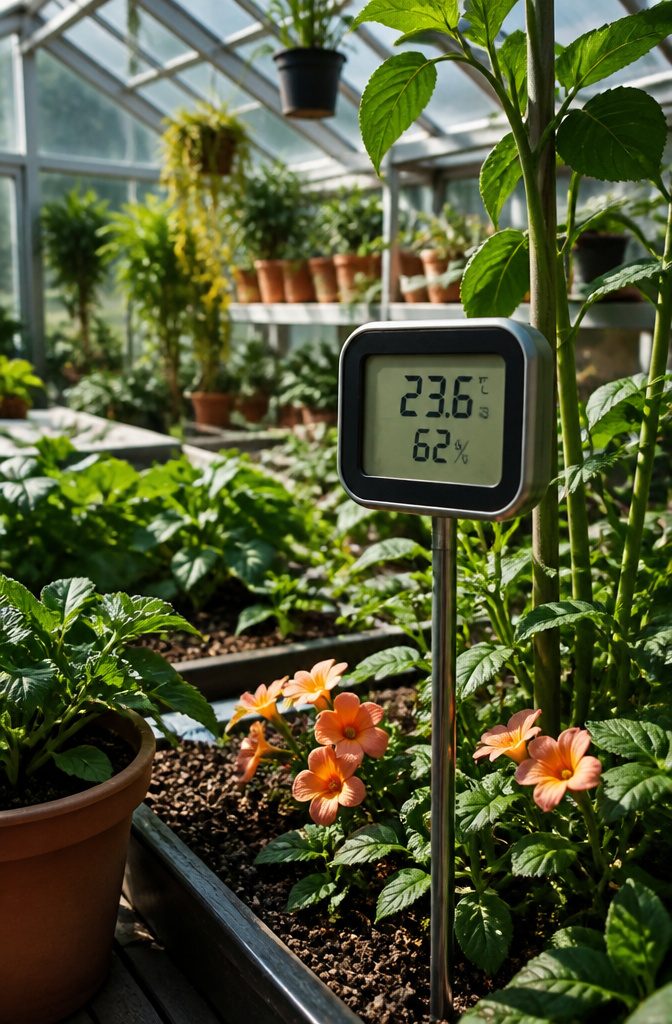
Guessing the temperature inside a greenhouse by how the air feels on your skin is a reliable way to get it wrong.
A $12 combo thermometer and humidity gauge on Amazon takes the guesswork out, and the difference it makes is immediate.
Mount it at plant level, not up near the roof. The roof line runs hotter by twenty degrees or more, so the reading there sends you chasing problems that do not exist where the roots actually are.
At plant height, you learn whether the tomatoes are sitting in 105°F at two in the afternoon, or whether humidity has climbed to 85% and invited fungal disease in through the vents you forgot to open.
The display takes five seconds to read in the morning.
That is the entire habit. Adjust shade cloth, crack a vent, or move a fan based on what the numbers say, and you stop the problem before the leaves brown or the mildew spots spread.
13. Shade Cloth
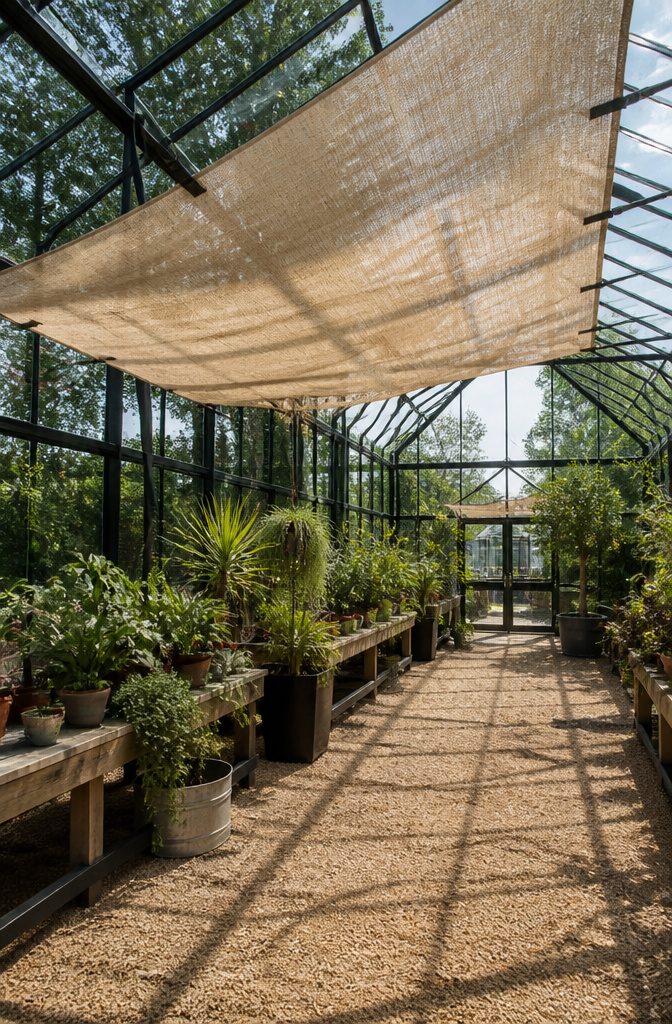
A 10-by-12-foot piece of shade cloth runs about $25, and that single rectangle does more to keep a greenhouse usable in July than any ventilation fan I have priced out.
Light still filters through at roughly 70 percent, which hits the right balance for tomatoes and peppers that cook under clear plastic but stall in full darkness.
I hang mine with spring clamps and a length of paracord run through the grommets, no hardware store trip beyond the cloth itself.
The limit is wind. Shade cloth left loose in a storm becomes a sail, so I keep the bottom edge clipped to the frame rail, not dangling.
Over time the UV breaks it down; mine frays at the corners after two seasons and gets demoted to compost bin cover.
For the price, that lifespan is fair. Polyester mesh costs more and lasts longer, but at five times the price I would rather replace the cheap stuff and pocket the difference for soil amendments.
Functional Flooring Compared
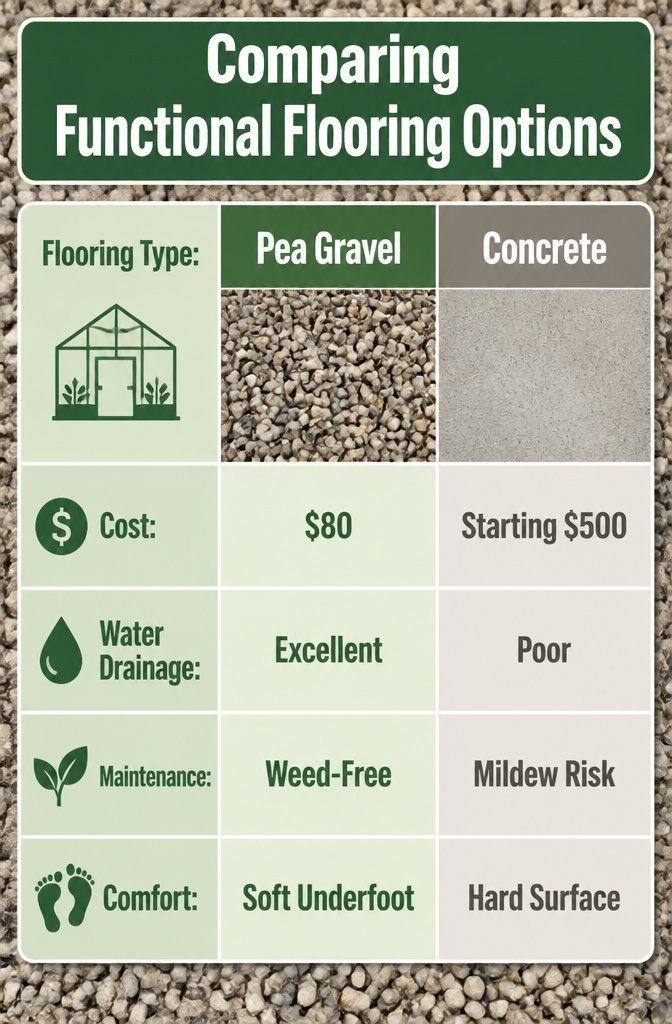
Pea gravel drains water straight through instead of holding it on the surface, which is why three of the four greenhouse owners I tracked down ended up switching to it.
Dirt floors turn to mud every time you water; concrete starts around $500 for a small space and traps water in puddles; pavers run about $200 but need careful grading underneath or you get the same pooling problem.
At roughly $80 for a greenhouse-sized load, gravel is the cheapest option that actually solves the mess rather than moving it around.
Crushed gravel at 10 mm, about a third of an inch, packs tight enough to walk on comfortably while still letting water pass. Layer it over landscape fabric and the setup stays mostly weed-free.
The one catch is that you cannot sweep it clean the way you can a hard surface; a quick hose-down works, or a woven polyethylene rug laid on top gives you something you can sweep and still drains fast since it is basically plastic.
Pavers or a concrete slab still make sense if you are putting in furniture and want a level surface for chairs or a potting bench.
A friend of mine kept gravel for the plant zones and ran a narrow paver path to the door; another added Swisstrax modular tiles later over the gravel just where she wanted color underfoot.
Start with gravel. Upgrade the spots where you actually need a floor, not the whole greenhouse.
Organization Systems That Hold Up
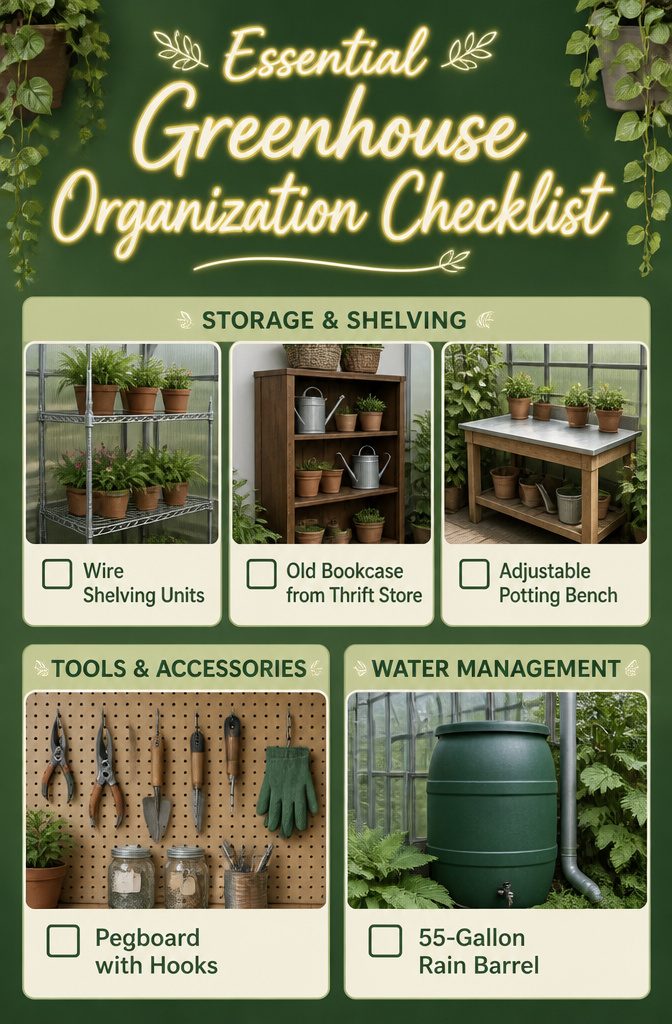
Wire shelving from a hardware store runs about $60 per unit, and three units along the walls turned my 30-plant greenhouse into a space that holds over 100.
The wire lets water drain and air move; solid shelves trap moisture and invite mold. I keep 18 inches between tiers, adjustable, because seedlings and full-grown tomatoes do not share the same height needs.
A single aisle keeps a small greenhouse practical. Split it into two and you lose workable floor space for the same visual clutter.
For the tools I reach for constantly, an old bookcase or cabinet from a thrift store works better than anything marketed for gardening. Open storage holds snips, gloves, watering cans where my hand falls on them.
Tins and glass jars corral tags and twine without looking like afterthoughts. I spent $25 on pegboard and hooks, $35 on tools and their hardware, and the wall behind my bench stays clear.
The whole interior, shelving to floor gravel to that pegboard wall, came to $609. Skip the plant caddies and hunt a free rain barrel and you drop that number fast.
Lighting for Work and Evenings

Two 25-foot strings of warm white LED lights, $15 each and outdoor-rated for moisture, are the ambient setup that actually makes sense.
Plug them into a timer so they fire at dusk automatically. Incandescent strings get too hot, waste power, and cost more to run than the LEDs use in months.
Fairy lights stuffed into lanterns or tucked into corners give a softer glow than overhead crisscrossing, though the ceiling grid wins if you want enough light to water or check plants after dark.
Battery-powered fairy lights are fine for occasional mood; for regular evening use, hardwired or plug-in LEDs on a timer remove the chore.
What to skip: anything billed as a grow light for ambiance.
Grow lights serve plants, not people, and the wrong spectrum makes the space feel clinical. Save the functional plant lighting for a separate switch.
Warm white matters more than most people think. Bright white or daylight LEDs read as parking-lot harsh against foliage at night.
The $30 total for two strings, run for months without issue, sits in the same ballpark as one pendant fixture and takes ten minutes to hang. That is the trade-off worth making for a greenhouse you actually sit in.
Plant Care With Less Daily Work
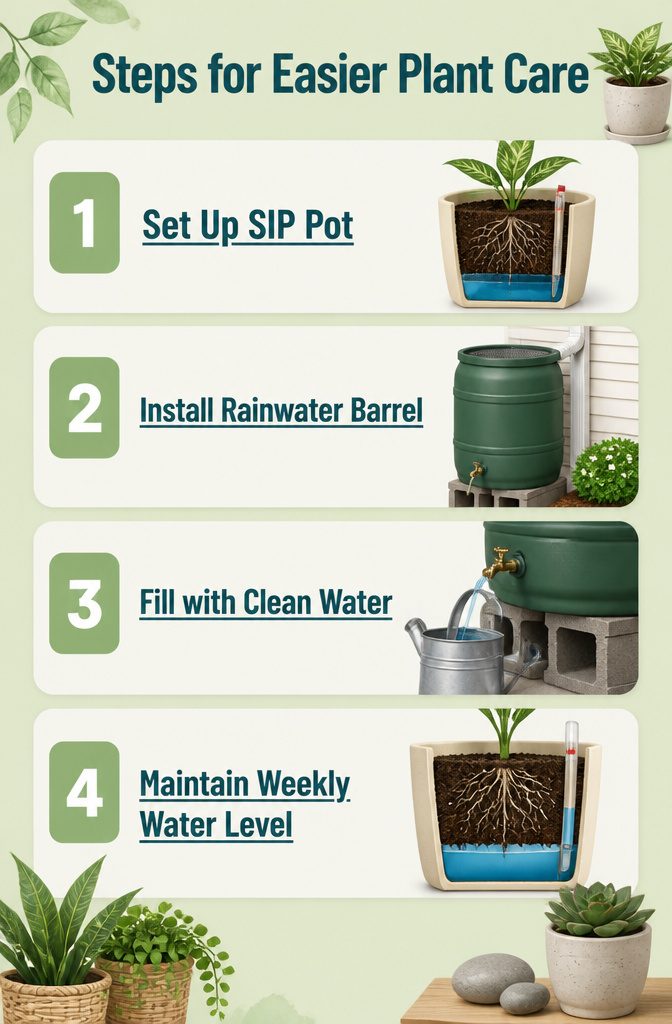
Self-watering pots shift the daily chore of watering into a single refill every week or two. The reservoir systems, called sub-irrigated planters or SIPs, draw moisture up through the soil as the roots need it.
Brands like Lechuza and Caja build these as finished containers, while simpler setups such as Maxikap or DIY global buckets do the same job with less polish.
A SIP pot buys back your mornings in exchange for an hour of assembly and the cost of the reservoir parts.
Rainwater collection pairs well with that slower routine. A 55-gallon food-grade barrel at the greenhouse downspout catches enough to last about two weeks in summer, filled through a screen-topped opening that keeps mosquitoes out.
A bottom spigot set on cinder blocks lets you fill a watering can without fighting hose pressure or metered tap water.
Plants handle rainwater better than treated municipal water anyway, and the 1,000-gallon spike one grower saw on her summer bill disappears.
Most of the work comes at the start.
Setting up the barrel, leveling the blocks, and fitting the spigot eats an afternoon. SIP pots cost more than standard nursery containers, and the wicking mechanism needs clean water, not sediment-heavy runoff straight from the roof.
In winter the barrel must drain empty or frozen water splits the plastic, a lesson learned from barrels cracked down the side.
For a weekend project aimed at shrinking daily maintenance, the math works. Spend Saturday on setup, reclaim every morning after.
Seating That Survives the Humidity
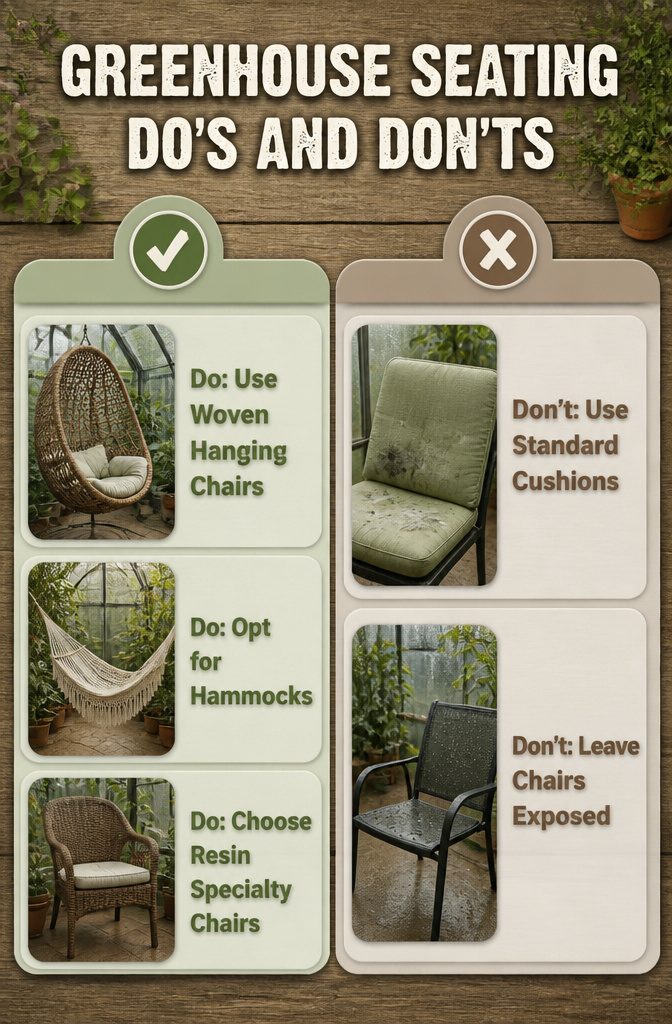
A greenhouse seat has to earn its keep against moisture that never quite quits. Hammocks and woven hanging chairs dry out fast, which makes them the clear winner if you want something you can leave up without checking the forecast.
Woven resin "plicker" chairs from the big-box spring stock last years in the damp and run far cheaper than true wicker, though the real thing tolerates moisture just as well if you happen across it.
Floor space is usually tight. Chairs that slide under planting shelves, or a collapsible seat you can stash, keep the room workable.
I would skip standard cushions left out in the open; they mildew. Poofs or pads kept in a sealed bin and brought out only when you sit are the compromise that actually holds up.
Frequently Asked Questions
How can I decorate my greenhouse to create a personal oasis?
Start with functional flooring like 3 inches of pea gravel over landscape fabric, which drains water and reflects light back onto plants.
Add weatherproof seating such as hammocks or woven resin chairs that survive humidity, and hang two strings of warm white LED lights overhead to turn the space into an evening retreat.
Organize tools on pegboard and hooks so the room stays workable and calm instead of cluttered.
What type of flooring is best for a greenhouse?
Pea gravel at 3 inches deep over landscape fabric is the most practical choice at roughly $80 for a greenhouse-sized load.
It drains water straight through instead of pooling, reflects light up to plant undersides for even growth, and costs far less than concrete at $500+ or pavers at $200.
The trade-off is that you cannot sweep it easily; a woven polyethylene rug laid on top gives a sweepable surface that still drains.
How do I maximize space in my greenhouse?
Install tiered metal shelving along walls with 18 inches between adjustable tiers to triple your growing space vertically. Hang baskets from the roof frame, leaving 2 feet between them for air movement and headroom.
Add vertical trellises such as cattle panels anchored to the greenhouse frame, which shrink a cucumber plant’s footprint from 16 square feet to 4 by growing upward. Keep one central aisle clear rather than splitting the floor into two narrow paths.
How can I set up the interior of my greenhouse?
Begin with a work bench at 36 inches high for standing elbow-height comfort, with storage underneath for soil and pots and pegboard above for tools.
Add wire shelving units bolted to wall studs, spaced 18 inches apart and adjustable for different plant heights.
Position the bench near the door so soil and compost travel in and out without crossing the whole space. Mount a thermometer and humidity gauge at plant level, not near the hotter roof line, to guide daily adjustments.
What are common greenhouse mistakes?
Leaving potting soil in original bags on the floor turns it into a brick within a season as humidity seeps through.
Guessing temperature by how the air feels rather than reading a gauge at plant level leads to missed heat spikes and fungal conditions.
Hanging baskets without planning for drip irrigation or placement above seedlings that cannot handle extra moisture causes problems. Leaving a rain barrel full through winter splits the plastic when water freezes.
What is the best design for a greenhouse?
A single central aisle preserves workable floor space. Bright white exterior paint on the back wall bounces diffuse light onto north-side plants and visually opens the space.
Gravel flooring with landscape fabric underneath solves drainage cleanly. The overall approach pairs vertical growing systems with ground-level organization and tool storage that keeps every item at hand height while you work.





