

The right TV cabinet idea depends on whether you own the wall behind it or will need your security deposit back. A floating unit saves floor space only if the bracket bites into actual studs; drywall alone will drop a 60-inch setup without warning. I watched a friend learn that in a 1920s apartment where the stud finder gave up against plaster and lath, and the repair cost him a Saturday and part of his ceiling.
1. Wall-Mounted Floating TV Unit

A wall-mounted floating TV unit keeps the floor completely clear, which matters in a studio apartment or any rental where square footage pays the rent. The clean line along the wall reads as built-in even when it is not, and vacuuming underneath stops being a chore.
Mounting is where this idea lives or dies. A 40-inch TV needs a unit 110–140 cm wide, a 50-inch needs 140–170 cm, and a 60-inch needs 170–200 cm. That extra width keeps the proportions from looking like a shelf that lost a fight with the screen. Drywall alone will not carry the load; the bracket or cleat must bite into studs, or you will need toggle anchors rated for the combined weight of the unit, the TV and whatever you stack on it. Brick or concrete block is more forgiving, but the hardware changes. I have watched a friend learn this the hard way in a 1920s apartment with plaster over lath and no stud finder that could sort the signal from the noise.
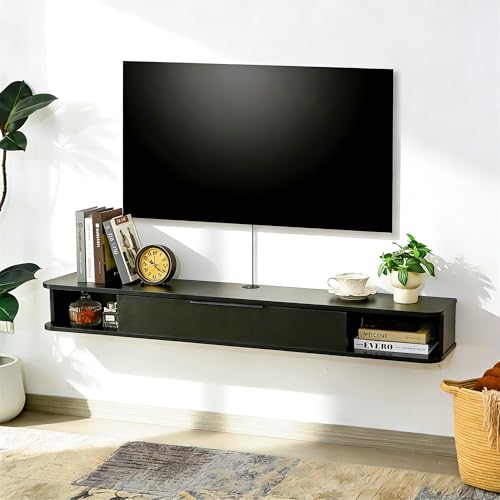
[Fits Most TV Sizes] : This 55"(L) TV shelf works with 32" to 65" TVs. It offers plenty of space for your TV and media devices, keeping your entertainment area clean and tidy

Wall Mounted TV Stand with Power Outlets: With 4 standard plugs, the floating TV stand is extremely suitable for use with TVs, game consoles, WiFi router, DVDs, CD players, etc., easy charging for your media components
2. Minimal Wooden TV Console Unit
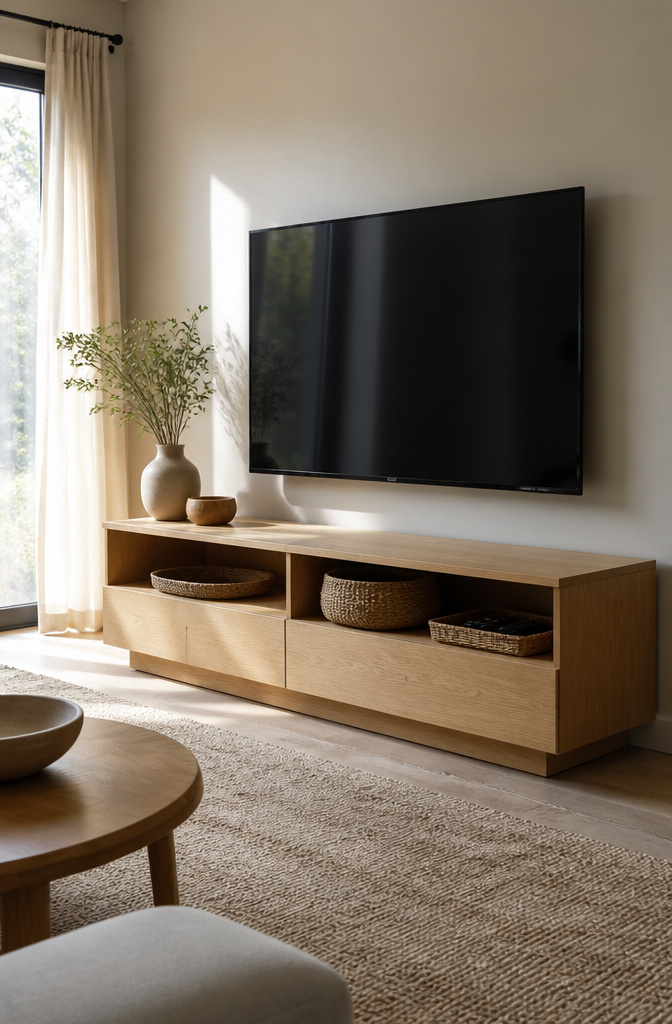
Plywood and pine are where a minimal wooden console actually becomes possible on a renter budget. I built one from three-quarter-inch pine boards and a plywood top two years ago, and the finish matters more than the wood species. Water-based polyurethane in a satin sheen has held up to daily dusting and the occasional coffee ring without the plastic look of high-gloss. Oil finishes feel nicer but need reapplication every six months if you actually use the surface.
Pine dents. Plywood edges show. The fix is iron-on edge banding for the plywood and a simple 1×2 pine frame screwed to the front to hide the plies. Assembly takes one Saturday if you have a circular saw and a pocket-hole jig; a drill and a straightedge clamped as a guide work too, just slower.
For renters who need lighter weight, HDHMR board carries paint better than plywood and resists the humidity swings near windows. MDF is cheaper still but swells at the corners if you breathe on it wrong, so I would only use it in a climate-controlled room with a good primer seal. My pine version cost under eighty dollars in materials and moved with me intact; the screws came out, the holes filled with putty, and the wall behind it looked untouched.

Farmhouse Flair: This entertainment center features a wood-look finish, charming barn doors, and sleek metal knobs, creating a cozy and inviting atmosphere in your living space

☑【With Drawer--Store Items Related to TV】Rolling TV cart with storage drawer can hold remote controls, power cords, game discs, switch,etc..

Sturdy & Cleanable: This durable TV stand features 5 supportive legs and anti-scratch foot pads to protect your floors. Built with premium solid board, it stays sturdy for years of use. The open undercarriage makes daily cleaning super easy—simply wipe it with a dry or damp cloth to keep the whole unit neat and effortless to maintain
3. Sleek Matte Finish Modern TV Cabinet

Matte finishes forgive daily life in ways gloss never does. A flat sheen hides the dust and fingerprints that collect around a screen within a single week of actual use, so the cabinet looks tended without constant wiping. I learned this after refinishing an old media console in semigloss because the can was already in my garage. Every smudge showed under the TV’s glow, and I spent more time polishing the cabinet than watching it.
For that modern, low-sheen look, a water-based acrylic enamel in eggshell or matte gives cabinets a soft, unified surface without the plastic feel of high-gloss laminate. A weekend refinishing project runs about $80 to $140 if you already own sandpaper and brushes: two quarts of quality paint, a bonding primer for laminate surfaces, and fresh hardware if the old pulls fight the cleaner lines. The real cost is patience. I rushed the second coat on a humid Saturday evening and woke to a streaked, rubbery surface that had to be sanded back to primer. Third coat, dry day, done by noon. The finish held.

Ideal Size for Large TVs: Designed as a TV stand for 65 inch TV, the 63” wide tabletop securely supports 55–70” TVs while offering extra space for soundbars, décor, and streaming devices

Easy Wall Mounting:Skip the complicated assembly process. This floating TV stand arrives fully assembled, allowing you to mount it quickly and enjoy a clean, modern entertainment space with minimal effort.
Easy Wall Mounting:Skip the complicated assembly process. This floating TV stand arrives fully assembled, allowing you to mount it quickly and enjoy a clean, modern entertainment space with minimal effort.
4. Curved and Sculptural TV Units
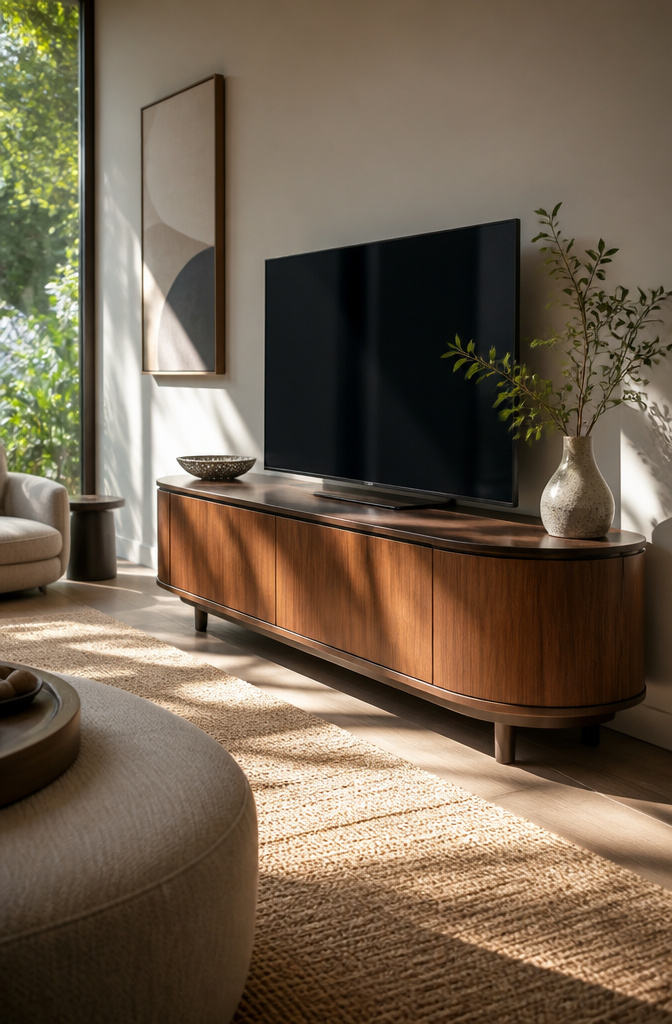
Curved lines soften a room in a way straight edges rarely manage, but the price of custom millwork stops most weekend projects cold. Ready-made curved components are the easier path: rounded cabinet ends from larger hardware suppliers, or a single bow-front credenza that carries the whole sculptural effect without touching a router. For anyone set on building, bending plywood opens the door. Thin luan or flex-ply layers around a form, laminated with glue, will hold a gentle radius once it cures. The Oxford Cherry laminate mentioned for these builds adds warmth that keeps the curve from reading as clinical.
This style fights small rooms with tight corners and low ceilings; the sweep needs space to breathe or it crowds the sightline. It earns its place in open plans where the unit floats against a wall, or where a wave-textured back panel can stretch wide enough to feel intentional rather than apologetic. Rounded floating shelves work the same way; they read as sculpture when they have room, as obstacle when they do not.

MULTIPLE SIZE OPTIONS – This heavy duty toggle bolt assortment includes 3 sizes (1/8 in, 3/16 in, 1/4 in) to help you choose the appropriate size for drywall anchor applications based on wall type and intended use. Suitable for selected hanging projects such as hanging pictures, curtain rods, and plants when used correctly. Please refer to the size chart and installation guidance before use.

TOGGLER SNAPTOGGLE Drywall Anchor – 1/4"-20 UNC Zinc-Plated Snaptoggle Anchors – Holds 265 lbs on Drywall, 802 lbs on Concrete Block – Toggle Bolts for Mounting Cabinets and TV – 20 Pack (With Bolts)

COMPLETE SET FOR VARIOUS MOUNTING NEEDS: This Heavy Duty Toggle Bolts Assortment Kit includes 164 pieces of drywall anchors, toggle bolts, and screws in multiple sizes to fit different installation requirements. The set contains 40pcs #6×1", 40pcs #5×1", 40pcs #7×1", 20pcs #6×1-1/5", 12pcs #8×1-3/5", and 20pcs black #8×1-1/4" wall anchors, along with toggle bolts in 1/4" (4pcs), 3/16" (12pcs), and 1/8" (16pcs). Ideal for mounting shelves, mirrors, or curtain rods.
5. Modern TV Console with Hidden Storage

Flap doors that drop down or swing up keep remotes and gaming gear accessible but out of sight, though the hardware rarely stays aligned past the first year of use. I have watched soft-close hinges lose their tension and lift-top pistons leak oil, turning a clean silhouette into a wobbling repair job. A full set of quality hinges and a lift mechanism runs roughly $80–$150 if you retrofit an existing cabinet, which is often the only way to hit a weekend timeline without ordering a whole unit.
Drawer configurations work better for cables than doors do, because the back panel can be drilled without compromising the face. Leave a 10 cm margin between your cabinet’s inner width and the TV’s stated width; that gap swallows power bricks, a small surge protector, and the slack from HDMI cables that are always six inches too long or three feet too short.
Pop-up lifts hide the entire screen, but the motor and track eat most of the interior depth. A cabinet deep enough for a lift mechanism is usually too deep for a clean profile against the wall. That trade is worth making only if the television sits in a multi-use room where it genuinely disappears for hours at a time.
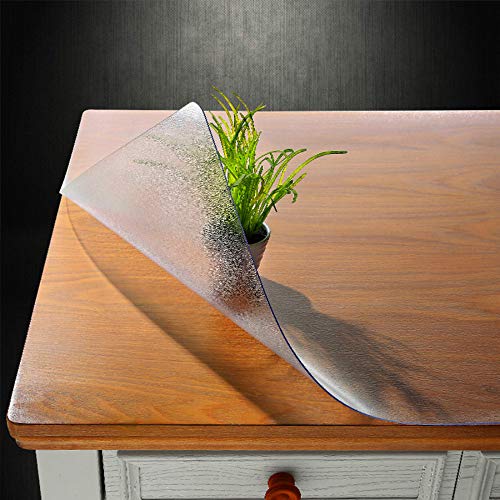
Materials & Design: Made from high-quality PVC, the table cover protector is highly durable and resistant to wear and tear, the clear and frosted design allows the natural beauty of your table to shine through, blending seamlessly with any decor while providing effective protection
Materials & Design: Made from high-quality PVC, the table cover protector is highly durable and resistant to wear and tear, the clear and frosted design allows the natural beauty of your table to shine through, blending seamlessly with any decor while providing effective protection
Materials & Design: Made from high-quality PVC, the table cover protector is highly durable and resistant to wear and tear, the clear and frosted design allows the natural beauty of your table to shine through, blending seamlessly with any decor while providing effective protection
6. LED Backlit Modern TV Panel Design
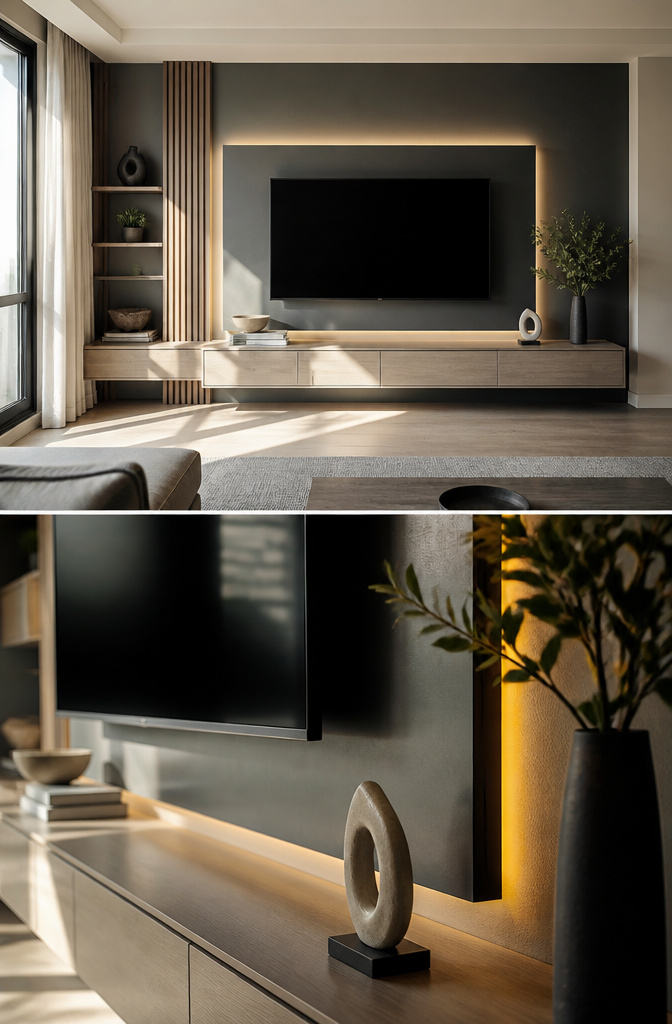
Bias lighting sounds like a gimmick until you try it at night. The LED strip behind the panel throws a soft glow that makes the screen feel easier to look at, and there is some science to that: your eyes don’t strain as hard when the contrast between a bright display and a dark wall is softened by a mid-tone halo.
For a modern TV panel, a 6500K color temperature LED strip works best because it matches daylight white without throwing weird tints on skin tones. I mounted mine too close to the edge the first time, so the individual diodes showed as dotted hotspots instead of an even wash. The fix was peeling it back and recessing the strip about two inches from the panel’s perimeter, where the shadow line diffuses the light properly.
Cost lands around $25–40 for a decent strip with adhesive backing and a dimmer. Skip the RGB kits unless you want your living room to look like a gaming setup; warm white or daylight white is what makes this look built-in rather than novelty.

Versatile Floating TV Stand: The Atelier Mobili floating media console is a stylish and modern wall-mounted TV stand that accommodates TVs ranging from 65 inches to 80 inches, making it a versatile choice for living rooms and bedrooms

Optimize Your Space: Size: 43.7"L x 11.0"W x 8.9"H. Our floating TV stand saves valuable floor space and includes generous storage for all your media essentials - routers, DVD players, remotes, projectors, set-top boxes, game consoles, TV components, and decorations

【Modern Fluted Design】Elevate your living room with the textured waveform fluted panels and matte finish. This floating TV console combines minimalist aesthetics with robust construction, complementing contemporary or mid-century decor. Ideal for impressing guests while organizing essentials.
7. High-Gloss Acrylic TV Unit Design

A high-gloss acrylic finish catches light like glass and reads as expensive even on a modest cabinet. The surface is actually plastic, thermoformed over MDF, which keeps the weight manageable for a rental move but scratches if you look at it wrong. Microfiber cloth and water are the only safe cleaners; paper towels drag grit across the face and leave hairline trails that show under lamp light.
For busy households, the upkeep is real. Fingerprints appear on every edge a toddler touches, and dust sits visibly in the gloss. I would not put this in a room that sees daily cereal bowls and remote-hunting. The effect is stunning in a low-traffic adult space, less so where life actually happens.
Renters can fake the look with high-gloss contact paper laid over a flat-front cabinet they already own. The seams at corners betray the trick up close, but from sofa distance the reflection reads the same. Peel it off when the lease ends and the deposit stays intact.

【Space-Saving Serenity TV Stand】Designed for studio apartments & 32/40/43 inch tv (31.7''W x 21.9''H x 15.7''D), this mid century modern tv stand features tapered legs and wood texture. The media console for corner and compact spaces, transforming unused areas into retro-elegant zones while infusing warmth into your living room or bedroom.

[Retro Fluted Appearance]: With the charming fluted look, this TV console effortlessly combines mid-century aesthetics with contemporary needs, infusing your home with a touch of elegance, making it a standout piece in the living room or bedroom.

Sturdy & Cleanable: This durable TV stand features 5 supportive legs and anti-scratch foot pads to protect your floors. Built with premium solid board, it stays sturdy for years of use. The open undercarriage makes daily cleaning super easy—simply wipe it with a dry or damp cloth to keep the whole unit neat and effortless to maintain
8. Modular TV Unit with Clean Lines
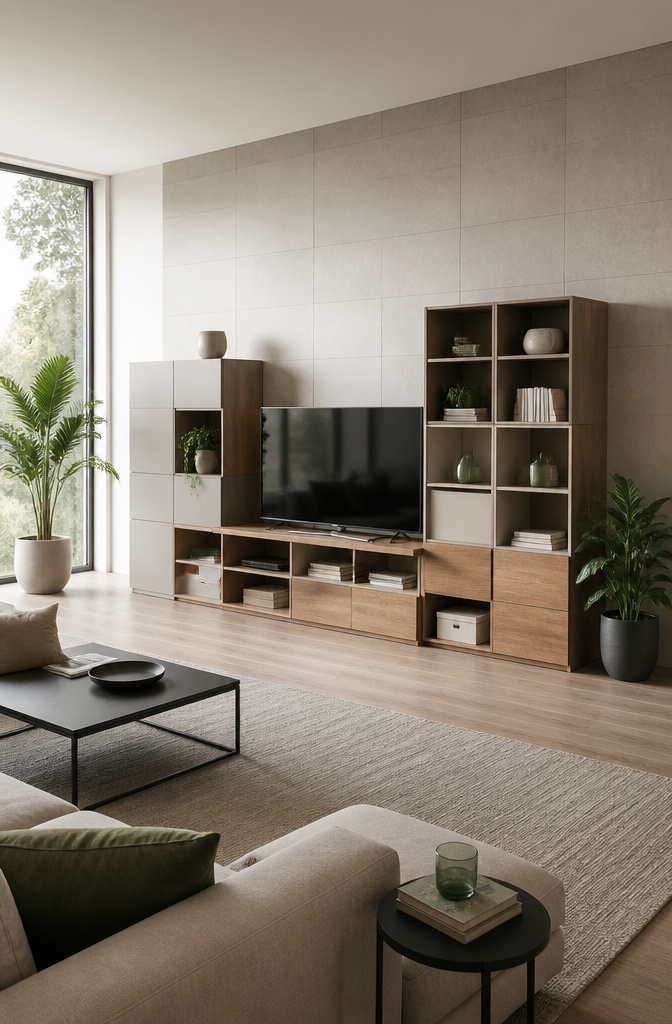
Cube systems split the difference between furniture and building blocks. The first set I bought was a four-by-two grid from IKEA’s Kallax line, $79 in 2019, chosen mostly because it fit in a hatchback with the seats folded. Each square holds a 13-by-13-by-15-inch basket, which swallowed a router, three gaming consoles, and the mess of cables that used to live on my floor.
The real test came eight months later when I moved to a third-floor walkup with a narrower living room. I broke the unit into two vertical stacks, set one on either side of the TV, and gained about four feet of wall space without buying anything new. The particleboard edges scuffed slightly where the connecting hardware gripped, but the finish held up well enough that I didn’t bother touching it up.
For renters, modular units repay their cost if they survive one reconfiguration. Thuma’s Nest Media Console, at $2,125, is built for this explicitly: magnetic joinery lets the same shelves serve as a low credenza or a taller tower. The Douglas console from West Elm, with its solid wood and tatami door panels at $1,099, will outlast particleboard but weighs enough that you’ll want to disassemble it for stairs, not pivot. Both limit you to cabinet storage only, so plan your streaming box placement before you commit.

Easy Wall Mounting:Skip the complicated assembly process. This floating TV stand arrives fully assembled, allowing you to mount it quickly and enjoy a clean, modern entertainment space with minimal effort.
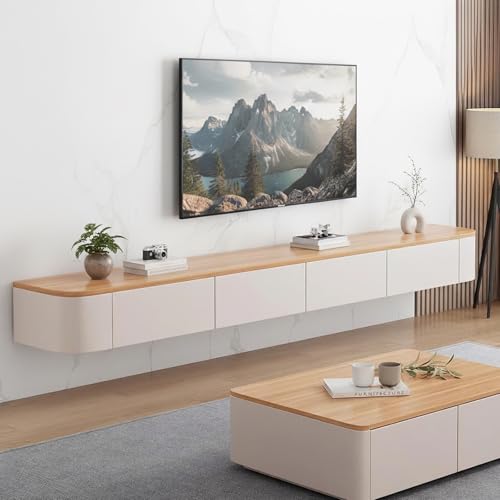
Easy Wall Mounting:Skip the complicated assembly process. This floating TV stand arrives fully assembled, allowing you to mount it quickly and enjoy a clean, modern entertainment space with minimal effort.
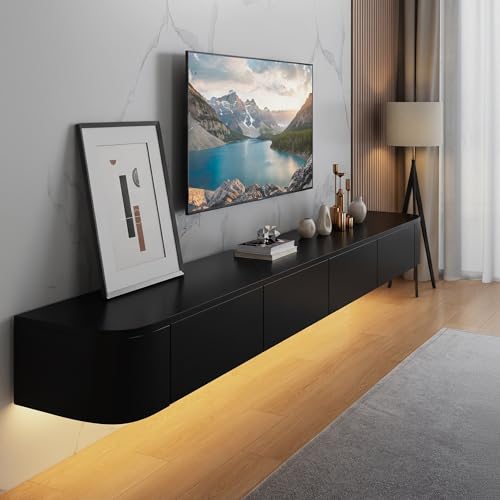
Easy Wall Mounting:Skip the complicated assembly process. This floating TV stand arrives fully assembled, allowing you to mount it quickly and enjoy a clean, modern entertainment space with minimal effort.
9. Scandinavian Style Minimal TV Stand Design
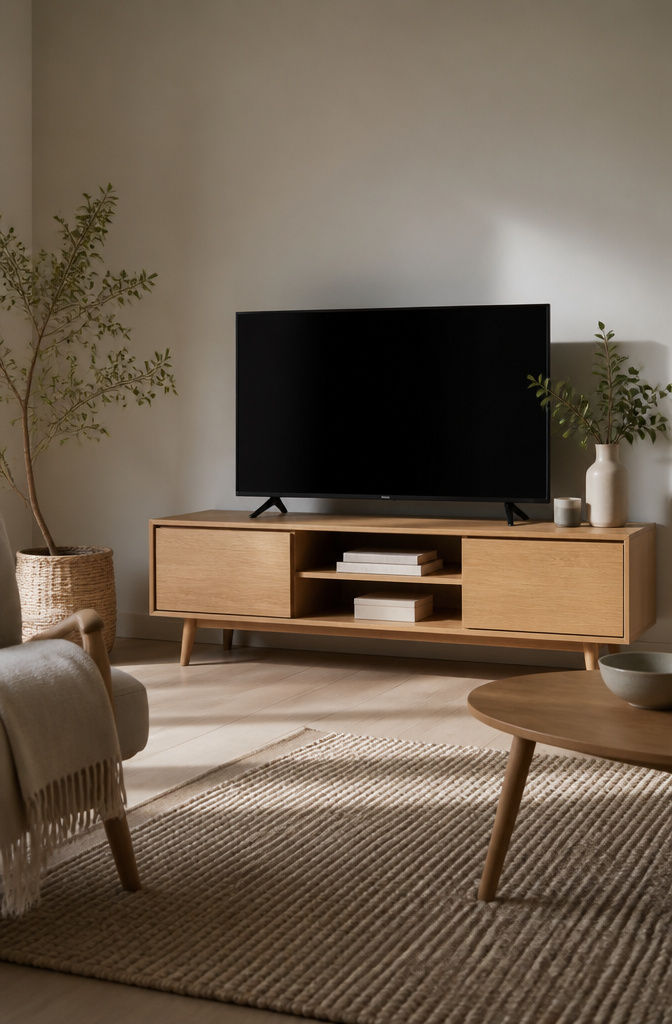
Light oak with tapered legs and a restrained footprint is the Scandinavian signature that works best for renters and first-home owners. The 70.87-inch width hits the sweet spot for American TVs up to about 65 inches without swallowing a small living room, and the 15.43-inch depth keeps walkways clear in tight apartments.
Cable management in this style runs through slots in the bottom panel rather than an open back, so the unit can float in the middle of a room or sit against a wall without cord chaos visible from any angle. Two open shelves handle the cable box or router you need quick access to; two closed compartments swallow the spare cords and board games that otherwise colonize the floor.
The affordable entry here is manufactured wood with particle board construction, not solid oak. That drops the price to around $227, though color options stay limited to oak. If you want real hardwood and a 70.75-inch slatted front, the cost jumps to roughly $3,995 and the unit arrives fully assembled. For a weekend project budget, the manufactured option delivers the look; the hardwood version only makes sense if you plan to keep it through a move or two.

Toggle Bolts for Drywall for 1/4"-20 With Bolts,Holds 265 lbs on Drywall,These sturdy anchors are of high strength, ensuring stability and are used for installing cabinets and TVS.The bolt can be removed without losing the fixed point behind the wall.After installation,the anchor stays in place even when bolts are removed, facilitating easy fixture swaps.

🔩 Hang with Confidence: When it comes to hanging heavy objects securely on walls, finding the right anchor is crucial. That's where Qualihome's toggle anchor with bolts comes in. These wall anchors are designed to make mounting tasks a breeze. Whether it's shelves, or a TV bracket, our toggle anchor design ensures maximum stability and strength.

Mount Your TV Where You Want It, Not Just Where the Studs Are: When there's no stud where you need one, these heavy duty drywall anchors deliver 255lbs of holding strength into the wall. Perfect for flat and tilt TV brackets on 1/2" & 5/8" drywall
10. Modern Built-In TV Wall Unit Design
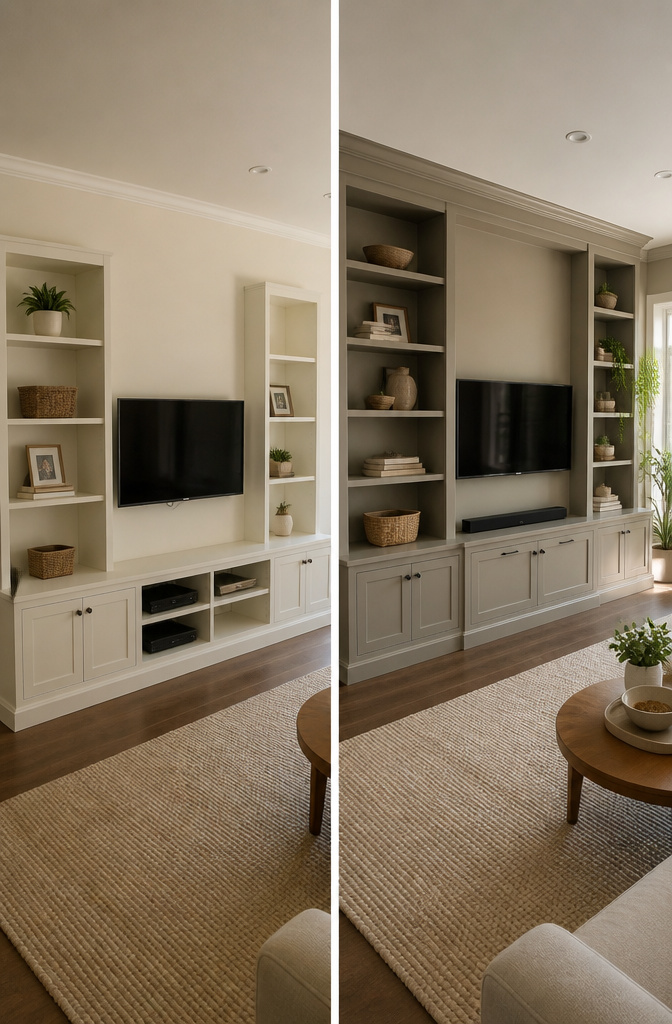
Built-in wall units look expensive because they are. Custom millwork starts around $3,000 and climbs fast, and landlords do not thank you for the holes. The renter’s version leans on three things that read as permanent but pack into a U-Haul later: freestanding bookcases, added molding, and paint that matches the wall behind them.
Ikea Billy bookcases, 30 inches wide and 11 inches deep, line up against the wall with their backs removed so cables pass through. The trick is the gap. Even pushed tight, two units leave a seam and a wobble. Quarter-round shoe molding, nailed to the front face of the shelves and painted to match, fakes the look of a single cabinet run. The molding is pine, cheap, and fills the visual break without joining the cases permanently. What you lose is the back panel rigidity; the shelves need L-brackets into wall studs or they lean under a television’s weight. Those brackets leave screw holes, which is the honest trade. Spackle fills them later, but the paint touch-up never disappears completely on flat or eggshell finishes. Satin hides the repair better.
Paint the bookcases the exact wall color, not a contrast shade, and the eye stops reading them as furniture. I learned this watching a friend do it wrong in a rental in Queens: navy shelves against white walls shouted "temporary storage." Her second try, matching Benjamin Moore’s Chantilly Lace, looked like architecture. The units came with her to the next apartment and read just as built-in there, because the wall color changed with them.
Crown molding across the top, cut to span the whole run and attached with finishing nails into the bookcase tops, completes the illusion. It is removable, but the nail holes in the cabinet are permanent. That damage is yours, not the landlord’s, which is the cleaner split. I have seen people use command strips for the crown; it holds for six months, then drops on the TV during a humid August. Not worth the risk.
Materials & Design: Made from high-quality PVC, the table cover protector is highly durable and resistant to wear and tear, the clear and frosted design allows the natural beauty of your table to shine through, blending seamlessly with any decor while providing effective protection
Materials & Design: Made from high-quality PVC, the table cover protector is highly durable and resistant to wear and tear, the clear and frosted design allows the natural beauty of your table to shine through, blending seamlessly with any decor while providing effective protection
Materials & Design: Made from high-quality PVC, the table cover protector is highly durable and resistant to wear and tear, the clear and frosted design allows the natural beauty of your table to shine through, blending seamlessly with any decor while providing effective protection
11. Marble TV Unit Design for Luxury Spaces
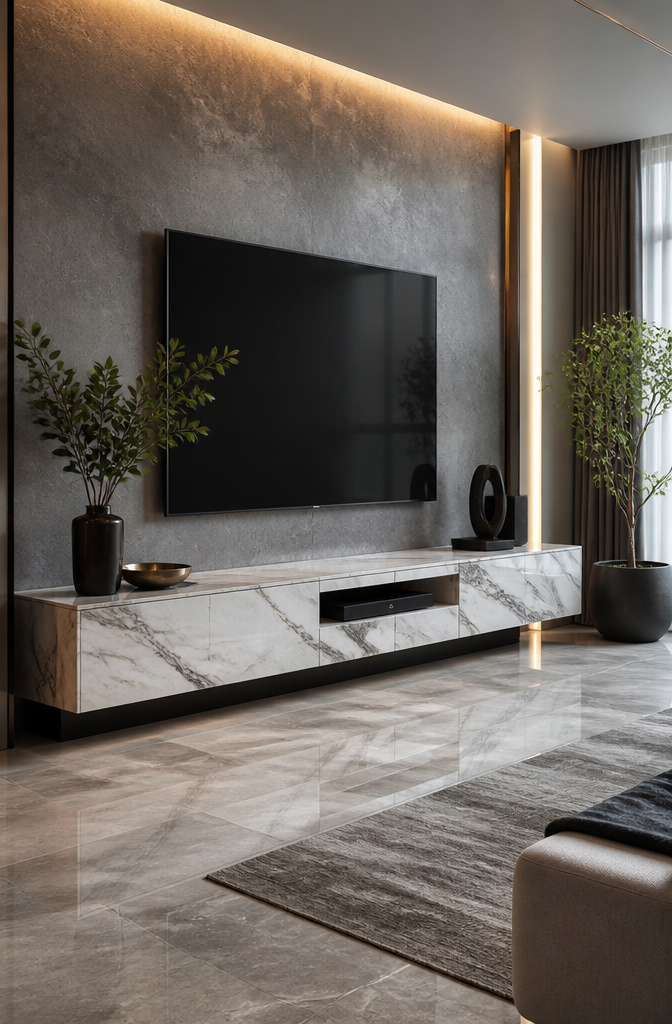
Real marble weighs enough to crack a subfloor before you notice the sag. In a rental, that rules out anything but a surface treatment, and even then the slab has to stay thin. Laminate with a pressed stone pattern runs about one eighth the weight and, at three feet, fools the eye if the veining is printed rather than photographed. Contact paper works for a single panel backing the television, but the adhesive fails around heat vents and the edges lift within a season of dusting. Remnant stone from a countertop shop gives you a genuine face for the price of a cutout sink hole, though the piece you find dictates the cabinet size rather than the other way around.
A single marble-look panel, the kind sold as shower surround material, hits the middle ground. It comes in 60 by 96 inch sheets, cuts with a circular saw, and mounts with construction adhesive to a plywood skin. Budget around $180 for the panel, $40 for the skin, and a weekend for the glue to cure. The finish is polyester, so it scratches if you slide the TV base across it; lift and place instead.
12. Dark Premium Veneer TV Panel with Gold Motifs
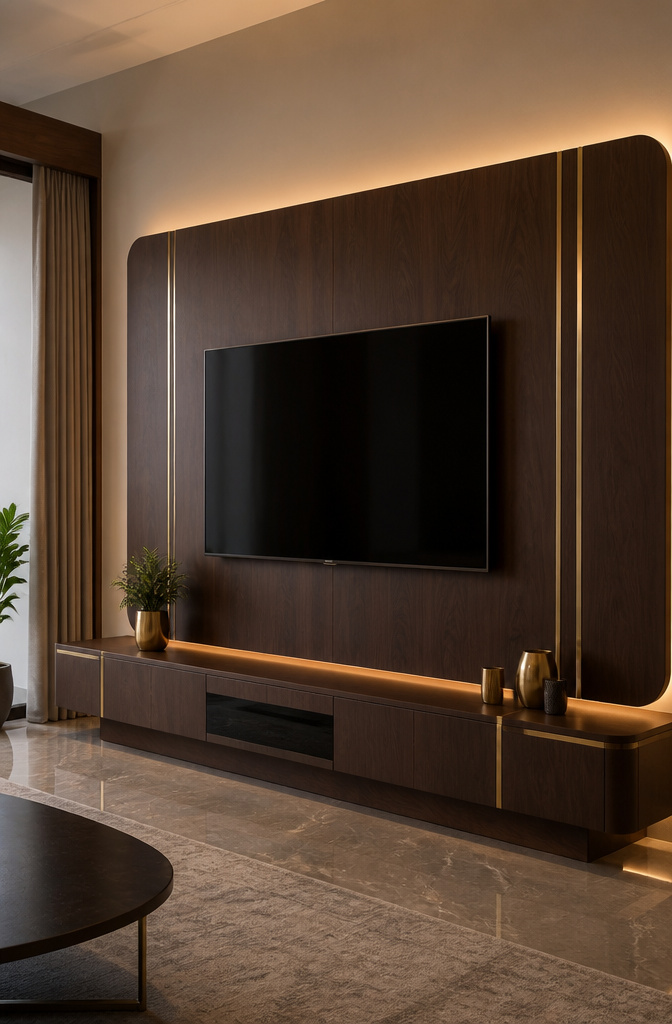
Dark veneer with brass trim reads expensive because it is expensive when done traditionally. Peel-and-stick veneer sheets and brass strip rolls let you fake the built-in look on a standard cabinet without the built-in price. The veneer goes over flat panel doors or a simple plywood backing; the brass cuts with tin snips and presses into place with a rubber roller.
The adhesive needs a full 72-hour cure before you load the cabinet. I learned this the winter I rushed a guest-room dresser. The panels lifted at the corners after three days because I set a lamp on top to test the look. Heat from the bulb softened the glue that had not yet set. The lamp went back in the box, the panel came off, and I started over with fresh sheets.
A full wall panel in walnut or espresso veneer runs about $80–120 for materials. Brass trim adds another $25–40 depending on how much linear footage you wrap. The paisley or lotus motifs from traditional designs translate here as simple geometry: two horizontal brass bands across the cabinet face, or a perimeter frame. The motif is the brass itself, not what’s carved into it, and the dark ground does the work of making it read as luxury rather than hardware.
13. Elegant TV Cabinet with Glass Showcase
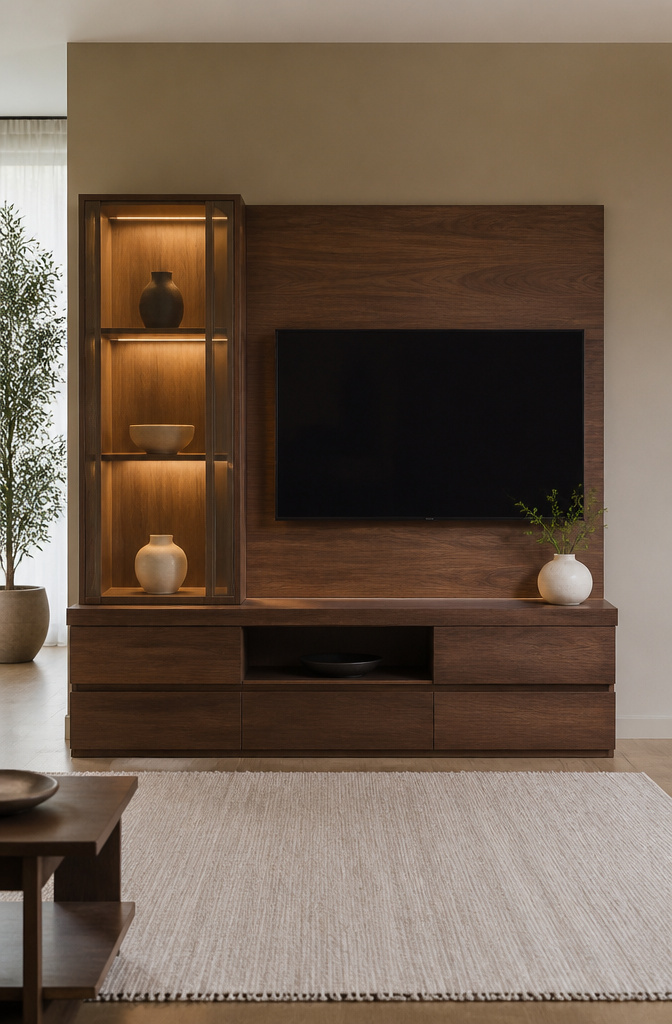
Tempered glass on a media cabinet reads two ways: either you own the objects behind it, or the glass owns you. The Sundays Glimpse unit at 63 inches wide uses a gallery-style pane up top, which keeps dust off keepsakes while still letting light pass through. That part works. What separates curation from clutter is the restraint of what goes inside. Three or four pieces with actual space between them will look intentional; a full shelf of every figurine and vacation rock you own will look like a storage problem wearing a frame.
Lighting inside the cabinet changes the equation entirely. A string of battery-powered LEDs tucked behind the glass turns the display into something the room notices after dark, not just something you walk past. The hardware runs roughly $15–$30 for a basic kit, or up toward $60 if you want a dimmer and a warmer color temperature. Hardwiring is an option only if you are comfortable with a drill and a switch, and most renters should skip it.
The Glimpse sits at $2,350, solid wood and tempered glass together. That price is the trade. For a weekend budget, the same glass effect can come from a used cabinet with a pane swapped in, or from a simple console where you add the lighting yourself and leave the top open.
14. Concealed LED Lights and TV Wall Design for Hall
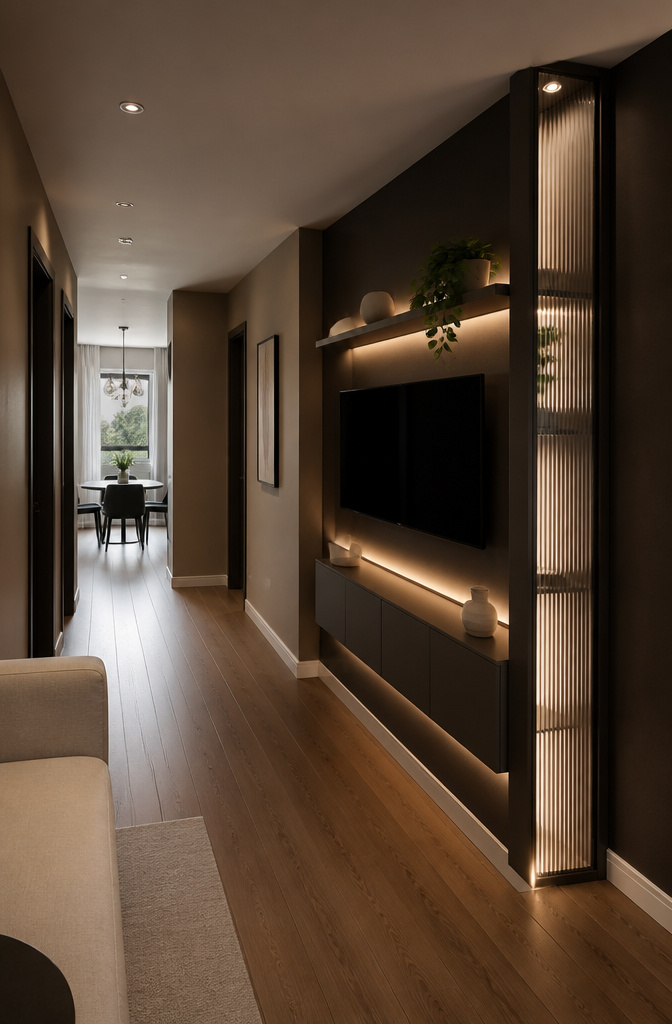
Hallways fight a media wall harder than any living room. The space is narrow, people pass through rather than settle in, and any light source ends up at head height or worse. A standard 18-inch deep cabinet blocks the route in anything under five feet of clear width; a 12-inch depth is the practical ceiling for most hallways, and that shallow box forces every wire and outlet into the wall behind it rather than the unit itself.
Cove lighting up top solves the glare problem that kills most hallway screens. The wash hits the ceiling first, so the light is indirect by the time it reaches eye level, and a soft yellow tone warms a zone that would otherwise feel like a corridor you rush through. Backlit panels behind the screen do the opposite of what you want here: they throw light forward, straight into passing eyes, and in a hallway that traffic is constant. The reeded glass trick, lit from within, works because the texture diffuses the source; the glow reads as furniture, not a fixture.
Dark paint on the wall behind the screen is the other half of the fix. It kills the contrast that makes screens look washed out under ambient light, and in a hallway where you cannot control the angle of every viewer, that matters more than in a seated living room. The mood is a side benefit; the real point is you can run the cove dim without losing the picture.
15. TV Unit with Wallpaper Back Panel
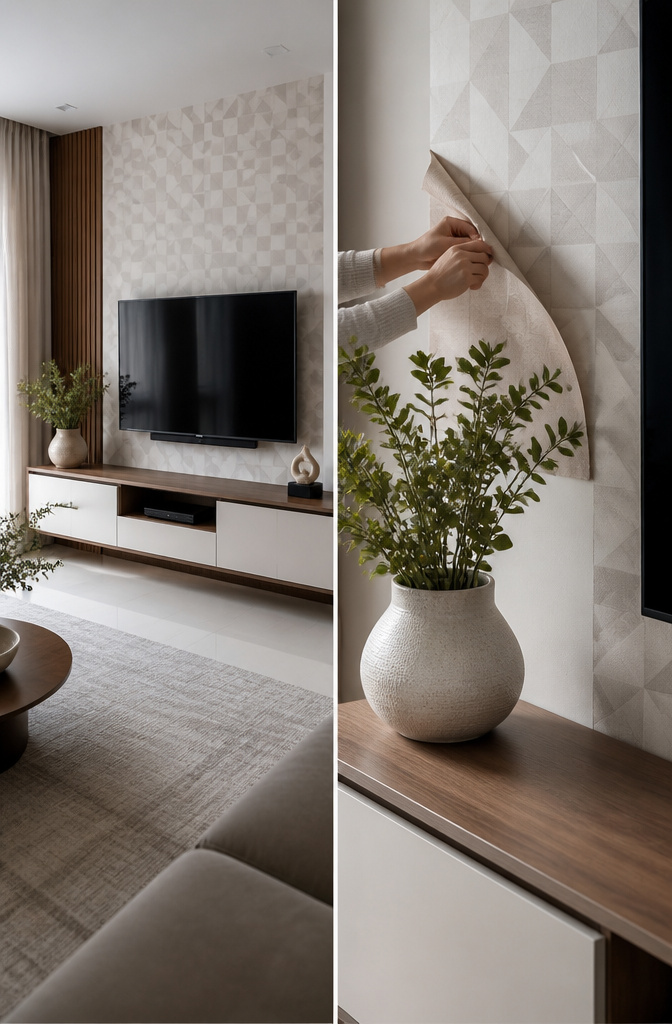
Removable wallpaper turns a flat TV wall into something that actually holds your eye without fighting the screen. I learned the hard way that small-scale patterns photograph better than large ones, which tend to strobe and compete with whatever is playing. Geometrics in the two-to-four-inch range, subtle textures, and tonal stripes all sit back nicely; oversized florals or high-contrast geometrics demand attention you probably want on the movie.
For renters, a mounted panel solves the commitment problem. A half-inch plywood sheet, cut to your wall width and framed with simple one-by-two trim, becomes a wallpapered rectangle you screw into studs and patch over later. The cabinet sits in front, the panel floats behind, and both leave together when the lease ends. I chose a pale grasscloth-look vinyl in greige for my last apartment; it added warmth the beige wall lacked, and in photos the texture read as intentional rather than busy. The cabinet was a basic IKEA Besta, but the panel behind it made the whole wall look considered in a way paint alone never had.
16. Simple Wall-Mounted TV Cabinet Design

A wall-mounted cabinet with enclosed storage sits closer to the wall than a floating unit and carries its weight on a frame rather than cantilevered shelves. The difference matters in small rooms where every inch counts, and in rentals where a patch behind a single box is simpler than a long line of wall repair.
Stud spacing, usually 16 inches on center in most American framing, is the first thing to check. Miss the stud and the lag bolt pulls out slowly, or all at once. I have watched a cabinet sag half an inch over a month because one of four bolts hit empty drywall; the doors never hung straight after that.
The hardware that held afterward was a pair of French cleats rated together for about 200 pounds, plus a single lag into the third stud for insurance. Cabinet weight varies by size and material, but MDF with ash veneer runs heavier than it looks. The Burrow Totem credenza at 52 inches wide and 24 inches high is floor-standing, but its proportions give a sense of how much mass is involved once you lift something similar onto a wall.
For a sideboard-mounted look without the floor footprint, keep the cabinet height low enough that the TV center stays near seated eye level. A 22-inch cabinet like the West Elm Douglas console would sit fine beneath a wall-mounted screen, though the Douglas itself is not built for hanging. The principle transfers: low, enclosed, and directly mounted beats high and floating when the goal is hiding cables and consoles out of sight.
17. TV Unit with Integrated Fireplace

Electric fireplace inserts top out around 5,100 BTU, enough to warm a small living room but not the blast you might expect from the visual. The flame effect runs without heat, which is how most owners use them: ambiance for TV binges, not actual heating. The heat function is a six-hundred- to eight-hundred-dollar add-on over a basic insert, and in practice the money buys you maybe three months of shoulder-season use before the central system is still doing the real work.
What had me re-cutting trim last March was clearance. Manufacturers call for three inches minimum from any combustible side panel, and more to the top if your cabinet encloses the unit. My first build ignored the side gap; the MDF started bowing in six weeks from the residual warmth. Keep three inches to wood on every surface the insert touches, and run the cord so it does not drape across the vented top. The insert itself needs nothing fancy, just a standard 120V outlet, but plan that location before you build the box around it.
18. Dynamic Bookshelf TV Stand
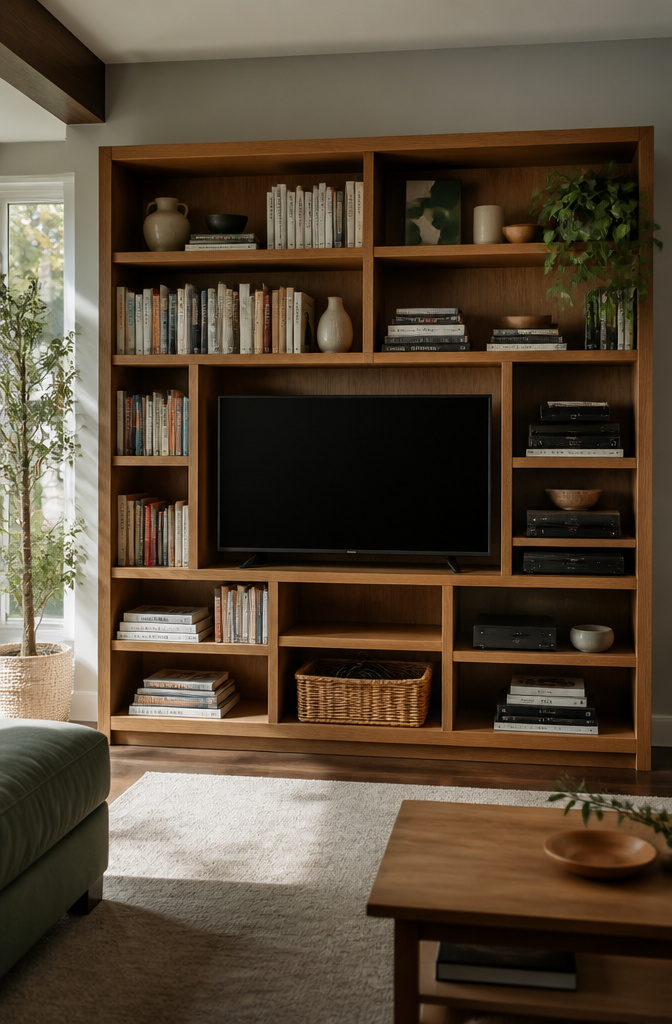
A standard bookcase can become a TV stand if the shelf spacing clears your components and the frame handles the weight. Most vertical shelves run 11 to 13 inches between fixed shelves, which works for a cable box or streaming stick but chokes a soundbar or receiver. Measure your tallest device before committing, and look for units with at least one adjustable shelf, or a gap of 15 inches or more somewhere in the stack.
With a weight capacity of 363 pounds, you can store a range of your tech devices and video game consoles in here without it teetering over.
That kind of headroom matters because a 65-inch screen plus a console and a few hard drives pushes past 150 pounds fast. I would not trust a particleboard back panel to hold that alone. Anchor the unit to studs, and if the shelves start to bow, a steel L-bracket under the lowest loaded shelf costs about four dollars and buys years.
Styling this setup means accepting that books and electronics compete for attention. I keep paperbacks to one side and devices to the other, with a woven basket on the bottom shelf for the cords and remotes that otherwise colonize the middle. The eye reads it as intentional rather than temporary, which is the whole point of using furniture you already own.
19. Conceal the TV Under a Mirror

A two-way mirror TV cabinet hides the screen behind glass that looks like ordinary mirror when the set is off. The illusion needs real engineering. The glass itself runs thin, around a quarter inch, with a partial reflective coating that passes some light while bouncing the rest back at you. That coating has to match your TV’s brightness or the picture dies in the reflection.
Brightness is the make-or-break detail. Most living room TVs output 300 to 400 nits, which struggles against daylight hitting a mirror surface. You either buy a display built for high-brightness environments or accept that this only works in a room you can darken. Plan on at least 700 nits, and test the mirror sample against your actual windows before you commit. Anything less and you are watching a dim ghost of your show through your own reflection.
The mirror alone cost me, reading through build logs, somewhere between $200 and $400 for a 55-inch piece of custom-cut dielectric glass. Cheaper acrylic exists but scratches when you breathe on it and warps the image. Picture quality does suffer slightly even with good glass: contrast drops, blacks lift to dark gray, and off-angle viewing gets worse because the reflective layer fights the backlight. For a bedroom TV you watch straight-on at night, the trade is acceptable. For a main living room set with windows and seating scattered around, the mirror becomes a $300 downgrade you installed yourself.
20. Use a TV Lift

Motorized TV lifts hide the screen inside a cabinet or bench, then raise it on a column when you press a button. Most kits run off 110V and fit into standard furniture heights from about 26–36 inches, though you need a hollow cavity roughly four inches deeper than the lift itself plus the screen thickness.
The motors vary in noise. Budget units hum audibly for twenty to thirty seconds; pricier ones dampen sound with rubber mounts and slower movement. Common failure points are the limit switches that tell the motor to stop, stripped gears from overloading, and sag in the column after a few years of daily use.
For a rental or first home, the cost is hard to justify unless you genuinely need the floor space back. The mechanism alone often runs more than a complete conventional cabinet, installation requires cutting and reinforcing existing furniture, and moving it means uninstalling wiring and possibly patching holes. The payoff is real in a studio where the TV lives in the footboard and the same wall hosts a desk, but for most people in this phase, a regular credenza with good cable management does ninety percent of the work for a fraction of the price and none of the repair risk.
Frequently Asked Questions
How big should my TV unit be?
A 40-inch TV needs a unit 110–140 cm wide, a 50-inch needs 140–170 cm, and a 60-inch needs 170–200 cm. That extra width keeps the proportions from looking like a shelf that lost a fight with the screen. Leave about a 10 cm margin between your cabinet’s inner width and the TV’s stated width to swallow power bricks and cable slack.
What are the latest TV cabinet ideas?
Wall-mounted floating units, modular cube systems, and sleek matte or high-gloss finishes are the directions worth watching. The article also covers LED backlit panels, curved sculptural builds, and Scandinavian minimal stands with tapered legs. Modular designs that reconfigure for new apartments have become especially practical for renters who move often.
How can I style a TV cabinet?
Keep decorative objects sparse and intentional; three or four pieces with breathing space between them beats a crowded shelf. Add a string of battery-powered LEDs inside a glass-front cabinet to turn the display into something the room notices after dark. For the wall behind the unit, small-scale removable wallpaper in greige or subtle texture photographs better than large patterns that strobe against the screen.





