
The fourteen projects and guides below run from a two-hour chair build to a framed arbor swing that needs structural hardware, with most landing in a single weekend.
What decides which one to start is whether the piece lives inside or out, since the finishing and the fasteners split on that line, and so does which pallet treatment is safe to use.
Heat-treated stock, the kind with an "HT" stamp, is the only sort that belongs in a bedroom or near food, and that distinction shapes half the choices here.
1. Pallet Coffee Table
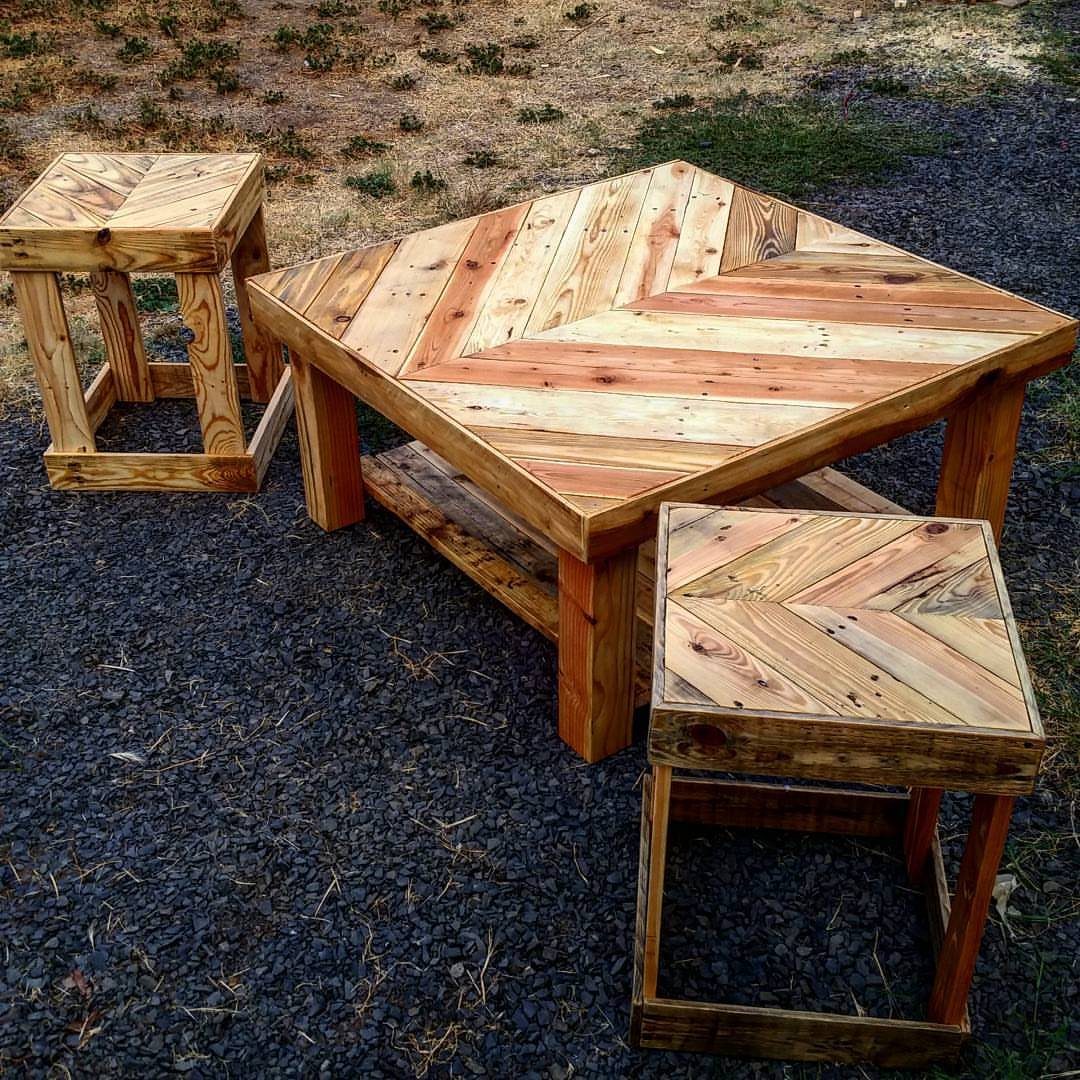
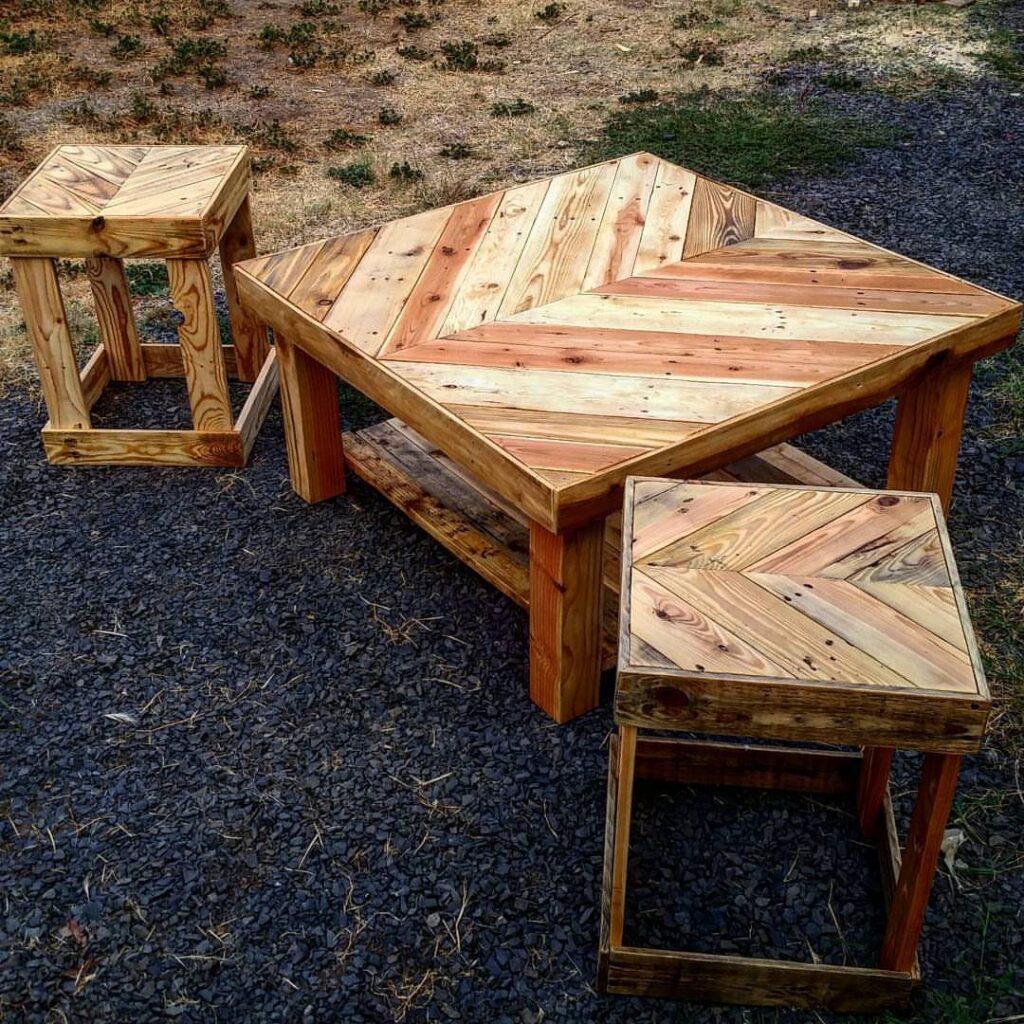
A chevron top turns pallet slats into something that reads as intentional, not makeshift.
Cutting the angles takes a miter saw and patience, and the surface catches light differently than straight boards. Two matching side tables keep the scale right for smaller spaces.
I like sealing the top with exterior-grade polyurethane even for indoor use; pallet wood is soft and drinks up spills otherwise. Sand fine enough and the splinters stay gone.
Sand it smooth, seal it well, and this outlasts most particle-board tables at any price.
You can make a lot of different furniture with pallets, from outdoor benches to indoor DIY coffee tables, and even bed platforms.
2. Pallet Outdoor Seating Arrangement
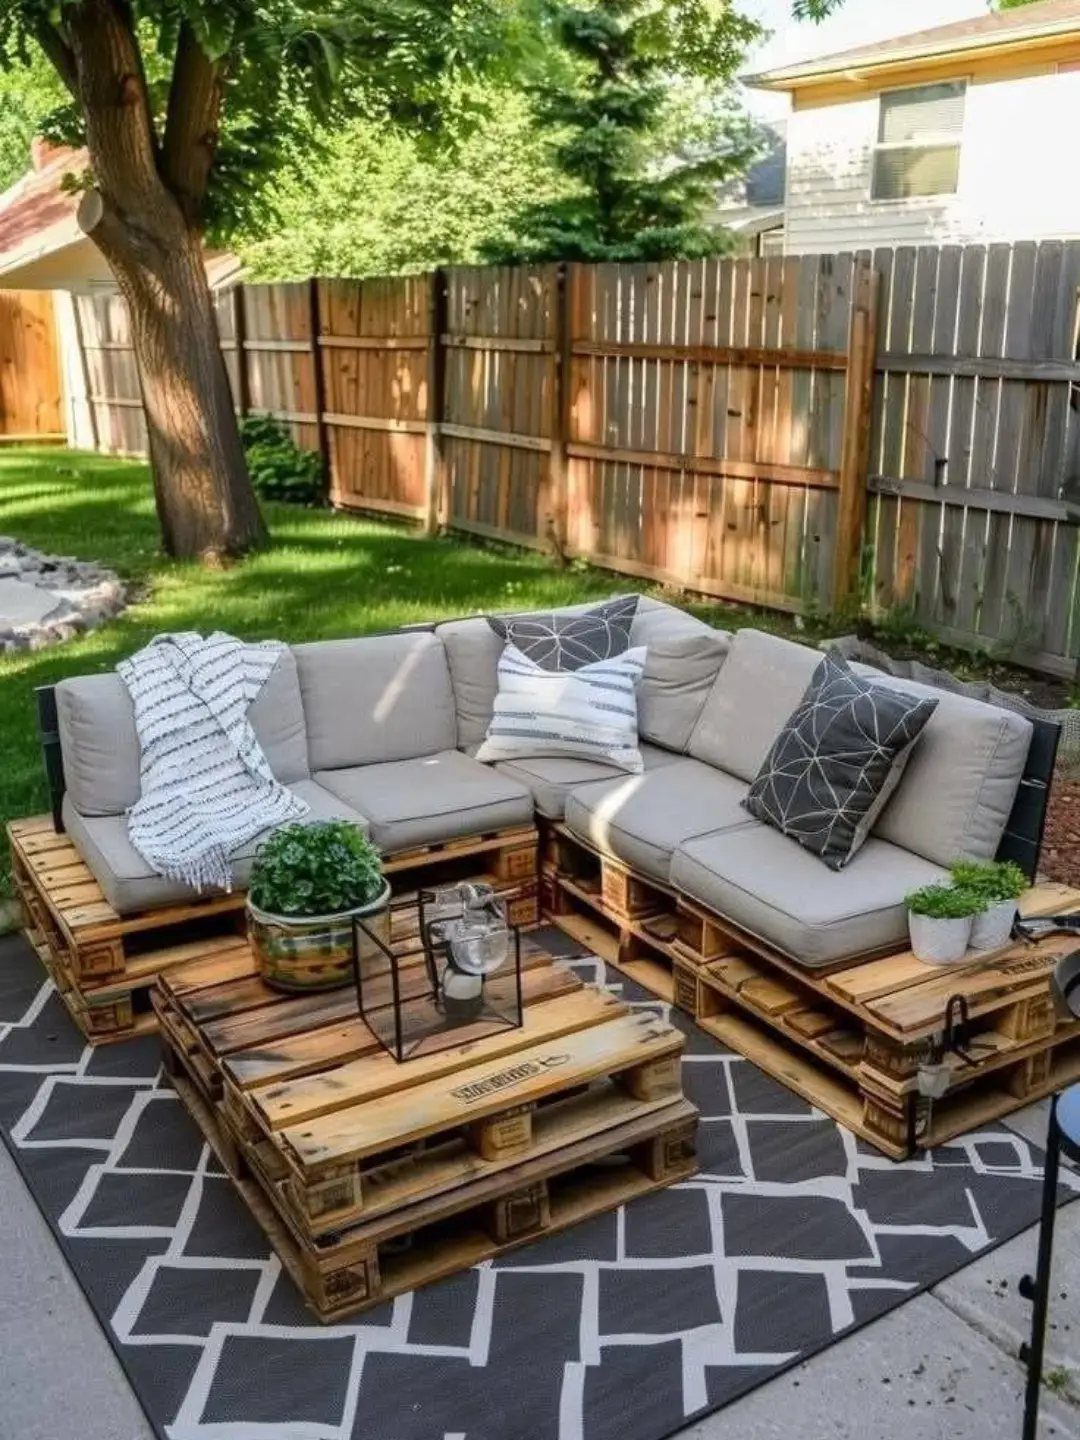
Stacked pallets build a sectional that lets you rearrange pieces season by season. Secure each layer to the one below with 3-inch deck screws so nothing shifts when someone leans back.
Outdoor cushions go on sale end of season, and they matter more than the wood. Grey hides pollen; navy hides dirt worse than it sounds.
Leave gaps between pallets for drainage, or the center rots out in one wet year. I have seen that mistake twice.
3. Pallet Bed Frame
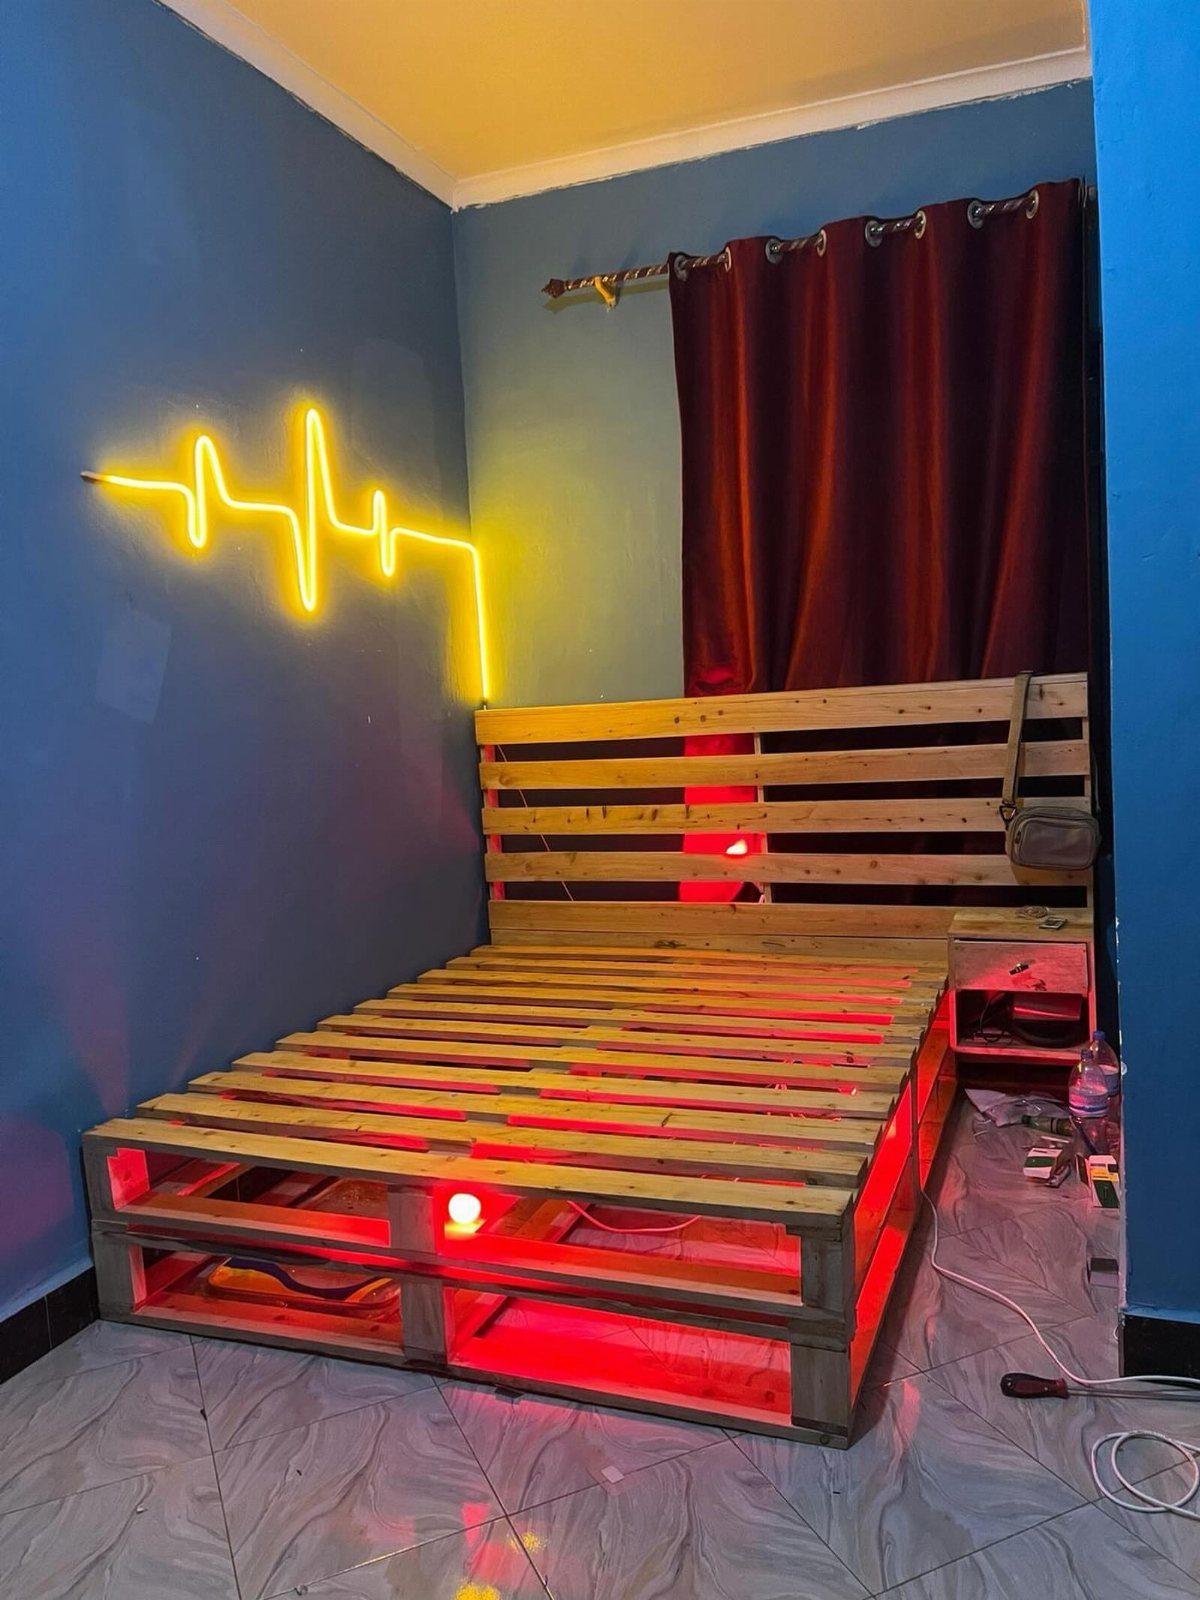
Platform height from pallets means storage underneath without a separate frame purchase. The slatted construction already breathes, which beats a solid platform for mattress longevity.
LED strips along the base need a channel to sit in so the tape adhesive does not give out from dust and floor moisture. Aluminum channels diffuse the light cleaner than bare diode dots.
A queen setup takes heat-treated pallets, sourced free from most warehouse loading docks. Ask for "HT" stamped; the chemical-treated ones are not bedroom-safe.
4. Pallet Garden Planters
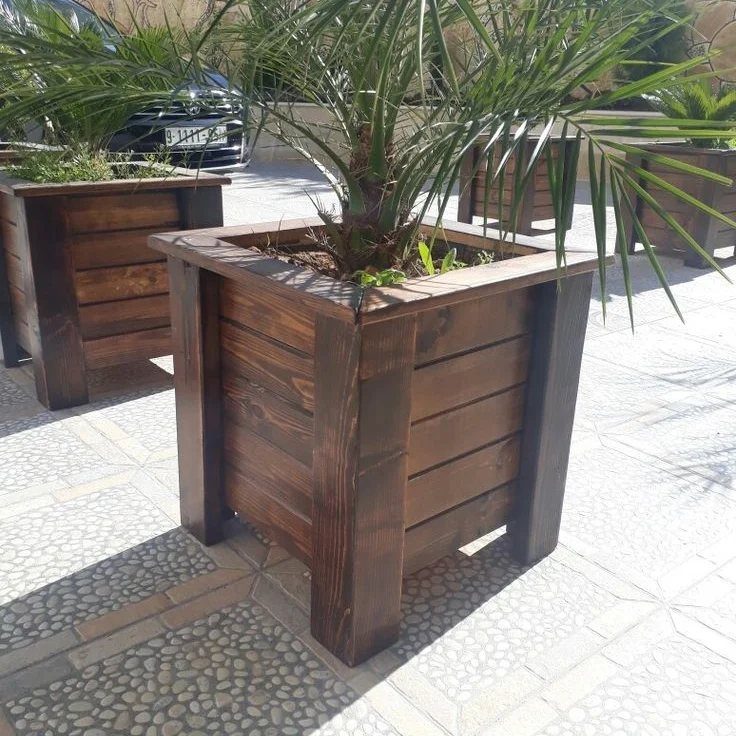
Deep box planters from pallet wood solve the root space that store-bought versions cheap out on. Corner posts raise the structure off the patio, which means drainage and less rot where it matters.
Line the interior with landscape fabric before soil; it buys 2 extra years before the wood succumbs. Dark stain on the exterior is a choice I would repeat: it recedes visually and lets the plants read as the feature.
Palm-sized specimens need enough soil depth for the roots to spread. Plan for that volume of mix in your hauling.
5. Pallet Bench
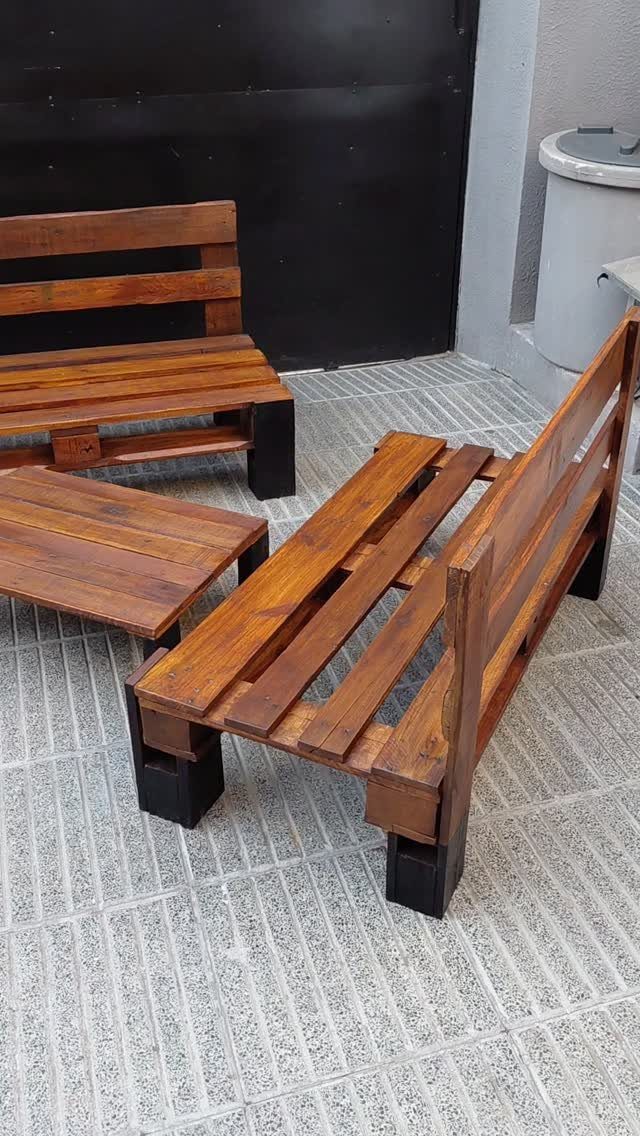
A backrest on a pallet bench changes it from temporary seating to somewhere you actually stay. Uprights extending above the seat with a horizontal brace at shoulder height make the stronger joint than back-attached slats.
Matching stain across bench and table unifies pieces built on different weekends. I would do the table first, then hold a slat against it to match color before committing the benches.
2 benches and a low table fill a patio corner without crowding the walking path. Scale to your slab.
6. Pallet Shelves
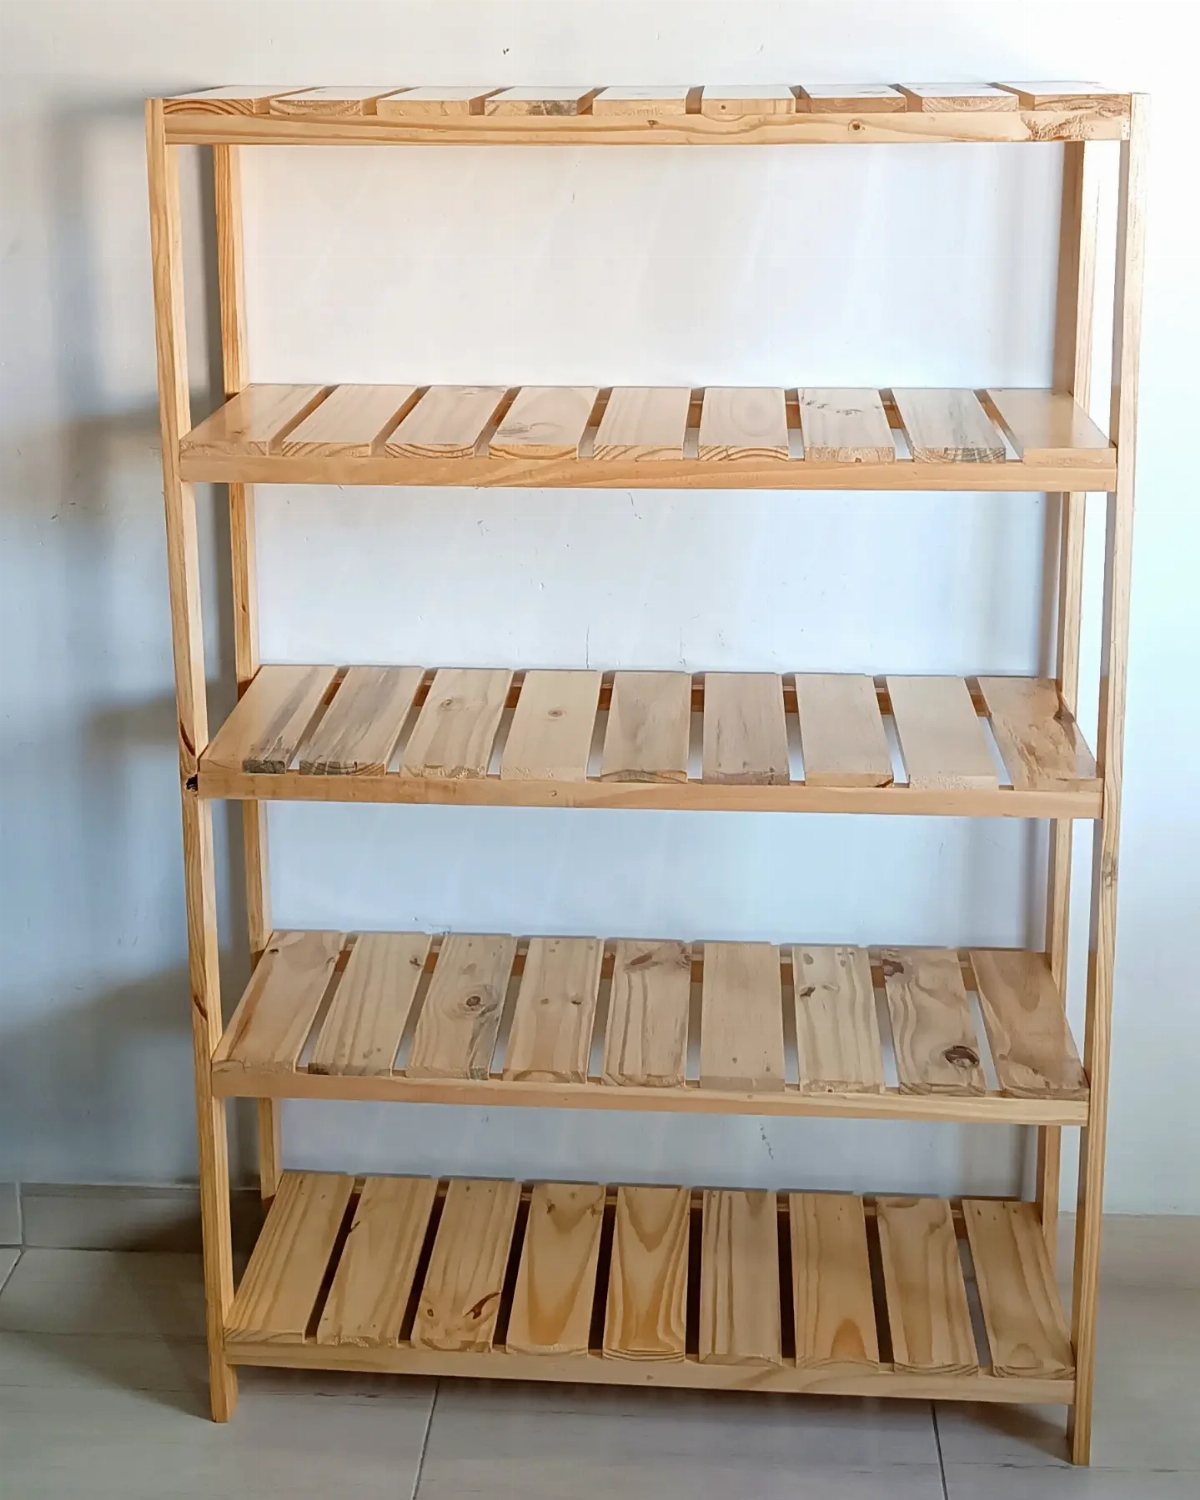
Slatted construction lets air move through, which matters more than it sounds for entryways and anywhere damp outerwear lands. Light wood reads as Scandinavian if you keep the lines clean and skip bulky brackets.
Wall-mount through the horizontal supports, not the slats; the slats split under load. Find studs, or use toggle bolts for the lower supports where weight concentrates.
Tiers spaced to fit folded linens, small plants, or the kitchen overflow. I would not load heavy books above the third shelf; the flex adds up.
7. Pallet Sofa
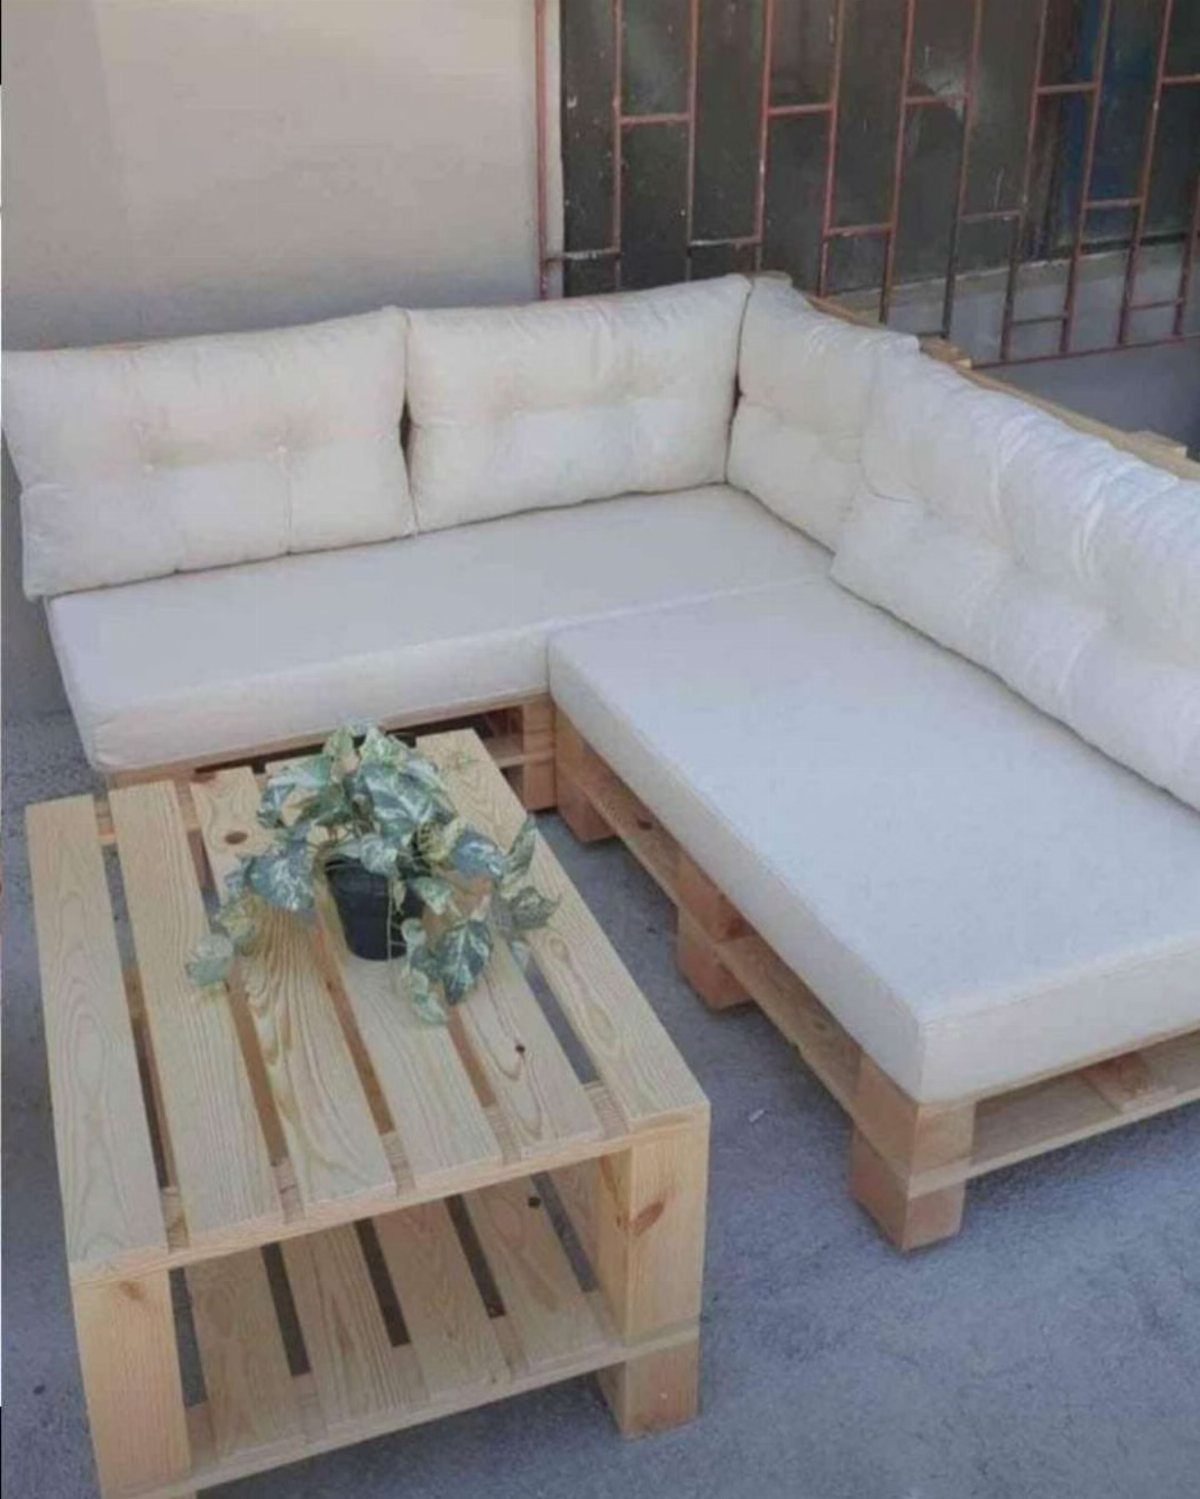
An L-shaped sectional from stacked pallets fills patio corners that store-bought furniture ignores. Raw light wood like this soaks up spills; I would seal it anyway, since cushions trap moisture against the slats.
Back cushions need a solid rear rail or they slide through the gap. A 2×4 across the back, screwed flush, solves it without changing the look.
Off-white reads clean against pale wood, though it asks for more washing than I prefer. Grey covers the same base with less vigilance.
8. Pallet Desk
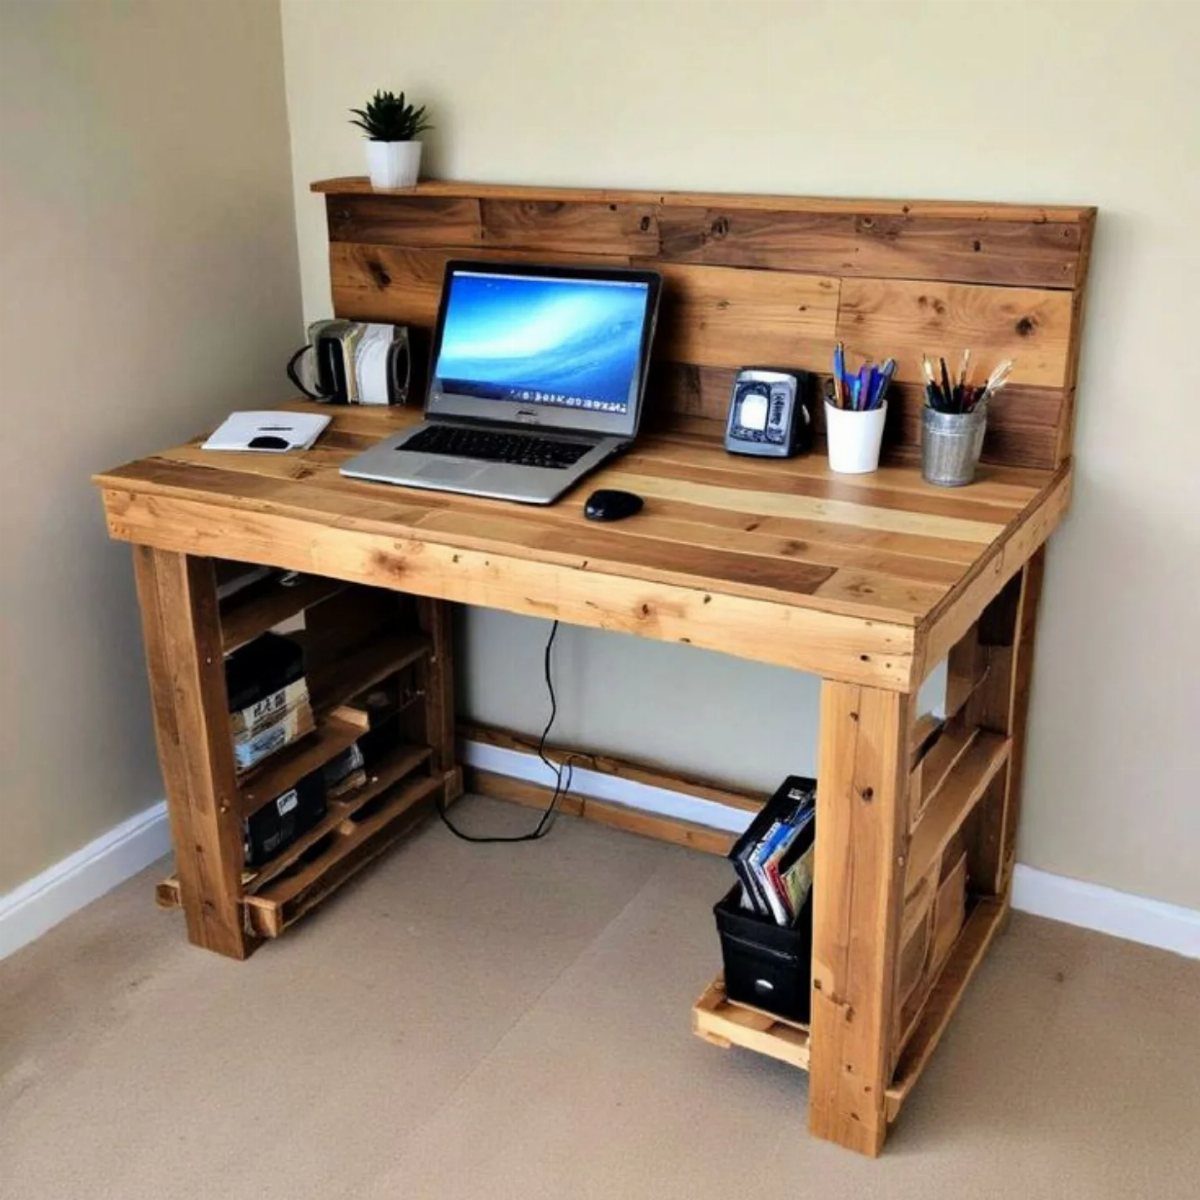
A pallet desk with side shelving keeps the laptop and the paperwork on separate levels, which matters more than it sounds for focus. The backboard hides cords that otherwise collect dust behind every monitor.
Wall-side placement lets the shelving cantilever; freestanding needs a diagonal brace or the weight tilts the frame. I would bolt through the pallet blocks into legs of 4×4, not 2×4, for the lateral stiffness.
Small plants on the backboard do fine if you skip the water tray; drips warp pallet wood in a week.
9. Pallet Wine Rack
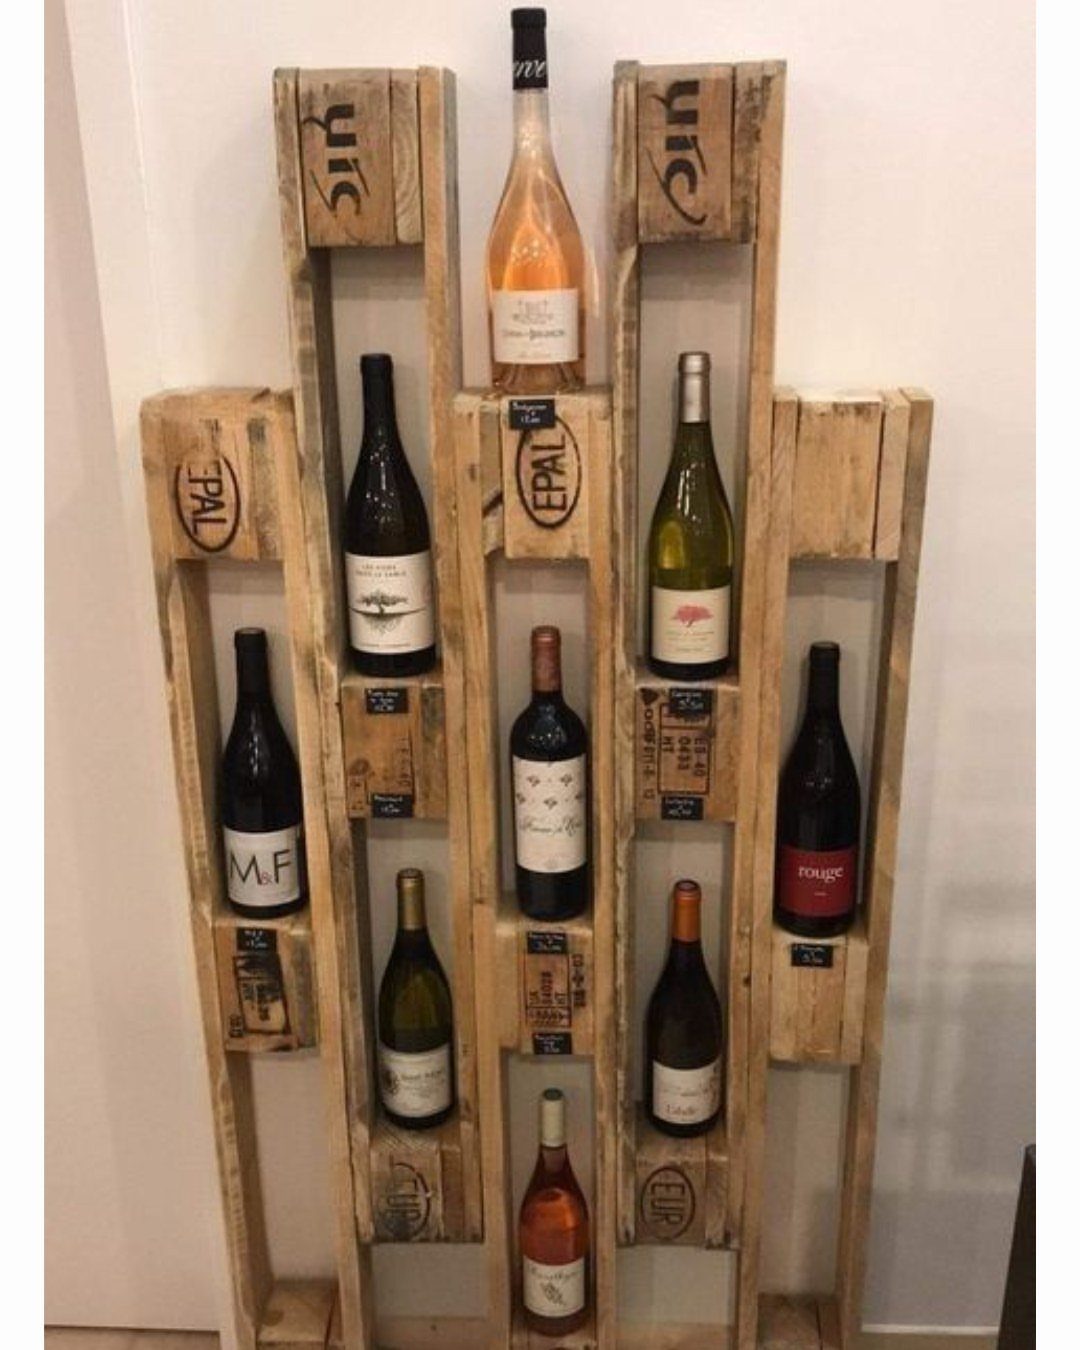
Leaning a full pallet against the wall turns its slat gaps into bottle rows with no cutting at all. The "EUR" and "EPAL" stamps mark heat-treated stock, which is what you want indoors.
Bottles store neck-down in the gaps between slats; the center rows hold the most, fewer if you use the wider outer gaps.
I would add a 1×4 across the base as a toe kick, so the bottom bottles do not roll forward when someone bumps it.
Wall-leaning needs non-slip pads or it walks on hardwood; a French cleat secures it flat if you prefer.
10. Pallet Wood Chair
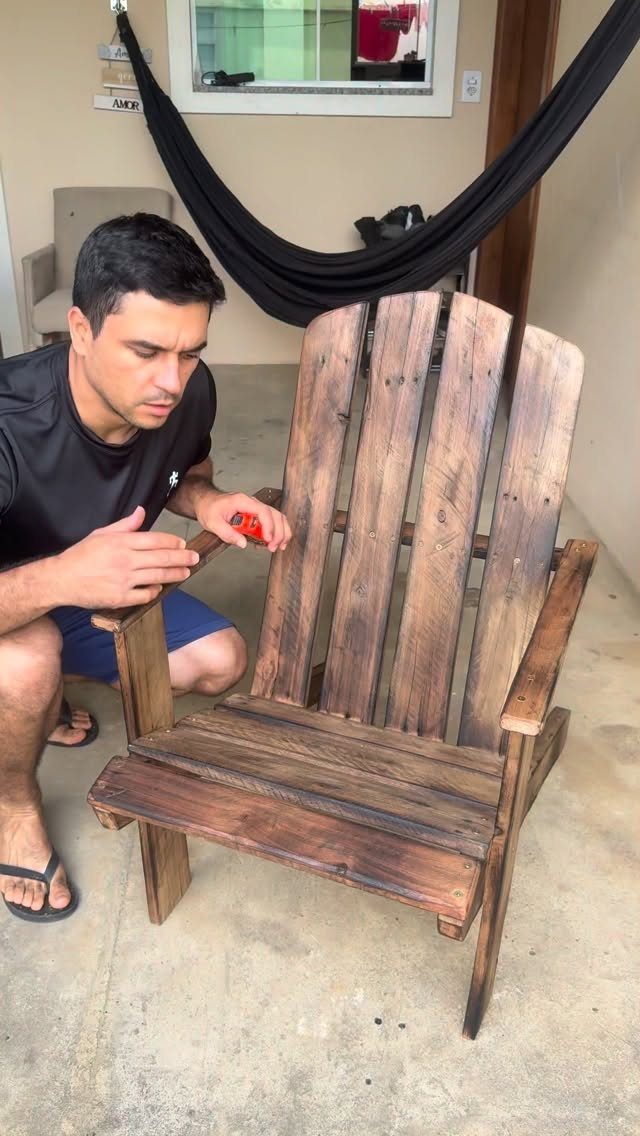
An Adirondack chair from pallet slats sits lower and wider than garden-store versions, which is the comfort of the type. Dark stain reads as finished furniture; raw pallet wood would look like what it is.
The two-hour build means pre-cut templates and an assembly mindset, not hand-planing. A jigsaw handles the curved back slats if you trace one master and clone it.
I would sink screws from the back face and plug the holes, since pallet wood splinters under countersinking from the show side. A tape measure checks square on these builds, not length; pallets vary enough that templates beat dimensions.
11. Pallet Bar

Standing height from stacked pallets puts the server at eye level with guests, which changes how the gathering flows.
A back rail keeps bottles from sliding during the reach; the pitcher and glass sit safer with one. 2 pallets deep gives shelf space behind the working face for backup stock.
I would hinge the front face for a drop-down that extends the counter to buffet depth when needed. The bucket hat is optional; the 2 thumbs up are earned.
12. Pallet Swing
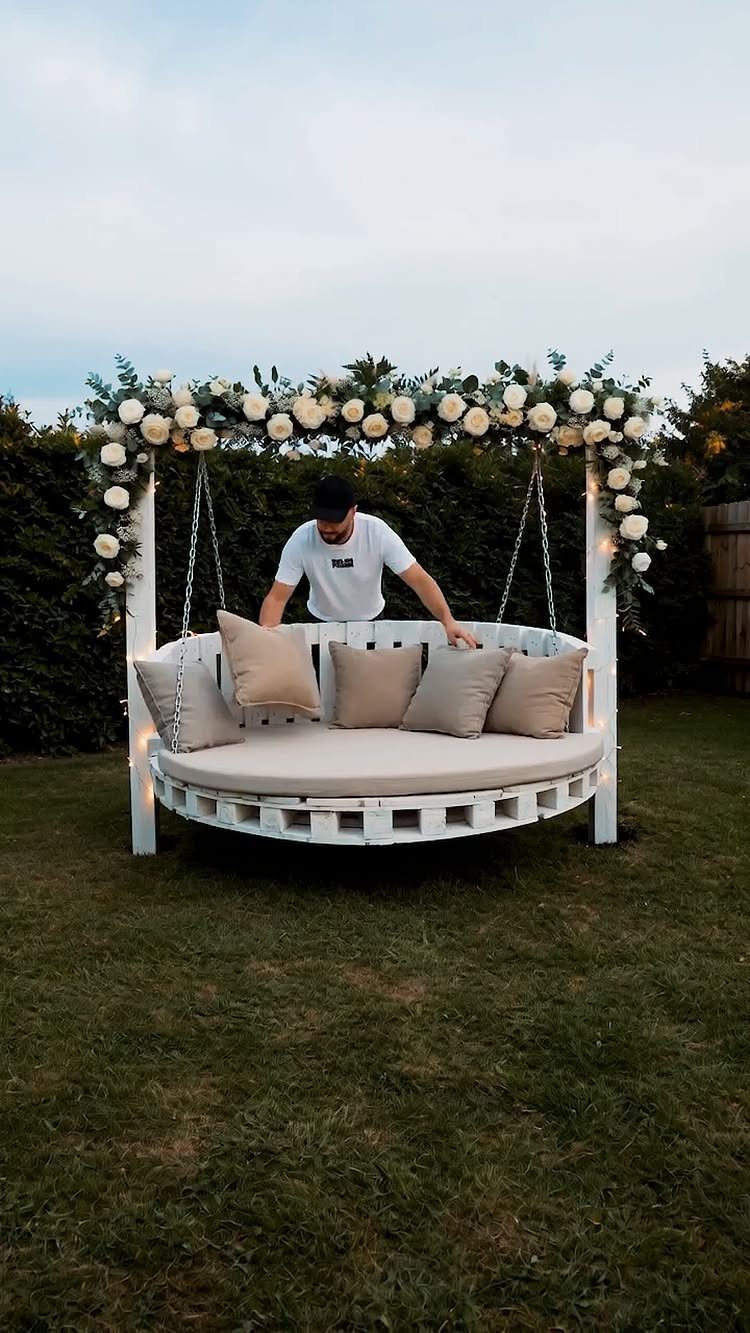
A circular swing bed from pallets needs a frame that carries dead load plus the shift of someone climbing on. That arbor is structural, not decorative; chains bolt through the crossbeam into backing plates, not eye screws.
The white finish on the frame and slats reads as intentional furniture, not salvage. I would repeat that choice: primer and exterior enamel over bare pallet wood checks and greys in one season.
Round cushions for the base are custom or converted daybed sizes; standard seat cushions leave gaps. The flower garland is event dressing; the swing lasts longer without the moisture trap.
Safety Considerations for Pallets
Not every pallet is safe to sleep on or eat near. Heat-treated stock carries an "HT" stamp burned into the wood; chemical-treated pallets are marked "MB" for methyl bromide, and those belong in a landfill, not the bedroom.
Condition matters as much as chemistry. A pallet with blue or red paint streaks, oil stains, or the sour smell of shipping freight has absorbed something you cannot sand out.
Loading docks give away the clean ones if you ask, but skips and building sites require permission and a close look.
New pallets from supply catalogs eliminate the guesswork entirely. They cost more than free, but the time saved inspecting every slat for hidden rot or embedded metal is worth pricing out if the project sits where people breathe or sleep.
Finishing Techniques
Outdoor pallet furniture needs protection from the start. Raw wood left to the weather checks, greys, and rots; the swing and sectional entries both point to primer and exterior enamel as the finish that lasts.
Interior pieces get chalk paint or stain, which lets the grain read through; I skip polyurethane on anything that sits inside, since the plastic sheen fights the rough look I want from pallet wood.
Application order matters. Sand first to 120 grit or the finish catches on splinters and raised grain.
A small roller covers flat surfaces faster than a brush and leaves fewer streaks; cut in edges with the paintbrush after. Two thin coats beat one thick one for durability.
Color choice is practical before it is decorative. Dark stain on planters recedes visually; grey cushions on outdoor seating hide what navy cannot.
The pine stain on the table and chairs reads as polished because the tone is uniform, which means testing on scrap before committing the whole piece.
Tools and Materials Needed
A miter saw handles the angled cuts for the coffee table chevron; a jigsaw curves the back slats on the Adirondack chair. Between them, a circular saw or handsaw manages most straight cuts pallet projects ask for.
Drilling happens more than cutting. A cordless drill with torque settings sinks screws without stripping the soft wood; 3-inch deck screws secure stacked layers on the sectional and bar.
Sandpaper runs through several grits, starting coarse to knock down the roughest mill marks and finishing fine enough that sealing actually holds. The slats are thin; an orbital sander works but risks divots if you lean in.
For finishing, a roller and tray in small size match the pallet scale.
Chalk paint or stain goes on after sanding; exterior-grade polyurethane seals indoor tables against the spills that soft wood drinks up. Screws, not nails, allow for the seasonal shifting that outdoor pieces endure.
Frequently Asked Questions
What furniture can I make with pallets?
Benches, tables, sofas, beds, shelves, desks, bars, and outdoor swings all work well from pallet wood. The slatted construction suits anything that needs air flow or light weight, and the modular size of standard pallets makes stacking and sectioning straightforward.
The coffee table with a chevron top and the L-shaped patio sectional are the two I would start with if you want a project that looks intentional rather than improvised.
How do I prepare pallets for furniture?
Sand first, starting coarse to knock down mill marks and finishing at 120 grit so the sealant actually holds.
Then seal with exterior-grade polyurethane for indoor tables, or primer plus exterior enamel for outdoor pieces; raw pallet wood drinks up spills and greys in one season if you skip this.





