

Built-in master bath storage ideas span from an $8 ladder rack to a full vanity rebuild, and the deciding factor is not budget but how much wall you are willing to open.
Most of these projects fail on waterproofing, not carpentry: the 2019 niche that turned to mush behind its tile because regular drywall met bathroom air.
Two coats of RedGard on the recess and six inches past its edges is the detail that separates a lasting build from a tear-out.
1. Built-In Shelving Around the Tub
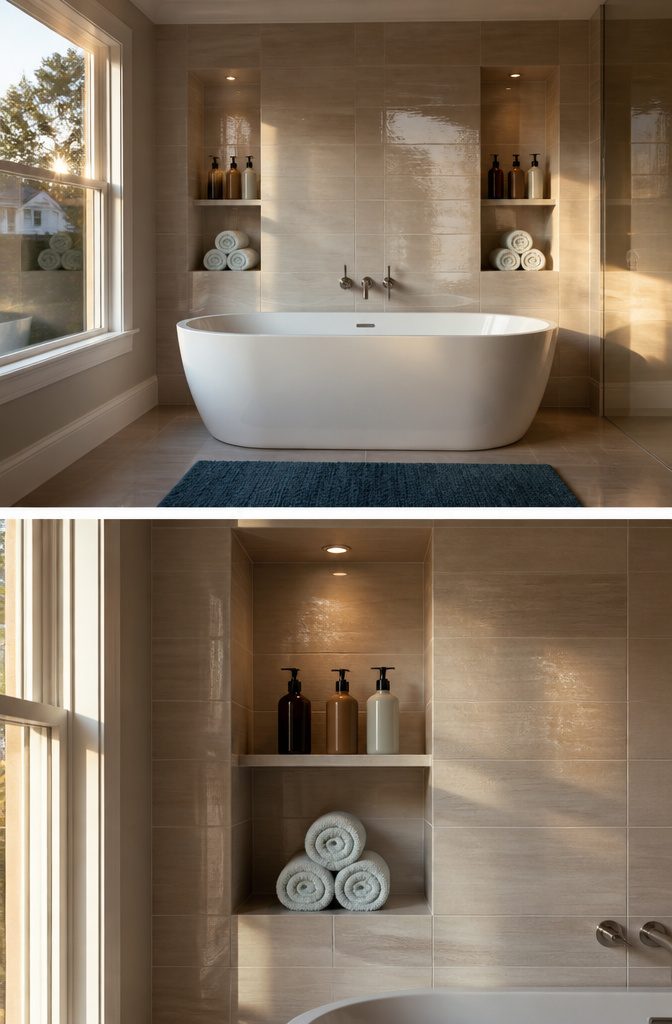
Recessed wall shelving beside a tub gives you storage that does not eat floor space.
The standard depth matters more than the width: four inches fits shampoo and body wash bottles upright, while twelve inches handles rolled towels without them tumbling forward.
I learned waterproofing the hard way on a 2019 project where regular drywall behind the niche turned soft and crumbly within eighteen months.
Now I roll on two coats of RedGard or a similar liquid membrane before any tile goes up, treating the entire recess and six inches past its edges.
For the surround itself, tile-backer board costs less than a full tile envelope and holds up fine if you seal every seam with fiberglass tape and thinset.
The savings run roughly half, which leaves room in the budget for a decent porcelain field tile on the visible faces.

Shower Shelf Corner 2 Pack: Crafted from SUS304 stainless steel, our wall mounted shower shelves offer exceptional protection against corrosion and rust. With a robust 1.2mm thickness, each tile shower corner shelf can support up to 15 pounds, ensuring long-lasting durability for your bathroom essentials. The easy install corner shower shelf is designed for tiled wall.

SPACE-SAVING: Sleek bathroom niche medicine cabinet integrates into the wall, creating a clean, modern look.

Sturdy: Constructed from solid and rustproof 304 stainless steel, has stronger resistance of corrosion, scratch; and seamless welding makes it leakproof
2. Recessed Medicine Cabinets
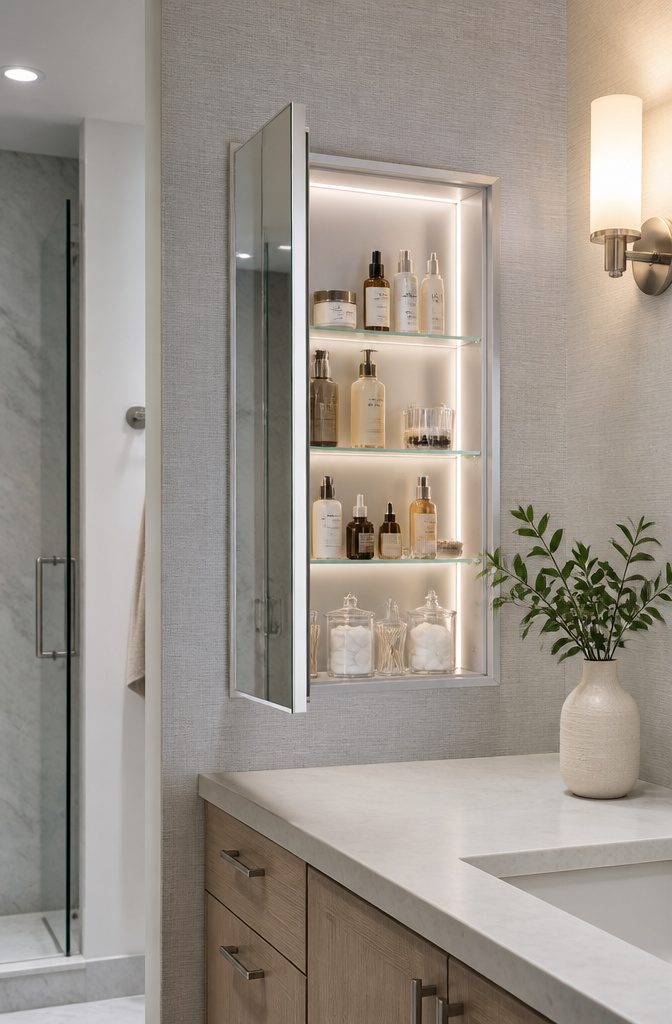
A recessed medicine cabinet slides into the wall between studs and buys back the three or four inches a surface-mounted box steals from a narrow vanity.
Most residential walls have studs set 16 inches apart, so a 14-inch rough opening is the dimension to plan around; anything wider and you are cutting into framing you probably do not want to touch.
Built-in lighting is where I tripped myself up.
I fed the cabinet’s LED strip into the same circuit as the bathroom outlets, not the dedicated lighting line, and the GFCI saw the mismatch and shut the whole thing down the first time I flipped the switch.
The second attempt, wired to the overhead junction, stayed live. I also added a defogging pad behind the mirror, ordered from Amazon for $23, which keeps the glass clear after a shower without waiting for the exhaust fan to catch up.
I measured the Kohler Verdera in a showroom and liked the three adjustable shelves and the soft-close hinges, but the price pushed past where I wanted this project to land.
The off-brand I ended up with fits the same 14-by-24 opening and has held square for two years.

Reflect your best self with mirrored surfaces inside and out, offering a clear, flattering view from every angle as you get ready for the day

Metal Framed Medincine Cabinets: Premium metal door with PLATED brushed nickel finish, super moisture resistant and beautiful,framed with an elegantly beveled mirror. Door is coming with strong magnetic hinges.
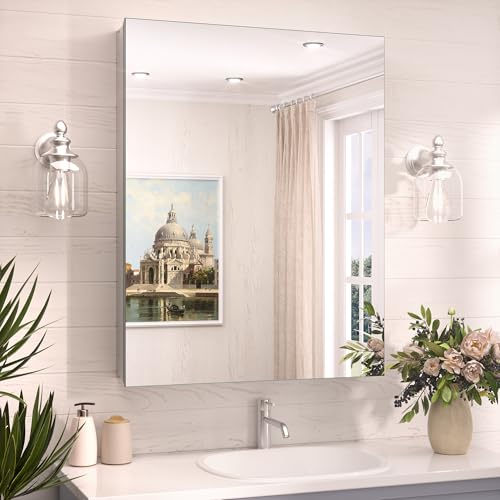
【Lightweight, Strong and Built to Last】 Featuring an aluminum structure, this medicine cabinet mirror is 65% lighter than traditional wood, making it incredibly easy to hang— even solo installers can handle it! Thanks to its water-proof and moisture-proof construction, this bathroom mirror with storage is designed to withstand the steamiest of bathrooms. Its premium aluminum frame is resistant to rust and won't warp like wood, giving you years of reliable use.
3. Wall Niches for Toiletries
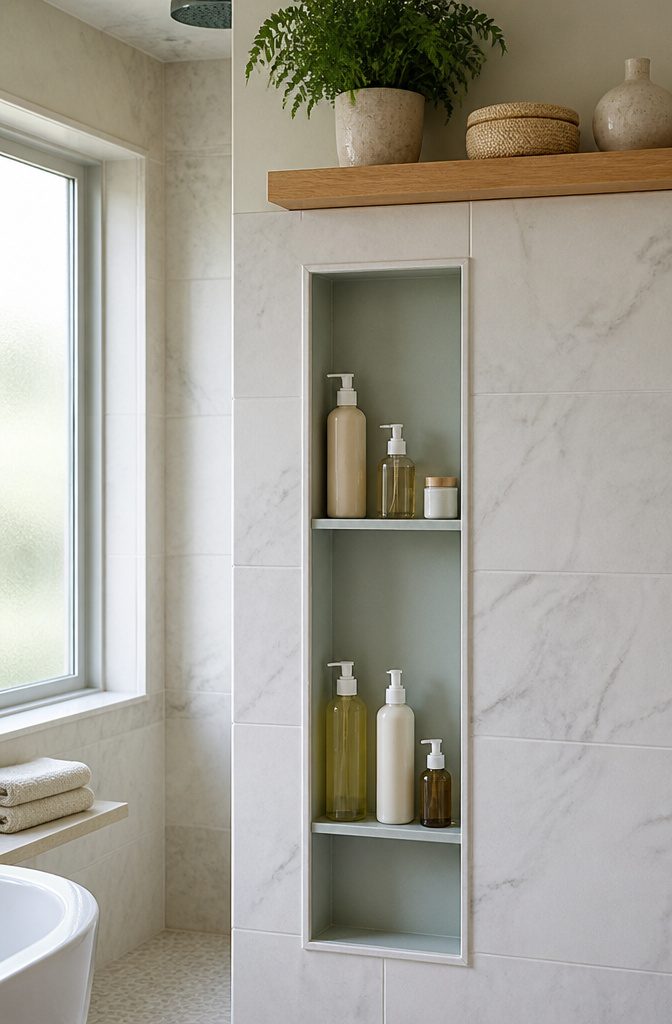
A wall niche for toiletries reads as intentional only when it stays shallow.
Two inches of depth is the practical limit; anything deeper and bottles slide out of sight or collect standing water. That recess is a display ledge, not a shelf you can stack.
I learned the grout lesson the hard way. The joint between my tile and the niche frame was 1/16 inch, and I used sanded grout because I had half a bag left from the floor.
Six months in it cracked in a clean line across the top edge. Unsanded grout is the right move for anything that tight; the sand grains need more room than a sixteenth of an inch to bind.
For the build itself, Schluter makes prefab niches in standard sizes that drop between studs and tile over clean.
A tile-and-board build takes longer but lets you size to the wall. I painted the back of mine in Rainwashed by Sherwin Williams so the white bottles in front read as styled rather than clutter.

Sealed and 100% Waterproof: VEVOR shower bays use XPS extruded foam board, cement mortar, waterproof coating triple waterproof substrate, 100% sealed and waterproof, which not only can protect the wall and extend the service life of the wall but also effectively prevent water penetration into the wall, keep the indoor dry and sanitary. Note: This product is not ready for direct use. Surface layer, such as tile, must be applied to the surface before use!!!
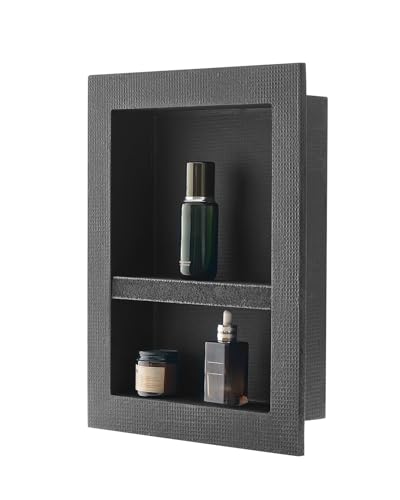
Sealed and Waterproof: The insert shower niche uses a triple-layer waterproof base of XPS foam board, cement mortar, and waterproof coating, ensuring 100% sealing. It safeguards walls from wet and humidity, extending their lifespan and avoiding water penetration, keeping interiors dry and hygienic. Note: This product needs to be used in conjunction with waterproofing materials, not on its own!!!!

ALL-IN-ONE STORAGE SOLUTION: One-piece shower niche with recessed shelf
4. Drawers and Pull-Out Shelves
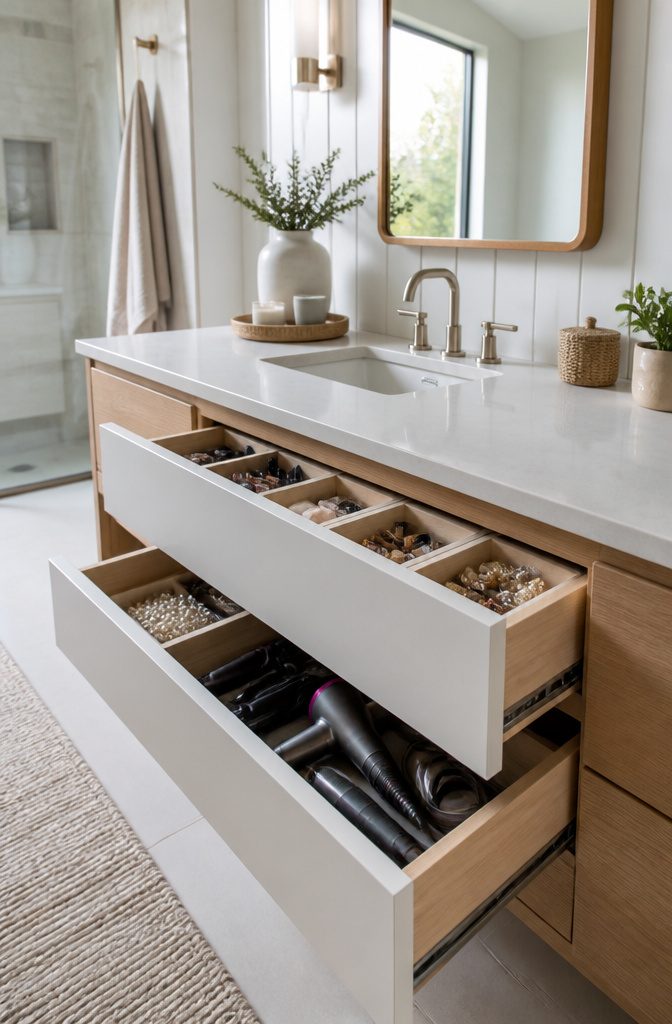
Deep drawers at 24 inches swallow a hair dryer and its cord without the Tetris game a cabinet demands.
That reach to the back wall is what makes the difference; full-extension soft-close slides, the Blum Tandem pair I paid about $28 for, roll out until the last inch is usable. No more kneeling to feel around for a dropped brush.
The shallow top drawer is where the 6-by-6 InterDesign bins come in, three for $9.99 back when I found them at Target.
They corral makeup, skincare, the small stuff that otherwise migrates into a pile. Dividers or inserts can go in at build time or after; the drawer does not care.
I retrofitted an old vanity with these slides and bins, which took a Saturday and some patience with a drill. A ready-made drawer cabinet skips that labor but costs more upfront.
Either way, the daily rhythm changes: pull, grab, close. No door to hold open, no crouching, no forgotten items in the dark corner.

Top-grade waterproof & water-resistant: 3.3ftX33ft,23.6 mils thickness. The shower waterproof membrane band is made of high-density polyethylene material, make sure highly waterproofing, enough tough to against moisture, anti-seepage and corrosion preventive. High-grade waterproof waterproofing membrane band seam tape.

Reliable Moisture Protection - It features a pliable, sheet-applied membrane with a modified polyethylene (PEVA) core, and non-woven polypropylene on both sides, ensuring robust waterproofing and vapor retardation.

CONTRACTOR-GRADE. The fiberglass-weave fabric backing on our waterproofing membrane for shower wicks off moisture without penetration and delivers up to 60 years of waterproofing with ZERO MAINTENANCE against extreme temps and humidity.
5. Dedicated Vanity Area
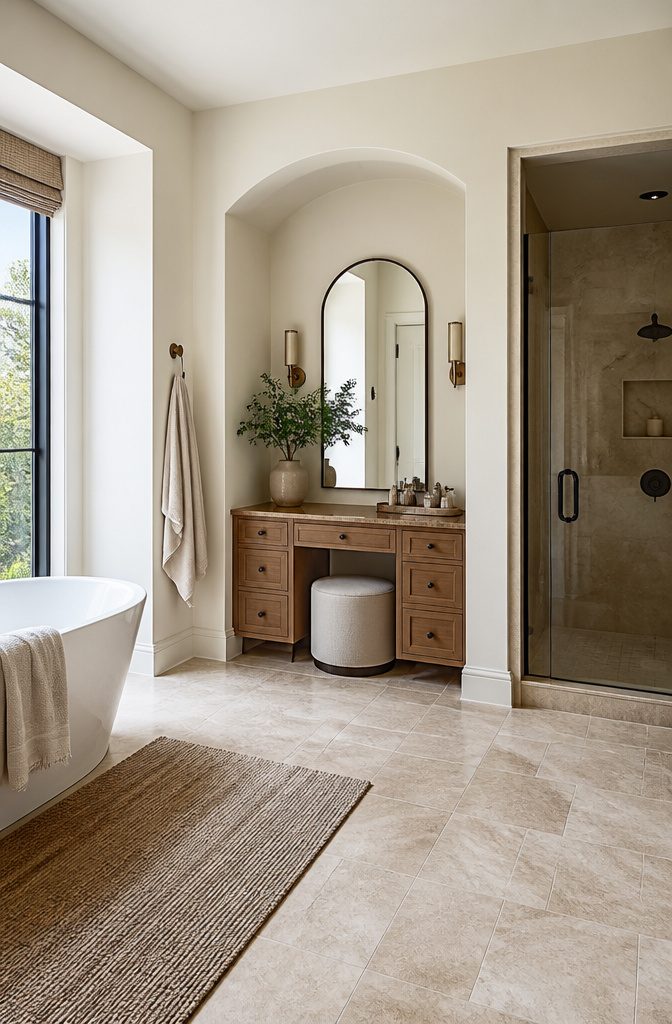
A dedicated vanity needs 36 inches of width minimum for one person seated comfortably, and that number is non-negotiable if you want to open a drawer without elbowing the wall.
The first time I planned this, I squeezed the space to 32 inches and spent two years bumping my shoulder into tile.
Drawer configuration matters more than width. A stack on one side keeps the seated zone open and gives you room to pivot; drawers on both sides work only if you have 48 inches or more to start with.
I learned the outlet placement the hard way: behind the stool means the cord drapes across your lap, catching on the knee space every time you shift.
The right-side install, about six inches forward of the seat edge, keeps the hair dryer cable off your legs without stretching the cord taut.
Sources describe this as a "pro move," but it reads as basic ergonomics once you have lived with the wrong side for a year.
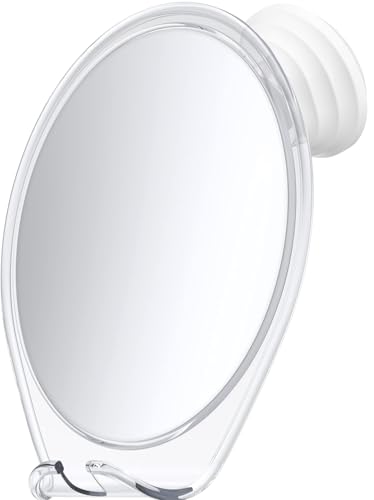
Shave Without Fog or Frustration: Say goodbye to blurry reflections and time-wasting mirror wipes. Our fogless shower mirror stays clear in steamy showers, giving you a crisp view every time.

Fog-Free Clarity Every Time – Enjoy a crystal-clear reflection after every shower. This 24" x 32" Rectangular self-adhesive defogger prevents condensation buildup by gently heating your mirror’s surface

Large Fogless Shower Mirror: This shower mirror has a bigger reflective surface than other's for a crystal-clear view of your face and neck. This shower mirror features a special anti-fog coating that keeps your reflection clear—even in hot, steamy showers. No rinsing or wiping needed, so you can shave or groom without delay.
6. Built-In Laundry Hamper Storage
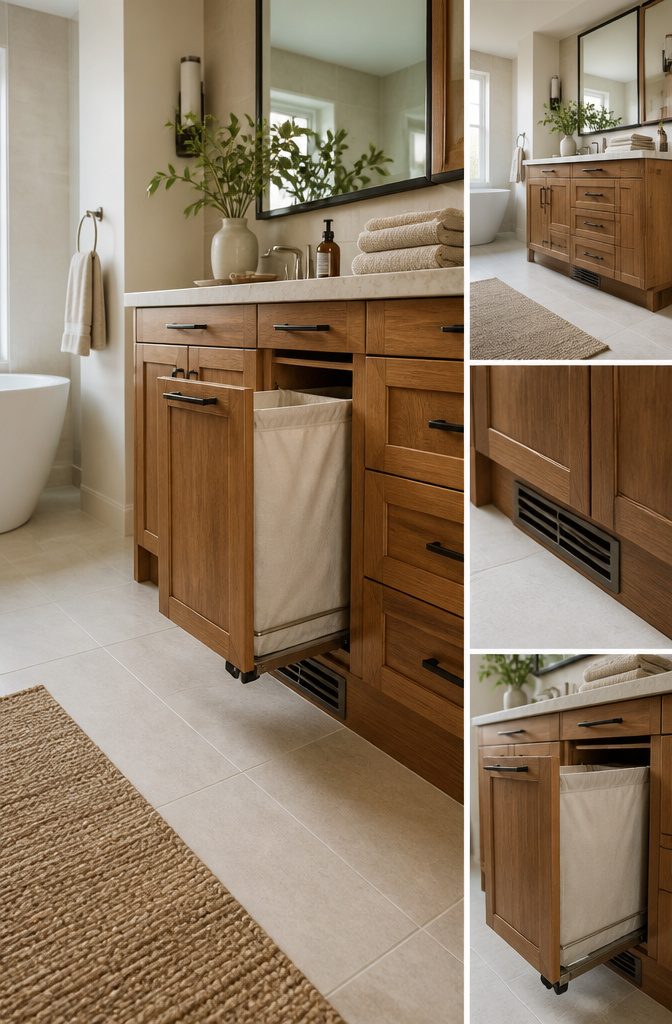
A cabinet deep enough to house a rolling hamper needs at least 18 inches front-to-back and 14 inches wide for a standard mesh model.
I found that out the hard way after measuring a 15-inch-deep vanity base that swallowed the hamper wheels on day one.
I ended up with a 21-inch base cabinet and a Rev-A-Shelf pull-out frame, about $67, which keeps the basket on tracks instead of letting it drift into plumbing.
The bigger problem was smell. A closed cabinet turns humid bathroom air into a petri dish for anything cotton or damp.
I cut a vent grille into the toe kick, the 4-inch gap at the bottom of the cabinet, and ran it straight through to the floor cavity. Air moves now without the hamper ever being visible from the doorway.
Two ways to play this: a pull-out frame like mine, or a tilt-out front that drops clothes through a slot.
The tilt-out looks cleaner but costs more and limits you to one basket. The pull-out frame wins if you haul laundry to a basement machine and need the basket itself to travel.

【Heavy Duty】This 2 mm thick floating shelf can hold 20 pounds. Made of ASTM standard 304 stainless steel. Floating shelf surface is well painted, which can help protect against corrosion, scratches and rust for years of use. Designed for TILED WALL only.

LAUNDRY ROOM AND BATHROOM SHELVES - The Aiden Wall Niche is handmade from real wood and features four sturdy shelves for storing and displaying personal items

LAUNDRY ROOM AND BATHROOM SHELVES - The Aiden Wall Niche is handmade from real wood and features four sturdy shelves for storing and displaying personal items
7. Over-the-Toilet Shelves and Cabinets
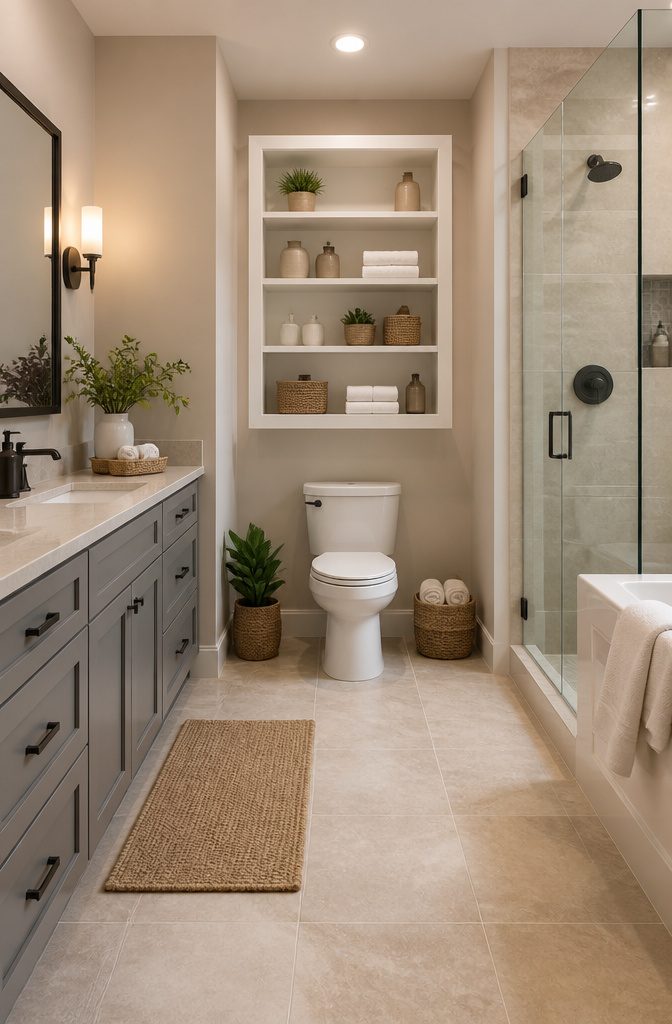
Twenty-four inches above the tank is where a standard cabinet should start; comfort-height toilets need 28. That clearance keeps the lid from clipping the shelf on its way up, and the gap is small enough that nothing useful hides behind it.
Open shelves work at 8-inch depth. Closed cabinets need 12 to swallow a spare roll or a bottle without the door catching your shoulder.
I learned the vanity-match lesson the hard way in 2017, when I hung a white cabinet against a gray vanity and spent two years noticing the clash every morning. The advice to match them is standard for a reason.
The $42 Home Depot unit sagged after eight months, the particleboard shelves bowing under nothing heavier than hand towels and a basket of travel-size bottles. Particleboard in a humid bathroom is a bet against physics.

【Material】The medicine cabinet is made of durable cold-rolled steel with matte white powder coated, which ensure long-lasting use.

METAL FRAMED DOOR & CABINET: Both the mirror frame and cabinet is made via premium metal for longer durability, the rounded edge metal frame gives this cabinet a clean reflection.

【Lightweight & Durable Aluminum Construction】Crafted with a high-quality aluminum frame and aluminum-plastic backpanel, this medicine cabinet is significantly lighter than iron or wooden alternatives, yet remains sturdy enough for long-term use, making it a wonderful long lasting choice in your bathroom, living room, hallway, etc
8. Built-In Storage Cubbies
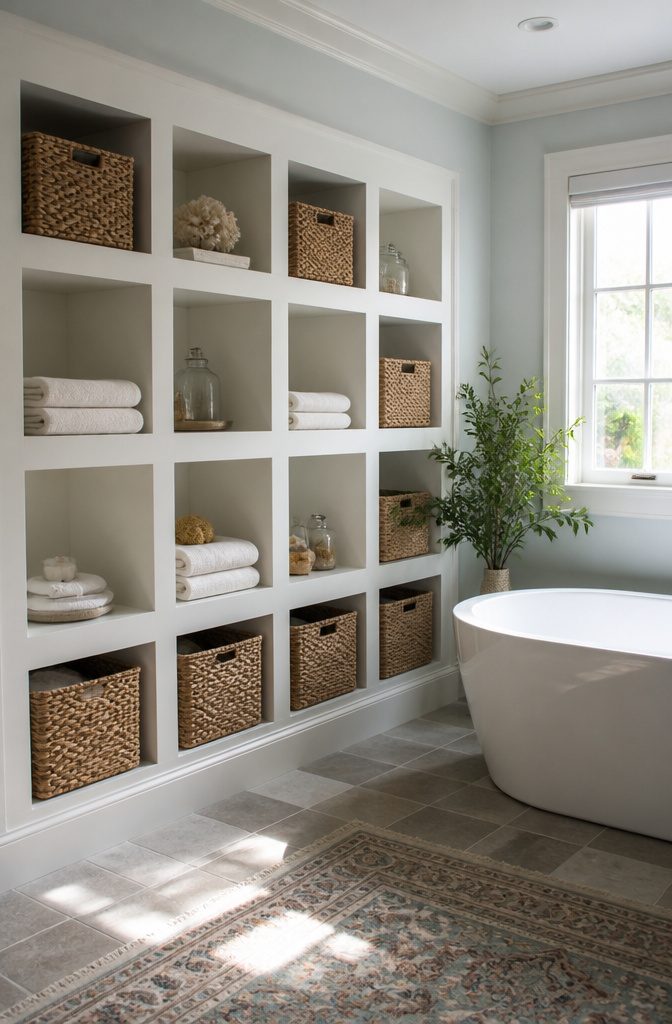
Open compartments look effortless on Pinterest, but a 12-inch cube fights you every time you load it. I sized my cubbies at 13 inches to fit IKEA Kuggis bins, and they jammed.
The bins sat proud by a quarter inch, which meant shoulder contact every pass through the narrow master bath. I shaved the face frames down with a block plane, then gave up and bought different baskets.
Standard 12×12 or 15×15 cubes are standard for a reason: tolerances add up. Face-frame construction hides those sins better than frameless, where every seam shows.
The real maintenance hit came later. Open storage in a bathroom collects drywall dust like a static cling experiment, graying white towels in a week.
Paste wax on the interior sides fixed it; one coat, buffed hard, and dust wipes off with a dry rag instead of settling in. Took twenty minutes, saved twenty minutes of vacuuming monthly.

1、DURABLE STAINLESS STEEL: Crafted from high-quality stainless steel, this shower niche is built to withstand humidity and resist rust, ensuring long-lasting performance in your bathroom.

① EASY INSTALLATION: stainless shower niche is fully finished and ready to mount into your wall opening, With a few simple steps and a minimum material requirement, you’ll be done installing this shower niche on your bathroom wall. No complicated processes or necessary tools required, no wasted time! you don’t need to buy expensive tiling or borders. There’s no need to hire an expensive contractor or remodel your entire bathroom.

WHAT YOU NEED: Whether you’ve embarked in a massive redecoration of your bathroom or you’re simply seeking for a practical and effective way of storing your bathing and showering products, we offer the perfect solution!
9. Floating Vanities
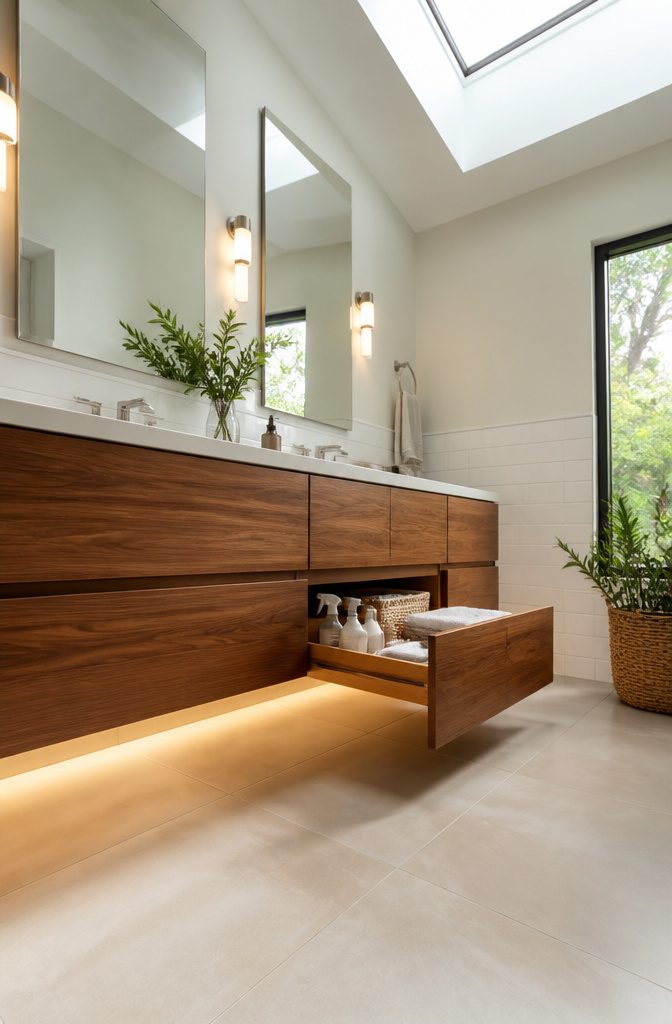
A wall-mounted vanity strips the legs out entirely and hands that floor space back to the room, or at least to a mop.
The bracket system matters more than the cabinet style: IKEA’s Godmorgon runs on a single steel rail lagged into studs, and four hours of solo leveling is about what that job takes if you are measuring twice and cursing quietly.
The open gap underneath looks sleek for roughly a week.
Two-tiered organizers stacked in that void keep cleaning bottles on the bottom and rags or sponges above, which turns the dead zone back into something you can actually shut a door on.
Most pre-made vanities land at 33 inches high, the old bath standard; framing to 36 inches saves your back and costs nothing extra in lumber.
LED strip lighting taped to the underside is the move sources keep suggesting, though I find it mostly helps at 2 a.m. when you do not want to flip the overhead.
Reliable Moisture Protection - It features a pliable, sheet-applied membrane with a modified polyethylene (PEVA) core, and non-woven polypropylene on both sides, ensuring robust waterproofing and vapor retardation.
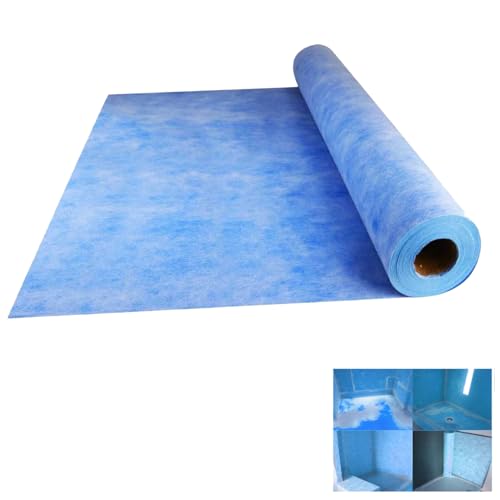
WATERPROOF MEMBRANE FOR SHOWER TILE INSTALLATION – 3.3FT x 98.5FT roll, 323 Sq Ft total coverage, 23.6 Mil (0.6mm) thick. Blue HDPE waterproofing sheet creates a moisture barrier between tile assemblies and substrate in shower floors, bathroom walls, sauna rooms, steam rooms, and wet areas. Suitable for new construction and bathroom renovation projects.

High-performance polypropylene construction wall panel with non-woven fleece webbing on both sides for superior mortar adhesion. Fully waterproof, vapor-tight, and thermally insulating - ideal for wet zones and high-humidity environments. Approved for residential and commercial settings
10. Vertical Storage
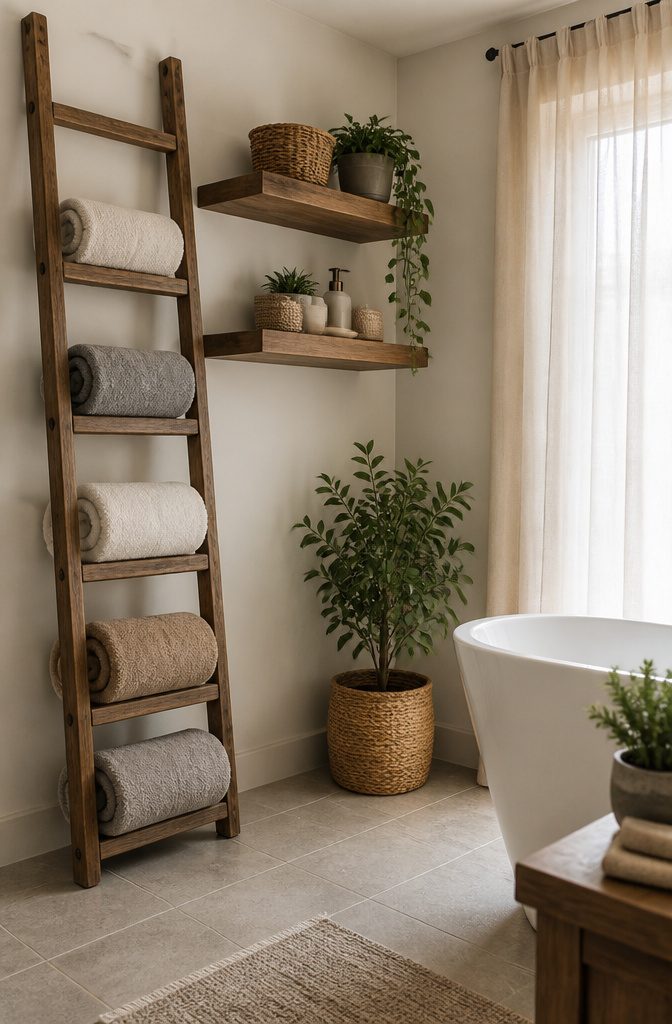
A ladder rack takes up the footprint of air. The one leaning against my bathroom wall is an old wooden garage-sale find, stripped with 80-grit paper and sealed with Watco Danish Oil.
It cost eight dollars, holds four rolled towels, and does not care whether the floor is tile or vinyl.
Wall-mounted shelves at 16-inch stud spacing use concealed brackets, so the hardware disappears and the shelf looks like it is floating. The brackets do the work; the wood just needs to be straight.
I once bought a 72-inch cabinet, stood it upright, and watched it tip before I had anchored it. The wall won, the cabinet did not, and the drywall needed patching.
Anchor tall units to studs. The brackets cost less than spackle, and the lesson is free.

Shower Mirror: For men: Shave in the shower with this shower mirror; keep all the hair, shaving cream, and water drips in the shower for a cleaner bathroom. For Women: This size mirror is enough to allow you to see every detail of your entire face so you can easily remove your makeup.

Fogless Shower Mirror: This shower mirror has a bigger reflective surface and thinner frame than the original for a crystal-clear view of your face and neck

Prevents fogging of bathroom mirrors and glass shower doors during and after showers
Maximizing Vertical Space
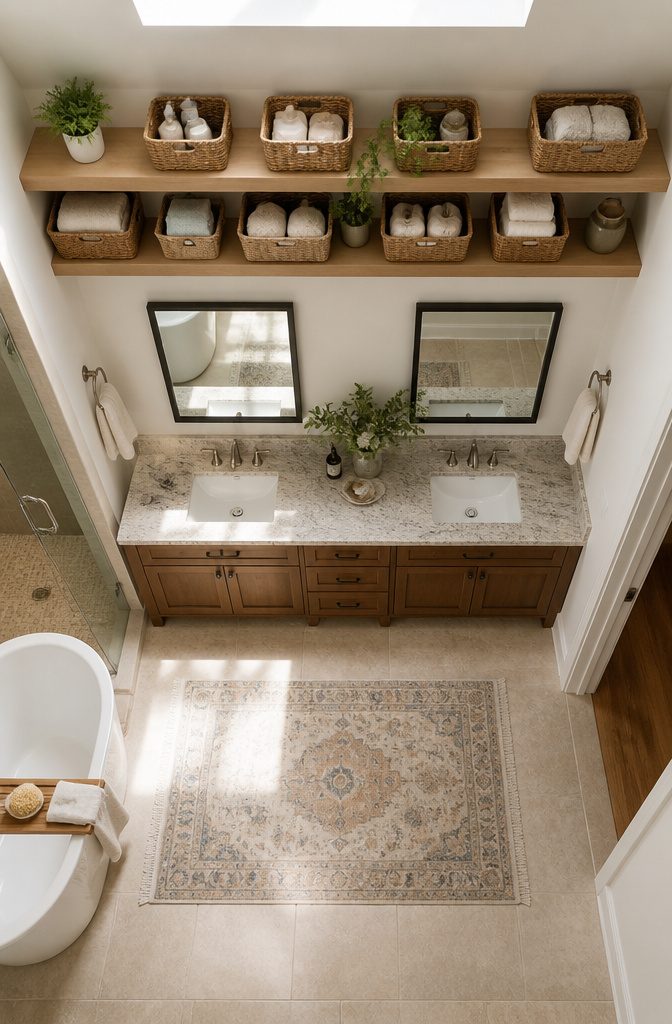
The ceiling in my bathroom is 96 inches high, which sounds generous until you measure what is actually being used. Standard cabinets top out at 30 to 36 inches, leaving a 12-inch gap that most people treat as dead space.
I added a simple shelf across that gap and filled it with woven baskets for backup toiletries. It cost nothing in floor space and the baskets keep the visual weight low.
Open storage above 66 inches reads as clutter, not convenience, because it sits above the natural eye line. That is the rule that stopped me from running shelves all the way to the ceiling.
The 30 inches between my cabinet tops and that 66-inch mark is where open storage works; above it, the eye catches every label and loose edge. My baskets stay below that line.
Moisture-resistant materials matter up there too, since heat rises and the upper wall sees more humidity. Melamine, laminate, glass, or stainless steel are the typical choices for anything permanent in that zone.
Drawer Systems That Work
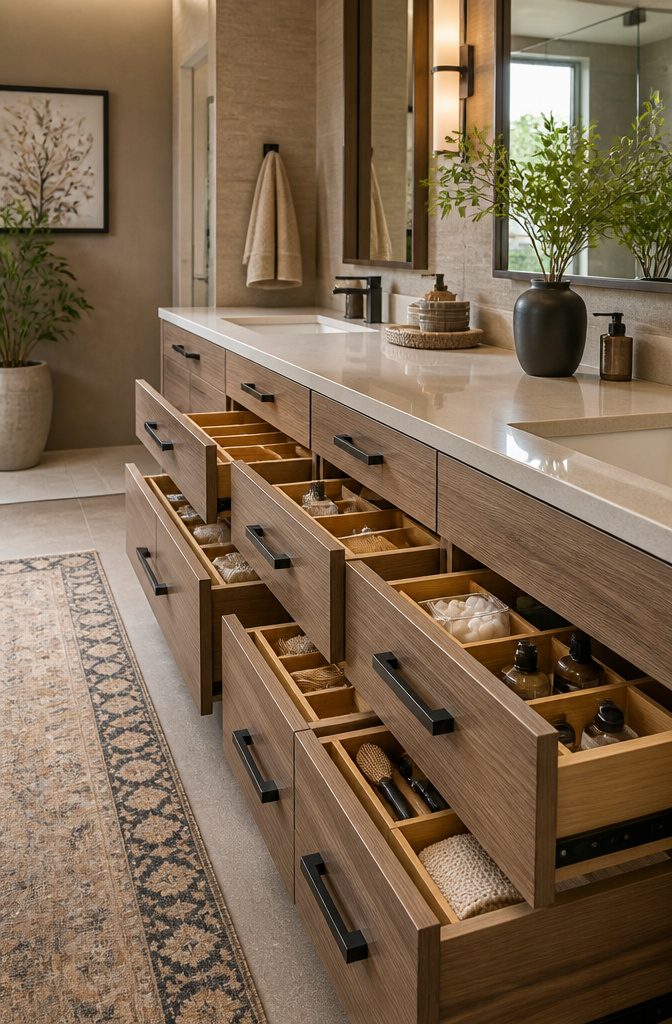
Two renovations taught me that drawers beat doors on every count.
A 15-inch base drawer now holds more than the 24-inch door cabinet it replaced, because nothing buries itself behind a stack of towels or a spare bottle of shampoo. Every item slides into view.
Bamboo dividers from The Container Store run $12–18 and do the sorting work for most vanities. Custom acrylic starts around $40 and only pays off if your morning routine involves enough small bottles to fill a grid to exact size.
The real choice is drawer versus pull-out shelf. Drawers win for daily use: toothbrushes, skincare, the hair dryer you grab wet-handed.
Pull-out shelves make sense for bulk storage, spare towels, the backup shampoo you bought on sale. Deep drawers handle towels fine, but a pull-out shelf at eye level shows you the full stack without the kneel-and-reach.
Built-In Versus Freestanding
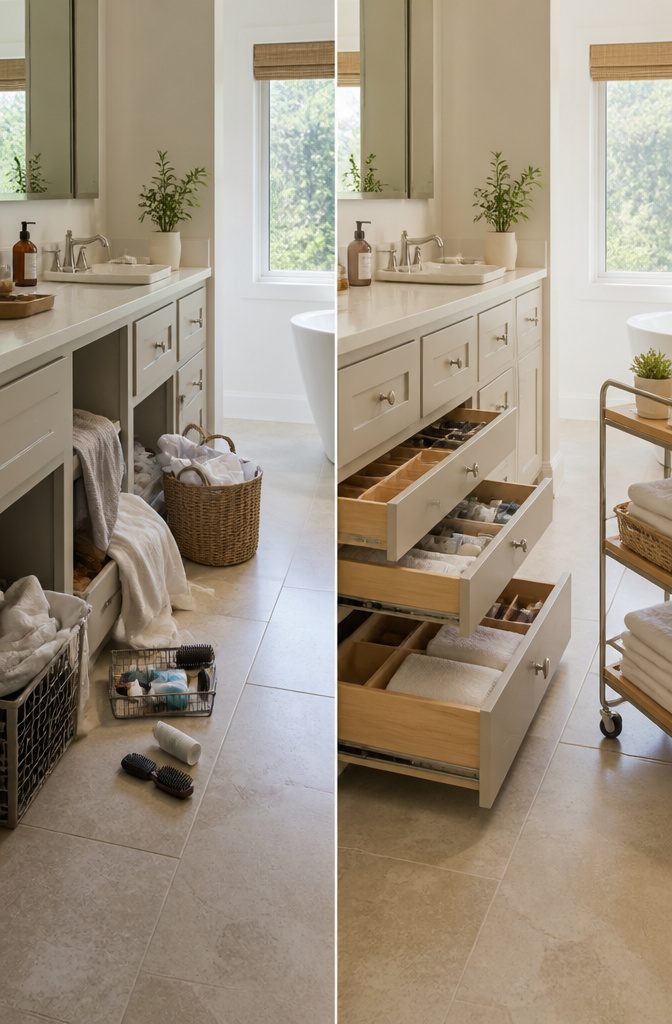
Built-in storage commits you to the wall, which makes sense only when you own the wall.
The rolling cart I kept beside my vanity for nine months cost less than a single custom drawer and rolled out when I finally saved enough for cabinets.
In a rental before that, a pedestal sink left me with zero cabinetry and a visible tangle of bottles underneath.
I bought a $12 Target shower curtain, cut a skirt to fit, and sewed a channel for tension-rod hardware. It looked intentional enough that a guest asked where I’d bought the vanity.
The permanent choice pays off for daily friction points you can predict.
My current vanity has a pull-out step stool built into the toe kick because my youngest couldn’t reach the faucet and I was tired of tripping over a plastic one.
That kind of tailored solution, a tilt-out toothbrush drawer or a laundry pull-out sized to your actual basket, is where semi-custom beats anything you can roll in.
Freestanding furniture wins when your life or your lease turns over faster than your projects do.
Organizational Products That Last
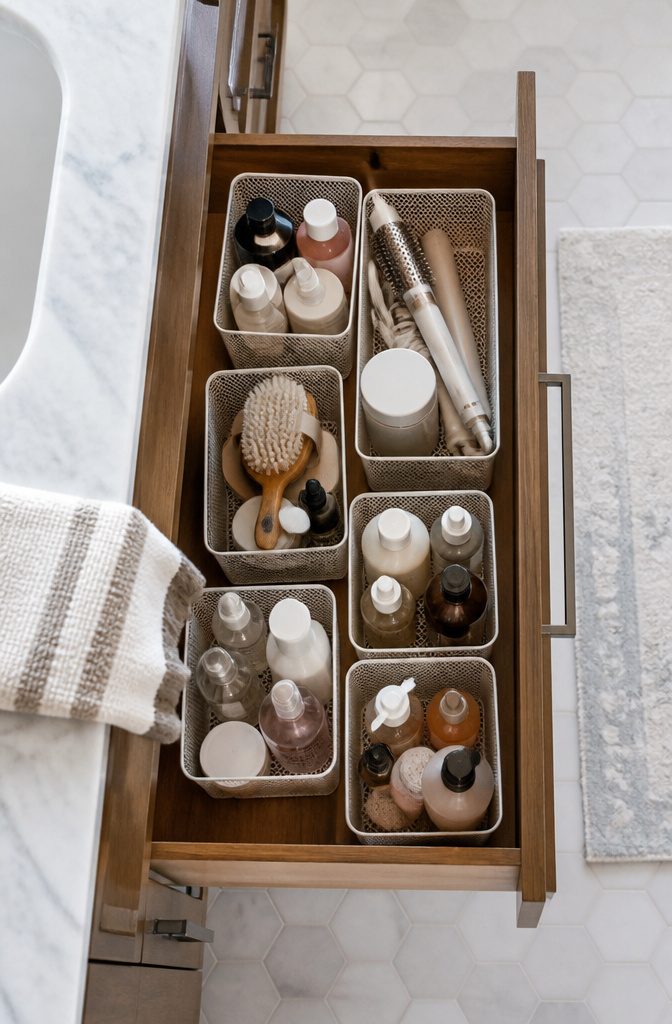
I bought a set of InterDesign 6-by-6 bins three years ago for under the sink, and the plastic still snaps shut like it did on day one.
Same cabinet, same humidity, same daily yanking open with wet hands. That is the exception, not the rule.
The mDesign stackable drawers I tried next cost $16 for two and looked tidy for about eleven months. Then a hairline crack spread through the lower housing while I was pulling it out normally, no drop, no overload.
Buy the container after you know the stuff, not before. I measured nothing first; the drawers were an inch too deep for my cabinet depth and sat crooked from the start, stress on the plastic every single slide.
The simplehouseware mesh bins, six for $22, have outlasted both of those experiments. The wire frame flexes instead of cracking, and the open weave lets me see the backup toothpaste without pulling anything out.
I use them inside the single deep drawer that came with the vanity, corralling travel bottles, skin care, and the hair dryer cord so they do not tangle into one solid knot by Wednesday.
Group like with like, label the bin if someone else shares the drawer, and leave finger-width clearance so the container does not fight the cabinet on the way out.
The InterDesign bins handle small bottles upright; the mesh set swallows bulkier items that would tip. Match the tool to the actual clutter, and the purchase survives the second year.
Design Moves That Read as Space
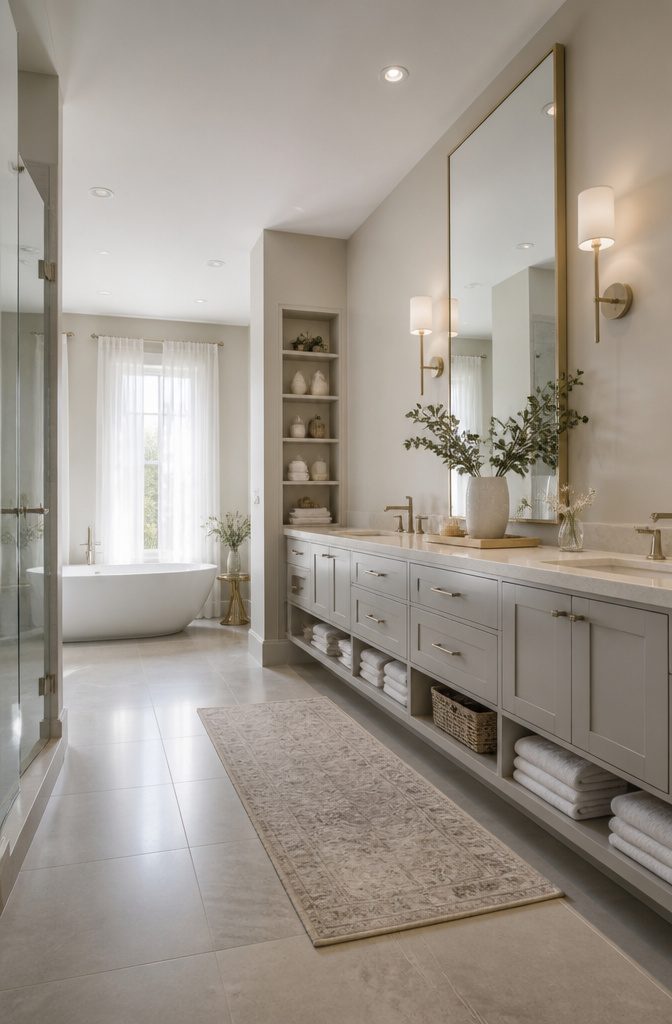
A mirror hung the wrong way eats space instead of making it. I learned this with a 36×48 inch frame I mounted horizontal above the vanity.
The wall felt chopped in half, and the storage below read as bulky. Turning it vertical opened the sightline from door to shower, and the same cabinets suddenly looked built into a larger room.
Color works the same trick on storage perception, not storage volume.
I started a refresh with Sherwin Williams Accessible Beige, thinking warmth would cozy the space up. The built-ins flattened into the wall and felt heavier.
Switching to Alabaster did the opposite; the same shelves and drawers faded back, and the room itself became what you noticed. Light paint behind storage lets the architecture read as space first, stuff second.
Two framed mirrors instead of one builder-grade slab can do similar work, though the effect is quieter than a single large surface. The payoff is in what your eye registers first: the room’s envelope, or the objects filling it.
Frequently Asked Questions
How do I add storage to my small bathroom?
Use wall space for recessed shelving, medicine cabinets, and niches that do not eat floor space. A four-inch-deep niche fits shampoo bottles upright, while a 14-inch rough opening between studs handles a recessed medicine cabinet.
For areas without wall depth, floating shelves at 8 inches deep or a ladder rack with zero footprint hold towels and daily items.
How can I organize my bathroom without cabinets?
Bring in freestanding furniture, floating shelves, or a rolling cart that moves when you upgrade.
A shower curtain cut to skirt a pedestal sink hides storage bins underneath for under $15. A ladder rack leans against the wall, holds four rolled towels, and costs less than ten dollars at a garage sale.
How do you store bathroom items?
Sort items into drawer organizers, trays, or bins matched to what you actually own.
Six-by-six-inch plastic bins corral makeup and skincare; mesh bins flex instead of cracking and let you see contents without pulling them out. Group like with like, label shared drawers, and leave finger-width clearance so containers slide freely.
How can I make more room in my bathroom?
Purge nonessentials, then optimize every built-in zone. Deep drawers at 24 inches with full-extension slides swallow a hair dryer and cord without kneeling; a shelf above standard cabinets fills the 12-inch gap to the ceiling with backup toiletries in baskets.
Light paint behind storage, like Alabaster instead of beige, lets the architecture read as space first.





