
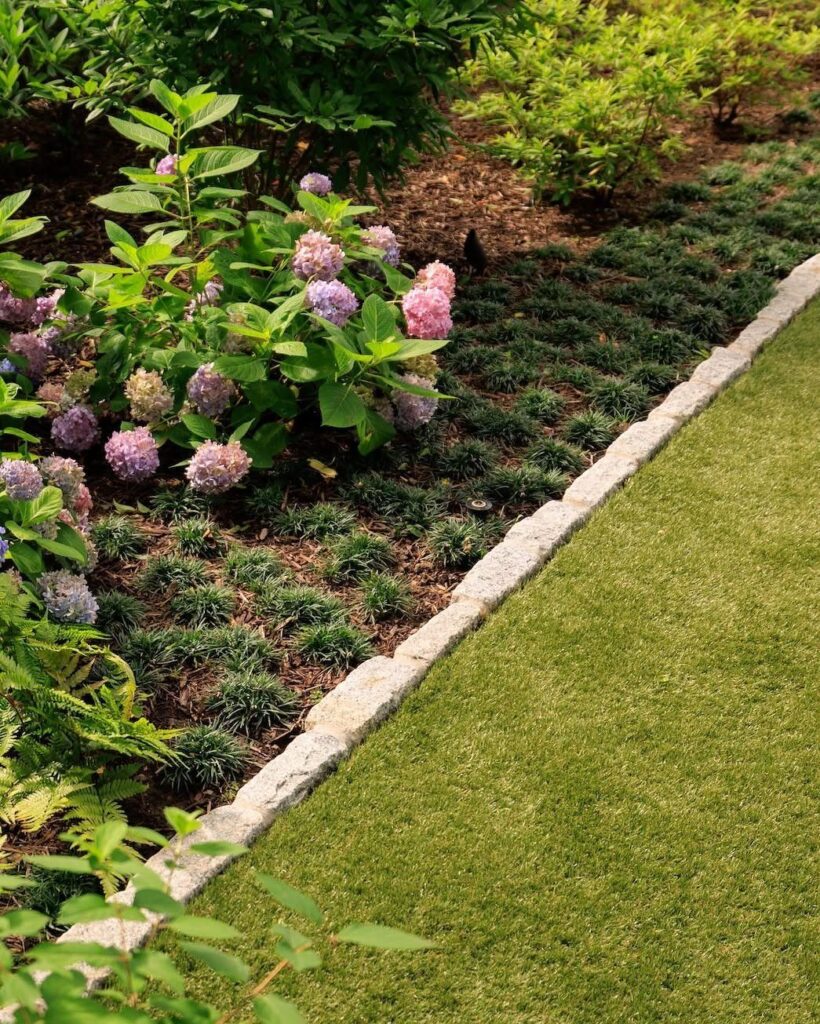
A lawn border can cost nothing but a half-moon edger and twice-seasonal effort, or it can mean calling in a crew to pour a concrete curb that still cracks in hard frost.
The right choice depends on how long you plan to stay in place, since a boxwood or yew hedge outlasts you while plastic edging suits renters who might reshape the bed next spring.
I would soak hardwood log rounds in preservative overnight before setting them, but I would not plant edibles against creosoted railway sleepers no matter how long they last.
1. Brick Edging
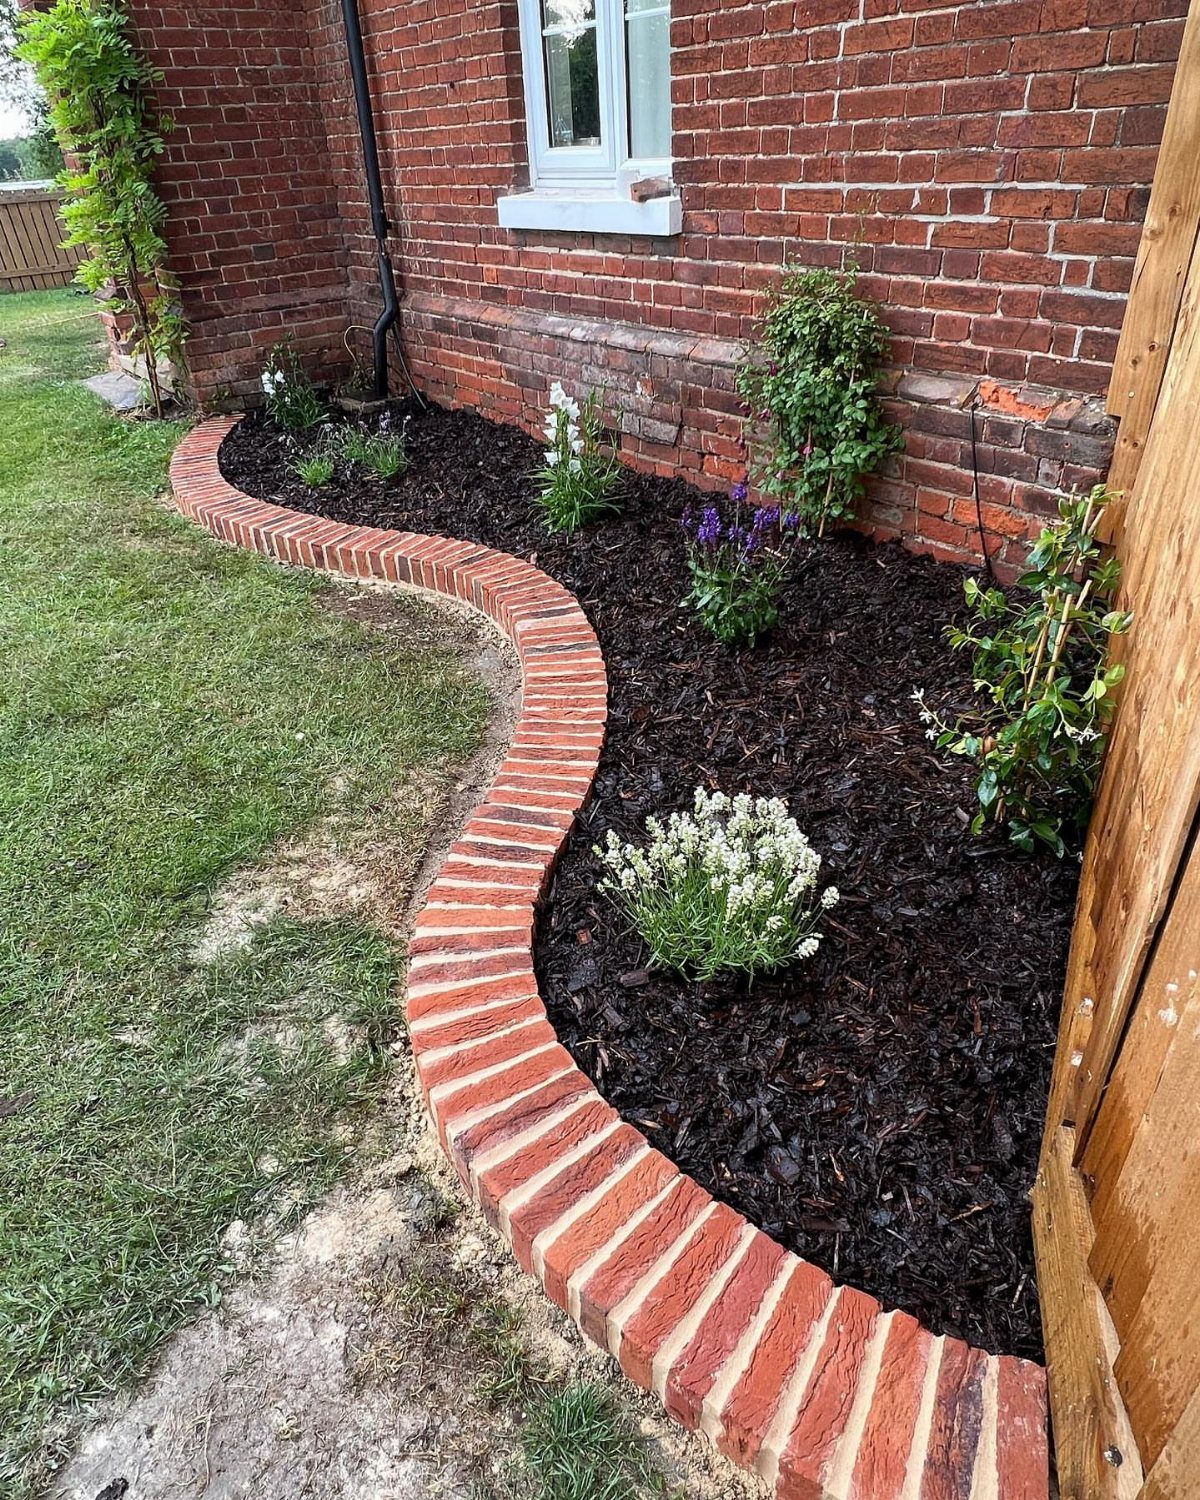
Red bricks laid on edge, half-buried, give a clean line that lasts decades without rotting or warping. I like them for renters who want something permanent-looking they can leave behind, since removal is just lifting and filling holes.
Standard bricks are set with the long side down, buried partway on a sand base for a clean line that stays put.
A gentle curve works without cutting if you stand bricks on end and let them touch tip to tip.
Cost stays low if you salvage from a demolition yard, though matching the red takes some hunting. Pressure-wash yearly to keep moss off the faces.
2. Gravel Edging
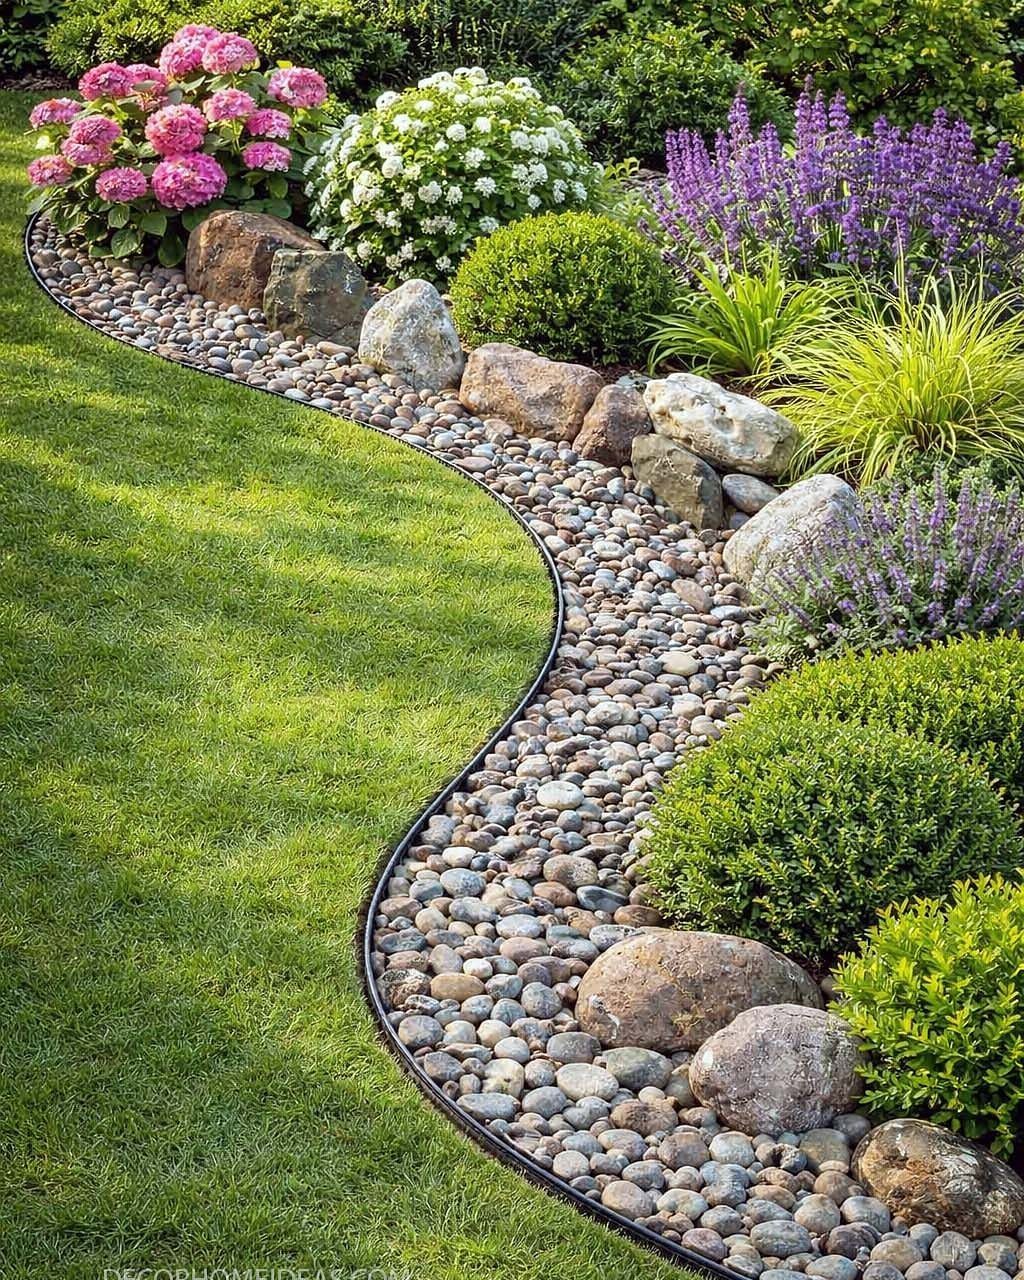
A narrow trench filled with river stone gives you a border that drains well and never needs painting.
I reach for this when the lawn meets a bed that shifts, since gravel adapts to any curve you dig. The black strip visible is likely a flexible edging held by stakes, which keeps the stone from scattering into grass.
Dig a trench, line it with landscape fabric, then fill with stone deep enough to hold its place. Larger accent rocks on top add weight and visual anchor.
Refresh the strip as stones settle or wander; it is the one maintenance task this edging asks for. Best for gardeners who hate straight lines.
3. Steel Edging
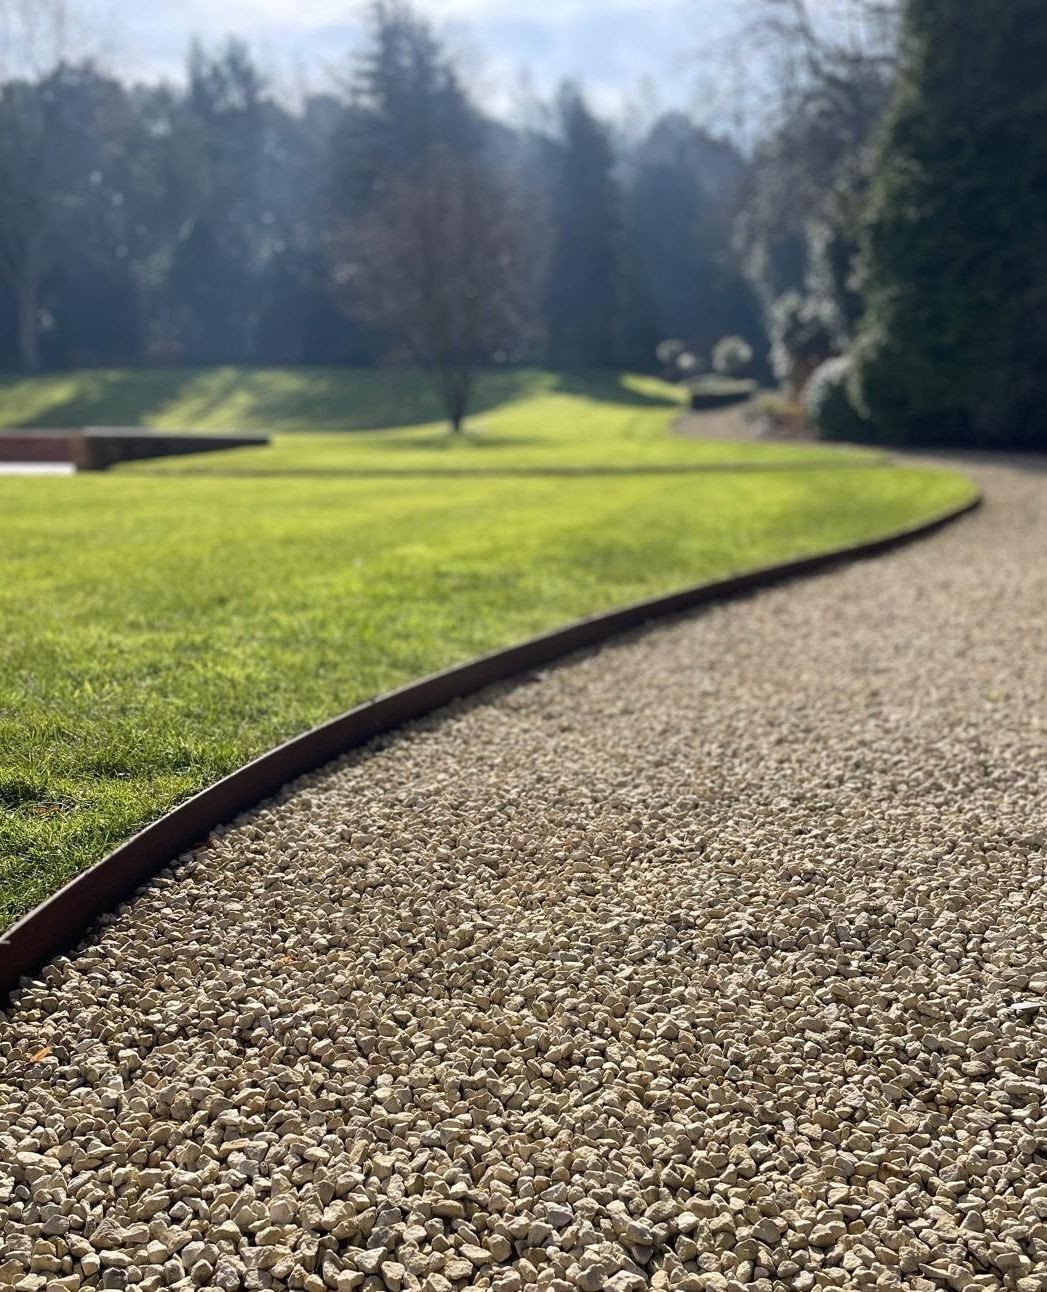
Thin steel strips give the sharpest lawn-to-path separation you can buy, and they disappear visually once they weather to a soft rust.
Installation means driving stakes through pre-punched slots at intervals, which takes a mallet and patience on rocky ground. I find a low profile most useful, with enough buried for stability so the strip does not lift in frost.
The raw edge is crisp enough for modern landscaping, though it costs more than plastic and will dent if you kick a mower into it.
Sections are short enough that one person can handle them, which matters if you are working alone on a Saturday.
4. Paving Stones
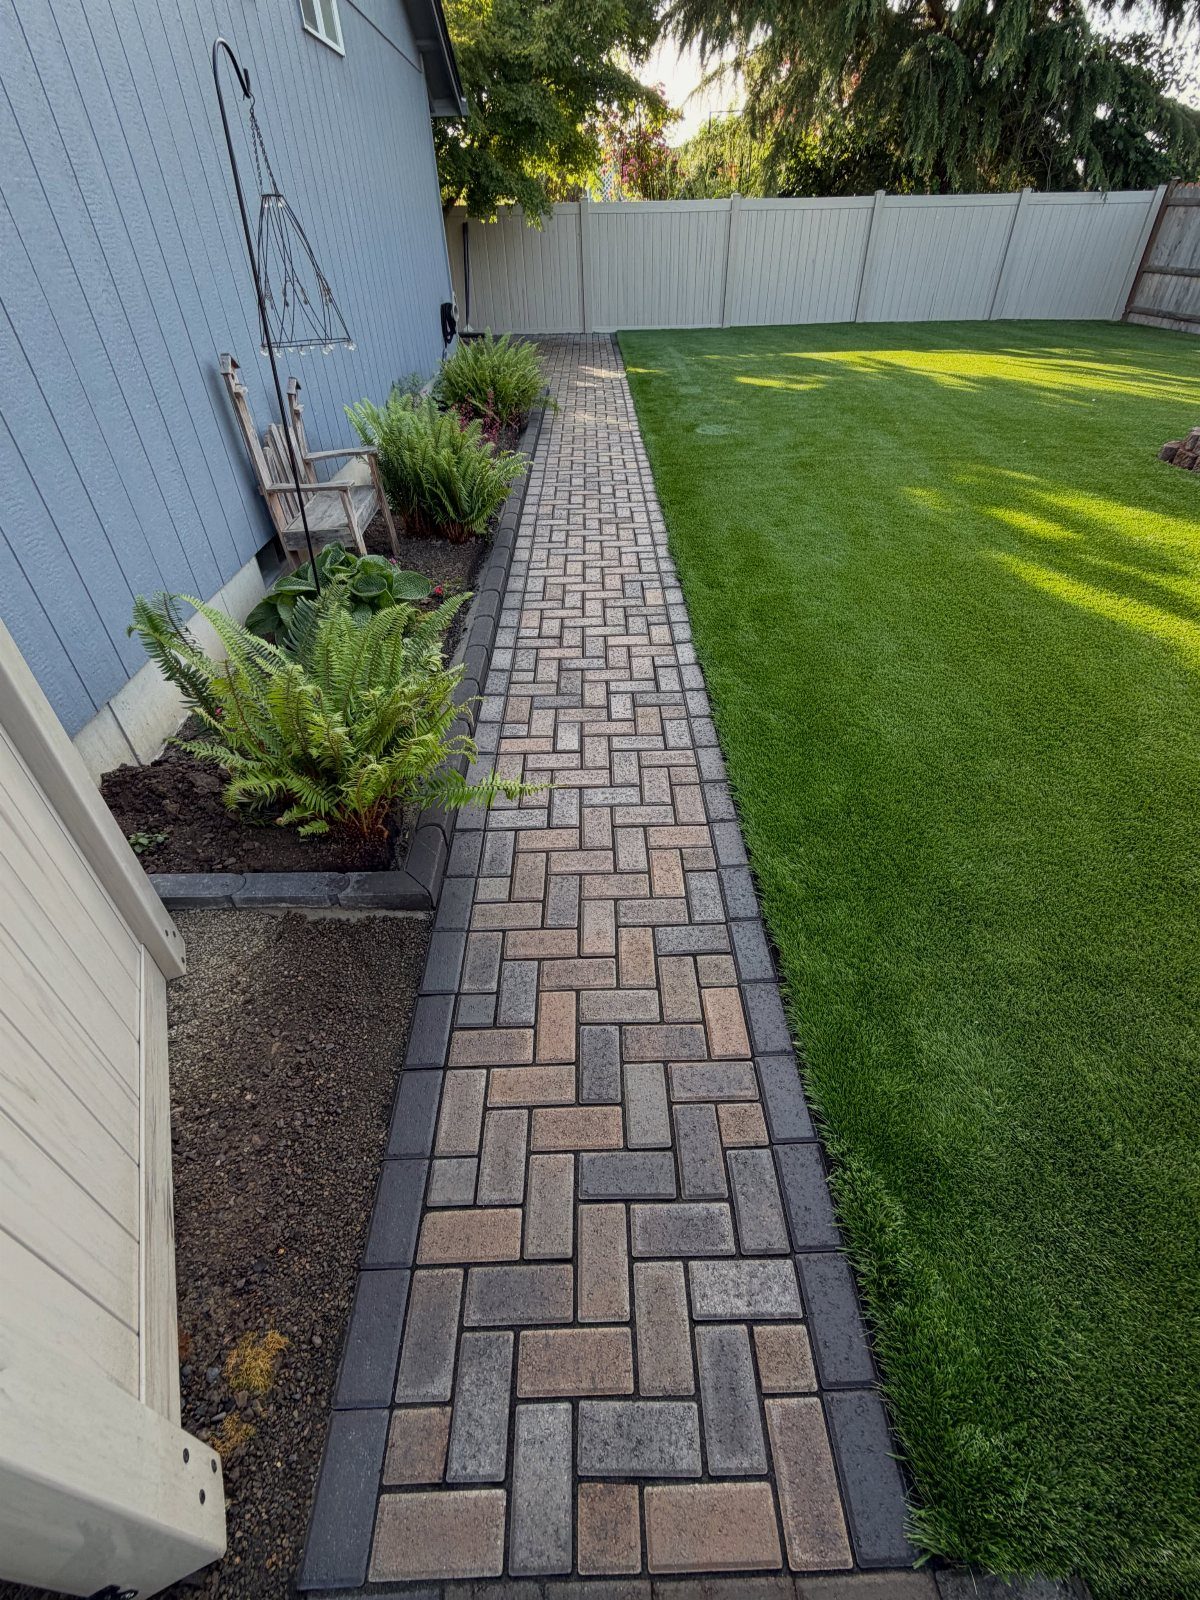
A herringbone paver strip turns the border itself into a feature, not just a divider. Angling rectangular stones against the run of the bed locks them against shifting better than laying them straight.
Base matters here: compacted gravel, a layer of sand, then tap each stone level with a rubber mallet. I would not attempt this without a mason’s line and a straight 2 by 4 to screed the sand.
The tight pattern suits formal gardens and houses with traditional architecture. Expect a full weekend for a modest run, and buy extra pavers for cuts and breakage.
5. Living Edging
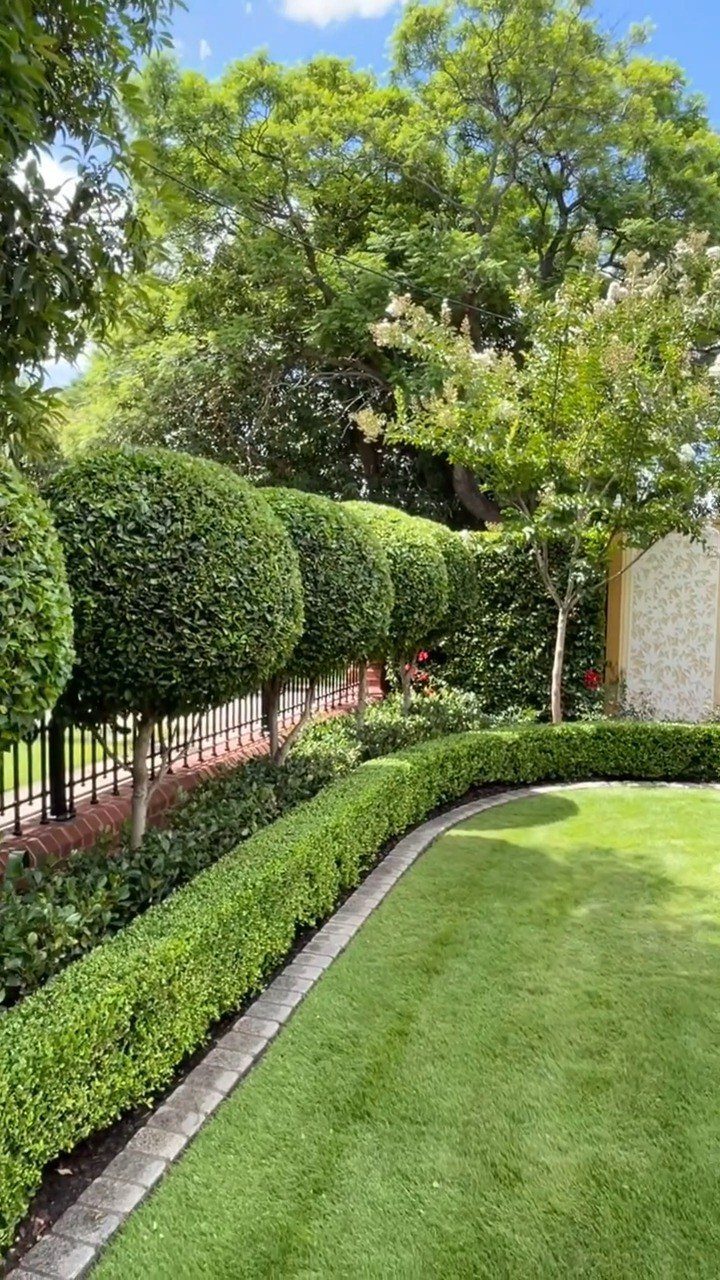
Low boxwood hedges fill in slowly from small plants, but once established they need only seasonal clipping to hold a crisp edge.
The classic dwarf variety stays low with twice-yearly shearing in late spring and late summer. I plant them close in enriched soil, mulching the first 2 summers while roots spread.
This option trades instant results for permanence; it is not for renters or anyone planning to move soon. Roots stabilize soil and clipped leaves return to compost, so the work does earn its keep.
6. Wood Edging
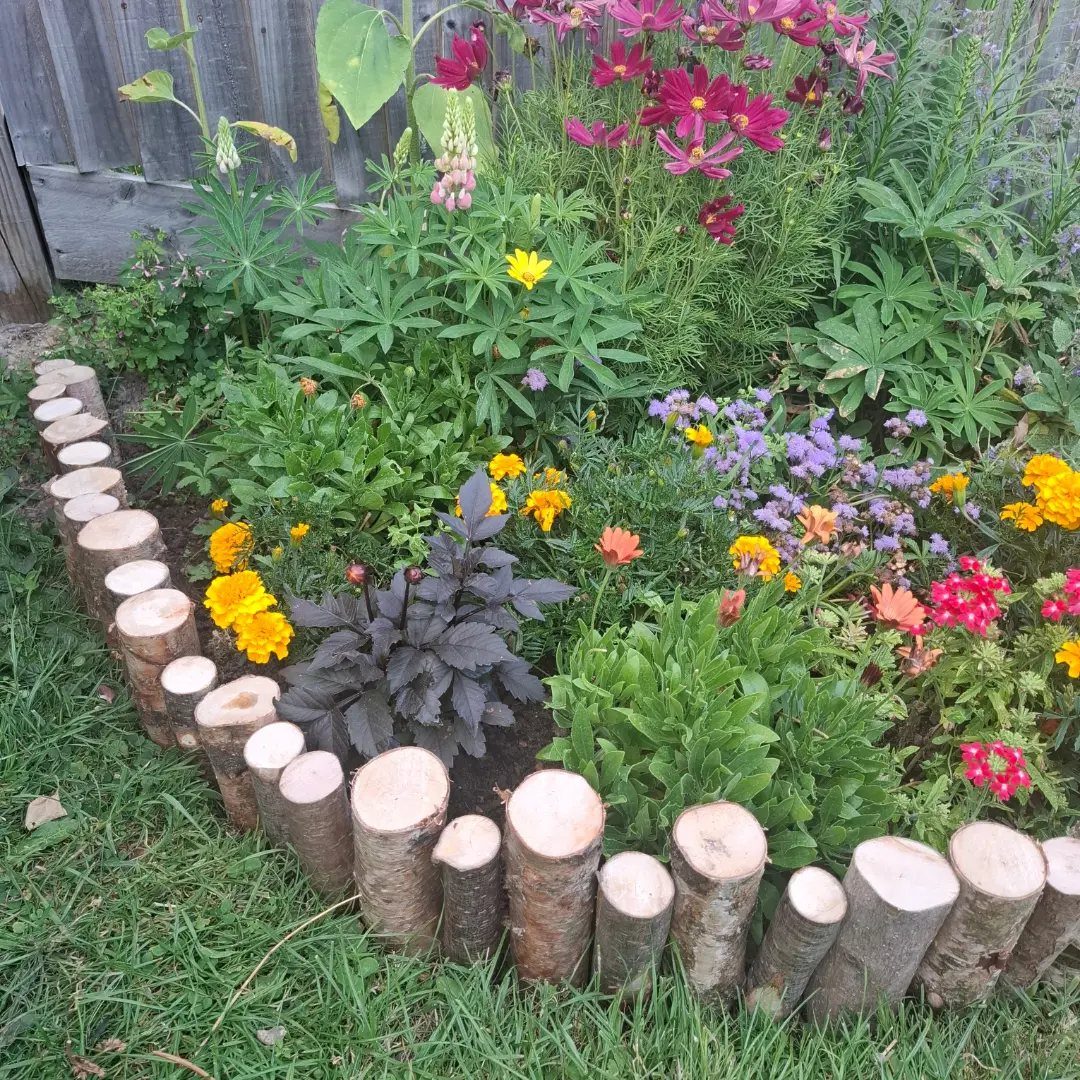
Vertical log rounds set like fence posts give a friendly, informal border that works with cottage planting and curved beds.
The ones visible are cut to length and buried halfway for stability, with diameter enough to read as a solid edge.
I soak hardwood rounds in wood preservative overnight before setting them, which buys extra years against rot in damp climates. Softwood is cheaper but the lifespan drops noticeably.
Set them touching for a solid wall, or spaced apart for a lighter look that lets some soil blend through. A sledgehammer and a level line are all the tools you need.
7. Landscape Timber
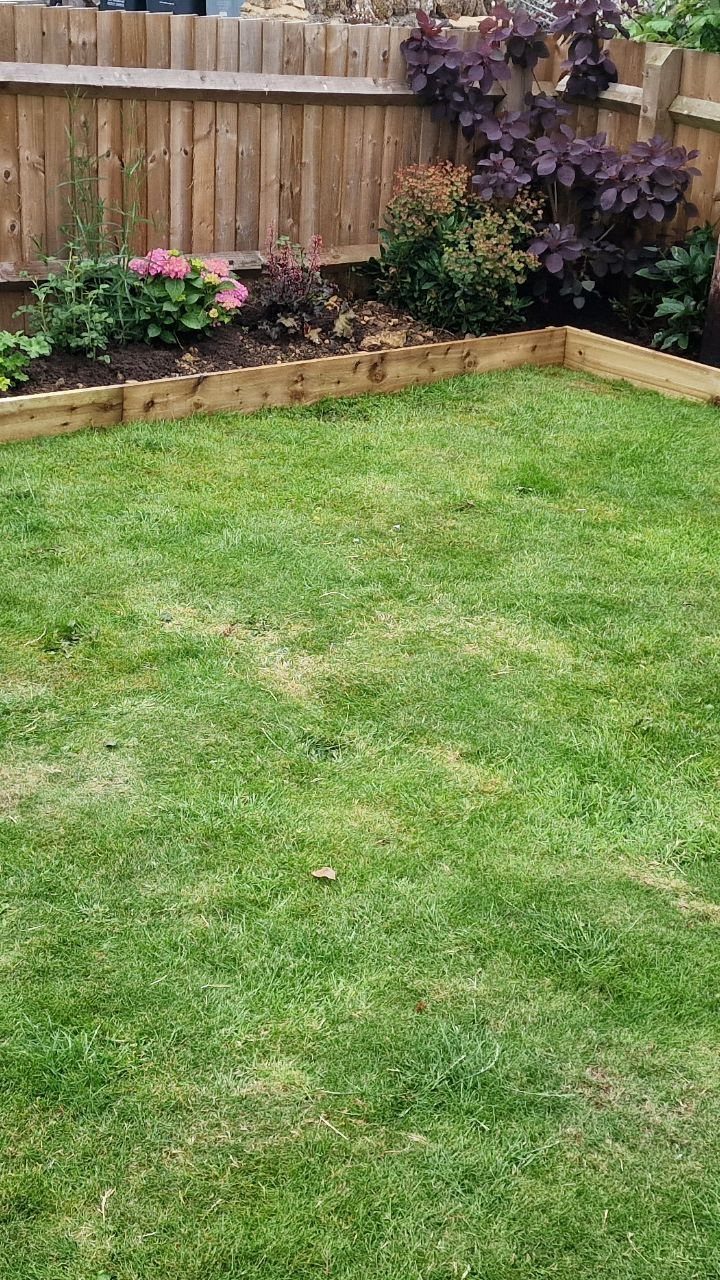
Landscape timbers laid flat and half-buried give a sturdy wooden edge that costs less than milled boards, though tight curves need angled cuts at each joint.
I like them for raised beds and flat borders alike, since a low profile holds mulch and soil without dominating small yards.
Drill holes and spike them with rebar at intervals so they do not wander in freeze-thaw cycles. Pressure-treated stock lasts longest; cedar costs more but weathers to silver without the green tint.
8. Plastic Edging
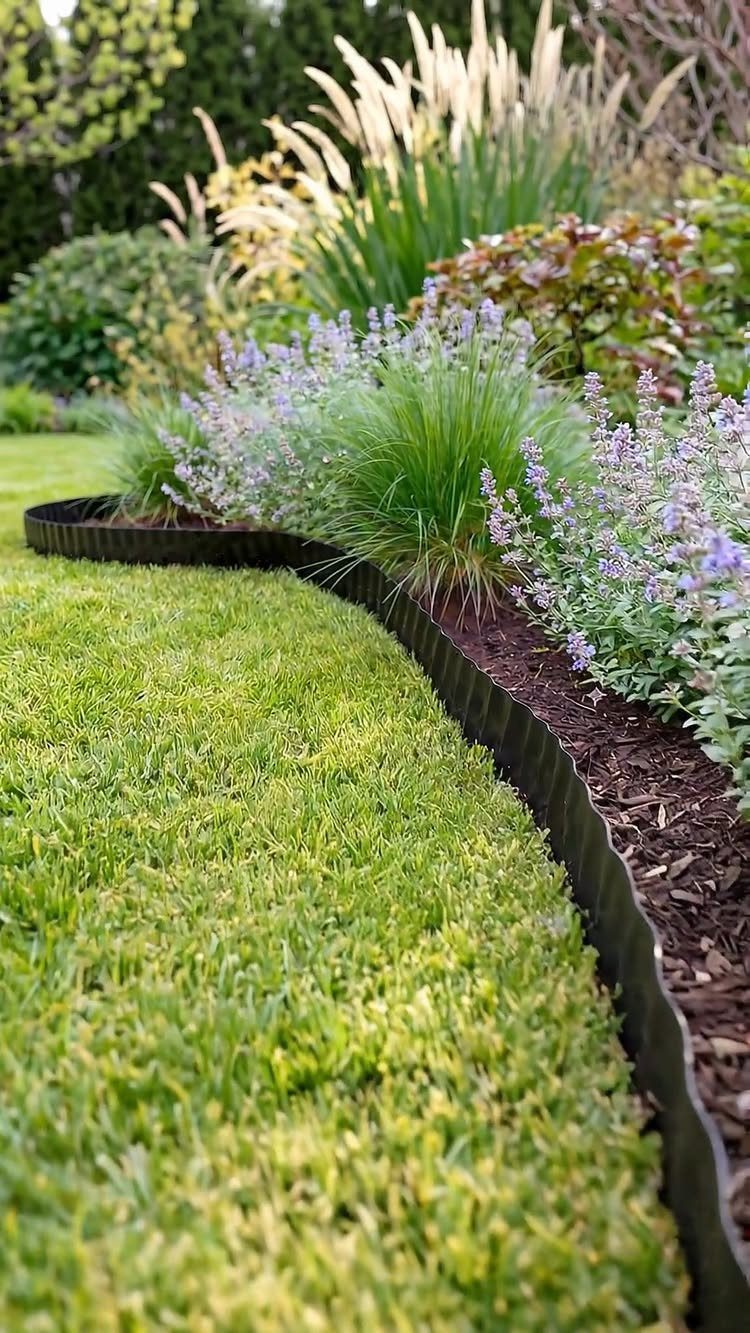
Corrugated black plastic bends around any bed shape and costs a fraction of metal or stone, which makes it the default choice for renters and first-time installers.
The wavy profile visible buries deep enough to block grass roots, with a flange at top that sits flush against the mower line.
Pound stakes through the slots at close intervals; sun will make it brittle after a few seasons, so I treat it as temporary even when it is doing permanent work. Best for beds that change shape season to season.
Made from recycled rubber, it’s an environmentally friendly choice, plus it’s soft with rounded edges so it’s child friendly too. It can be cut to size and curved, up to 70 degrees, so it’s ideal for trimming around trees or flower beds.
9. Glass Bottle Edging
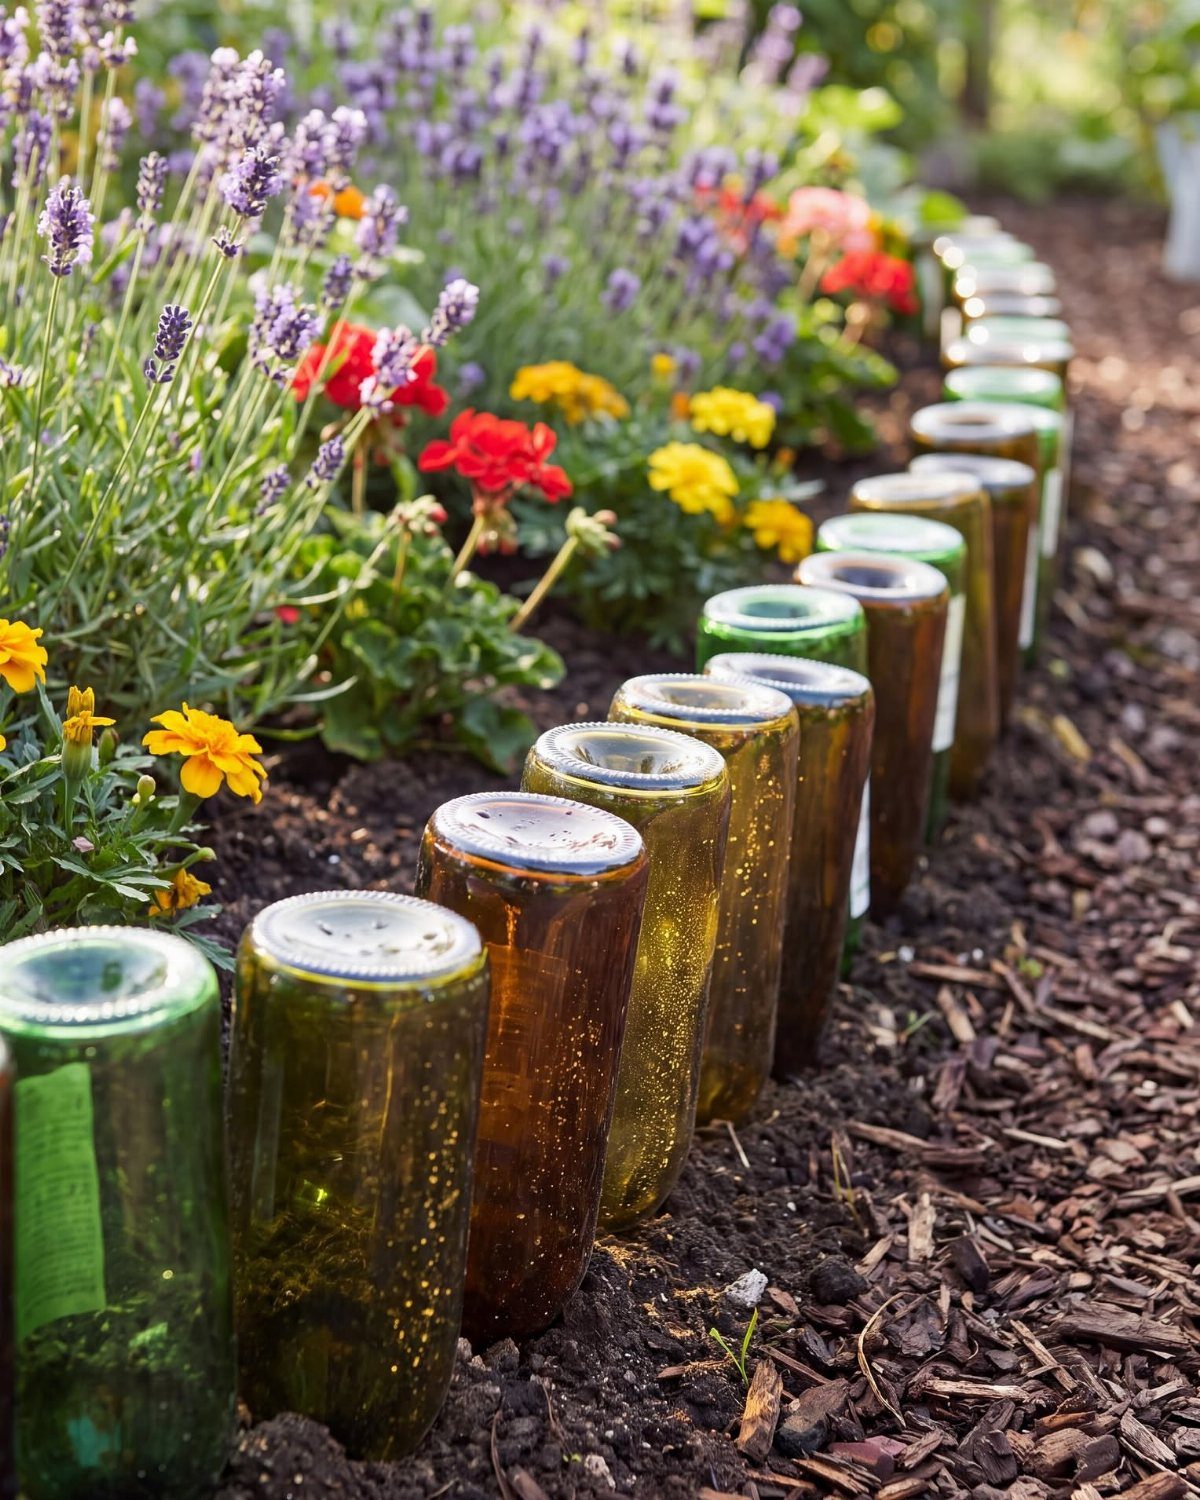
Upended bottles set neck-down in a narrow trench turn recycling into a colored glow that catches morning light.
I sink them two-thirds deep so the shoulders brace against each other; any bottleneck works, though Bordeaux-style bottles give the most uniform line.
Remove labels or let weather do it. The soil holds them in place without mortar, but frost heave can still push bottles out of line or crack them since glass has no give once the ground shifts.
This is weekend work that costs only patience and whatever your household drinks.
10. Railway Sleepers
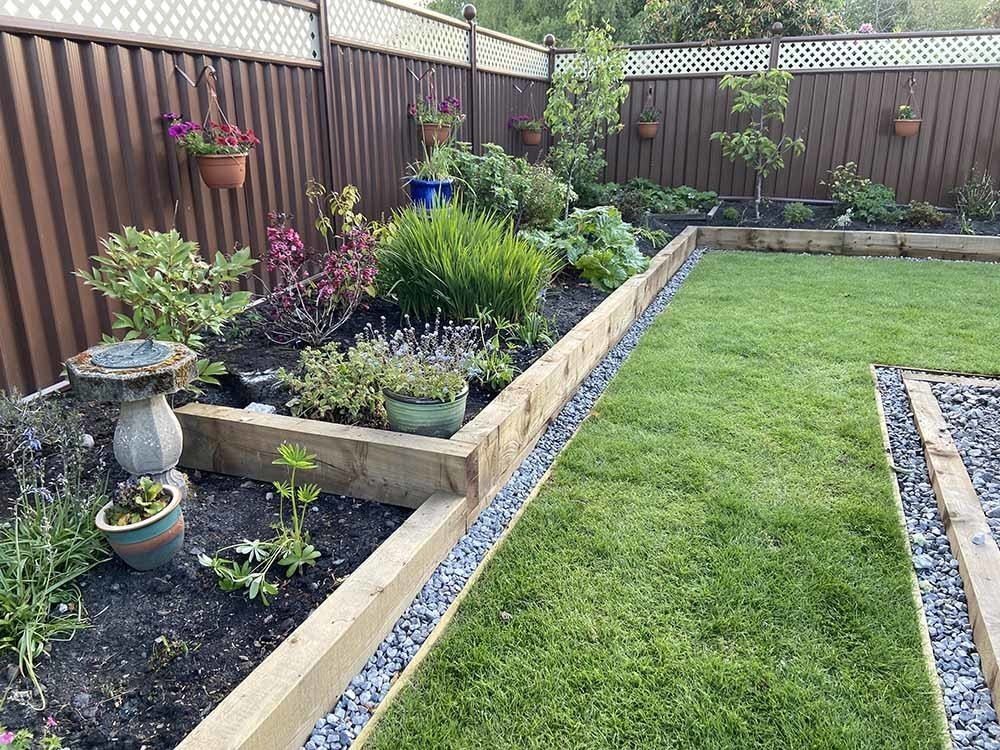
Old hardwood sleepers stacked two or three high make a raised border that holds back soil and defines space with serious visual weight.
I use them where the lawn drops off to a bed, since the thickness absorbs grade change without building retaining walls.
They are heavy enough that a pair struggles with one; rent a dolly or plan for a full crew. Creosoted stock resists rot but I would not plant edibles against it; untreated oak is the safer trade-off for vegetable gardens.
11. Hedge Borders
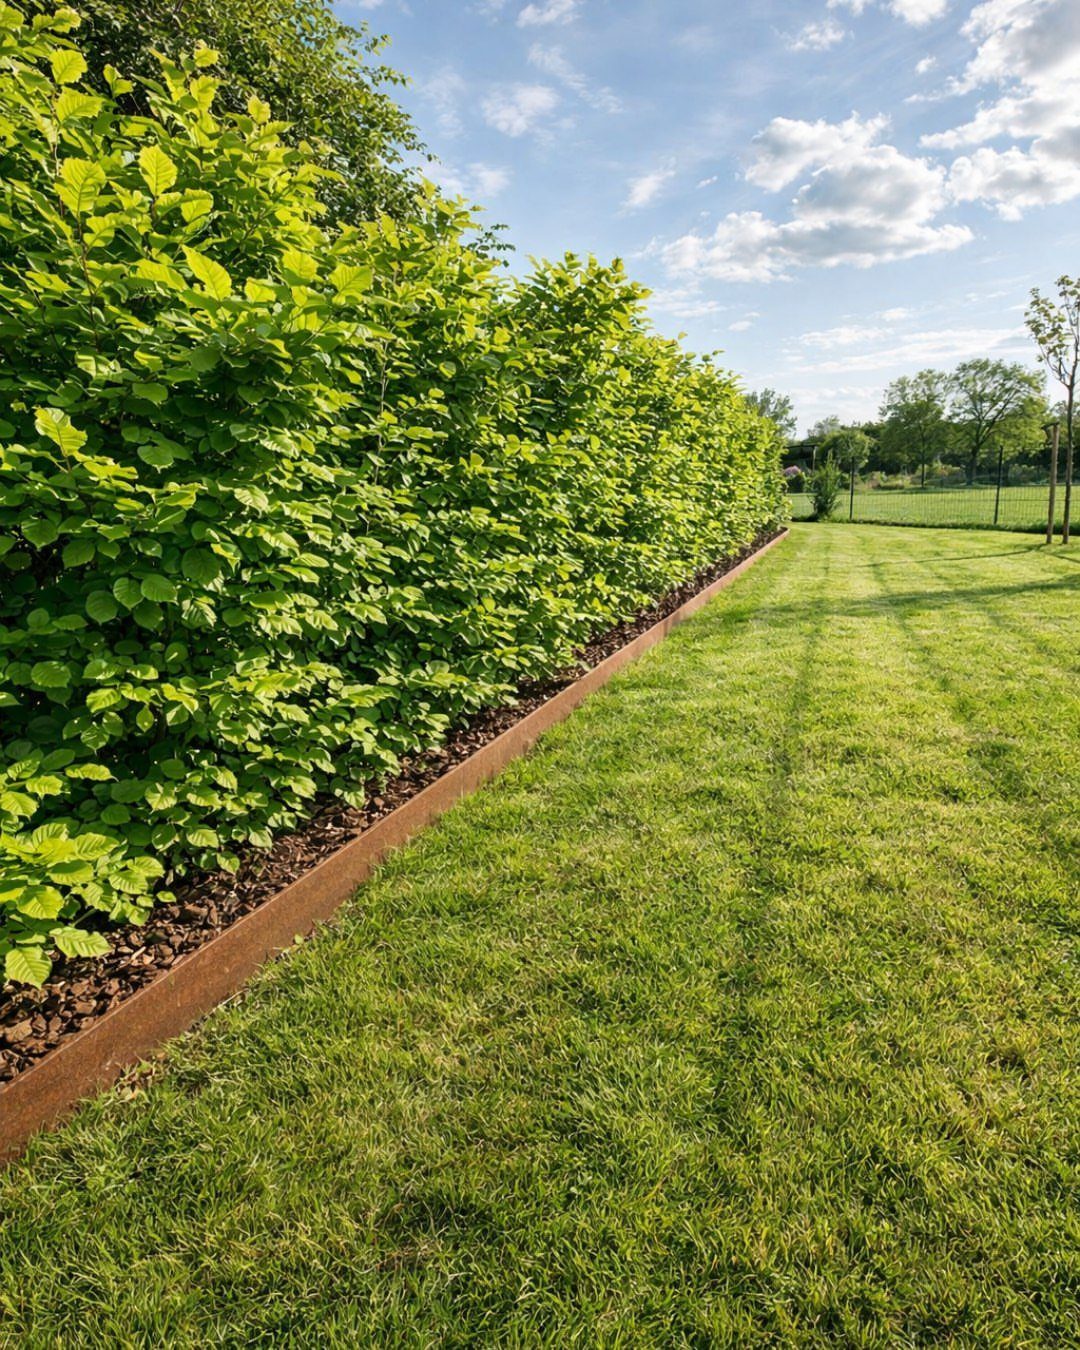
A sheared hedge gives living architecture that changes with the season and asks only for clipping twice a year once established.
The metal strip at its base is optional; I add it where grass creeps aggressively, since trimming a crisp line freehand takes skill most weekend gardeners lack.
Boxwood and yew grow slowly enough to control, privet faster but hungrier for shearing. This is the longest-commitment edging on the list, so plant it only where you plan to stay.
12. Mini Picket Fence
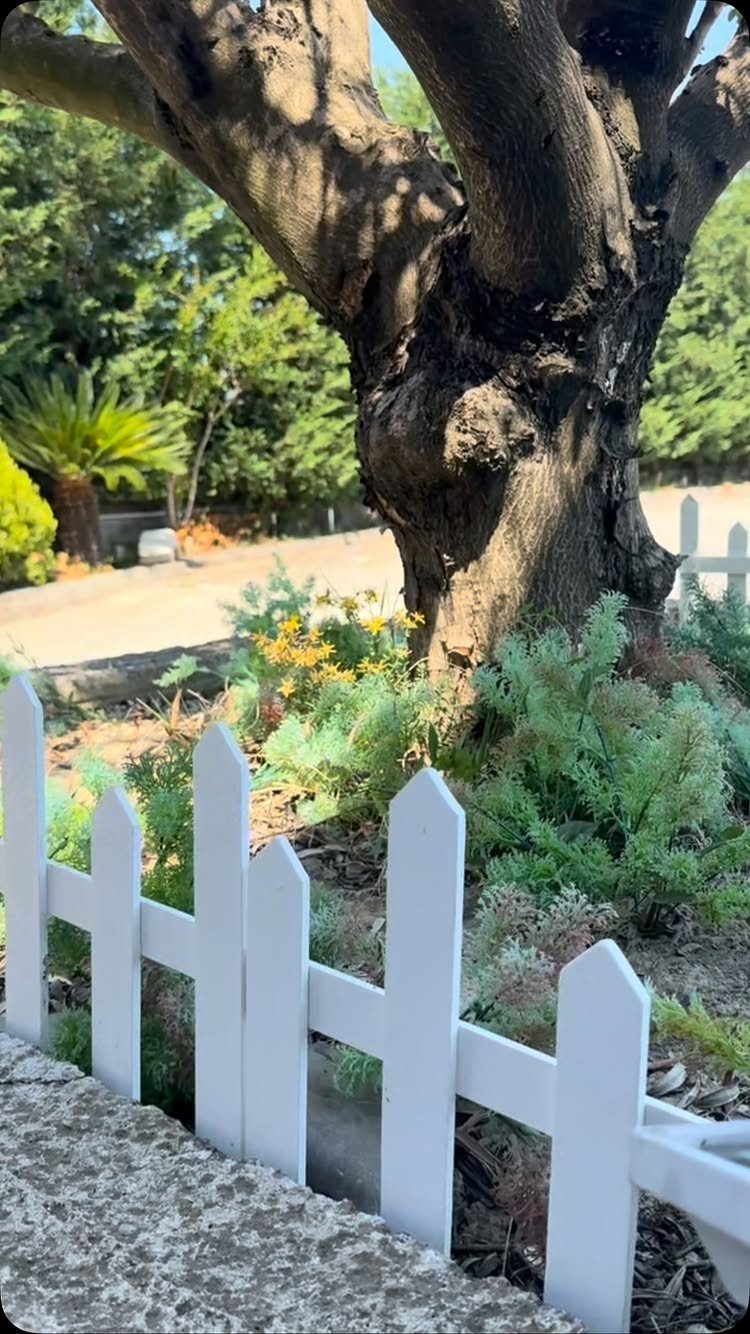
Short white pickets enclose a bed with cottage charm that reads as garden feature, not just boundary.
I keep them low enough that they do not fence the viewer out; pressure-treated pine takes paint well and resists rot if the bottoms are sealed.
Set posts in gravel rather than concrete if you might want to move the line later.
Mowing means trimming by hand or accepting a thin grass gap, which is the trade-off for the look. Best around specimen trees and formal front beds.
13. Neat Lawn Edging
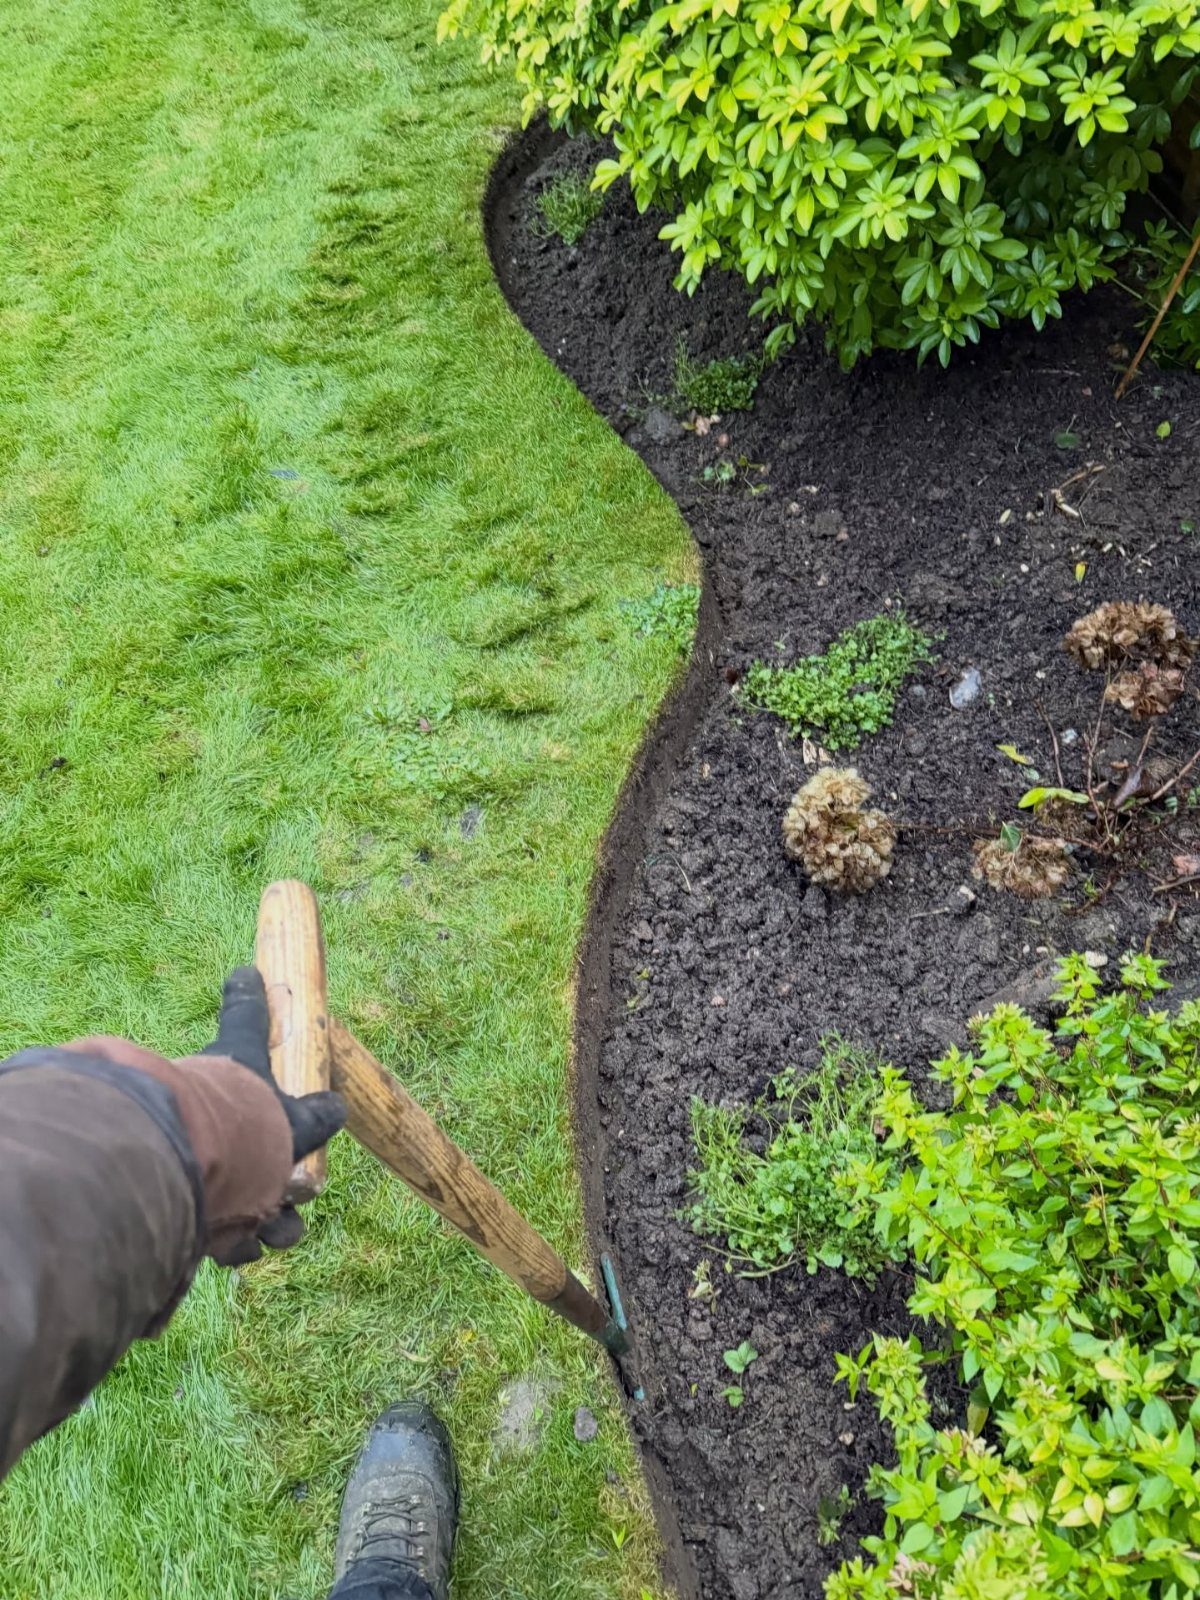
A manual half-moon edger driven along a string line gives the sharpest grass edge for no material cost at all.
I use this method when a bed changes shape yearly or when I want the lawn itself to read as the border.
Cut straight down on the bed side, then angle back under the grass to remove the wedge; the vertical face throws shadow that reads as a dark line from across the yard.
Refresh the cut twice a season. Best for gardeners who already own the tool and do not mind the repeat labor.
14. Poured Concrete Curb
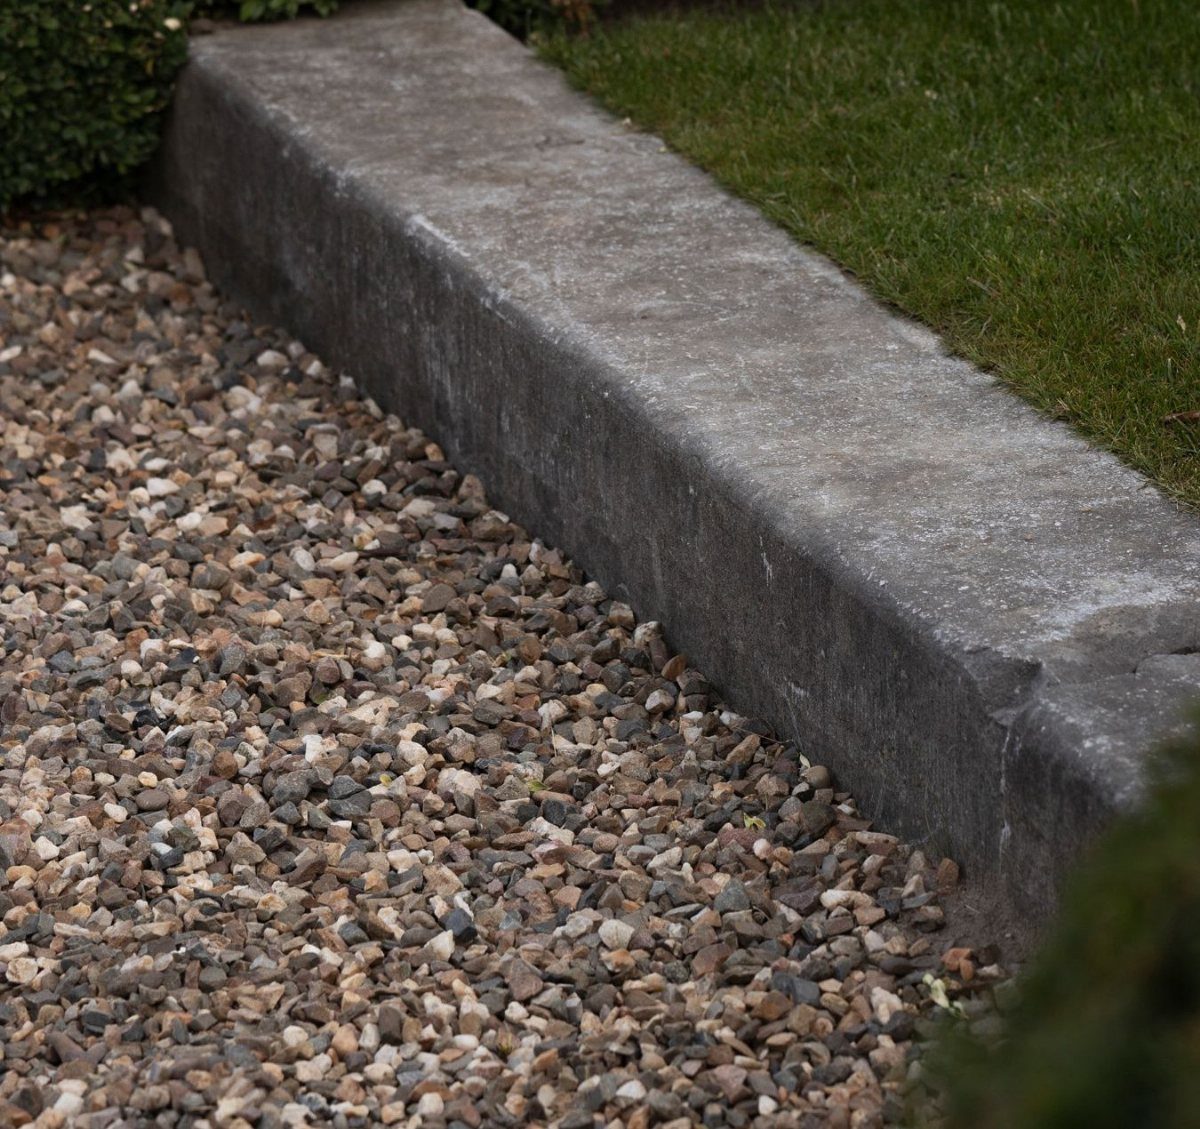
A continuous concrete curb forms a single waterproof barrier between lawn and gravel that nothing grows through.
I see this most often in new builds where the builder included it, since renting a curb machine for a DIY pour rarely pays off on modest lengths.
The smooth face catches light and stays clean with a hose; color can be tinted at the truck for a softer tone than raw grey.
Cracking through freeze cycles is the real risk, so I would not choose this where winters hit hard and drainage sits poor. Where it works, it works for decades.
15. Raised Wooden Garden Bed
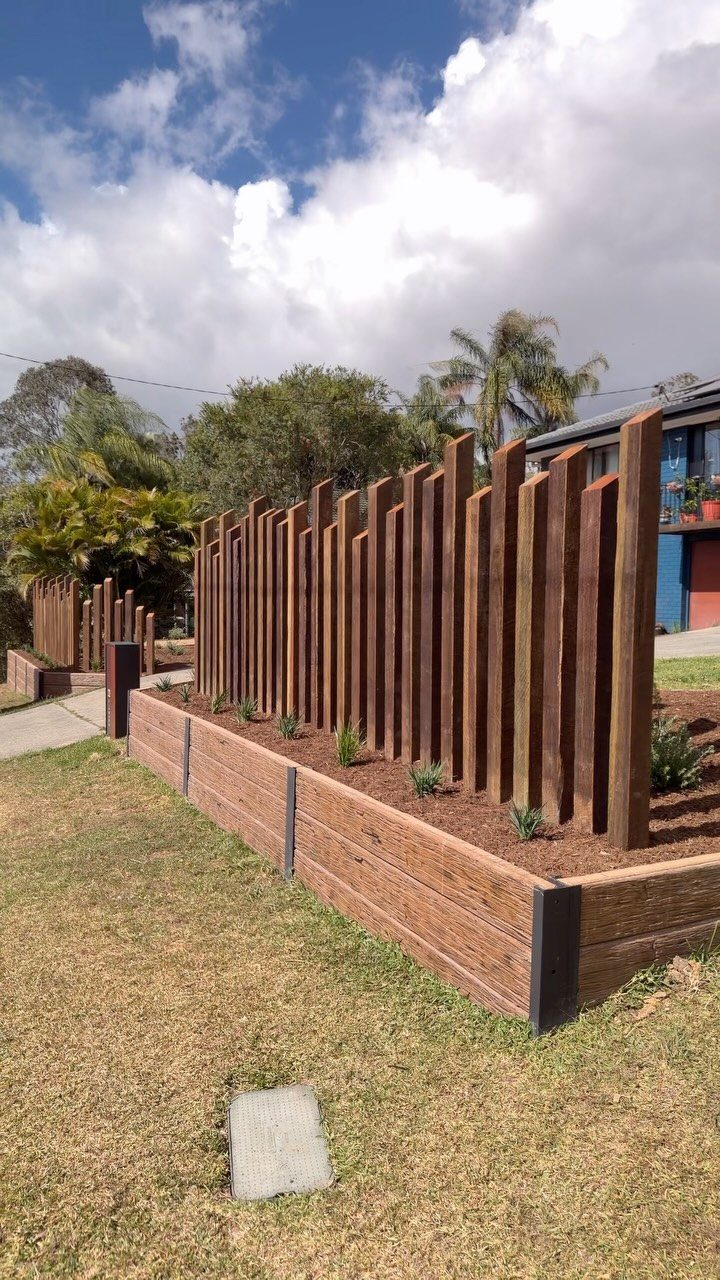
A raised wooden bed along the lawn edge turns the border itself into planting space, which matters when ground level stays poor or compacted.
The visible version runs long and low with vertical slats screening behind; I would build the box first, level on a gravel base, then add the screen as a second stage once the structure proves square.
Cedar or redwood holds up without the chemicals of pressure treatment; line the interior with fabric to slow rot where soil meets wood. This is weekend work that needs a miter saw and a drill, not masonry skills.
16. Stacked Stone Block Border
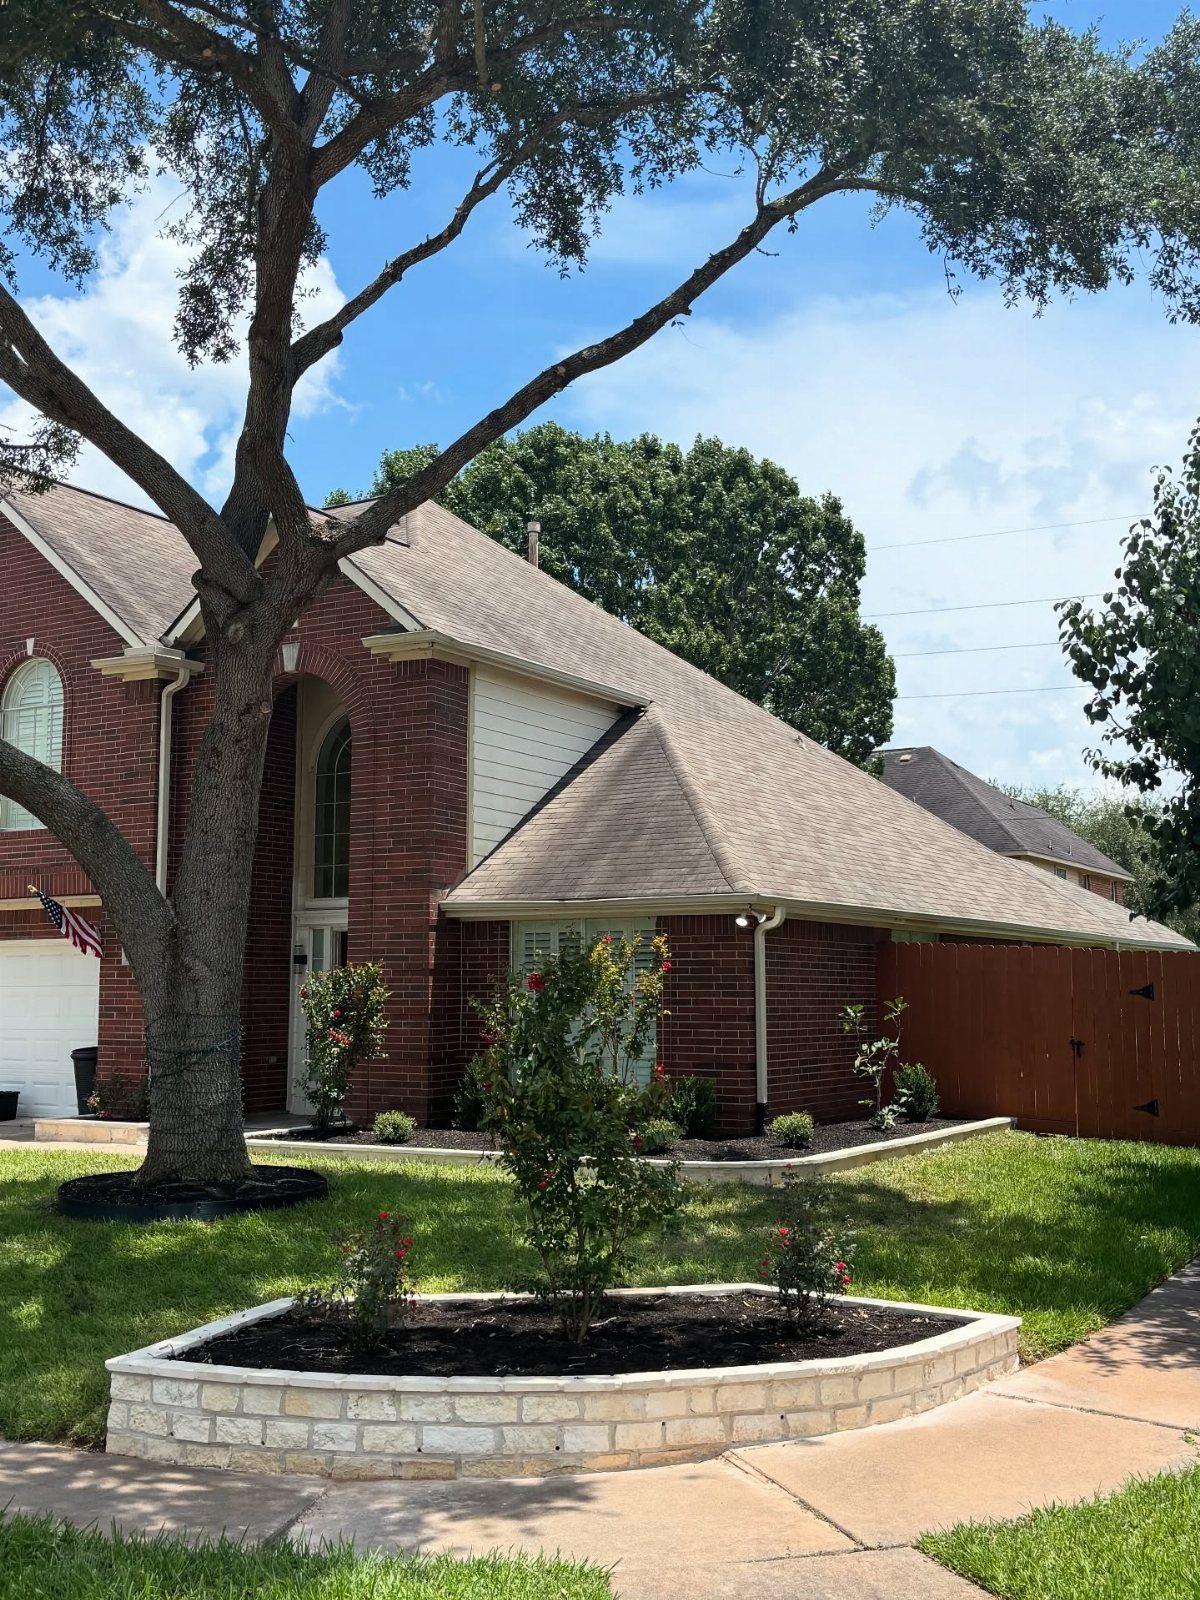
Stacked stone blocks give a raised bed that reads as permanent landscape without the weight of solid stone or the skill of mortared work.
The curved face visible is built by setting each block slightly back from the one below, letting the wall lean into the soil it holds; drainage behind is not optional, since water pressure will push a dry stack over in wet seasons.
I use the lightest blocks I can find, since even hollow-core units add up across a long run. Cap the top row for a finished edge that sheds water.
Installation Tips
Lay a garden hose on the grass and walk the shape a few times before you dig. Curves read differently from standing height than they do at knee level, and a rope lets you adjust without sunk cost.
Dig your trench wider than the edging itself by a few inches on each side. The extra room lets you backfill and tamp for stability, especially on curves where the material wants to push outward against soil pressure.
For flat-edged materials like brick or timber, the buried depth should put the top surface flush with the mower line, which means setting it just above soil grade so your blade can pass cleanly.
Too high and the blade catches; too low and soil buries your work by midsummer.
Clear the full width of grass and roots before setting anything.
Decomposition under edging produces soft spots that tilt the line within a season. A clean base is what separates edging that holds from edging that wanders.
Maintenance Considerations
Wood edging needs the most attention over time. Pressure-treated stock resists rot but still checks and splits as it dries; I reseal cut ends yearly where water wicks in.
Metal asks almost nothing once staked.
The rust layer on steel stabilizes and protects the core, so I leave it alone rather than painting. Dents from mower contact are permanent, so I set the strip back far enough to miss the wheel line.
Plastic becomes brittle in UV after a handful of seasons. I inspect the flange each spring for cracking and keep spare stakes on hand; a failing edge scatters into the lawn fast once it starts.
Concrete curb and stone block need only weed pulling and an occasional hose wash. The real maintenance is watching for frost heave or drainage failure behind the wall, which shows as a lean or a crack, not surface wear.
Frequently Asked Questions
What is the 3 inch edging rule?
I dig the trench 3 inches past the edging on both sides, so the material has room to sit.
That gap lets me backfill and pack the soil tight; on a curve it matters more because the edging wants to push outward.
I follow it for every type of edging because a narrow trench leaves the line tilting within a season.
What is the cheapest landscape edging?
Gravel and plastic edging cost the least up front, though they serve different purposes.
Gravel needs only a trench, landscape fabric, and stone you can often source locally. Plastic runs even less per foot and bends around any bed shape, though I treat it as temporary since sun brittles it after a few seasons.
Salvaged bricks from a demolition yard can also beat retail prices if you have time to hunt for matching color.
How to make a border for landscaping?
I lay a hose where I think the border should go, then stand up and look at it from normal height; the shape changes completely between knee level and eye level.
Dig a trench wider than your material by a few inches each side, clear all grass and roots so decomposition does not soften the base, then set your edging flush with the mower line and backfill firm.
The exact material, wood, stone, metal, or living plants, depends on your budget, timeline, and whether you need something permanent or movable.
How should you edge your lawn?
For a clean edge that costs nothing, I set a string line on the bed side and drive a half-moon edger straight down, then cut back under the turf at an angle to lift the wedge out.
That vertical wall catches light as a thin dark strip from across the lawn.
I re-cut it mid-season and again in fall; if I am tired of doing that, brick, steel, or plastic strip buried flush will stop the grass roots from crossing permanently.





