
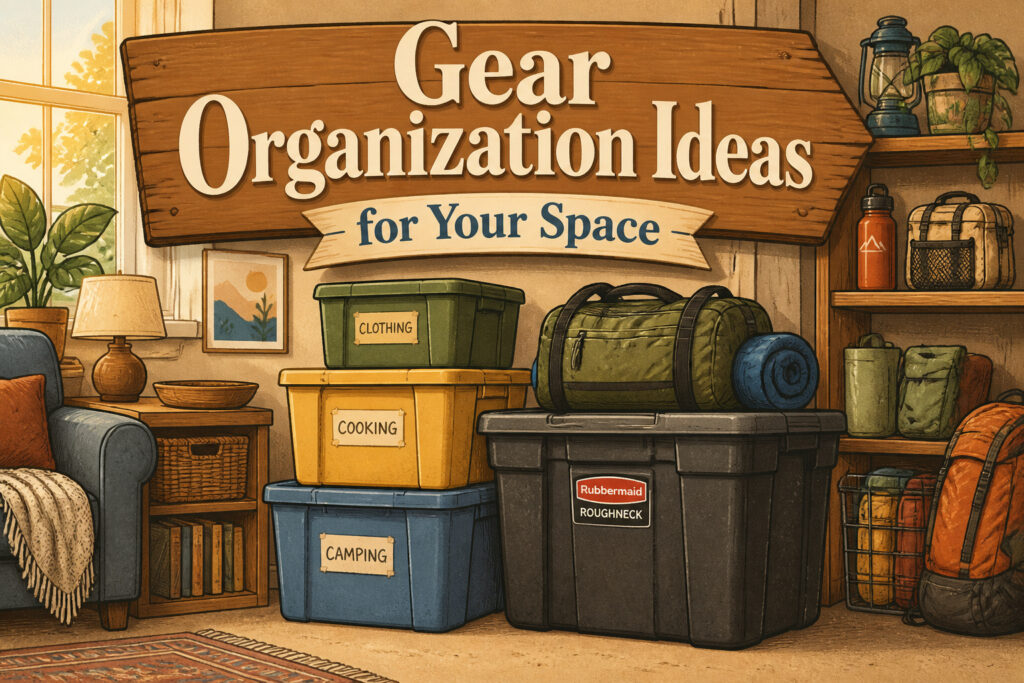
The best gear organization system is the one you actually maintain, and most collapse the moment life gets busy.
Color-coded bins look perfect until a shoulder-season stove breaks your five-color scheme into seven, then eight, and suddenly you need a legend taped to the lid just to pack for a weekend.
The Rubbermaid Roughneck tote that survives a decade of garage abuse costs about $10 at Lowe’s and stacks tight enough to ride in a truck bed without popping open, which is why it still has a place even after fancier options arrive.
1. Heavy-Duty Storage Bins
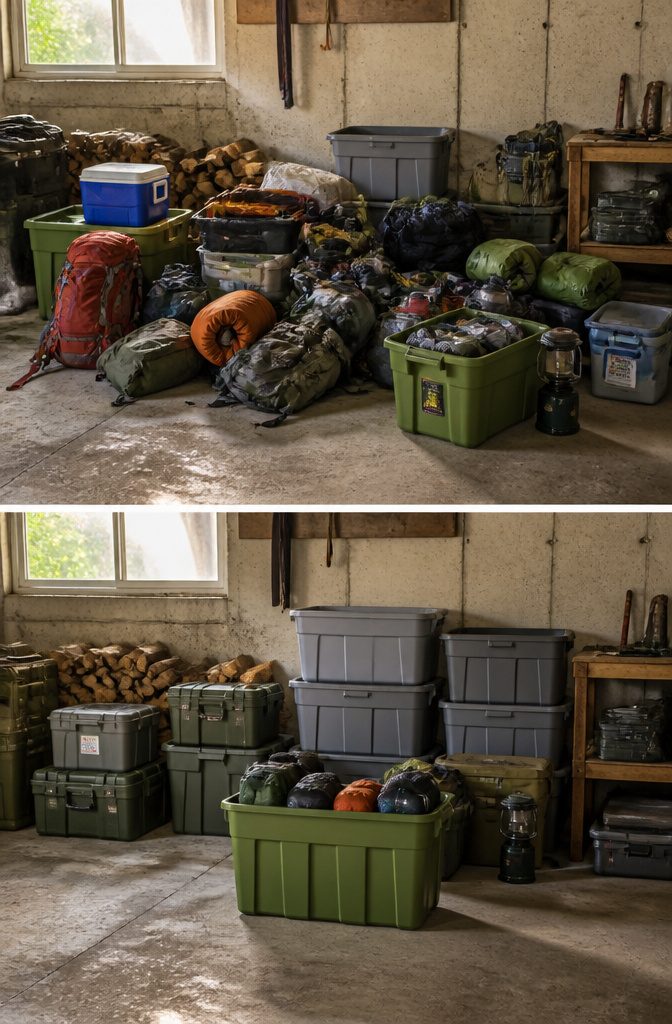
Hard-sided bins crack under pressure, and after watching a Rubbermaid Roughneck tote survive ten years of garage abuse, I still keep a few around for gear that doesn’t need coddling.
The 27-gallon Project Source heavy-duty totes from Lowe’s run about $10 and stack tight enough to ride in a truck bed without the lids popping; their opaque walls also hide the visual chaos that clear bins broadcast across a small rental room.
For anything bulkier, the REI Trailgate Bins in 60, 100, or 140 liters trade rigidity for capacity. The foam-reinforced fabric panels let you tuck in one more sleeping bag after the bin already looks full, then fold flat when the season ends.
Multiple handles on every side matter more than you’d expect when you’re hauling 140 liters down apartment stairs.
Stackability is non-negotiable in a renter’s closet. Floor space disappears fast; vertical storage that won’t topple keeps your security deposit safe.
The Gregory Alpaca Gear Box 45 adds a transparent top panel and a lid that seals secure, which makes it worth the premium for kitchen gear where you need to spot the stove fuel without unstacking everything above it.

Product Dimensions: With an outer size of 28 1/2" x 19 5/8" x 15 1/2" and a 27-gallon capacity, this industrial tote holds bulky equipment, tools, materials, and supplies for home organization.

MAX CAPACITY, FEWER TRIPS - 62L collapsible storage bins with lids hold more in fewer loads; perfect for groceries, bulk storage, camping gear, and collapsible crates for trunk organization

Roomy Storage for Bulky Gear: this this extra large duffle bag measuring 70 x 18 x 12 inches and offering a large storage capacity of 250 L, designed for large outdoor and household items such as tent components, canopy covers, camping chairs, sleeping bags, folded mats, cushions and seasonal equipment; Choose the size that fits your gear
2. Transparent Bins and Visibility
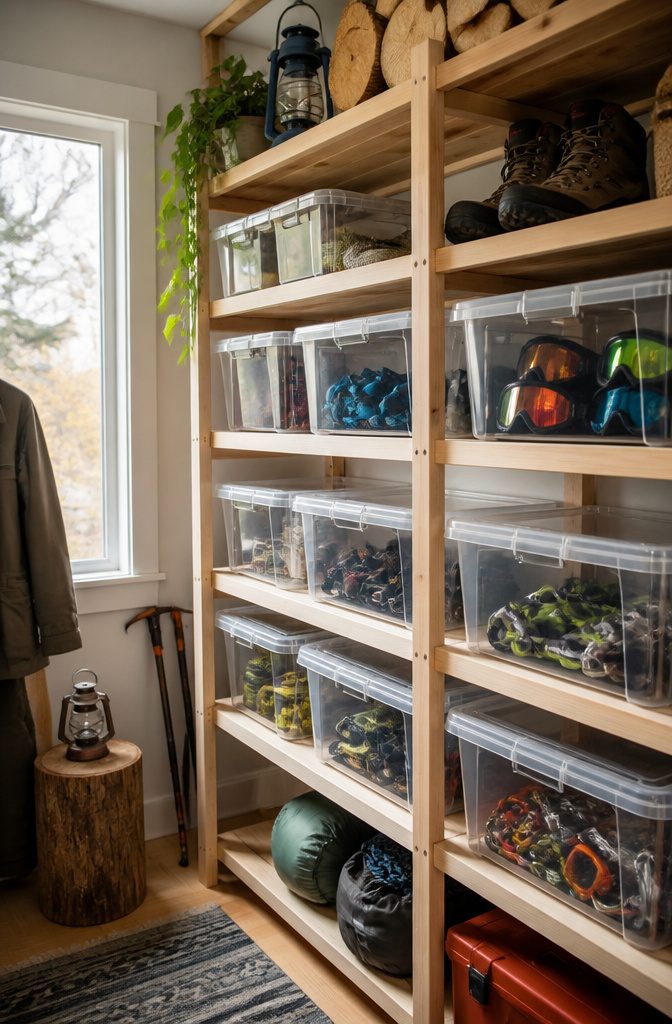
Opaque bins hide what you own until you pull the lid off and dig. Clear bins let you scan a shelf in seconds and know whether your headlamp or your rain shell is the thing missing from the bag.
That speed matters most on a Friday evening when you are trying to get out the door for a weekend trip and do not want to open four containers to find your stove.
I keep the gear I use seasonally, like ski goggles or summer climbing chalk, in solid bins on a higher shelf. The stuff I grab every other weekend lives in transparent ones at eye level.
If you cannot see it, you will not pack it, and the bin you skip is the one that costs you a gas-station replacement on the road.
Labels help, but a label only tells you what should be inside; a clear wall shows you what actually is.

IDEAL STORAGE CHOICE – These large capacity bins are great for creating a clean and organized refrigerator or pantry. Perfect deep plastic home storage organizer bin for cube furniture shelving in office, entryway, closet, cabinet, bedroom, laundry room, nursery, and kids toy room. Ideal for kitchen storage, pantry storage, fridge storage and your pantry cabinet or storage cabinet. You can use these storage organizers anywhere in your home.

✅Functional Storage for Any Space: You can use these pantry bins for various things throughout your home to organize and make your life easier. They are fit to pantry organization,ideal for cabinet, kitchen, fridge, bathroom,under sink, closet,laundry room and RV.The clear organizing bins to store drinks, snacks, cans, meat,body face wash, cleaning supplies and daily necessities.

Make Storage More Simple — These clear storage bins are versatile enough to fit easily in your fridge, refrigerator as well as pantry shelves, and cabinets, make your storage easier and help to keep your refrigerator, fridge and pantry look neat and organized.
3. Pegboard Systems
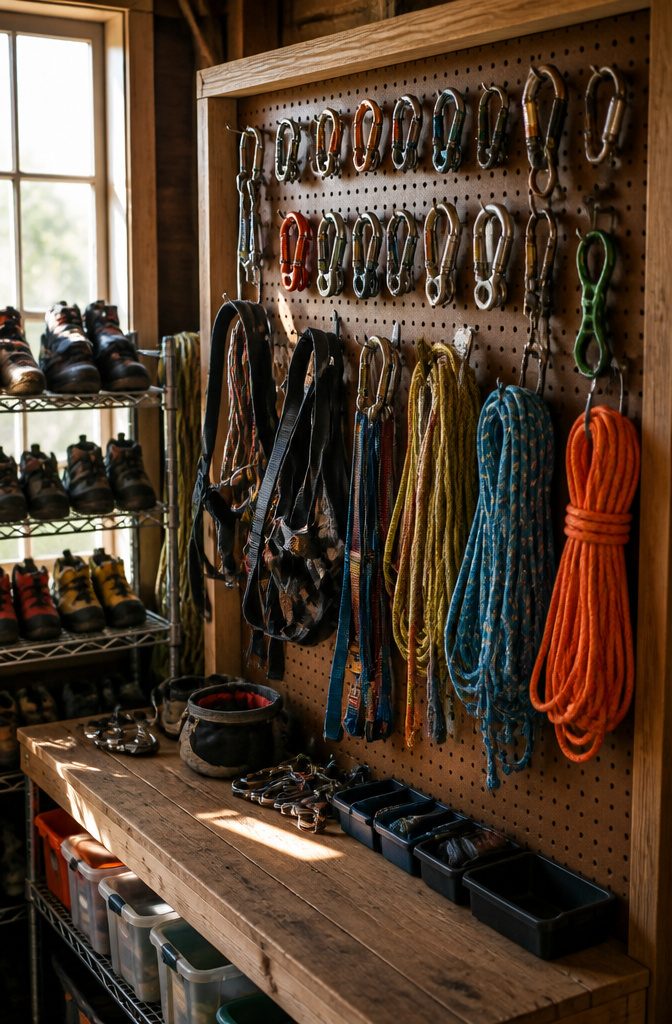
A pegboard wall puts every carabiner, cam, and harness in plain sight so nothing gets buried in a bin.
The backing boards sit on a frame of 2x4s screwed into studs, which leaves the gap you need for hooks to pass through.
I like that part: the whole system costs little more than the pegboard and a few lengths of lumber, and you can shift hooks around as your gear changes.
The renter’s version skips the studs. A freestanding pegboard on a simple hinged frame, or one leaned against a wall and anchored at the base, gives you the same visibility without drilling holes you will have to patch later.
It will not take a heavy rack of ice tools, but it handles climbing hardware and shoes fine.
One warning on the DIY route from someone who has built more than one of these: the board looks better in the planning stage than it does with ropes draped over it. Outside Online puts this more bluntly:
Don’t waste your time making things look beautiful and laying out gear on a pegboard wall. Your garage isn’t an REI.
The real payoff is the A- and B-team split: gear you reach for every weekend at eye level, the backup and seasonal stuff higher up or in bins below. Visibility is the point, not display.

ENHANCES ATHLETICISM. This product is best used for Wall Climbing Trainings, Metolius Climbing, Cross Training exercises, Gymnastics and Parkour Training

Designed for use with Dorman Peg Strips and fits any 1/4-inch pegboard

Extra-Thick Solid Birch Plywood Climbing Board – Made from pure multi-layer birch plywood with a 5 cm thick solid board, this IRONVIB wooden climbing wall panel is strong and wear-resistant for heavy training in an indoor home gym, indoor climbing gym or Swedish ladder wall gym. Great as a wooden climbing wall, climbing wall for kids indoor, rock climbing wall for kids, indoor climbing for kids and home bouldering practice in your playroom or home gym.
4. Shelving Units
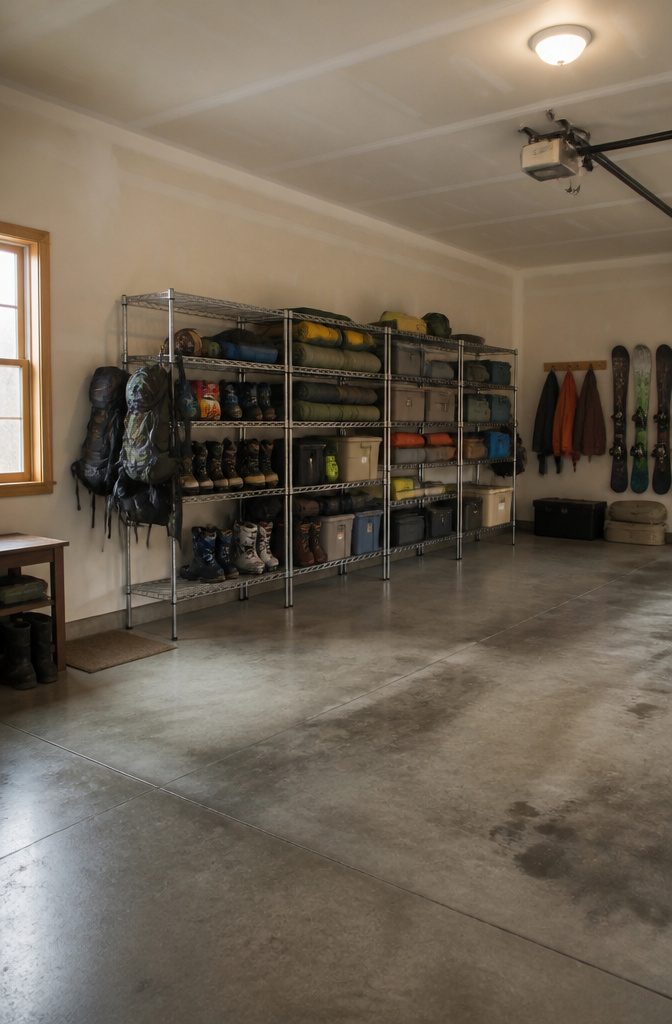
Adjustable shelving turns vertical wall space into storage you can actually use, and the height between those shelves matters more than most people notice at first.
A heavy-duty wire unit with removable shelves let my friend Reid fit ski boots and mountaineering boots that a standard shoe rack would have crushed, and the same system works for tents and sleeping pads stacked on a second unit.
The wire lets mud fall through instead of caking on the surface, and S-hooks on the frame hold wet backpacks until they dry.
For renters, freestanding beats wall-mounted every time. A unit on wheels, or one you can add casters to, rolls out when you move instead of leaving anchor holes behind.
Weight capacity needs real attention though: a 27-gallon bin full of gear gets heavy fast, and a cooler or tent packed wet weighs more than you expect.
The industrial steel unit I looked at holds 1,800 pounds per shelf, which is overkill for most basements but not absurd for a loaded garage setup.
Keep the heaviest bins on the bottom shelf or the floor itself so you lift with your legs, not your back reaching upward.
If you skip wheels, raising that lowest shelf to sit on top of a floor-level bin gives you one extra surface, though the stack gets wobblier the higher you build it.

【Multi-Functional】The closet drawer are convenient to store your lightweight items such as shoes, clothes, toys, snacks, books, file etc. Suitable for bedroom, bathroom, kitchen, living room, office or study areas. Stylish neutral style, suitable for any place

【Multi-Functional】The closet drawer are convenient to store your lightweight items such as shoes, clothes, toys, snacks, books, file etc. Suitable for bedroom, bathroom, kitchen, living room, office or study areas. Stylish neutral style, suitable for any place

Product Size: To ensure a perfect fit for your wardrobe, please pay close attention to the product dimensions before making a purchase. Each storage box layer measures 16.73 inches in length, 13.11 inches in width, and 7.28 inches in height (equivalent to 42.5 cm x 33.3 cm x 18.5 cm). Double-checking these measurements will help you avoid any compatibility issues.
5. Color-Coded Storage
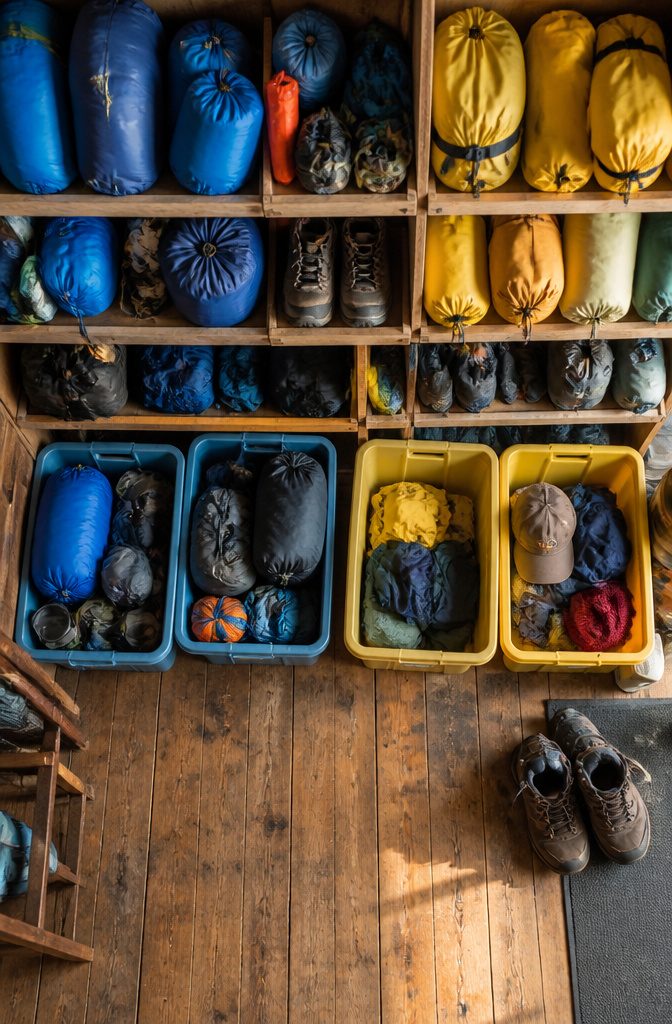
I started my color system with five categories, just like most people who sort by shelter, sleep, cooking, clothing, and safety or navigation gear.
Blue bags carried the sleep system. Red marked ski and snow gear.
Green handled kitchen stuff. Yellow was clothing layers.
Black held anything first aid or emergency. The categories felt clean on paper.
What broke down first was the overlap.
A stove you only use in winter lives in a different mental bucket than the three-season stove, but both are cooking gear. I ended up with a gray stuff sack for shoulder-season items that did not quite fit.
The five-color system became six, then seven when I added a small dry bag for toiletries that used to scatter into everything else. Each new color made the system harder to scan, not easier.
Dry bags and stuff sacks ventilate poorly if you seal them around tents or sleeping pads, so leave those bags open at home or mold sets in fast.
The color code works best for the grab-and-go stage, not for long-term storage of bulky items.
Sea to Summit and similar brands make this easy to replicate across bins or bags, but you have to start at home.
The same colors travel with you so you are not rethinking the system in a trailhead parking lot. Two or three colors assigned to your most common trip types beat a rainbow that demands a legend taped to the lid.
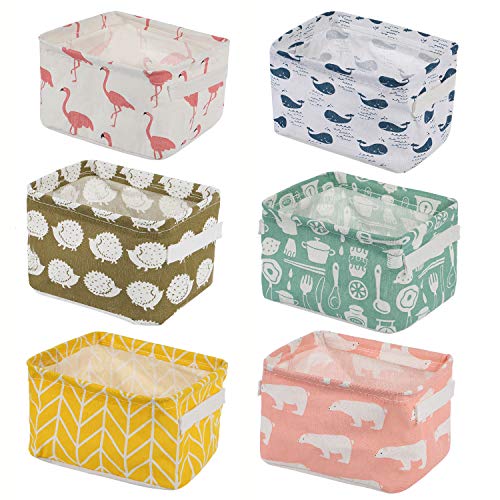
【Premium Material】Made of Natural Linen & Canvas Fabric, stylish, eco-friendly, non-toxic and durable. A reliable basket of nursery room. With PE coating inner, which to achieve the effect of waterproof and moisture resistant.

【QUALITY STRUCTURE】These cubby storage bins are made from tough non-woven fabric with excellent sewing to make them last, heavy cardboards added at the sides and bottom to make this storage bins rigid enough to hold a heavy load.

These Fabric Storage Bins are crafted with high-quality cationic fabric materials, ensuring durability and longevity. Made from premium fabric, these bins are designed to withstand regular use and provide reliable storage for your belongings. The fabric is chosen for its strength and resistance to wear and tear, ensuring that the storage bins maintain their shape and integrity over time. With their sturdy construction, these storage bins are a dependable choice for organizing your home.
6. Packing Cubes
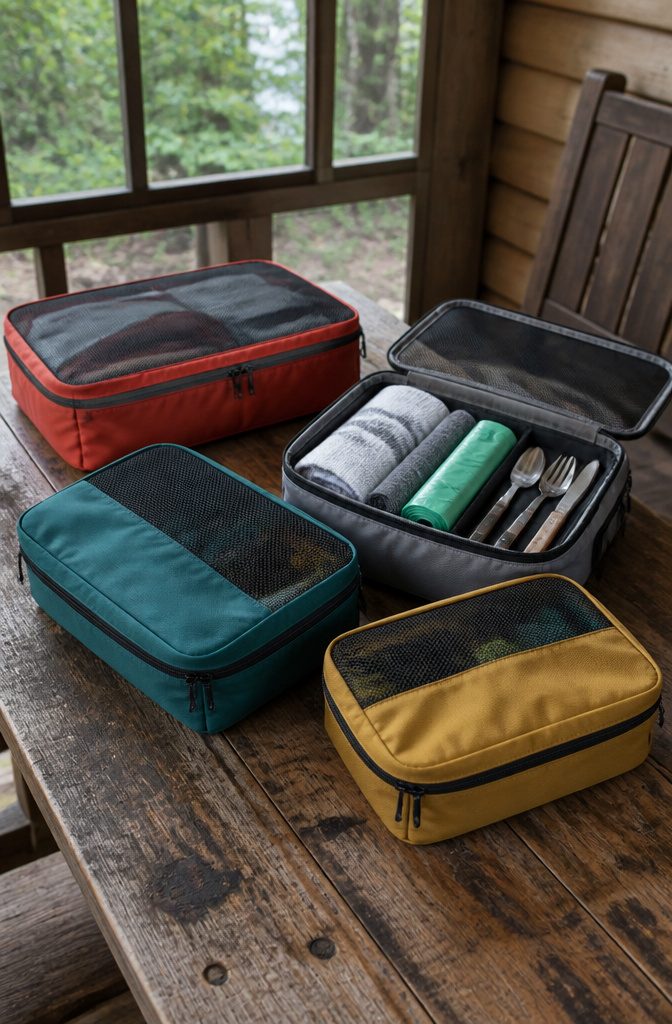
Packing cubes keep smaller gear from vanishing inside a heavy-duty bin, and the right size matters more than the brand.
A 5-liter cube fits a camp kitchen setup: towels, trash bags, the spare fuel canister. A 10-liter swallows a repair kit, first-aid supplies, and tent hardware without the jumble.
The Gregory Alpaca Gear Pods stand on their own when partly empty, which sounds minor until you’re digging one-handed on a gravel pad. Their mesh lid lets you see contents without unzipping, and the loop pulls work with gloves.
The padded bottom is the detail that kept mine upright in a 27-gallon tote through two seasons; what failed was the coating on a cheaper cube I tried first, which cracked along the fold lines after one winter in the garage.
For electronics and lighting, the REI Trailgate Adjustable Cube at 25 liters stacks inside the same bins and uses two removable dividers to keep headlamps separate from cables.
A cube that collapses flat is a cube that will slide under the bin’s contents by trip three, so structured sides earn their space.

Meet Your Space Giant: Dive into 65L of roomy storage with our collapsible storage bin, easily accommodating a large number of items. Whether you're doing bulk shopping or daily tidying, we have got you covered. Say goodbye to cluttered trunks. Hello, easy, breezy organizing!

Product Dimensions: With an outer size of 28 1/2" x 19 5/8" x 15 1/2" and a 27-gallon capacity, this industrial tote holds bulky equipment, tools, materials, and supplies for home organization.

45L Extra-Large Capacity: Holds shopping, camping gear, and everyday household items with ease. These collapsible storage bins with lid provide roomy, all-in-one organization so a single crate handles multiple storage needs
7. S-Hooks and Garment Racks
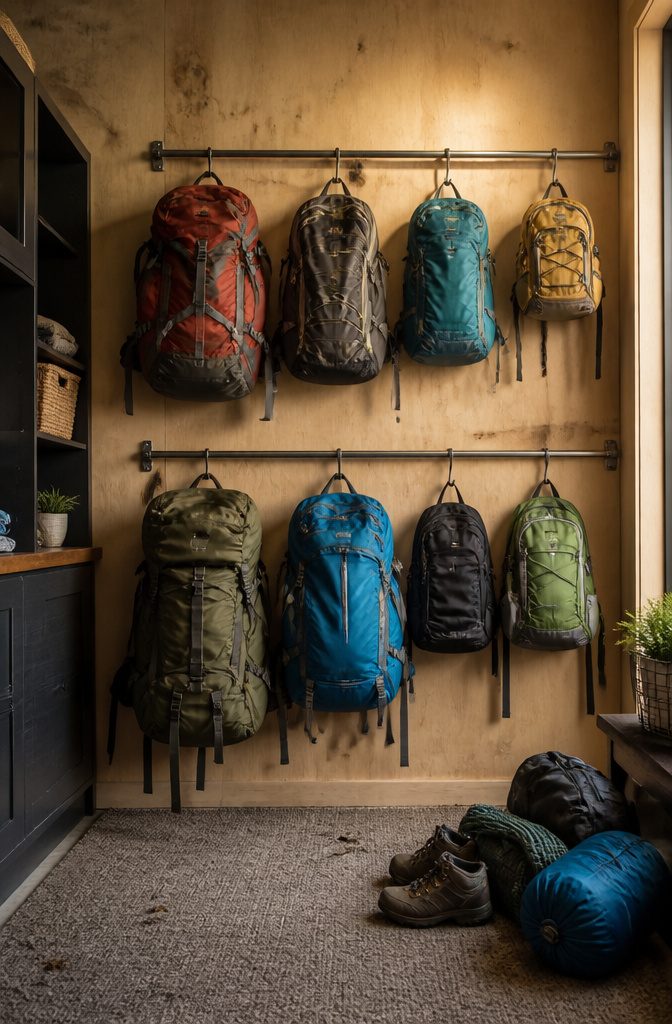
Backpacks eat floor space faster than almost anything else in a gear closet, and the shoulder straps tangle into knots the second you stack them.
Hanging solves both problems, but regular hangers are useless: the straps slide right off in a heap.
S-hooks are the right shape. They catch the grab handle or the top loop and let the pack hang face-out, so you can read the brand, grab the right one, and go.
A garment rack turns any wall into storage without a drill bit touching the drywall. That matters if your lease has a clause about holes, or if you just do not want to explain spackle to a landlord.
The rack stands on its own, rolls if you buy one with casters, and holds a surprising load. But the frame has a limit, and the manufacturers do not always print it large.
Overload a lightweight rack and the horizontal bar bows first, then the joints start to stress, and one morning you find six packs in a pile on the concrete.
Check the weight rating before you buy, distribute the heavy expedition packs toward the uprights, and leave the center for daypacks and dry bags.
If the rack starts to lean or the bar shows even a slight bend, you have already passed the safe load.

WRAP-AROUND HANDLES CARRY THE LOAD - The webbing runs under the bag instead of being stitched to one panel, so a full bag lifts from the bottom and does not tear away when you hoist it into a car trunk

✅Functional Storage for Any Space: You can use these pantry bins for various things throughout your home to organize and make your life easier. They are fit to pantry organization,ideal for cabinet, kitchen, refrigerator, bathroom, sink, bedroom and other scenes.The clear organizing bins to store drinks, snacks, canned goods, meat body wash, face wash, cleaning supplies and daily necessities.

DECORATIVE TRAY FOR ORGANIZING – Keep bathroom items neat, organized and beautifully displayed with the iDesign Decorative Countertop Bathroom Tray; ideal for items such as makeup, cosmetics, skincare, jewelry, perfume, lotion, and more
8. Labeling Systems
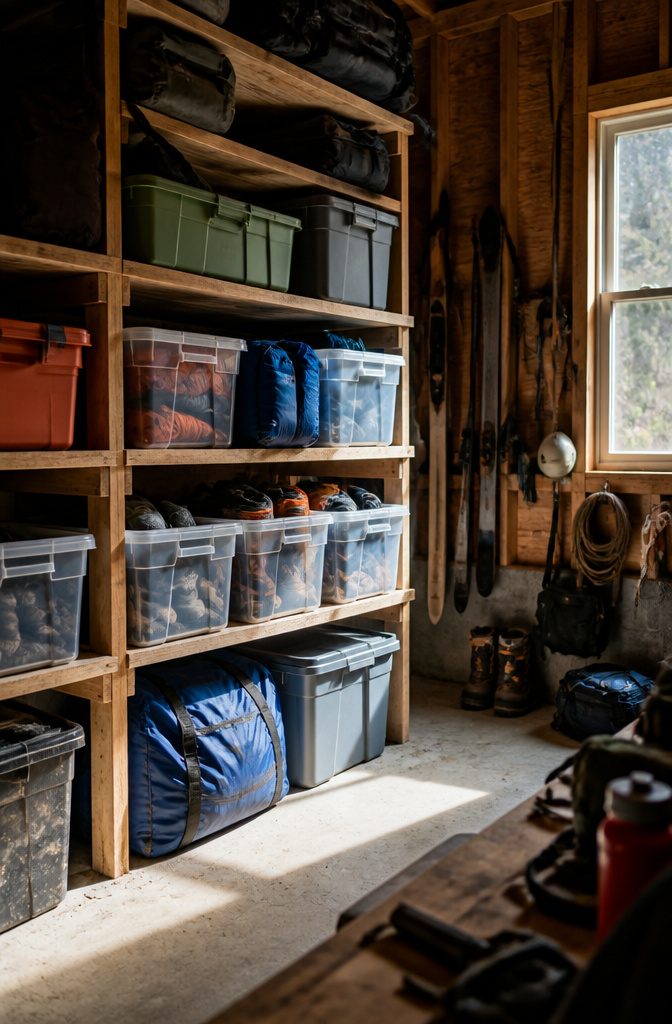
Clear labels on bins and bags only work if they survive the conditions where you store them. A paper sticker on a garage bin turns into pulp after one humid summer.
What lasted in my reading were laminated labels or color-coded tags: blue for sleep systems, red for ski gear, dry-bag labels that stayed legible through dust and rough handling.
The sources split on how to sort. One approach groups by activity, another by item type or season.
Both work until your gear shifts. A "winter" label becomes a lie when you stuff a headlamp in that bin in July and forget to swap the tag.
Check labels when you rotate gear. A label that does not match the contents wastes more time than no label at all.

Effortless to assemble: the black pegboard hook fixers are designed with semicircle in the center, just clip over the hook locks into the pegboard holes on each side of peg hooks, no need other tools, easy and simple to install, with well-made structure and firm material, not easy to break, can serve you for a long time

【Strengthened l shape construction】Pegboard hook can be easily installed and bear standard 20lbs for longer time,doesnot slide or fall when in use.Suitable for use in shop,locksmith shops,kitchen,office,basement,hardware stores,garage,retail stores and so on.The solid material last forever

VALUABLE PACKAGE: The pegboard hooks comes with 5 types, 2 pcs for each type, totally 10pcs peg board tool hangers, hose holder, power tool holder, double-arm tool holder, 4" double-arm holder and 6" double-arm holder. Max load bearing 20LBS
9. Drying Racks and Hooks
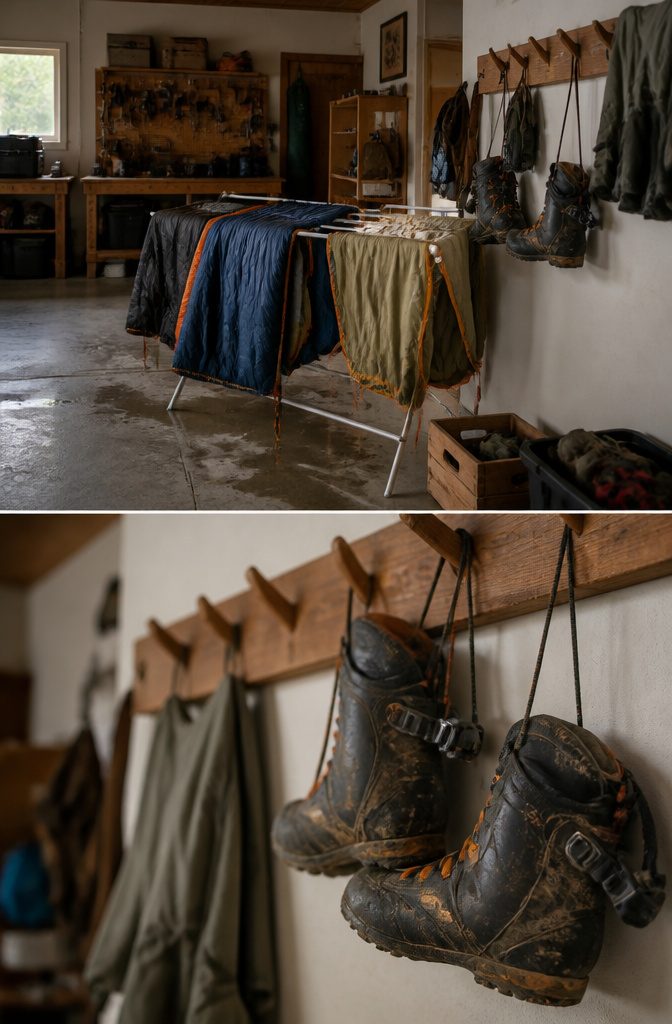
Damp gear stowed too fast is the fastest way to ruin it.
A tent packed wet after a rainy weekend trap moisture against nylon and polyester, and within forty-eight hours that musty layer hardens into mildew that eats coatings and smells permanent.
Sleeping bags suffer worse: down clusters clump and lose loft, synthetic fills flatten, and both grow the same sour bloom if the bag goes into a stuff sack before it is fully aired.
Waders, boots, and rain layers need the same patience; leather cracks, neoprene delaminates, and mesh linings turn into breeding ground.
The fix is simple space and time, not money. In my last rental, I strung a length of paracine across the unfinished basement joists and draped a three-season tent body over it like a sheet on a line.
A sleeping bag hung open on a sturdy metal hanger regained its shape in a day; two days if the humidity was high.
For heavier water, garage hooks handle waders and ski boots you do not want in the house yet. An oscillating fan shortens drying time by half.
For longer-term vertical storage once dry, GravityGrabber makes ski-specific hangers that keep boards off the floor and let bases breathe. Hooks for everything else: daypacks, poles, even a damp life jacket after a paddling trip.
The gear is not organized until it is dry. Skip this step and your whole system rots from the inside out.


【Dimensions】11.8"x15.7"x8.7"(W x D x H) in size,these clothing organizers are suitable for most size of clothing especially big clothes, pants and jeans(Patent 30022416).

【30% Deeper for More Storage】Designed with a deeper storage space than standard wire baskets, this closet organizer holds more towels, blankets, sweaters, jeans, and everyday essentials while maximizing vertical space.
10. Dedicated Gear Zones
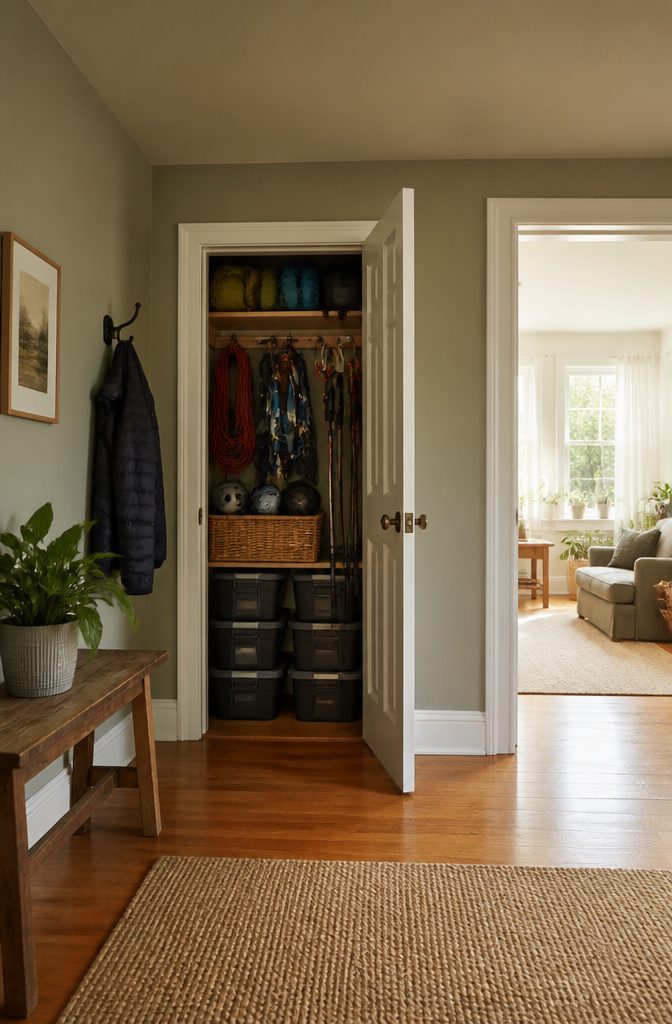
My old apartment closet was six feet across and already holding winter coats, so dedicated gear zones had to overlap by season or they would not fit at all.
One wall became the climbing corner: a Rubbermaid container for the camp kitchen, a basket wedged above for snowshoes and trekking poles, and the rolling cart I stole from the laundry room for shoes that needed to air out.
The opposite wall held the tent, sleeping pads, and water filters.
When ski season arrived, the climbing rack shifted to under-bed storage and the skis took its place. The rotation was not elegant, but it worked because each zone was labeled by activity, not by calendar month.
A zone that sits empty half the year is still doing its job if the empty half is the one you are not in.

ASSEMBLED SIZE AND WEIGHT: Our storage cubes measure 10.5"W x 10.5"D x 10"H each, providing ample space for organization and storage. Lightweight non-woven polypropylene material and thick paperboard construction allows for easy movement between rooms while maintaining durability. This product will hold up to 10 pounds per bin for a total weight of 20 pounds.
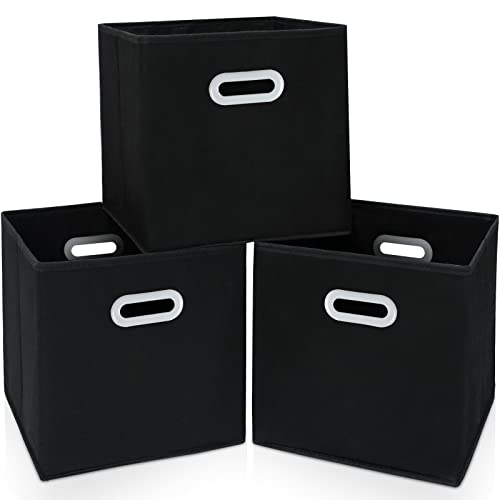
【2 STURDY METAL DUAL HANDLES】- These durable foldable storage organization bins cubes comes with a sturdy handle on both the front and back side, making it convenient for you to pull out the bins from the shelves.Made from sturdy non-woven Fabric . Dimension:11 "x 11 " x 11 "
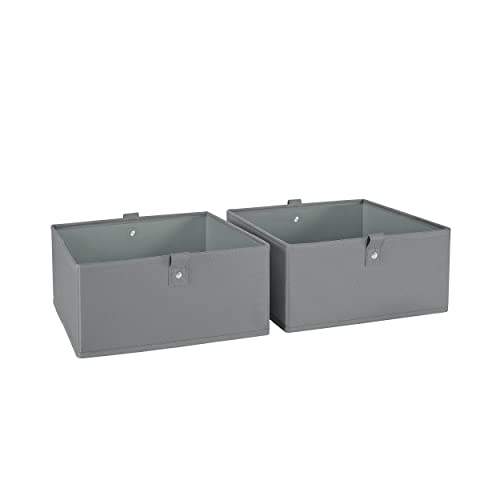
ASSEMBLED SIZE AND WEIGHT: Storage cubes measure 10.5" W x 10.5" D x 5" H each. Made from 600 Denier Polyester Canvas, non-woven polypropylene and thick paperboard, these lightweight bins are easy to move and carry for efficient organization and storage. Each bin will hold up to 10 pounds for a total weight of 20 pounds.
Cleaning Before Storage
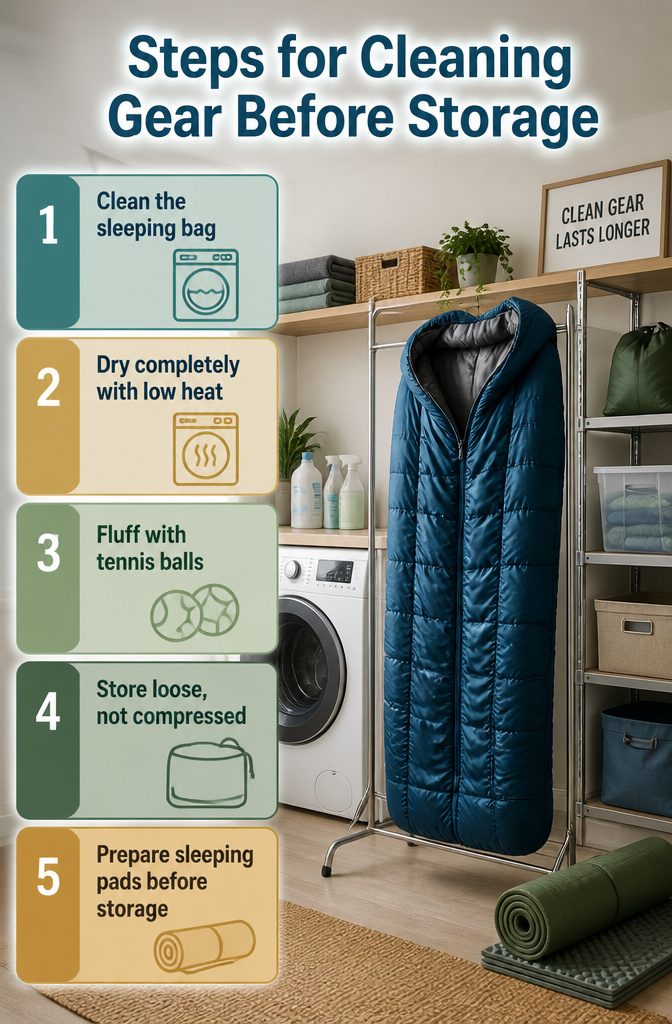
The temptation to stuff a sleeping bag straight into its stuff sack after a trip is real, especially when the laundry pile already feels endless.
A sleeping bag needs to be clean and completely dry before it ever reaches storage, or the loft you paid for starts breaking down in ways you cannot see until the next cold night. Damp down clumps.
Synthetic fill mats. Either way, you have reduced the bag to a heavy blanket and invited mildew smell that never quite washes out.
Most sleeping bags can run through a front-loader on gentle with the right cleaner, but the drying is what eats the afternoon.
A down bag in a home dryer needs hours on low heat with tennis balls or dryer balls to break up clumps, and pausing every twenty minutes to pull apart wet spots by hand.
I have started this at noon and still been fluffing at dinner.
Skipping it and hanging the bag damp in a closet is a choice you feel months later, when you unzip a flat, musty rectangle instead of a puffy shelter.
Storage itself is simple once the bag is actually ready: loose, not compressed, whether that means the manufacturer’s storage sack, a bin, or draped over a hanger so the fill can breathe.
The same rule holds for sleeping pads. Self-inflating pads store flat with the valve open; foam pads just need to be clean and dry before they get tossed anywhere.
The hour or two of prep is what separates gear that lasts a decade from gear you replace every other season.
Taking Gear Inventory
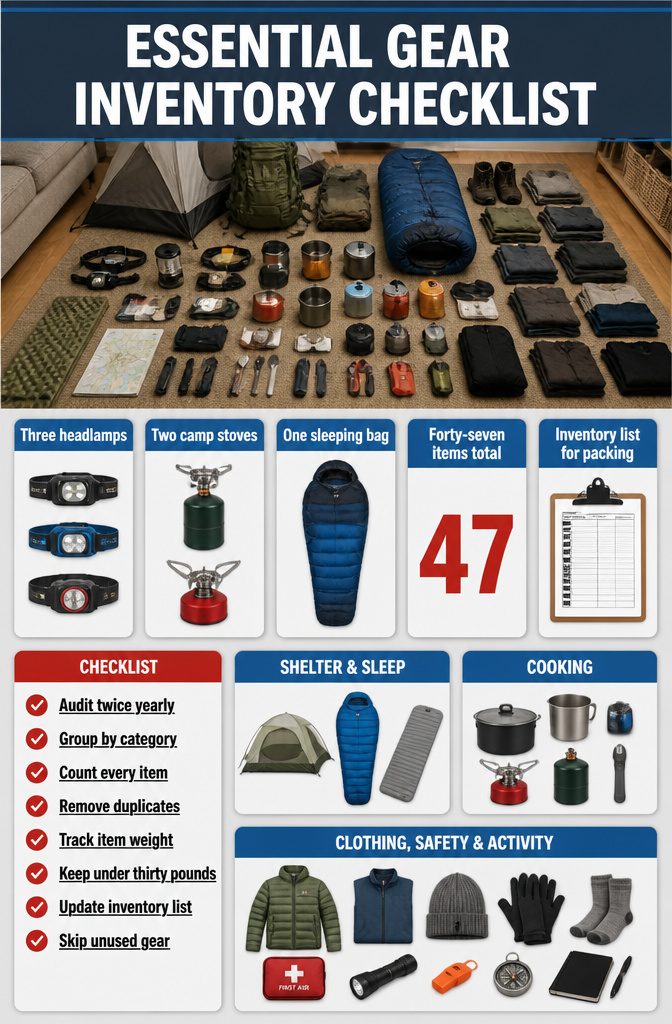
Spread every item across the living room floor before anything goes into a bin or onto a shelf.
Seeing the full pile at once reveals what the top-ranked storage guides never mention: most renters own three half-empty headlamps, two camp stoves that do the same job, and a sleeping bag rated for weather they never camp in.
I grouped mine into shelter, sleep, cooking, clothing, safety, and activity-specific piles, the way the inventory systems suggest. The count stopped at forty-seven individual items for a person who camps maybe six weekends a year.
Twenty-two of those items left the house the same weekend, either sold on Facebook Marketplace or dropped at a gear exchange. The cash back paid for three clear bins that actually fit the closet depth.
A spreadsheet sounds excessive until you use it as a living packing list. I list weight beside each item now, which keeps the pre-trip bag under thirty pounds without guessing.
The real payoff is what disappears from the shopping cart: seeing "camp stove, 12 oz" already on the sheet kills the impulse to grab another one at the spring sale.
Run this audit twice yearly, or after any trip where you packed around something instead of using it. The duplicates cost more than the storage ever did.
Quick-Access Gear Kits
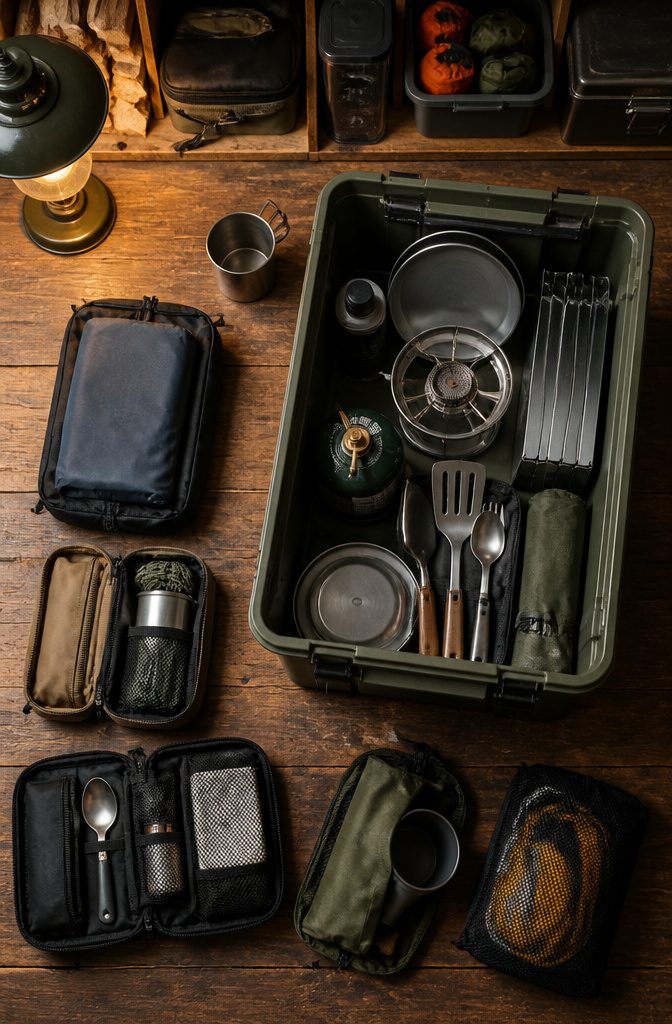
Pre-packed kits are where the labeling and bin systems actually start saving real time. A camping kitchen bin that stays loaded with stove, fuel, and utensils means Friday evening departure stops being a two-hour scavenger hunt through the closet.
The same logic applies to a first aid and emergency kit, seasonal clothing setups, or an activity-specific bag for skiing or bikepacking.
What stays packed and what gets refreshed is the judgment call. Sleep systems and tents can live ready year-round; food, batteries, and any perishable first aid supplies need a quick check before you leave.
I have learned to schedule that check when I unpack from the previous trip, not when I am trying to load the car.
The categories that matter are the ones you actually use.
Core gear like shelter, sleeping, and hydration crosses over every trip. Activity-specific piles like ski gear or water equipment only come out for those trips, so they can sit deeper in storage.
Two ways to play this: keep everything in one labeled bin family and pull out activity bags as needed, or maintain separate ready-to-go kits for each sport.
The separate kit wins if you take last-minute trips, but it costs more in bins and storage space. The single-bin approach works better for renters with limited closet real estate.
Moisture Control
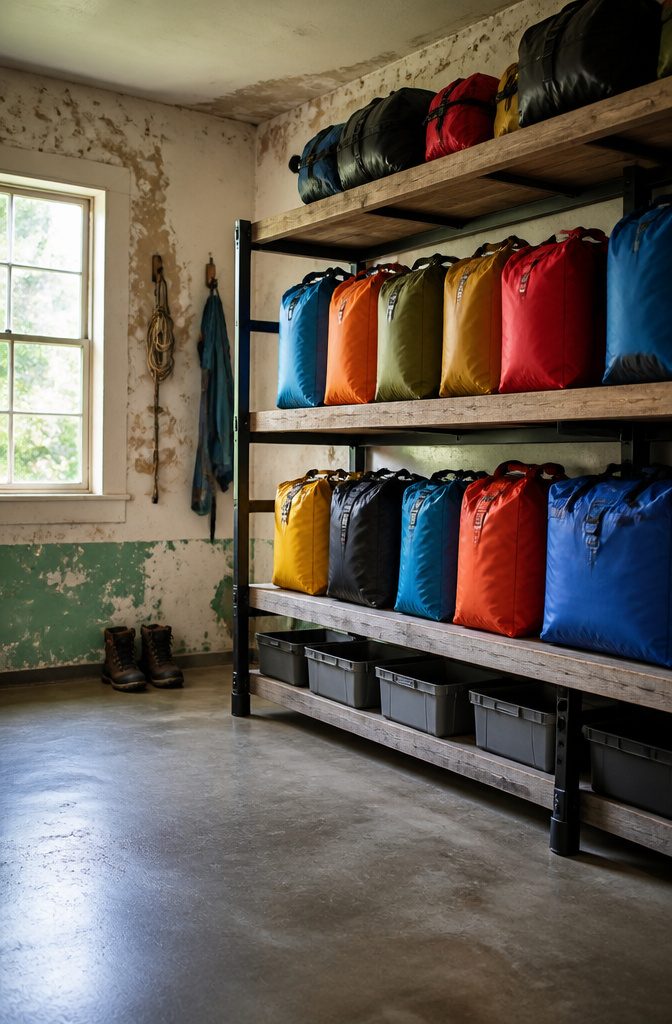
Moisture finds your gear before you notice it. In my garage, the first sign was a flashlight that flickered and died, corrosion blooming inside the battery compartment where humidity had settled.
Fabric tells a different story: mold spots on nylon, a musty smell that survives washing, the PU coating on a tent floor turning tacky and then peeling away in strips.
These are not fixable damages. They are replacements.
Keep gear elevated on shelves, not the floor, where concrete breathes damp upward.
Basements need a dehumidifier running; attics, despite the space, swing too hot and cold for anything sensitive. For sealed bins, silica packets work, but only if you hoard them from every box and bag that crosses your door.
The real test is touch: nothing goes into storage until it feels dry against your palm, not just the surface, straps and seams included. Sleeping bags should hang lofted in a closet, not compressed in a garage where humidity lingers.
What Specialized Storage Looks Like
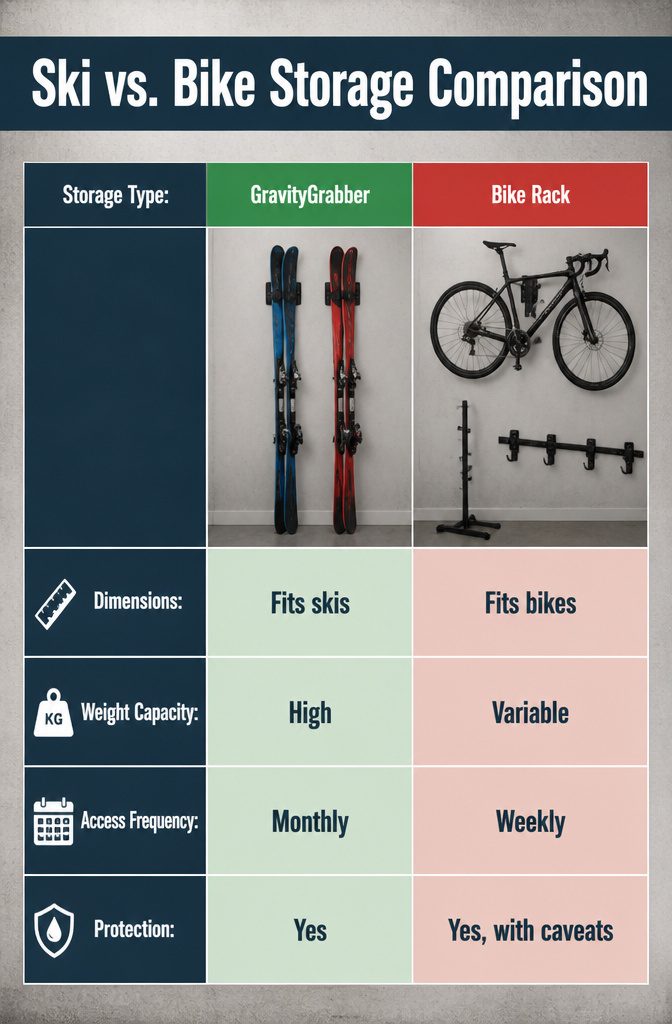
Standard bins hit a wall the moment you try to stand a pair of skis upright or hang a bike by its frame.
GravityGrabber handles vertical ski storage by clamping the tips and letting the tails rest against the wall, which keeps the camber from flattening and frees up floor space you did not know you had.
Bike storage systems range from a floor stand like the Feedback Sport to wall-mounted options such as the Hornit Clug or the Pedal Mount Bike Hanger; the Stashed Space Rail and the Ahha Toaster Bike Rack fit families running more bikes than people.
What separates these from tossing gear into a bin comes down to four things: the actual dimensions of the item, how much it weighs, how often you pull it out, and whether the storage itself protects from dings or moisture.
A cargo box ceiling hoist checks the weight and protection boxes, but access frequency kills it if you are up and down every weekend. Match the system to the gear, not the wall space.
Frequently Asked Questions
How do you organize outdoor gear?
Group gear by activity and store it in labeled, durable containers. Heavy-duty bins like the 27-gallon Project Source totes stack tight and hide visual clutter, while clear bins at eye level let you scan what you own in seconds.
Pegboard walls or garment racks with S-hooks keep frequently used items visible and accessible without eating floor space.
What is the best way to store camping gear?
Use heavy-duty bins and keep similar items together for quick access. Pre-packed kits, like a camping kitchen bin that stays loaded with stove, fuel, and utensils, turn Friday departures into a grab-and-go operation rather than a scavenger hunt.
Store the heaviest containers on the bottom shelf or the floor itself so you lift with your legs, not your back reaching upward.
How do you keep gear from getting damaged in storage?
Ensure everything is clean and completely dry before it goes into any container. A tent packed wet traps moisture against nylon, and within forty-eight hours mildew eats coatings and smells permanent.
Keep gear elevated on shelves, not the concrete floor where damp breathes upward; basements need a dehumidifier running, and attics swing too hot and cold for anything sensitive.





