

The right garden organization idea depends on whether you own the shed or answer to a landlord. Renters need grommet-mounted canvas organizers that move without patching drywall; owners can bolt pegboard to studs and build overhead racks that carry real weight. A $36 mailbox mounted under an eave outlasts lidded buckets for keeping daily tools dry, because bucket lids pool water every time it rains.
1. Hanging Storage Organizer for Garden Tools
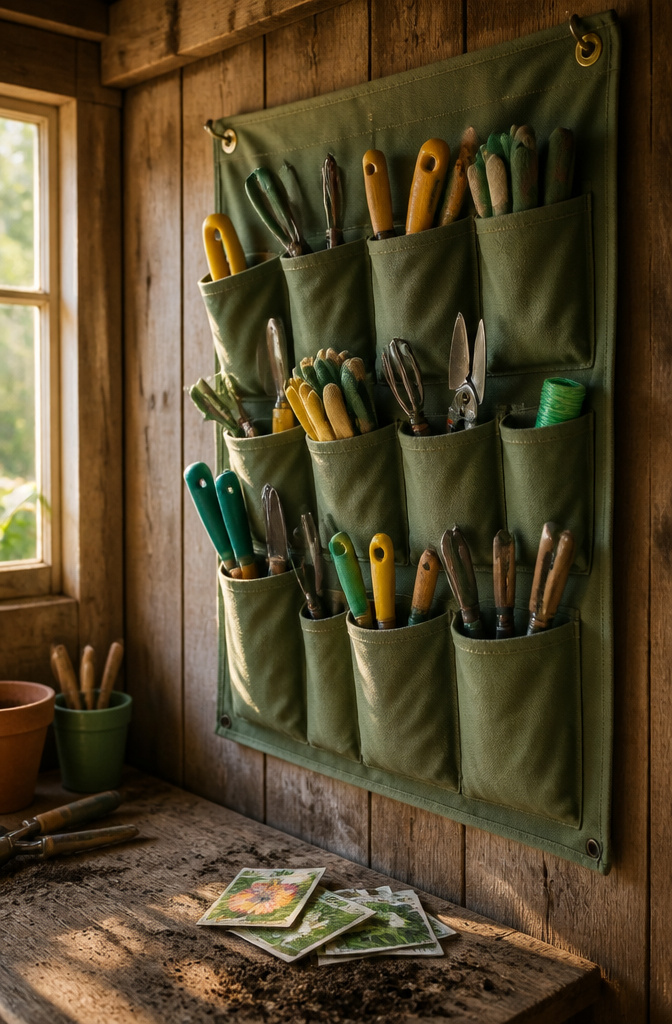
Wall-mounted fabric organizers with staggered pockets turn any shed wall into a sorting station for hand tools, gloves, and the small supplies that otherwise migrate to every flat surface. The canvas hangs from grommets, so you can move it when the layout of the space shifts, which in a garden shed happens more often than most storage plans account for. Visibility is the real advantage: each pocket keeps its contents at eye level and off the workbench, so you grab the pruner without clearing a pile of twine and plant tags first. A Niwaki-style organizer runs about the footprint of a door, with deeper pockets at the bottom for bulkier items and shallow ones above for seed packets or dibbers. The fabric breathes, so damp gloves do not mildew against a solid backing the way they might in a closed bin. For renters especially, the grommet mount means no hardware to patch later; screw-in hooks or even heavy nails on a fence panel inside the shed handle the weight without drama. The trade-off is that canvas softens over seasons and sags if you load the lowest pockets with anything heavier than a trowel. Keep the bottom tier light, or accept that you will re-tension the hooks every couple of years.

All Metal Material: Our garden tool organizer, both backboard and hooks are made of iron, which makes it more durable and solid.And its load-bearing capacity far exceeds other usual ABS material tool hooks. It is deal for various tools like shovel, rakes, bikes, broom, mop, trust that what you get is what you see,any dissatisfaction please contact our customer service team

HEAVY-DUTY GARAGE TOOL ORGANIZER: Revolutionize your garage with this wall-mounted storage hero! Designed to hold shovels, brooms, power tools, and more, it can support up to an impressive 300 lbs.

4-Outlet Power Strip:This garage shelf wall mount features an integrated 4-outlet power strip with a 6.5-foot cord for easy charging. Charge your tools directly on the shelf without the hassle of searching for outlets. By combining storage and functionality, this tool rack saves space while ensuring your power tools are always ready for use.
2. Pegboard for Tool Organization
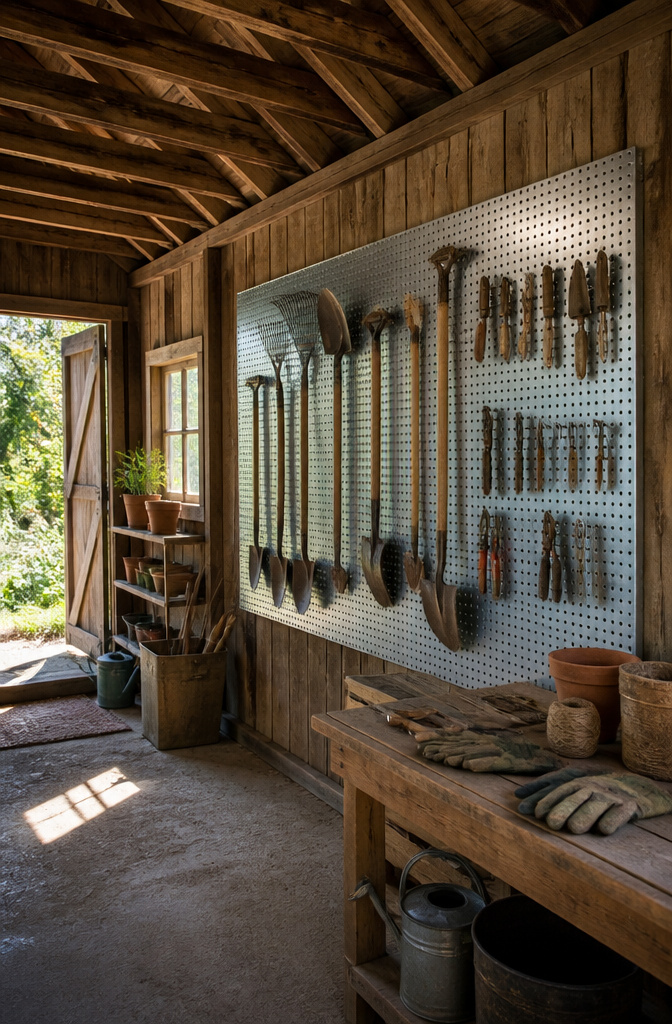
Pegboard turns a blank shed wall into a layout you can read at a glance. I mounted a 4-by-8 sheet of plywood-backed pegboard across the studs in my garage last spring, spacing it so the long-handled tools hang without knocking into each other. Hooks for rakes, shovels, and pruners each sit where the tool itself says they should, not where a pre-drilled rack decided. That spacing matters: overlap one tool over another and you end up moving three things to grab the one you need.
Metal pegboard costs more up front but holds up in damp sheds where the pressed-fiber kind swells. Either way, the real advantage is the rearrangement. When tomato season ends and pruning shears give way to loppers, the hooks slide to new holes in about ten seconds. No new brackets, no patched screw holes. The wall stays the same; the layout follows what you’re actually doing that month.

【Vertical Organization】: Maximize your space with this hanging organizer that keeps utensils off the ground and within close at hand for more efficient cooking area.

Canvas organizer:constructed by using high-grade material, ensures it safety and can use it with confidence,hanging organizer bag

Warm tip: dear buyer, due to lighting effect, monitor's brightness, manual measurement and etc, there could be some slight differences in the color and size between the photoes and the actual item. sincerely hope that you can understand! thank you!,practical hanging bag,practical storage bag
3. Utilizing Vertical Wall Space
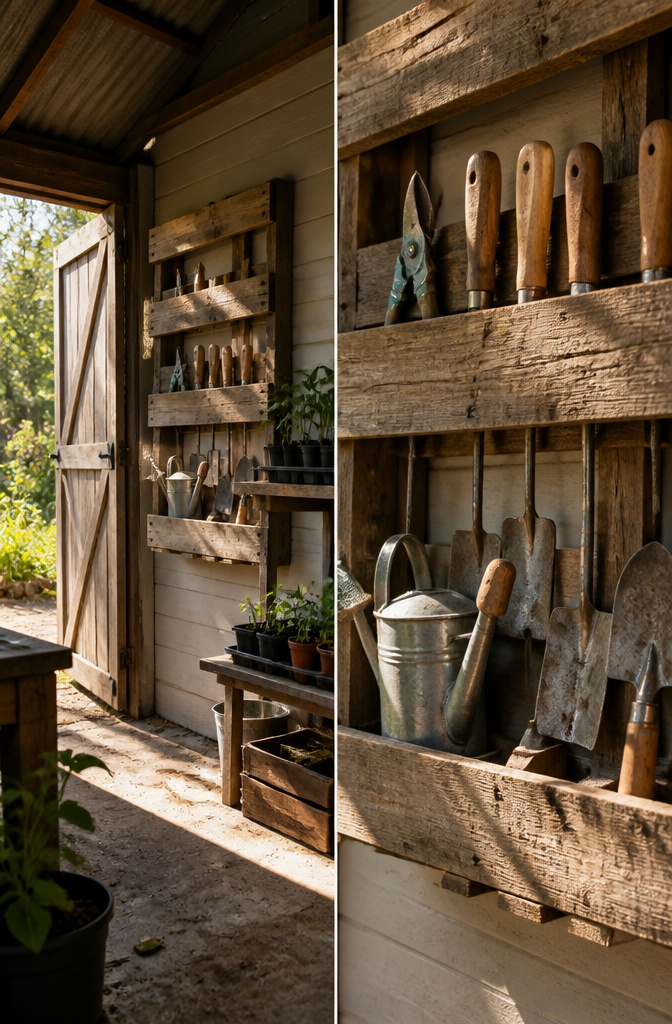
Wall space inside a shed tends to sit empty while rakes and spades lean against it in a heap. The shift comes when you stop treating vertical storage as an afterthought and start building for the tools you actually reach for.
An old pallet, stripped down and screwed flat against the studs, gives you slatted rails at no cost beyond the hardware. Tools slide in handle-first, heads resting against the open slats, and the whole assembly sits shallow enough that you still have room to move. An old wooden ladder, hung horizontally or leaned and fixed at an angle, does similar work for lighter gear: pruners, trowels, a watering can on the top rung. The ladder’s existing rungs become your hooks; no drilling required past the mounting brackets.
For anything heavier, a rail system with sliding hooks or mounted buckets keeps the floor completely clear. Position the rail so your most-used tools hang at hip height, and you eliminate the bending that turns a quick job into a chore. A slatted fence panel painted and screwed to the shed exterior works the same way if interior wall space is tight; add rafter hooks and it holds hand tools, watering cans, even shallow jars wired on for plant ties and labels.
The failure I see most is mounting too high. Eye-level for the handle means shoulder-level for the head; anything above that collects dust because putting it back becomes a stretch.
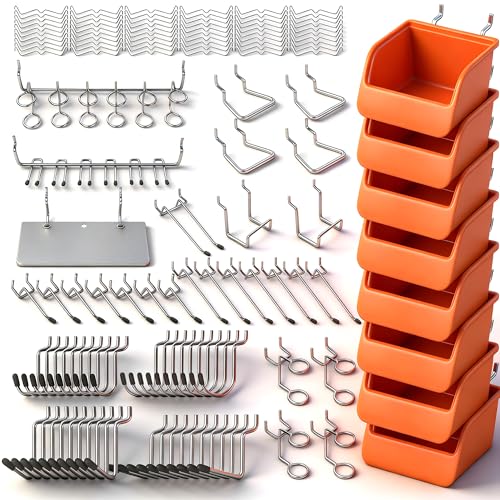
Product includes 15 different types of hooks and organizers, and is fully functional for a wide range of hanging applications.

Colorstorm Peg Hooks do not have split barbs that damage peg holes

【Orderly Space, Clear Visibility】 Tired of searching through chaotic piles of tools in your shed or garage? This organizer turns messy corners into a neat, functional space, no more rummaging & tipping. Spend less time organizing and more time enjoying your garden
4. Overhead Storage Solutions

Ceiling-mounted racks turn the dead zone above your head into storage for the things you touch twice a year: holiday lights, frost blankets, the tomato cages that only matter in July. Keep the weight under what the joists can handle, and if you do not know that number, err low. A 2×4 frame wall-to-wall with plywood on top is the build-it-once approach, and bins on top keep it from becoming a avalanche every time you pull something down.
Loft shelves work the same logic at a smaller scale. The seasonalhomestead crew rigs theirs for curing onions and garlic on racks and window screens laid across the rafters, which is smarter than storing gear you rarely need in the spot you reach most often. That trade is worth copying: up top for the harvest, down low for the shovel.
Hanging baskets from ceiling screw hooks, the vinyl-coated kind, suit the light stuff. Seed trays in February, the wind chimes you take in before ice. What stays down is anything with heft or daily use. A full watering can or the string trimmer lives at hip height, not overhead, because a step stool in a cramped shed is how projects turn into ER visits.

USA BASED & FAMILY OWNED - Our patent pending handy connectable garage ceiling storage racks design was invented by father and son tradesmen looking for a handy way to unlock more storage. The rails allow you to connect as many together as you can fit in your garage, shed, or workshop space.

SET OF 2 KAYAK HANGERS - This set of 2 kayak storage ceiling hoists is suitable for lifting ladders, kayaks, canoes, or bikes up to 125lbs overhead and out of the way. The kayak hangers help declutter and free up extra floor space in your garage or shed.

【50% Less Installation Time】8 pre-installed hooks securely hold each panel during setup, preventing accidental drops and allowing you to finish mounting much faster compared to traditional assembled grids.
5. Keeping the Floor Clear

Anything with legs ends up standing on a shed floor, and that is where the trouble starts. A small tractor parked in front of a tool wall means clearing it out just to reach a hand rake, or else reaching over it and hoping you do not lose your balance. Heavy equipment with wheels should stay on the floor; almost everything else belongs on a wall rack, a vertical shelf, or in a bin you can grab without stepping over anything.
Plywood and chipboard floors collect what drops on them. Oil leaks from equipment, gas can seepage, and spilled chemicals stain the surface, stick to boots, and hold odors that do not leave. A vinyl garage flooring roll or an epoxy coating over concrete creates a surface you can actually sweep clean during a quick weekend reset. The ten minutes it takes to clear the floor is what keeps the space usable all season.

EXTRA STORAGE: Remove the bottom panel to open up space to hold up to 2 weeks of mail and small packages, fits mail, large letters, magazines, and small packages, flag included

Ample space for various types of mail, including rolled magazines
6. Storage Bins for Garden Supplies
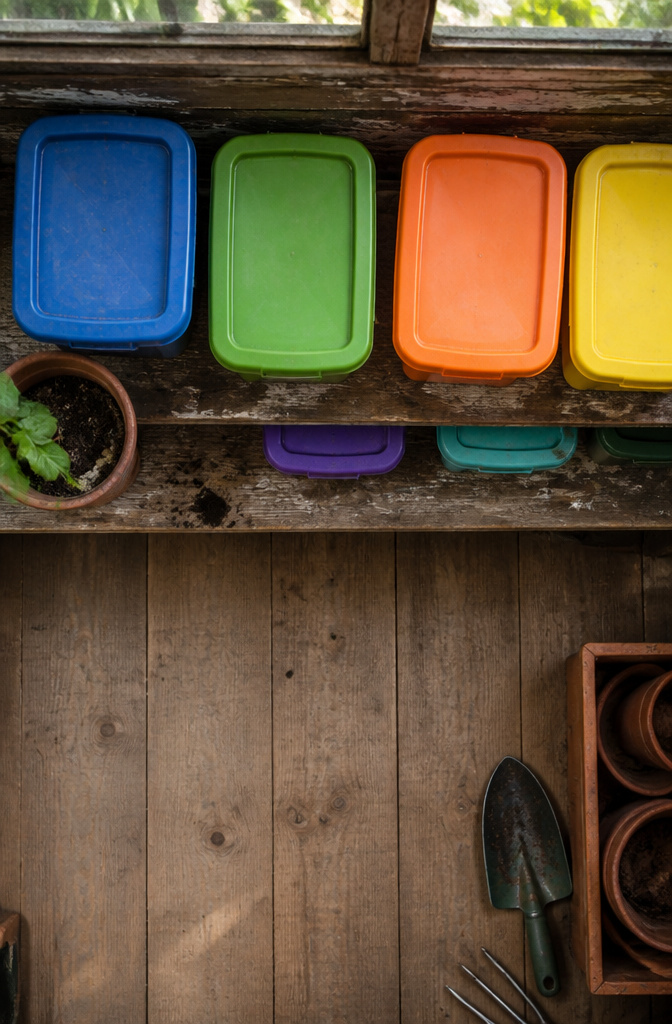
Plastic bins with lids keep potting mix and dry fertilizers usable through a wet season, though the top of the lid will pool water and needs dumping after rain. For bulbs and anything alive, ventilation matters more than sealing; a metal or slatted-side bin prevents the mold that closed plastic invites. Stackable versions save floor space in a small shed, but only if the bottom bin’s contents can handle the weight. I separate my amendments into two categories: dry goods that stay sealed, and living stock that breathes. A weatherproof storage bench serves both purposes if you leave the bulbs in a ventilated tray inside it, though that bench from Pottery Barn is seating first and storage second. The $36 mailbox-sized metal box Joe Gardener uses for hand tools also works for a few pounds of bone meal or a bag of starter fertilizer, mounted under a covered overhang where the rain skims past.
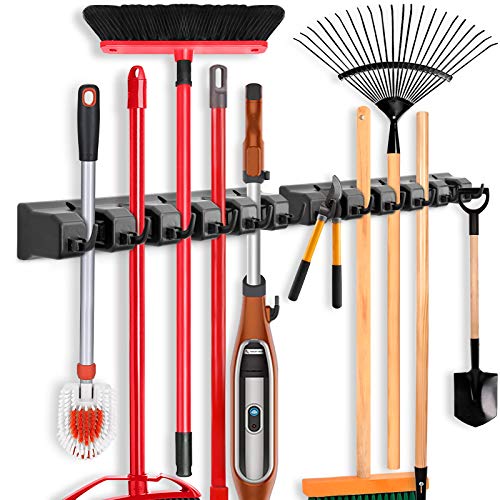
Tidy Your Home: 5 ball slots and 6 hooks design, organize your annoying cleaning tools within small space

FLOOR SPACE SAVING: If you need something for a garage remodel to tidy up, this garden tool wall organizer is exactly what you need. Perfect for hanging tools with rod shaped items like mops, spades, brooms, shovels, rakes, and other garden tools. An easy way to organize your tools up off the ground, this is definitely the space saving garage wall organizer

【Smart Garden Tool Holder】: As a smart tool storage and tools organizer, Sttoraboks garden tool holder features 35 tool slots, delivering generous capacity within a compact footprint. Unique storage holes are engineered to accommodate various tool types and sizes, from gardening and lawn equipment to cleaning supplies. Height-adjustable feet ensure stability even on uneven ground. This yard tool organizer for garage simplifies tool classification, keeping your workspace neat and efficient.
7. Using Buckets for Small Items

A five-gallon bucket with a canvas tool roll dropped inside turns the cheapest container at the hardware store into something that competes with purpose-built garden caddies. The roll keeps hand trowels, pruners, and dibbers upright and separated, and the bucket itself catches the dirt that falls off them. I have seen these setups outlast $40 plastic organizers that crack at the handle mount after two seasons of sun exposure.
Nested buckets work the same way for harvest collecting, weed pulling, or a mobile supply caddy that moves between raised beds. The stack nests to about 14 inches and unStacks to three separate containers when you need them. The cost difference is real: a purpose-built harvest trug runs roughly what you would spend on six or seven standard buckets, and the trug still leaves you buying something else for the tools.
The weakness is the lid. A five-gallon bucket with a snap lid will keep potting mix dry, but the lid top pools water after rain and needs tipping. A storage tub has the same flaw, though its contents stay dry underneath. For anything that cannot handle damp, an extra-large mailbox mounted under a covered overhang sheds water better, and runs about $36. Between the mailbox and a big lidded tub, most gardeners I have read cover the two real storage problems: keeping daily tools accessible and keeping bulk supplies dry.

3 PACK Zipper Bag size 9.7*7.7 *3.7 inch--2 individual tool bags allow you to carry and organize all your miscellaneous parts, tools and accessories.

⚙️STAND UP ZIPPERED SMALL TOOL BAG : bag size 9.7*7.7 *3.7 inch.

⚙️STAND UP ZIPPERED SMALL TOOL BAG : bag size 9.7*7.7 *3.7 inch.
8. Use of Labels for Organization

Paint pen on metal holds up where paper dissolves. I learned that after a rainy spring turned my handwritten seed tags into mush, leaving me to guess which tomatoes were which. A UV-resistant marker on a plastic or metal plant tag does the same job and survives a full season of sun without fading.
Embossed tape works for hooks and bins, though the raised letters collect dirt in a shed that sees real use. Sealed tags, the kind with a laminated flap or a small protective cover, split the difference: readable at a glance, replaceable when the tool lineup changes.
The method that stuck in my own space was simpler than any of those. A chalkboard marker on a painted pegboard lets me outline where each tool belongs and wipe it clean when I rearrange. Color-coded tape on the tool and matching tape on the hook does the same job without the paint can, and a new person can read the system in seconds flat. I thought I would remember where the small trowel lived. I did not, not after a month of not needing it.
A photo of each wall, printed and laminated, beats memory too. The cost is negligible; the hour spent not hunting for the pruners pays it back by June.

METAL NAILBOARD: Our peg board panels are made of high quality steel with a powder coated finish that is strong, scratch resistant and easy to clean. Each small pegboard has a weight capacity of up to 50 lbs. This is a favorite product for tool organizers, DIY enthusiasts, store owners and office workers.

【Perfect for Metal Pegboards】 Magnetic hooks attach easily to compatible metal pegboards, providing a convenient way to organize hair ties, bracelets, keys, scissors, and other small accessories. Keep your essentials neat, visible, and within easy reach in craft rooms, offices, and homes

[4 Pack Magnetic Utility Hooks]: Strong Magnet Hooks, flat and simple design, don‘t take up space,in line with modern decoration style.It's an ideal choice for homes, kitchens, warehouses and other scenes
9. Seed Storage Solutions

The photo storage box I settled on after two seasons of rusted staples and bloated packets has twelve compartments inside, enough to split tomatoes by type, one slot for Roma, one for heirloom, one for beefsteak, rather than letting them fight in a single heap. Dark, dry, and sorted by planting season is the whole job, and the box lid clicking shut handles the first two.
Glass jars work if you label them honestly, not just "flowers" but "cool-season annuals, plant by March," because a jar of seeds on a sunny shelf is a jar of dead seeds in July. I learned the dry part the hard way, not the dark.
For the collection that outgrows the box, accordion files hold the overflow, one envelope per packet, filed by the month they go in the ground. The resealable kind inside a tackle box is the setup I saw hold up through a humid summer, though I would skip the tackle box if floor space already costs you a path through the shed.

Various Usage: Our overhead garage storage hooks are great for garage organization especially with ladder, lumber, fishing rods, tools, ski, pipe, garden hose & other bulky items to provide overhead storage.

Versatile: Ceiling mounted garage storage hooks are perfect for garage organization, suitable for ladders, wood, fishing rods, tools, bicycles, garden hoses and other large items, and are efficient and convenient storage management solutions.

Multi Function: Our ceiling mounted garage storage hooks are great for garage organization especially with ladders, wood, fishing rods, tools, bikes, garden hoses & other bulky items to provide convenient overhead storage
10. Organizing Seeds in Photo Storage
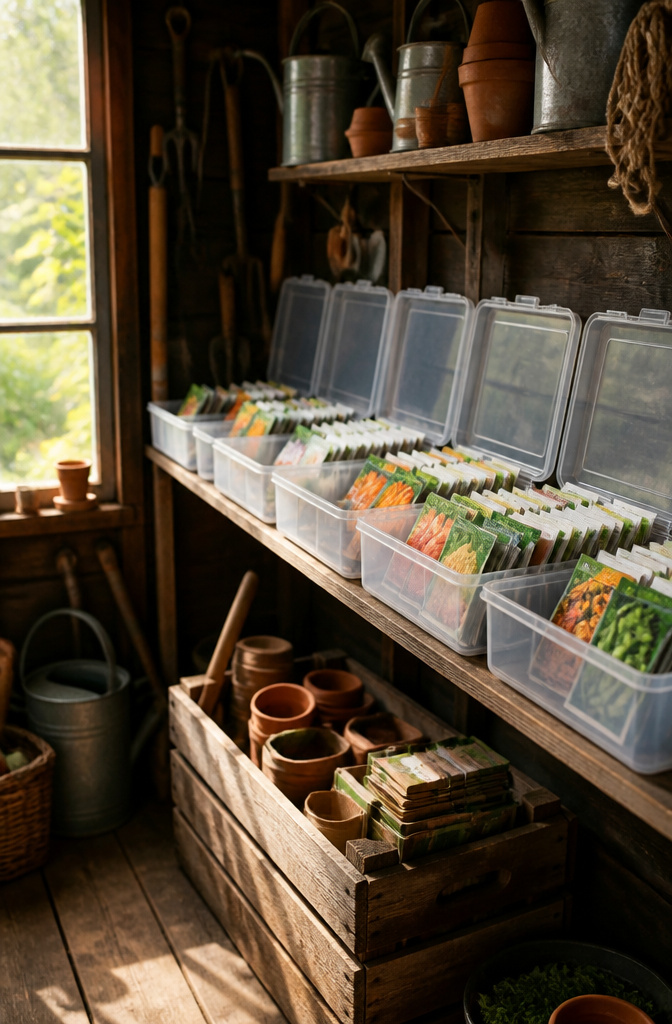
Plastic photo cases with snap-in dividers turned out to be the right depth for seed packets, one compartment per variety. I sort mine by type, tomatoes in one case, peppers in another, so the whole stack sits flush on a narrow closet shelf without tipping.
The trouble was humidity. The first summer, condensation crept in during a heat wave and cost me a row of heirloom tomatoes. A few silica gel packets dropped into each case fix that, and now I check them at the start of every season. Resealable envelopes inside the compartments add a second seal if you save seeds yourself rather than buying fresh each year.
Tackle boxes work too, but the photo cases stack cleaner. The flat lids let you read labels at a glance without unlatching anything, which matters when you are standing in a garden bed with dirt on your hands and just need to know if you already planted the jalapeños.
11. Creating a Potting Station
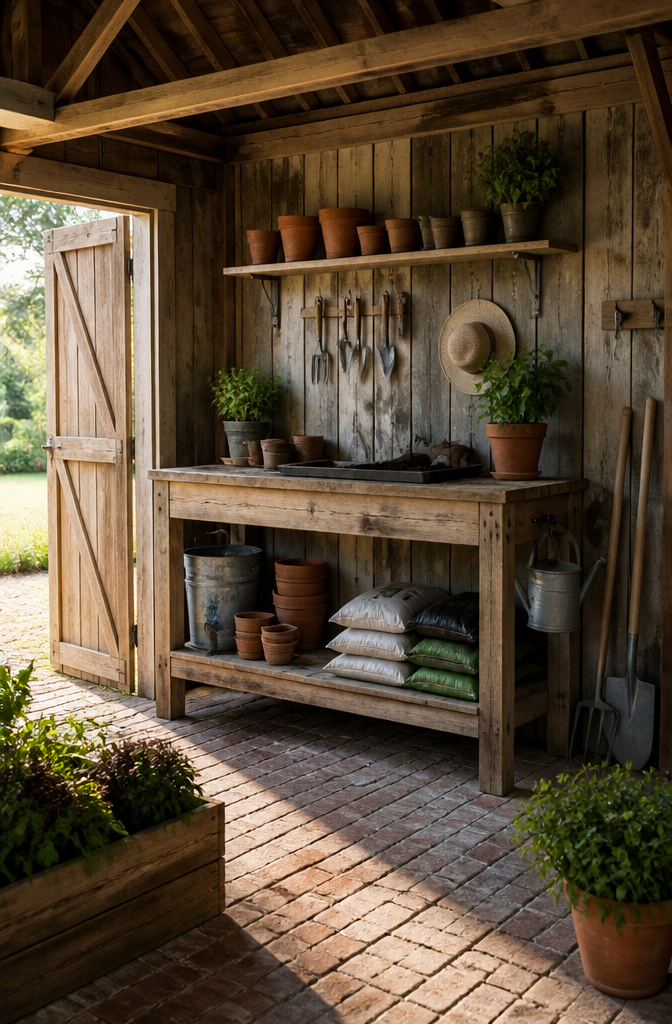
A potting station only works if the soil sits beneath the surface you work on, not across the yard in a heap. I built mine from leftover 2x4s and a sheet of plywood after watching a plastic storage bench sag under wet bags the first spring. The bench held potting mix, tools in a lidded tote, and spare pots, but the lid warped, and everything inside grew mold by July. Lumber lets you leave the storage open to air.
Tool hooks belong on the wall behind, spaced while each tool hangs in place so nothing overlaps. A horizontal strip screwed into studs, with hooks mounted to it, beats anchor screws for anything you grab a dozen times a session. The strip takes the weight; the hooks just hold the shape.
The working surface wants enough depth for a seed tray and elbows both sides. Mine is 24 inches front to back, which leaves room for soil bags underneath without kicking them every time I shift weight. An old table works if the legs survive a weekend of water and dirt. Built or found, the thing that matters is keeping the full job, soil to trowel, inside one arm’s reach.
12. Dual-Purpose Potting Station
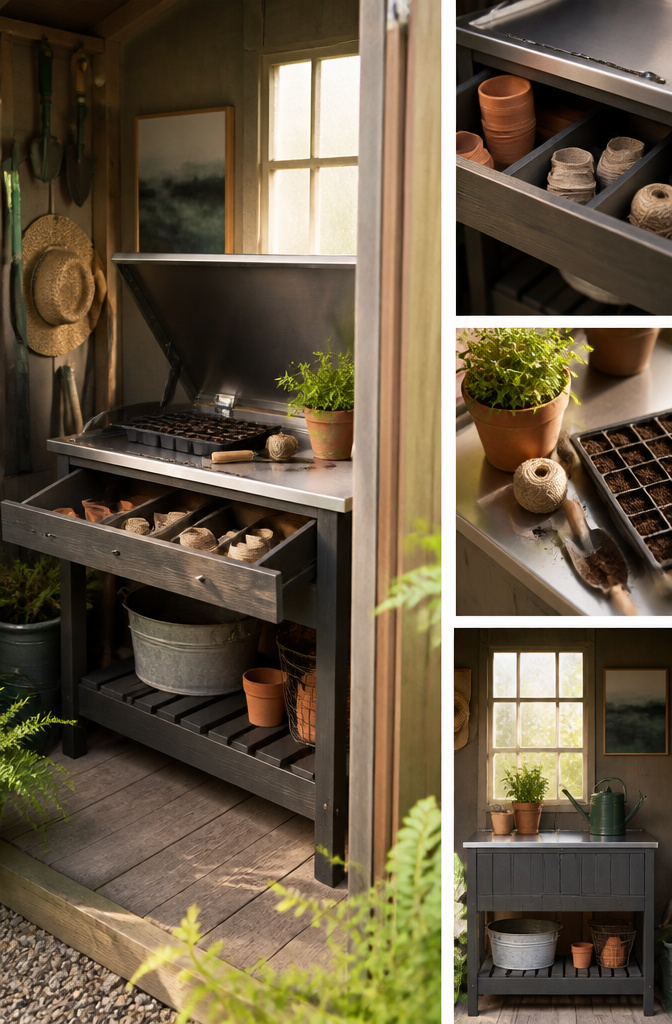
A potting station that sits idle most of the year is wasted square footage. The better build folds into whatever mode the season demands: active workspace, plant stand, or bench you can actually sit on.
The hinge is what makes the switch possible. The top lifts to reveal the soil bags and tool tote underneath, then drops back level when guests arrive or when you need a surface for starting trays. One version is essentially a weatherproof storage bench with a work-height back; another keeps the potting surface on a wall-mounted Murphy frame that folds flat entirely. Both free the floor between projects.
Removable bins seal the flexibility. A plastic tote with a lid corrals the hand tools and moves to the shed when the station becomes seating. The soil stays dry, the bench stays clean, and you inventory what you own every time you lift the lid.
A storage bench that doubles as seating wins for small yards where one piece must do three jobs. The Murphy-style station suits renters who cannot leave a footprint, though the hardware costs more and the wall needs blocking to carry the load.
The mistake is building storage too deep. Anything past arm’s reach from the front edge turns into a black hole of half bags and broken stakes. Keep the interior shallow, the bins labeled, and the top light enough to lift one-handed.
13. Multifunctional Storage Furniture

Benches with built-in storage pull double duty in a small garden footprint, but not everything wears well under real use. I started with a weatherproof storage bench that held potting soil, tools in a lidded plastic tote, and spare pots, and the contained area made inventory simple. That style of bench, also sold as a potting bench at Target or a higher-end version at Pottery Barn, works best under cover. Teak pieces left bare will patina to a silvery grey over time, which some people love and others regret.
For tighter spaces, a console table with inner compartments handles tableware and small tools, while a woven accent table stores outdoor cushions without reading as "shed." The 120-gallon resin deck box hides larger gear and doubles as seating. What I learned the hard way: anything you actually sit on every day needs hardware that can take weight and weather cycles, or the lid warps and the gasket fails. Hose pots hide coiled hoses and cut visual clutter, though they do nothing about the weight of the hose itself.
14. Benches with Built-In Storage
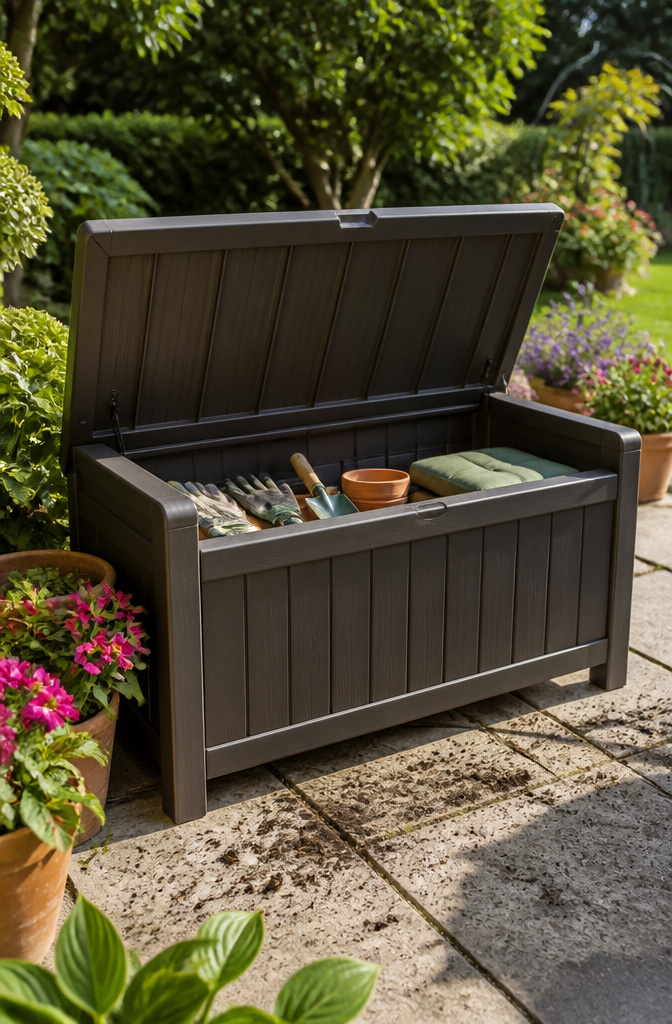
A hinged-seat bench on the patio or garden path earns its square footage twice: somewhere to sit with coffee, and a cavity that swallows the clutter you do not want to look at. The ones worth buying open on gas-strut hinges that do not drop the lid on your knuckles, because you will be opening this thing with soil on your hands. Water resistance matters more than the wood species. Rain that seeps through a gap ruins cushions in one season and tools faster than that. Durable, easy-to-clean materials pay for themselves here; a surface you can hose off beats one that needs refinishing. Some benches now come with connectable planters that clip to the arms or back, which turns the seat itself into part of the garden rather than just storage parked near it. For the interior, a plastic tote with a lid corrals smaller tools inside the larger space and keeps them from rattling around. The lid will pool water after a storm, so tip it out before you open the bench, or the contents stay dry but the floor of the cavity gets a bath.
15. Stylish Deck Boxes

A resin deck box with a wood-look lid sits beside my patio table and holds the trowels, gloves, and half-empty bags of soil I used to leave in a heap by the door. The better ones lock, which matters more than I expected after a raccoon scattered my pool chemicals across the deck one night. Polywood and similar makers rate some boxes for seating or as side tables, but only if the manufacturer actually lists that weight limit; I would not trust a lid that bows under 150 pounds to hold a guest.
Wheels help, until they don’t. I had a castored box I rolled around for portable coffee-table duty, and the first summer it was brilliant. By the third, the resin had chalked and the lid hinges had gone wobbly from UV. Resin fades to that dusty gray; wood-lid boxes crack at the joint where water sits. Now I evaluate storage the way I do cushions: if it looks tired, it is making the whole yard look cluttered, and no amount of organizing inside fixes that.
16. Outdoor Pillow Storage

Outdoor pillows look fine scattered across a patio until the first rain, and then they stay wet for days. After one summer of stuffing damp cushions back into a deck box and hoping, I opened it to find mildew had bloomed across every seam. The box itself had kept the rain out, but the pillows had gone in already soggy, and the trapped humidity finished them.
A plastic storage tub with a tight lid solves the dry part, though water pools on top after every rainfall and needs dumping. For anything larger than a few throw pillows, a deck box rated for seating or as a side table earns its space better. Models with castors move wherever the sun shifts, which matters more than I expected on a small concrete slab.
The real trick is the interim step: pillows come inside for a day to dry, or they come off the furniture the minute the forecast turns. Skipping that is what cost me the set.
17. Storage Shed Installation

A freestanding shed only earns its keep if the shell matches what actually goes inside. My first was a 6-by-8 foot box on a gravel pad, and the math looked generous until the wheelbarrow, two bags of potting soil, and the long-handled tools all needed floor space at once. A 6-by-8 fits a push mower, hand tools, and one shelf unit if you keep the floor almost empty. The walls did the heavy lifting: hooks for rakes, a narrow shelf for gloves and small pots, bins slid underneath the one work surface I built from scrap 2-by-4s.
The 10-by-12 I moved to later sat on a concrete pier foundation, which mattered more than I expected. Gravel shifts; doors stick, shelves lean, and anything with drawers binds by year three. Concrete piers cost a weekend and another hundred dollars in materials, but the square footage finally let me store the tiller, a full potting bench, and the bags of soil and amendments that had been rotting under a tarp. Overhead space held the ladder and folding chairs. Floor space stayed open because the walls and rafters carried the load.
Organization inside the shell matters as much as the dimensions. A shed twice as large with everything piled on the floor still hides what you own. The better move is sizing the box to leave two feet of clear floor, then building upward: shelves at eye level, hooks for long tools, bins labeled by season. The shell protects from rain; the layout protects from losing Sunday mornings to searching.
18. Hose Storage Solutions

A wall-mounted reel keeps the hose off the floor and ready to unroll, but the brass swivel at the center is where trouble starts. Mine developed a slow drip the second summer, not from the hose itself but from the connection I had overtightened trying to stop a leak that was not there yet. The pot that hides the coil looks tidier against the house than hardware on the wall, though pulling the hose through the side slot wears a groove in the rubber after a season of daily use. I kept the pot for the front yard where guests see it and moved to a manual crank cart for the vegetable beds in back. The cart is heavier to drag across grass, yet the handle lets me wind the hose flat every time, which means no kinks mid-row and no frantic untangling when the tomatoes are wilting. Portable reels that sit on the ground tip on uneven ground and collect muddy water inside the drum; I stopped using one after it rusted shut. For a small patio or a renter who cannot drill into siding, the pot wins. For anyone watering daily through growing season, the crank cart is the only option that still works by August.
19. Outdoor Kitchen Workstation
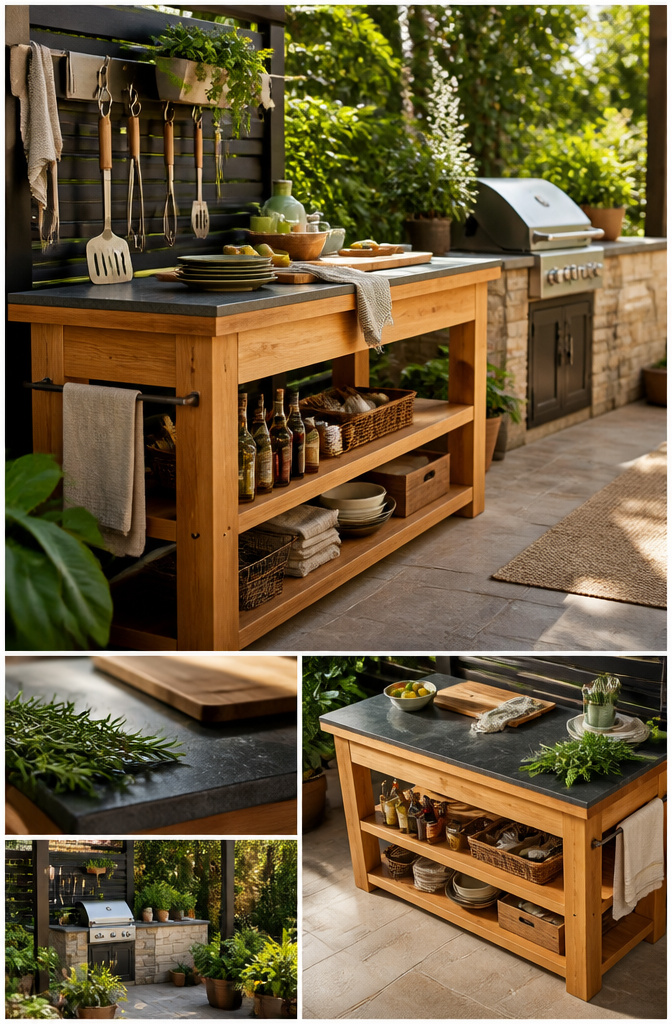
An outdoor kitchen workstation gives you a dedicated prep surface with storage underneath for grilling tools, serving ware, and the cleaning supplies that otherwise clutter the patio table. The sources point to two workable approaches: a Murphy-style station that folds out from the wall to save floor space, or a wheeled unit you can roll from counter to table when dinner is ready. Both keep bowls, hot mitts, and tableware in compartments below the work surface rather than scattered across the yard.
Mine started as a salvaged base cabinet from a kitchen remodel, stripped, resealed, and set on a frame of pressure-treated 4x4s. The countertop was leftover butcher block. What rotted first was the cabinet carcass itself, not the legs; the particleboard swelled at every seam the first rainy season, and by spring the drawers jammed on their own warped casing. The lesson is that even "indoor" wood needs to be exterior-grade or fully sheltered. A teak storage bin or resin deck box will outlast any bargain find, and the all-weather teak workstations with drawers, shelves, and peg hooks are the reference point if you are buying rather than building. If you store grilling tools outside, the bottom shelf of the grill works in a pinch, but a dedicated station keeps everything in one workflow and off the ground where it belongs.
20. Accent Wall for Vertical Gardening
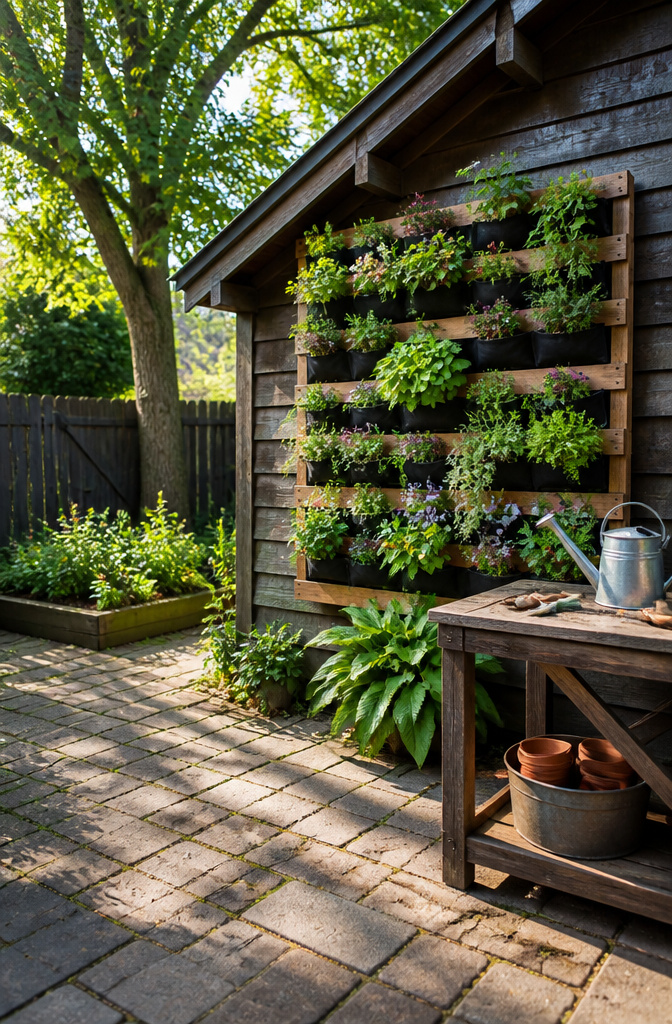
Vertical growing turns a bare shed wall or fence line into actual garden square footage. I started with a plain wooden trellis and a row of galvanized wall planters from the hardware store, screwed directly into the studs. A 4-foot grid of pocket planters will hold more strawberry plants than a 3-foot ground bed, and the fruit stays off the soil where slugs find it first.
Herbs do better in a defined grid than in mixed planting. Rosemary wants dry roots; basil wants steady moisture. Separated pockets or a slatted box system let you control water per plant instead of drowning one to save another. Trailing nasturtiums or calibrachoa work well along the bottom row, where the spill hides the hardware and softens the edge.
The real limit is light. A north-facing shed wall gives you leafy greens, not fruiting plants. Morning sun on an east fence is ideal for strawberries; afternoon heat against metal siding will bake roots unless you line the pockets with landscape fabric. Pocket systems dry out fast in July, so plan on watering twice a day or run a drip line along the top rail.
Frequently Asked Questions
What are some good garden organization ideas?
Strong options include wall-mounted fabric organizers with staggered pockets, pegboard systems for tools, vertical pallet or ladder storage, overhead ceiling racks for seasonal items, and multifunctional benches with built-in storage. The key is matching each solution to what you actually use and how often you reach for it.
How can I organize my garden tools?
Hang them on hooks or pegboard at hip height for daily tools, and use canvas pocket organizers for hand tools and gloves. Metal pegboard holds up better in damp sheds than pressed fiber, and grommet-mounted fabric organizers let renters avoid patching holes later. Outline each tool’s spot with chalkboard marker or color-coded tape so you remember where things belong.
How do I keep my shed organized?
Keep the floor as clear as possible by putting everything on walls, shelves, or overhead racks except heavy wheeled equipment. Use labeled bins for supplies, add shelves at eye level, and build upward rather than outward. A 6-by-8 foot shed fits a push mower, hand tools, and one shelf unit only if the floor stays nearly empty.
What is the best way to store seeds?
Use plastic photo storage boxes with snap-in dividers, one compartment per variety, sorted by planting season. Add silica gel packets to control humidity, and keep them dark and dry. Glass jars work if you label them with planting deadlines, not just plant names, since sunlight on a shelf will kill seeds by midsummer.
What are some DIY garden storage solutions?
Strip an old pallet and screw it flat against studs for slatted tool rails that cost only hardware. Hang a wooden ladder horizontally for lighter gear, using existing rungs as hooks. Build a 2-by-4 frame with plywood overhead for ceiling storage, or upcycle old furniture with waterproof exterior paint for weatherproof garden storage.





