
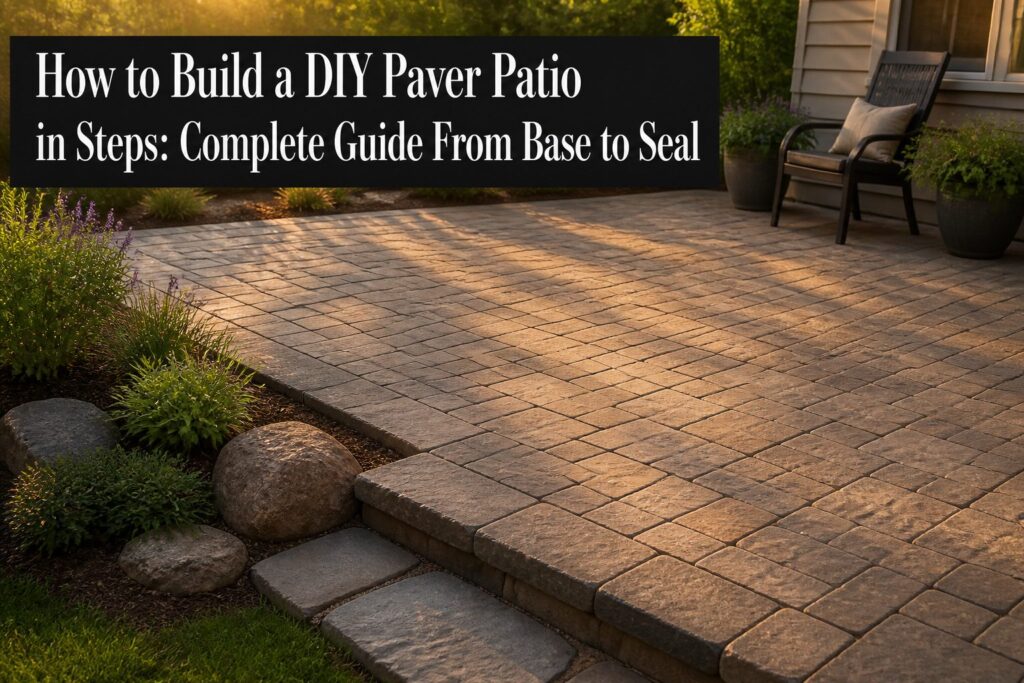
A finished paver patio runs about $3 to $8 per square foot in concrete, closer to $20 if you choose natural stone, and most weekend builds stretch across six to fourteen days once weather and compaction are factored in.
The stage that ruins more projects than any other is the gravel base: four to six inches of crusher run, packed in lifts, because a thin or loose layer guarantees the surface above it sinks within a season.
1. Planning and Measuring
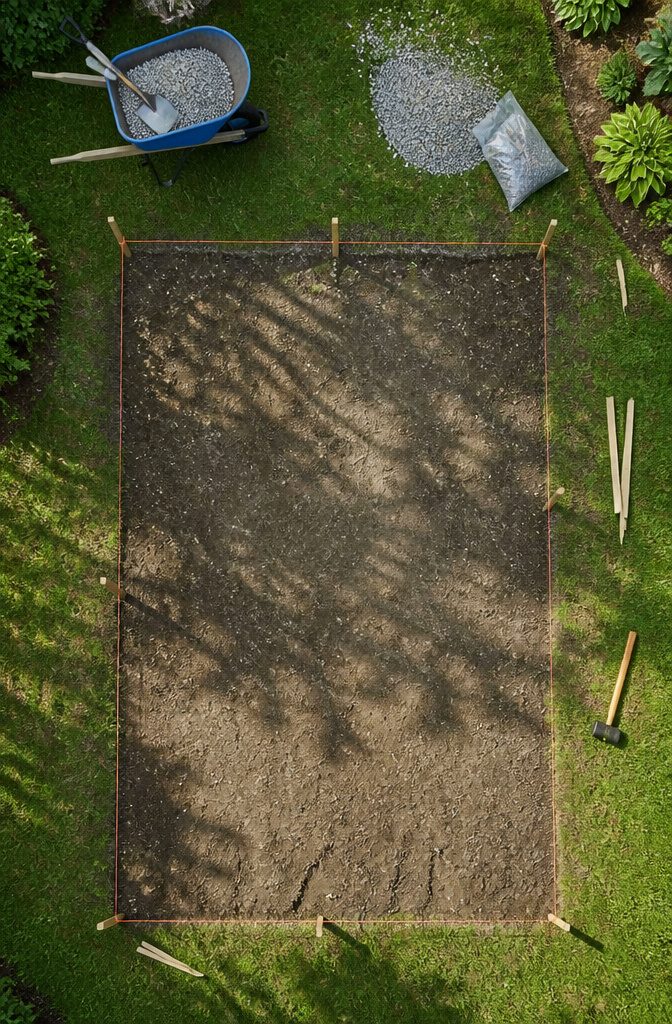
Mark the patio perimeter with stakes and masonry string before you move any dirt.
This gives you a visual boundary to stand inside and judge whether the size feels right for the furniture you have in mind. Measure width and length, then multiply for square footage; that number drives every material order that follows.
Slope matters more than most beginners expect. A quarter inch per foot is the standard for drainage, sloping away from the house so water pools somewhere other than against your foundation.
If your yard already carries a natural grade in the right direction, follow it rather than fighting to create something new.
Pattern choice is where weekend timelines live or die.
Running bond lays fastest and asks for the fewest cuts. Herringbone or basket weave look more intricate, but each one adds cutting time and the chance for a crooked line to throw off the whole field.
For a first patio, I’d take the simpler pattern and spend the saved hours on getting the base flat.
2. Excavation
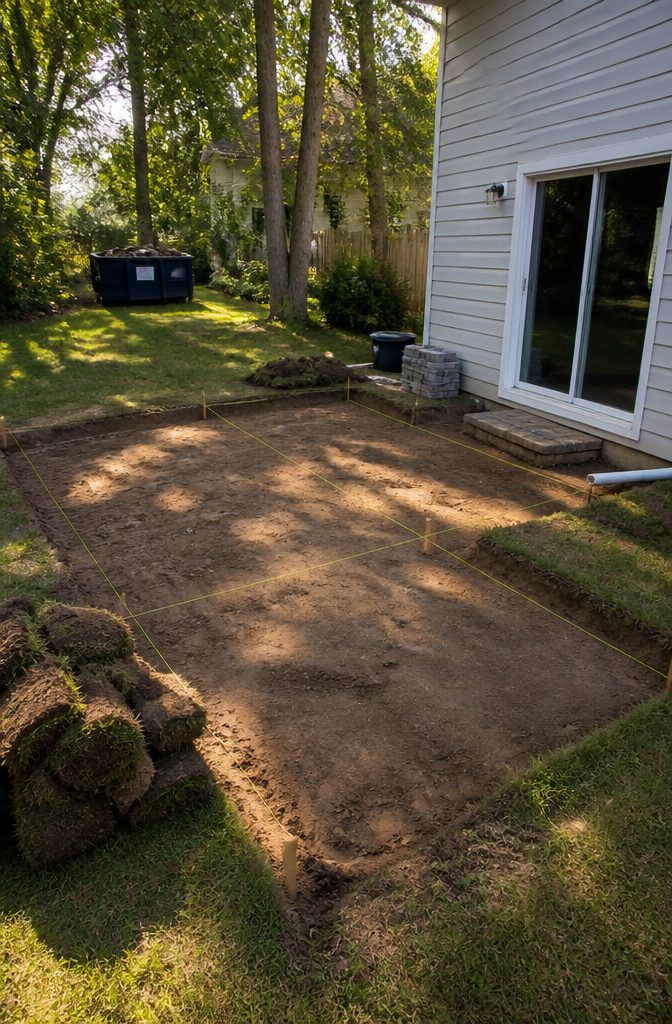
Dig out the whole area to 7–8 inches deep for a patio, measured from where you want the finished surface to sit. That depth leaves room for the base material, the sand layer, and the paver itself.
A tape measure and a stake at each corner strung with a level line will keep you honest; I check depth in a grid pattern every four feet or so because a shallow pocket in one spot becomes a low spot that holds water and shifts underfoot later.
The grade does not need to be laser-flat at this stage. Keep the depth consistent so the compacted base ends up uniform.
A little variation in the dirt bottom is fine; the base material and compaction correct that. What you cannot fix easily is a place where you cheated by two inches and the base runs thin.
Sod and soil volume adds up faster than most people expect. A 10-by-12-foot patio removes roughly five to seven cubic yards of material, and that is not a few bags.
Renting a small dumpster or scheduling a bagster pickup usually beats trying to load a personal truck in repeated trips. Most towns do not allow you to dump it in regular yard waste.
Expect the full project to run 6 to 14 days depending on how complex your layout is and what the weather does.
Rain softens the exposed soil and stops work; heat limits how long you can run the plate compactor or move material before the day breaks you.
Either way, the excavation day is the one that tells you whether your weekend timeline was optimistic.
3. Laying the Base
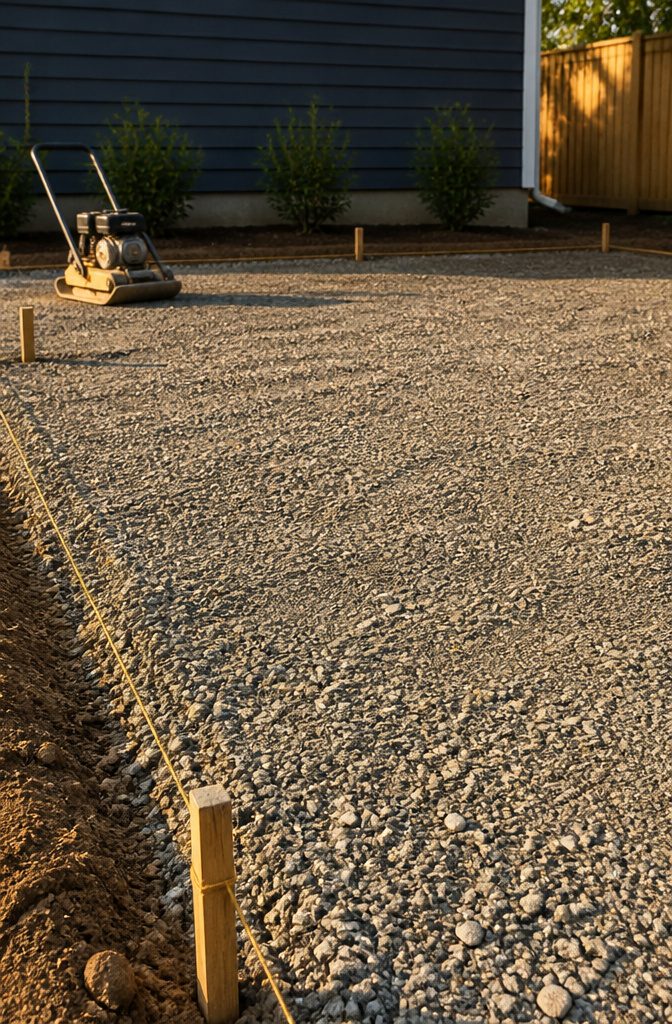
A 4-6 inch gravel base is where most DIY paver patios fail, and the material you choose matters more than the thickness.
Crusher run, also called dense grade, mixes stone dust with crushed stone in sizes from fines up to about an inch.
That blend locks together under compaction in a way clean gravel never will. Clean stone drains fine but shifts; the fines in crusher run fill voids and create a solid surface that still lets water through.
With a plate compactor, you can dump the full depth and compact in one pass. Working with a hand tamper means building in two-inch lifts, compacting each before the next goes down.
Either way, check thickness with marks on a stake or the side of a fixed point, then drag a board across the surface to catch low spots.
Rushing this step, or compacting only the top layer while the bottom stays loose, guarantees the pavers will settle unevenly once weight goes on. The fix later means lifting everything and starting over.
4. Adding Sand
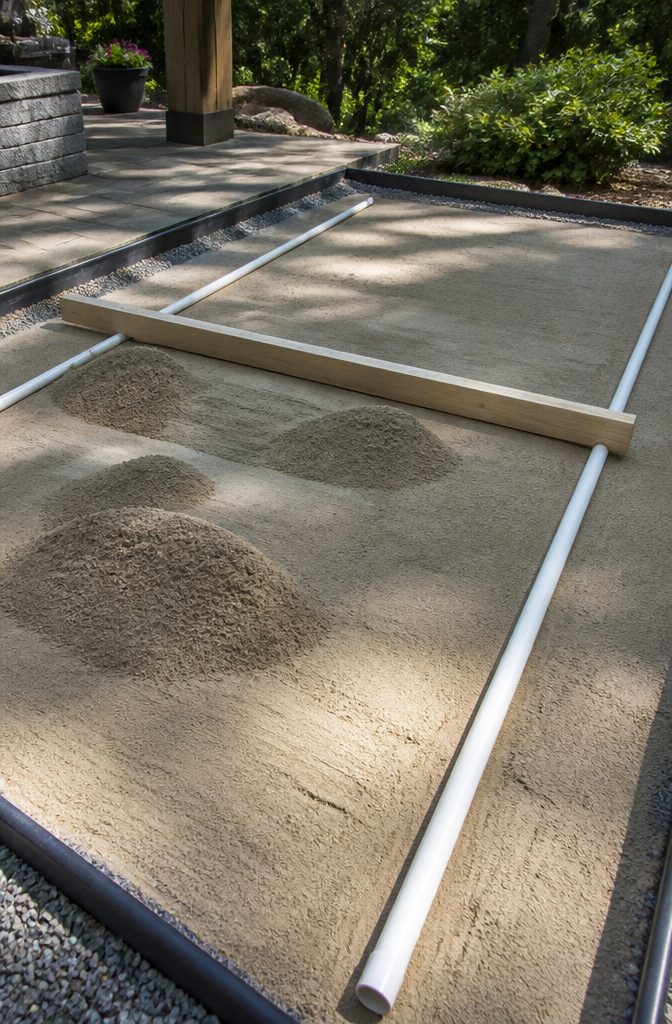
Mason sand, not play sand, belongs on your base. The grain size is what matters here: mason sand has enough body to lock together when dampened, while play sand stays too loose and will shift under the first good rain.
Spread it to 1 inch exactly, which is enough to fine-tune level without creating a soft spot that lets pavers settle later.
Screeding is the move that makes this work. Lay two 1-inch diameter PVC pipes across your compacted base, dump the sand between them, and drag a straight board along the tops of the pipes.
The pipe diameter gives you that precise inch. Once the sand is level, pull the pipes out and fill the grooves with a little extra sand, smoothing by eye.
This layer is not cushioning. It is a setting bed, a surface so flat that each paver starts at the same height as its neighbor.
Do not walk on it once it is screeded; a footprint in sand translates to a low spot in your patio.
Work from boards if you must cross the area, or reach from the edges. Mist lightly with water after screeding to help the sand settle, then let it sit undisturbed until you are ready to lay pavers.
5. Placing the Pavers
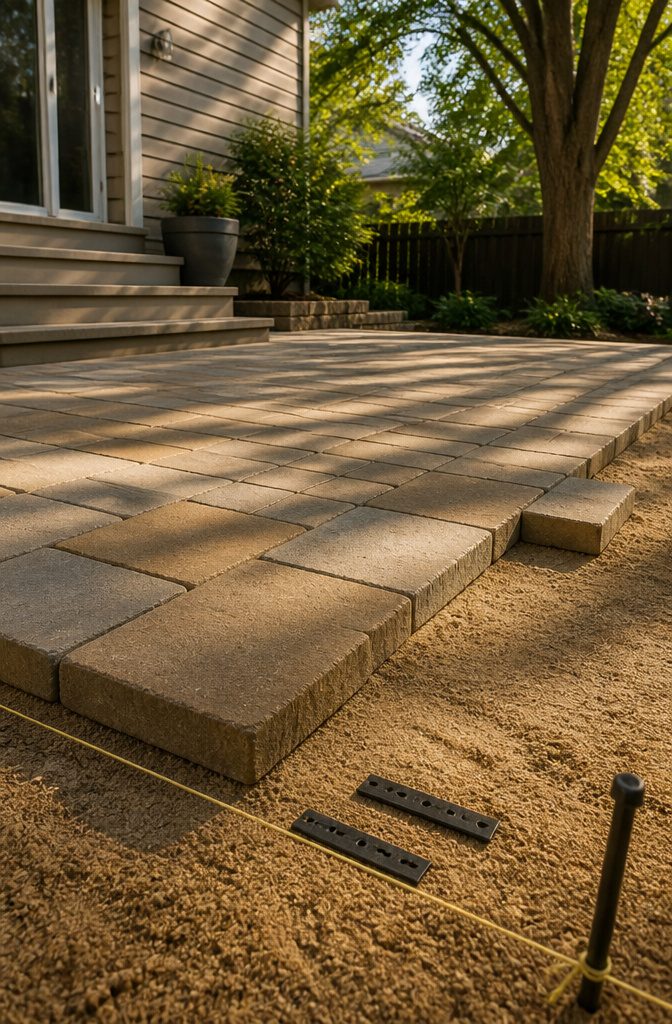
The pattern you chose back in planning decides where you start, and that starting point matters more than most people expect.
I always work outward from a corner or a straight edge rather than stepping into the middle of the sand bed.
Starting in the middle leaves you walking on freshly screeded sand every time you retreat for the next paver, and footprints in the bedding layer are nearly impossible to smooth back to level without tearing the whole section down.
The click-and-drop technique is what keeps that sand bed intact. Roger Cook put it plainly: drag the paver and you displace the sand beneath it, creating a dip that telegraphs through once everything is locked in.
Instead, touch the paver to its neighbor, let it click into alignment, and drop it straight down. No sliding, no wiggling into place.
Spacer bars give you uniform joints if your pattern calls for them; for tighter patterns, I eyeball the gap and check against a string line every few rows.
Either way, pause every four feet or so with a framing square to confirm your corners are still square.
A row that wanders even slightly becomes a nightmare by the time you reach the opposite edge, especially with herringbone or basketweave where the angles amplify every error.
Work from the laid pavers, never from the sand, and the surface you screeded stays the surface you set.
6. Cutting Pavers
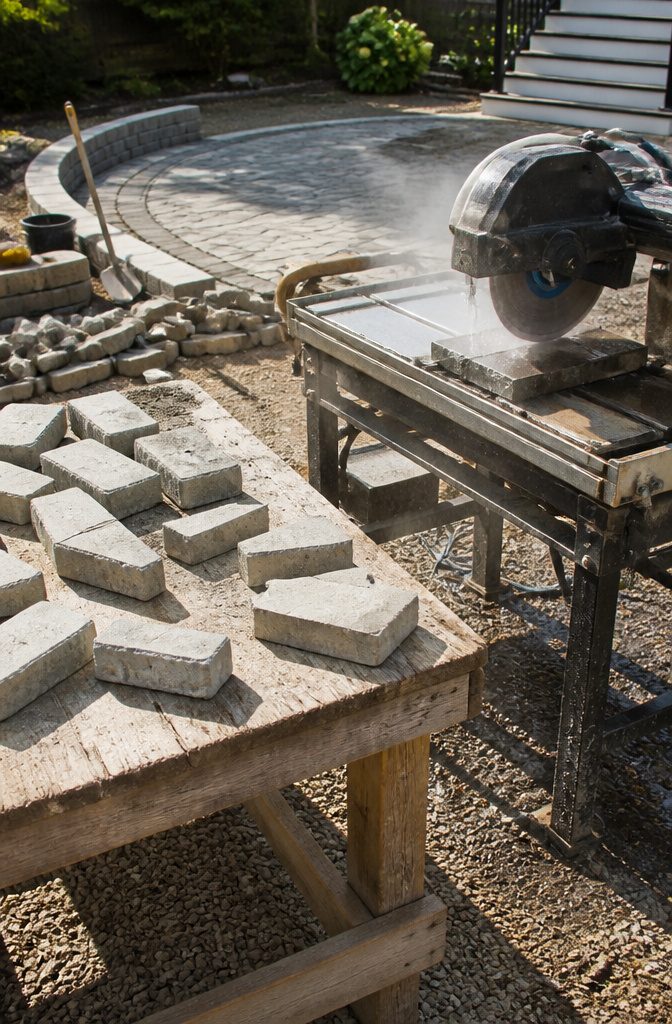
A hammer and cold chisel handle most straight cuts in concrete pavers, though the edge will be rougher than a sawn face.
Score a line about 1/8 inch deep with the chisel, then strike the handle firmly to split along the score. Brick pavers split cleaner than concrete, which tends to crumble; for those, the chisel alone often wins.
When the cut shows, or when you need a curve or an L-shape around a post, rent a wet saw with a diamond blade for the afternoon.
Blade width eats about 1/8 inch of material, so set your mark on the waste side of the line, not on it.
Dry cutting with any masonry blade throws silica dust; a properly fitted respirator with P100 filters and cutting outdoors or with a hose mist on the blade keeps your lungs out of it.
Wet cutting eliminates the dust entirely, which is why the rental yard stocks the saws.
7. Securing Edges
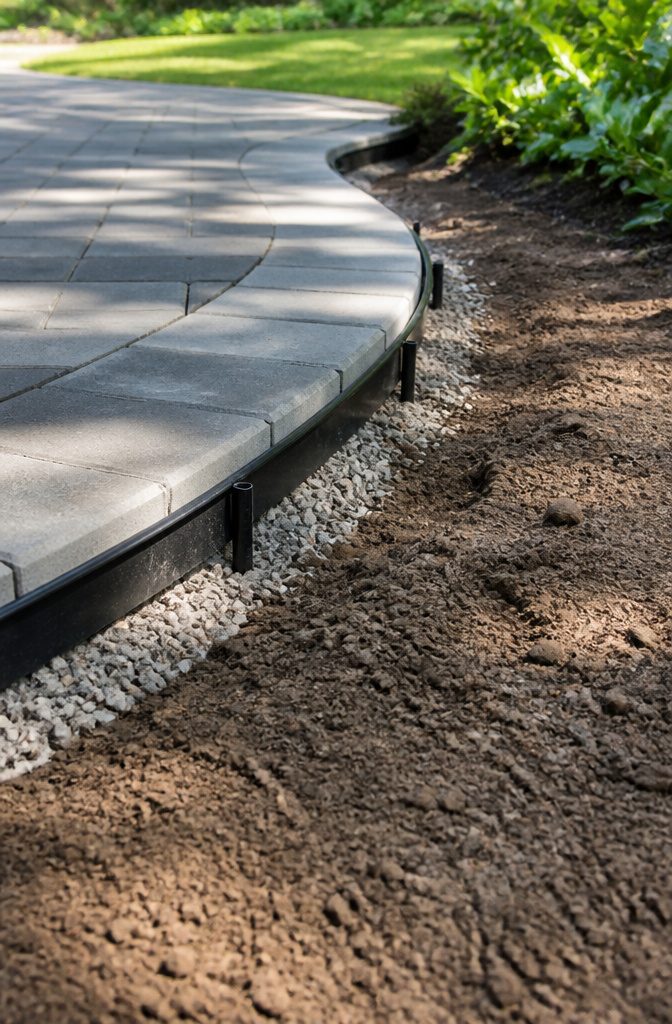
Plastic edging with long landscaping stakes is the option most weekend projects end up with, and it works if you install it right.
The restraint needs to sit flush against the outer paver edge, not an inch back where sand can slip through.
That gap is why beginners who skip this step watch their patio slowly spread outward over a season, the perimeter pavers tilting and gapping until the whole thing looks disjointed.
The real mistake is anchoring only into the sand layer. Sand shifts; stakes driven through edging and into the compacted base below are what actually hold.
Dig a shallow trench so the top of the plastic sits level with the pavers, not sticking up to catch a mower blade or heave in freeze-thaw cycles.
Concrete curbing is the permanent alternative, clean and invisible, but it adds a day and real cost most renters won’t recoup.
For a few hundred dollars and a Saturday, plastic edging wins if you do the trench and drive the stakes deep. Skip either, and you’ll be pulling up the border to redo it inside two years.
8. Finishing Touches
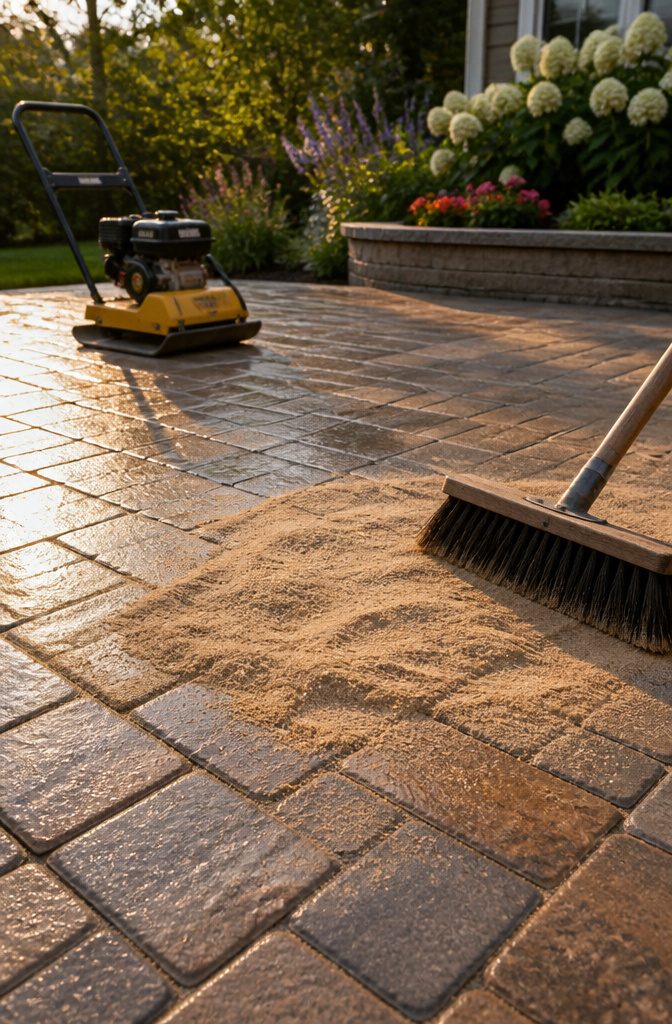
Polymeric sand and mason sand both fill joints, but the choice between them decides how much maintenance the patio demands later.
Mason sand is the older, cheaper option: sweep it in, run the plate compactor over the surface twice in perpendicular directions while the pavers are lightly damp, and the vibration drives sand down to lock the bed underneath.
Mason sand stays loose, so weeds and ants eventually find their way in.
Polymeric sand hardens after water activates it, creating a flexible bond that blocks weeds and insects.
The surface must be completely dry before spreading, and the forecast needs to stay clear for two to three days after application. Watering matters here: too little leaves the bond weak, too much washes the polymers out before they set.
I have watched a patio lose half its joint fill to one overenthusiastic pass with a hose, and the repair meant pulling up sections to start over.
Two compactor passes in perpendicular directions settle the pavers into the sand bed and force joint material where it belongs.
The patio is not finished when the last paver drops; the joint fill and final compaction are what keep the surface level through freeze-thaw cycles.
9. Sealing
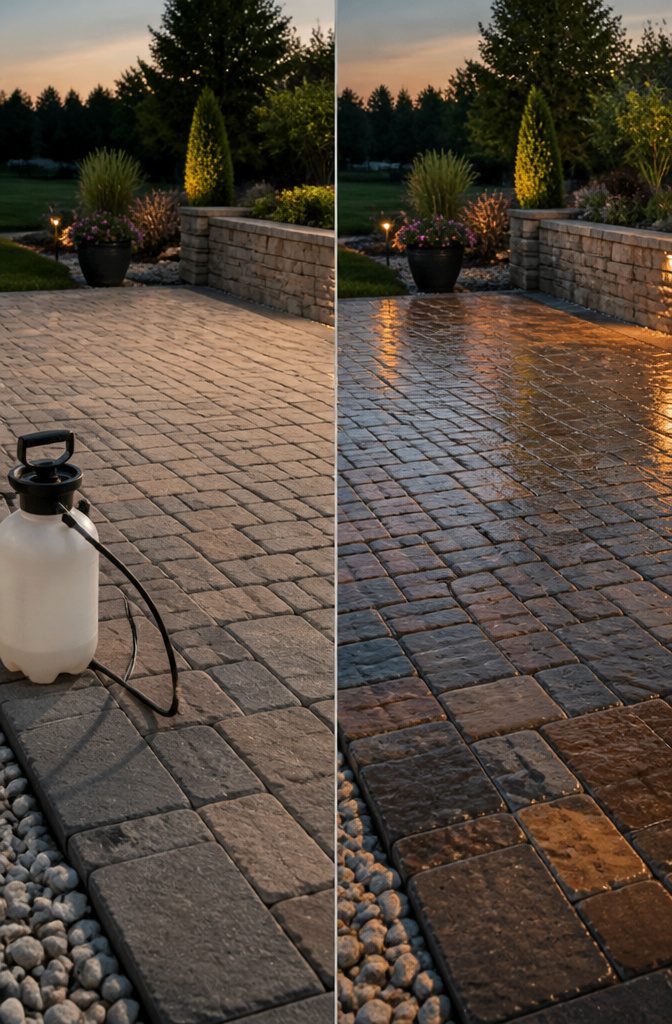
Sealing is optional on a paver patio, but skipping it means stains set faster and weed seeds find more purchase in the joints.
A coat of sealant every 3 to 5 years buys protection against weathering and fading, and it locks the joint sand in place so it does not migrate into pool pumps or gutters.
Solvent-based sealers penetrate deeper and tend to last longer, though they carry stronger fumes and cleanup demands mineral spirits.
Water-based formulas go on with less odor and wash out with soap and water, though they may need reapplication a season or two sooner.
Either way, mist it on with a garden sprayer or roll it according to the manufacturer’s directions.
Wait until any efflorescence, that white bloom of salts on the surface, has fully cleared before sealing. Trap it underneath and it ghosts permanently through the finish.
Some pavers, especially certain wet-cast or very dense concrete types, should never be sealed at all; the low porosity can trap moisture and leave a hazy, blotched film. Check the manufacturer’s guidance on your specific paver before committing.
Paver Types Compared
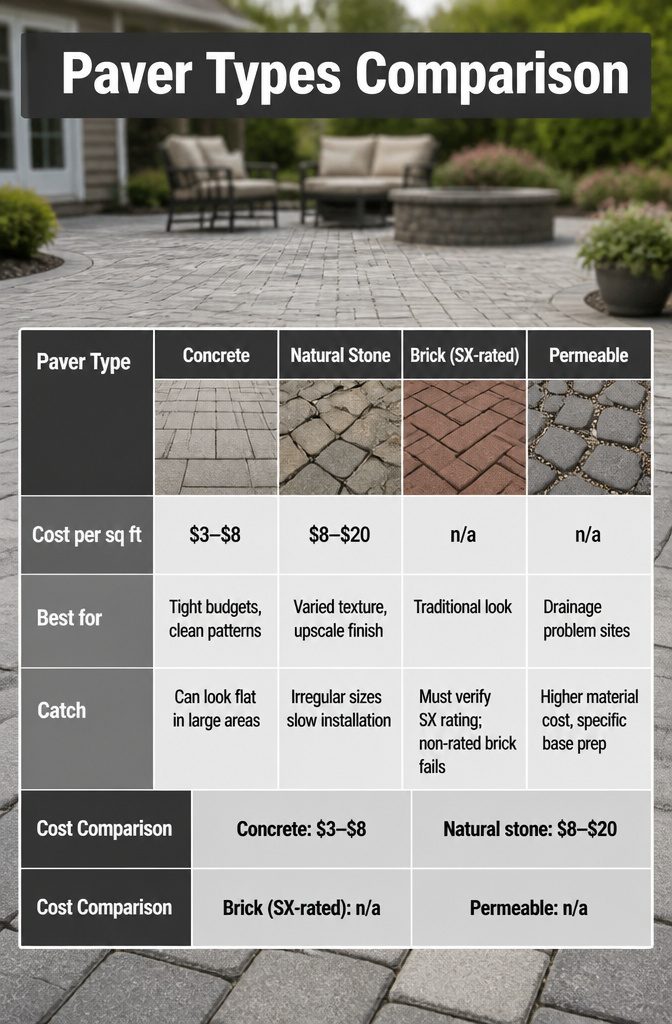
Concrete pavers run about $3 to $8 per square foot, which makes them the default choice for most weekend builds.
The edges are clean, the color stays reasonably consistent, and every unit is identical, so the laying goes fast once the base is right.
Natural stone starts near $8 and climbs to $20 per square foot; the variation between pieces is exactly what you’re paying for, but it also means more time spent sorting and fitting.
Brick gives that older neighborhood look, though only paver brick rated SX handles freeze-thaw cycles without spalling, and standard face brick will crumble within a season or two.
Permeable pavers cost more upfront than standard concrete, but the joints are built to let water through rather than sheet off, which matters on sloped yards or anywhere pooling is already a problem.
Clay and concrete pavers are cheaper, around $3–$8 per square foot, while natural stone pavers start close to $8 a square foot and can go all the way up to $20 per square foot.
That spread between $3 and $20 is wide enough to make or break a budget on a 12×12 patio, so the material choice is worth locking in before you rent anything.
| Cost per sq ft | Best for | Catch | |
|---|---|---|---|
| Concrete | $3–$8 | Tight budgets, clean patterns | Can look flat in large areas |
| Natural stone | $8–$20 | Varied texture, upscale finish | Irregular sizes slow installation |
| Brick (SX-rated) | n/a | Traditional look | Must verify SX rating; non-rated brick fails |
| Permeable | n/a | Drainage problem sites | Higher material cost, specific base prep |
For my own projects, concrete wins when I need usable space by Sunday evening.
Stone makes sense if the patio sits outside a kitchen door you look at daily. Permeable pavers earn their place where the alternative is building a French drain you didn’t budget for.
Tools and Materials
A plate compactor runs about $70–$90 per day to rent, and that fee is the hidden line item that can erase your DIY labor savings if weather or soil conditions push the job past your weekend window.
Most first-timers budget for pavers and gravel, then forget the tool rental until they’re standing in the rental yard on Friday afternoon.
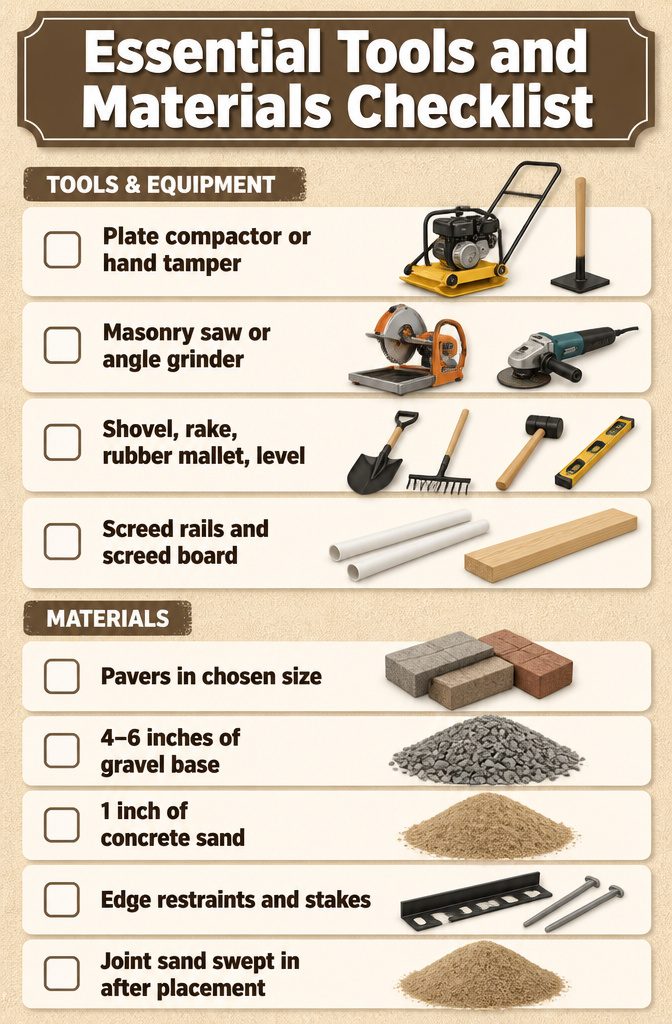
Here is what you actually need on hand before breaking ground:
- Plate compactor or hand tamper – the compactor is non-negotiable for any patio larger than a landing; hand tamping a 10 x 12 foot space will take hours and still leave soft spots that sink later
- Masonry saw or angle grinder – for cuts against walls, curves, and edge pieces; rent this with the compactor if you do not own one
- Shovel, rake, rubber mallet, and a long level – the mallet sets pavers without cracking them, and the level checks both the base and individual stones as you work
- Screed rails and a screed board – two lengths of 1-inch PVC pipe and a straight 2×4 let you pull sand to a uniform 1-inch layer
Materials stack like this:
- Pavers in your chosen size and thickness
- 4–6 inches of gravel base, compacted in lifts
- 1 inch of concrete sand, screeded level and lightly misted before the final compaction
- Edge restraints and stakes
- Joint sand swept in after placement
The compactor rental is where I would not cut corners. An improperly compacted base is the root cause of most of the failures that show up in the next section.
Common Mistakes
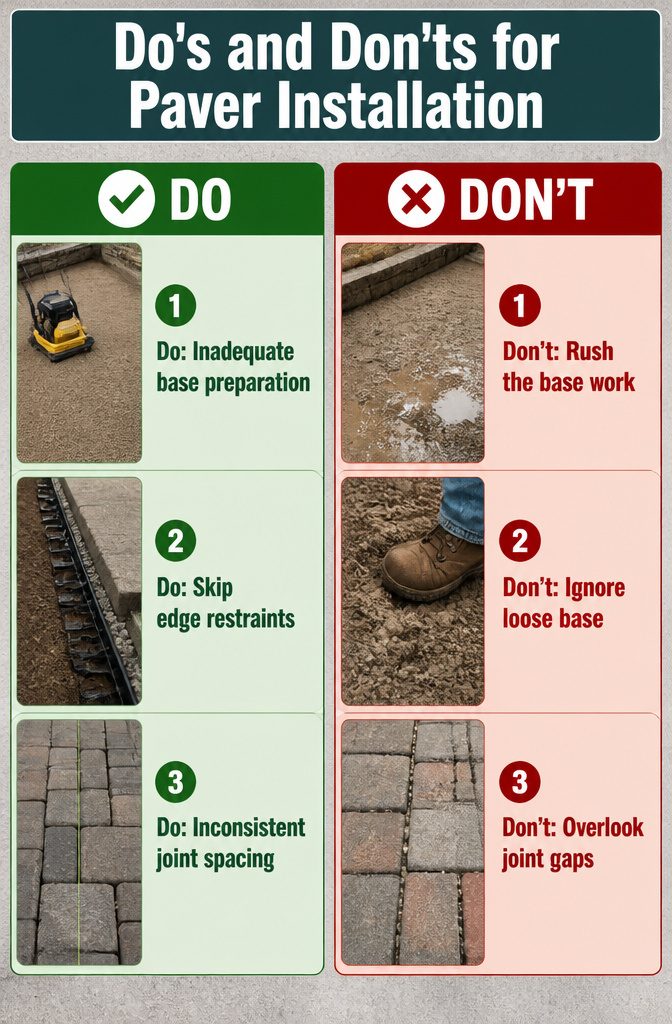
Most paver problems start with rushing the base work. A thin or poorly compacted layer lets water pool underneath, and once that happens, everything above it shifts or sinks.
You cannot compact through a finished surface; the only fix is lifting pavers and reworking what should have been solid the first time.
- Inadequate base preparation shows up as low spots that collect water after rain or flex under foot traffic. The warning sign while you work is a base that still feels loose or crumbles when you screed the sand. Stop and run the plate compactor again, adding material where the grade dips.
- Skipping edge restraints removes the wall holding your pattern together. Without it, pavers spread outward, joints open, and the perimeter sinks. You notice it during placement if the outer row drifts as you set neighboring stones.
- Inconsistent joint spacing breaks the pattern and leaves gaps where sand washes out. Loose pavers rock underfoot and become tripping hazards. Catch it by checking every third row with a string line before you compact; adjustments are faster now than after the surface locks in.
Cost and Budget
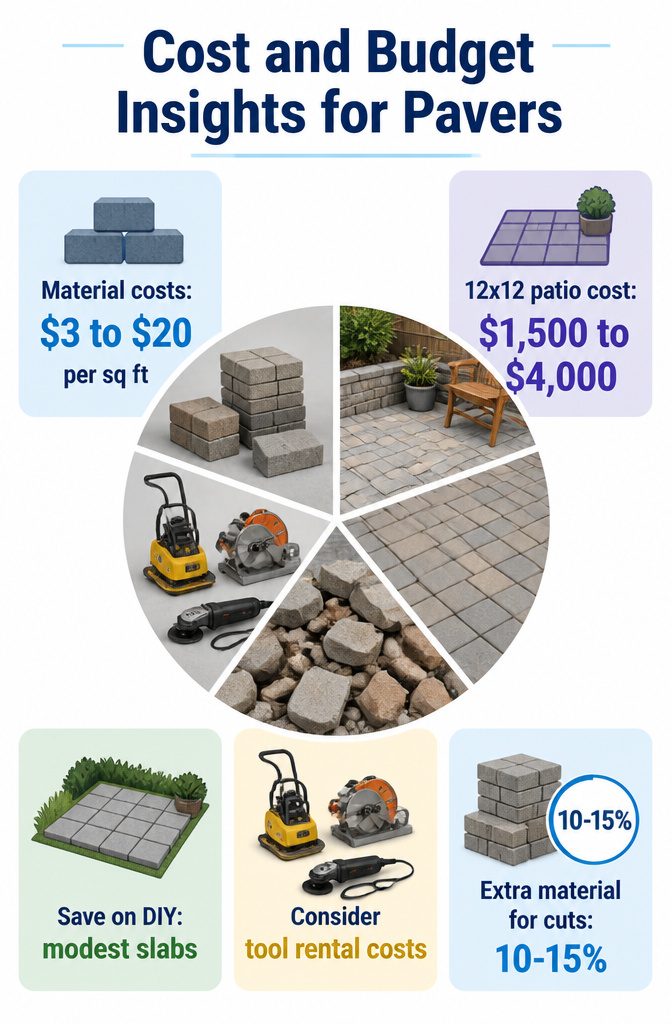
Labor savings on a paver patio look straightforward until you price out what "doing it yourself" actually costs. Concrete and clay pavers run about $3 to $8 per square foot, while natural stone starts near $8 and climbs to $20.
A 12 by 12 foot patio lands around $1,500 to $4,000 professionally installed, with a 20 by 20 pushing closer to $8,000. Cut the labor and your material bill drops, but the gap closes fast.
Tool rentals add up: plate compactors, wet saws, maybe an angle grinder at $80 if you do not borrow one. Then there is the waste.
Ordering 10% to 15% extra for cuts and breakage is standard, and a miscut pallet or a badly compacted base means buying replacement material on top of that. Your "savings" start shrinking when you are hauling failed sections to the curb.
Where DIY still wins is on modest, simple slabs. One homeowner spent about $950 on a 16 by 12 foot space; the comparable concrete bid topped $3,000.
The real savings live there, in smaller rectangles with no fire pit or outdoor kitchen to complicate the grade. Scale up or fancy up the pattern, and the professional premium starts looking like money well spent.
Frequently Asked Questions
Is it cheaper to DIY a paver patio?
DIY can cut costs sharply on a simple rectangular slab, but savings shrink fast once tool rentals, extra material for cuts, and do-over sections enter the equation.
A 16 by 12 foot space might run $950 in materials versus a $3,000 professional bid, but complex layouts with fire pits or outdoor kitchens often erase that gap.
How deep should I dig for installing pavers?
Dig 7–8 inches below your finished surface height for a standard patio.
That depth leaves room for 4–6 inches of compacted gravel base, 1 inch of screeded sand, and the paver itself. Check depth every 4 feet in a grid pattern; a shallow pocket becomes a low spot that holds water later.
What are the most difficult parts of a DIY patio install?
Ground preparation and base compaction trip up most first-timers. Getting the gravel base truly uniform and fully compacted takes patience, and rushing it guarantees sunken or shifted pavers within a season.
The screeded sand bed is equally unforgiving: one footprint before you lay stone telegraphs into a permanent low spot.
How often should I seal my paver patio?
Seal every 3 to 5 years if you want stain protection and locked joint sand.
Solvent-based sealers penetrate deeper and last longer; water-based versions go on with less odor but may need reapplication a season or two sooner. Wait for any efflorescence to clear before sealing, or the white bloom ghosts permanently through the finish.
What do I do if my pavers start to sink or shift?
Pull up the affected pavers, recompact the base material, and reinstall.
Sinking almost always traces back to an inadequately compacted base or a thin spot you missed during excavation. Fix the base first; relaying on the same loose foundation just repeats the failure.
Is it best to lay pavers on concrete or sand?
Sand is the standard bedding layer for residential patios.
A 1-inch bed of mason sand, screeded flat, lets you fine-tune each paver’s height and locks the stone in place once compacted. Concrete slabs are overkill for most backyard projects and complicate drainage; sand handles freeze-thaw cycles better too.
What is the best paver base material?
Crusher run, also called dense grade, outperforms clean gravel for paver bases.
The mix of stone dust and crushed stone from fines up to about 1 inch locks together under compaction into a solid yet permeable surface. Clean gravel drains but shifts; crusher run fills its own voids and stays put under load.
Is it cheaper to pour cement or lay pavers?
Pouring a concrete slab costs less upfront than pavers, but the gap narrows when you factor in repairability.
Individual pavers replace cheaply if one cracks; fixing a concrete slab means cutting out and repouring a section. Pavers also outlast concrete in freeze-thaw climates and let you redesign the layout later.
Can you make pavers yourself?
For a DIY patio project, purchased concrete, clay, or natural stone pavers are the standard route, with concrete units running $3–$8 per square foot and offering the most predictable dimensions for a first build.





