

DIY barnwood clean and dirty personal hand towel baskets are wall-mounted or freestanding storage setups that split your hand towels into two clear camps, fresh and used, using reclaimed wood and basic wire or wicker baskets. The catch is that barnwood splits if you drive screws without pilot holes, and stained boards need a full two-day dry cycle before assembly or the finish streaks. A triple-basket backing built from three 5.5-inch boards cut to 42 inches runs the width of most standard vanities and costs less than the single prefab rack it replaces.
1. Hanging Baskets
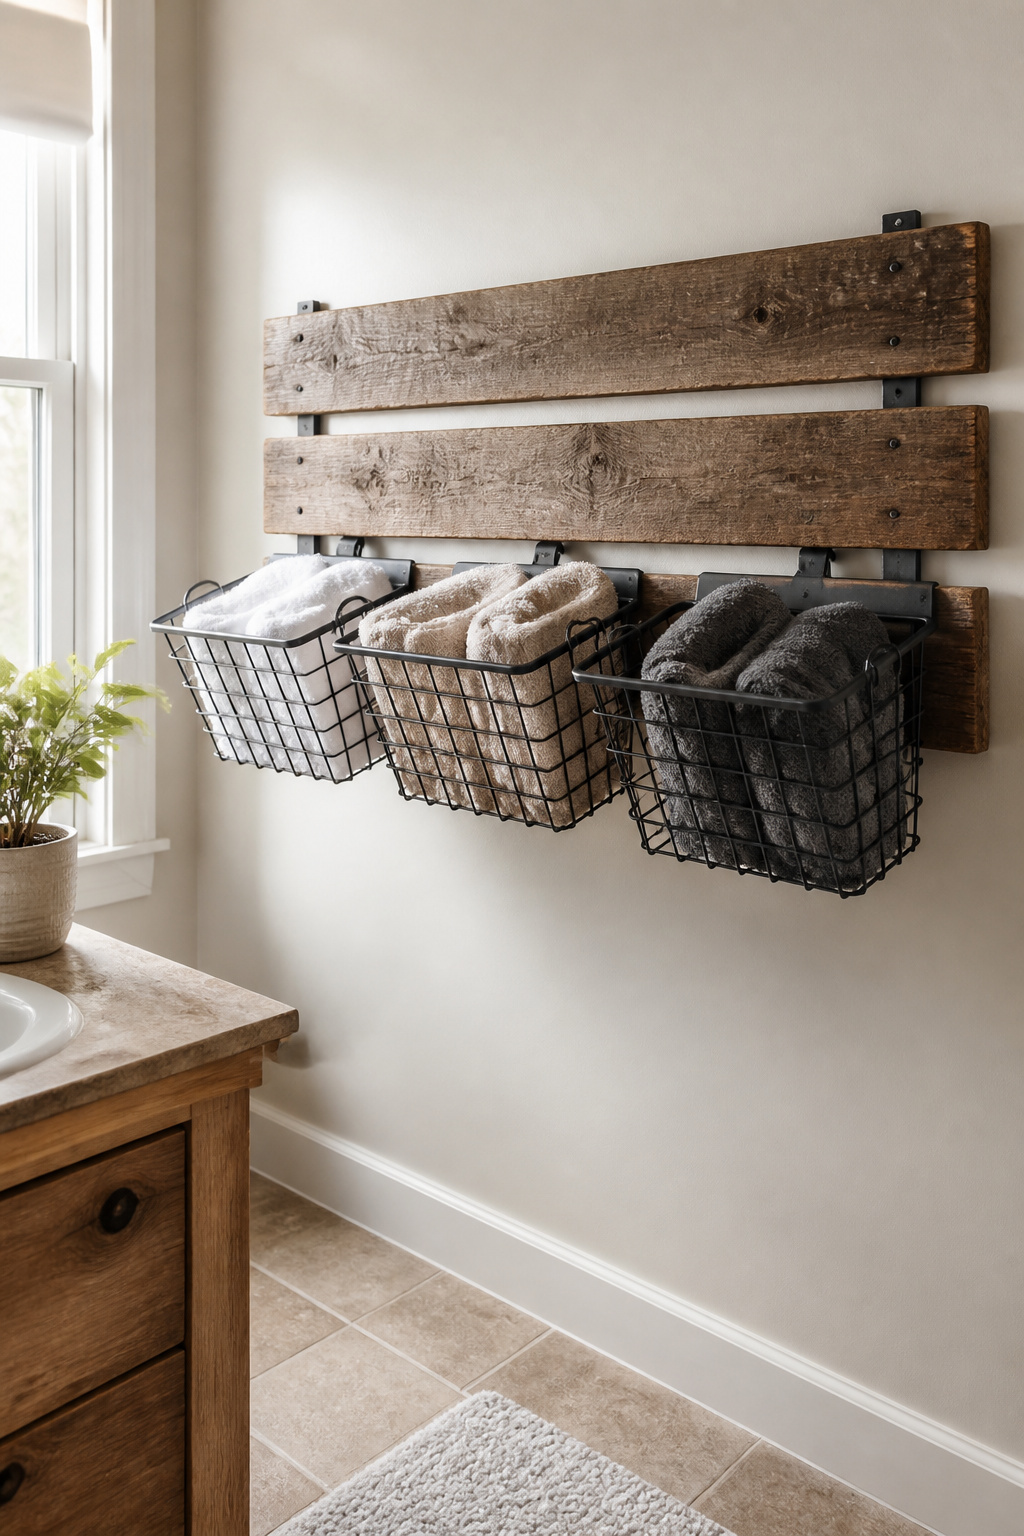
Wall-mounted baskets keep clean and dirty towels apart without eating floor space. A barnwood backing turns basic wire or wicker into something that belongs in a bathroom, not a pantry.
Three boards at 5.5 inches by about 42 inches long give you a solid frame for a triple-basket setup. Lay them side by side, dry-fit your baskets on top before cutting anything, and mark where the horizontal supports need to land. Cedar strips work well for those cross pieces; they hold the weight and take stain similarly to whatever weathered finish you are aiming for.
Wire baskets look deliberate against rough wood in a way they never do on their own. Wicker softens the whole thing if your bathroom runs more cottage than farmhouse. Either way, the barnwood does the heavy visual lifting while the basket does the actual work.

Material: This hanging laundry hamper bags are made of soft and high-quality polyester material, which is washable and durable to use. Laundry hamper supports hand wash or...
2. Rustic Towel Rack
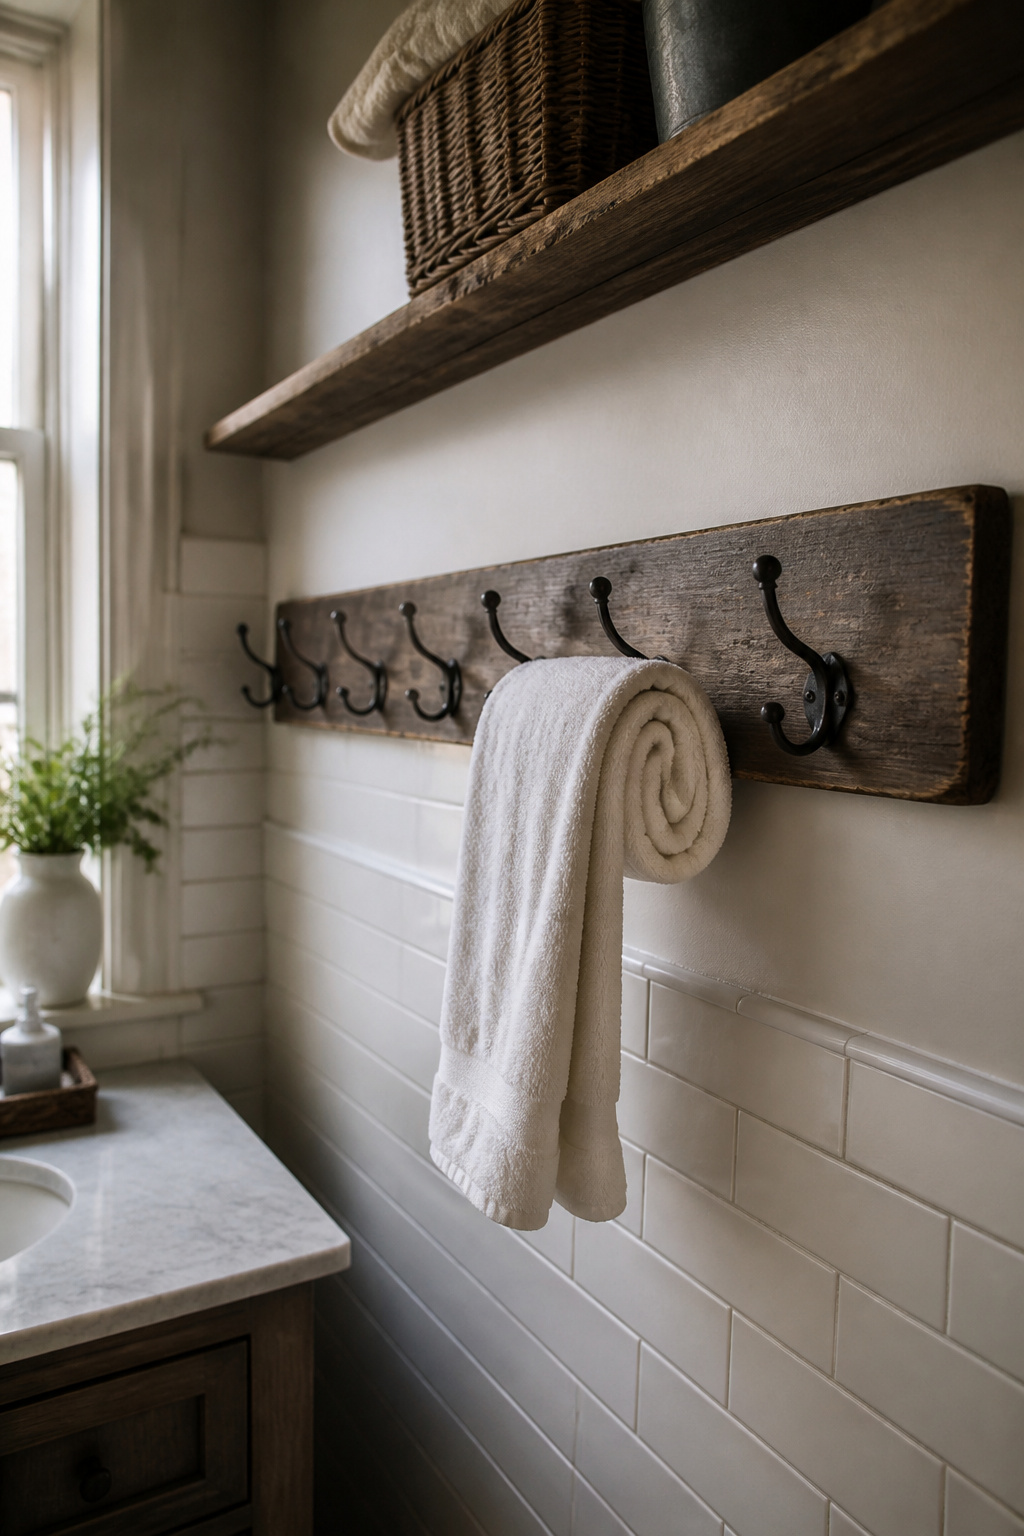
A wall-mounted rack from a single 1×6 board cut to 3 feet, or whatever length your wall allows, gives you hooks without the floor footprint. Six hooks spaced 6 inches apart fill that length neatly; pilot holes drilled before you drive the screws keep the barnwood from splitting where it is thinnest. Distressing the edges with a hammer or chisel before staining takes the newness down fast, and Minwax Provincial lands in the right weathered range without reading orange or purple.
The stain mix some builders prefer, dark walnut cut with special walnut, runs deeper and redder; Provincial skips the mixing step and still reads authentic against white tile or plaster. Store racks this size start around $60. The DIY route runs about $30 for the hooks and board, less if you already keep stain and a drill on hand. Two leftover hooks from the pack can finish a mini mudroom later, so the surplus does not sit wasted.

Unique Design: The unique design "Towel" lettering of this towel rack is made of wood embossed and creates a rustic stylish look, add a unique country charm to your space!

Rustic Farmhouse Style:Transform your bathroom into a warm and charming retreat with this decorative rustic wood "TOWELS" sign. Featuring a precisely cut letter design and a natural wood finish, it adds a cozy farmhouse touch that instantly elevates your bathroom wall decor

Unique Design: this rustic wood towel holder features a unique "Towels" lettering printed in a vintage, distressed style and individually affixed to the back panel, creating a three-dimensional, rustic yet stylish look that blends into any bathroom or home style
3. Towel Bar with Baskets
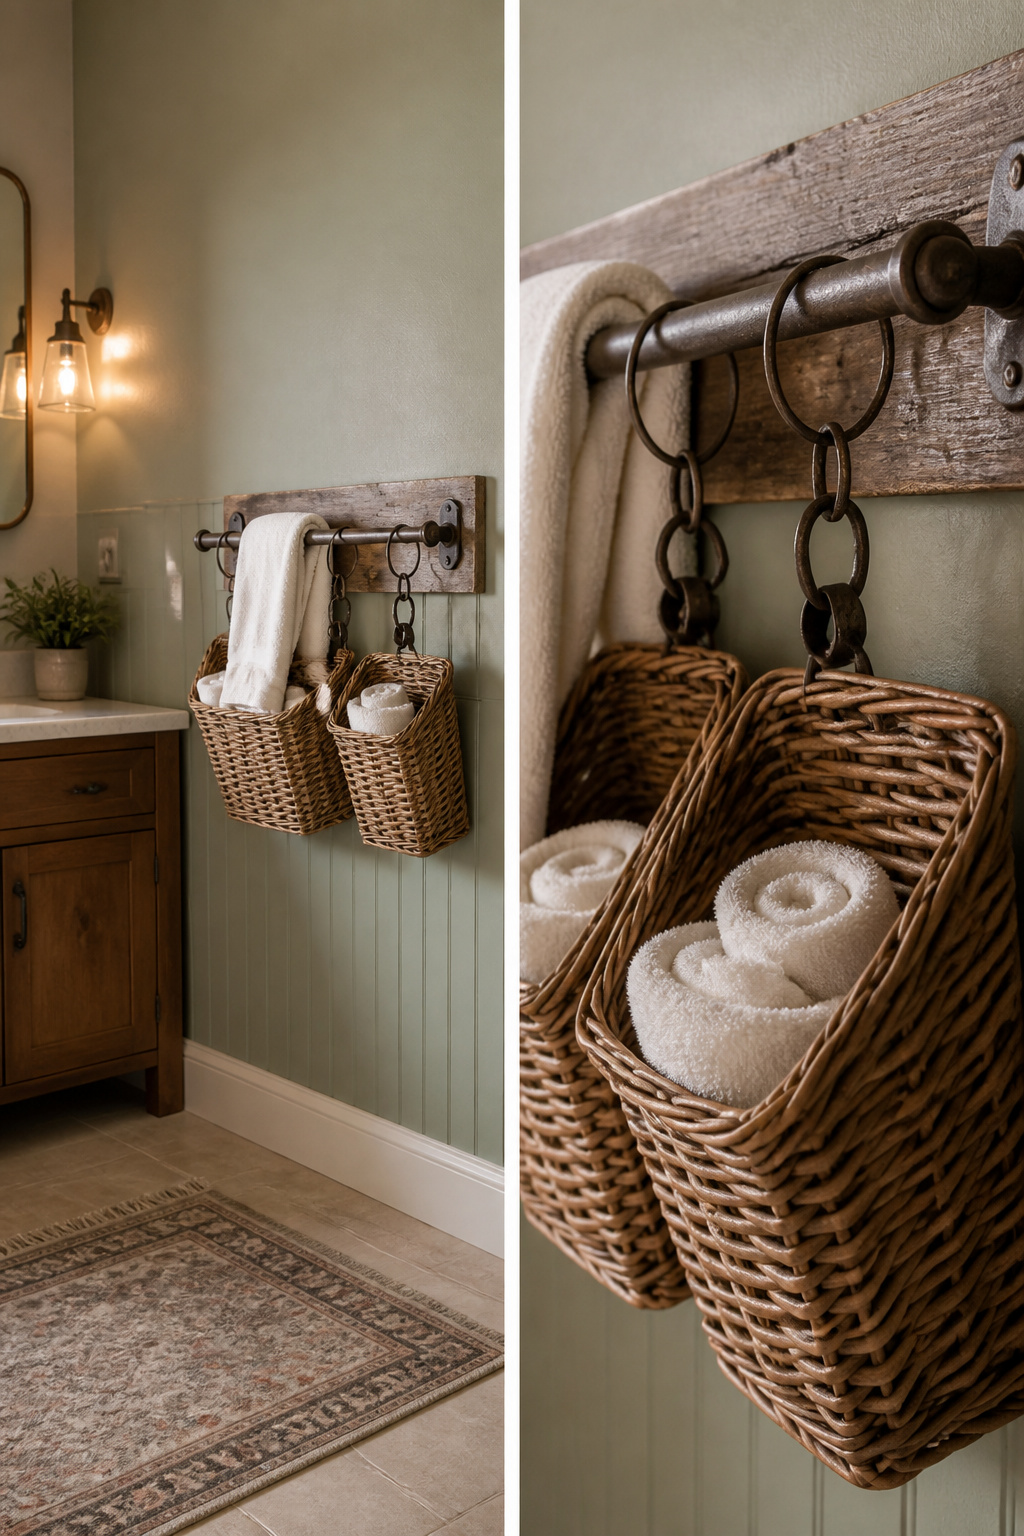
A towel bar already drilled into the tile or drywall is half the job done. The trick is adding storage beneath it without drilling new holes that a landlord will notice later.
Curtain rings with clips, the kind sold for shower rods, slide right onto most standard bars. Two medium wicker baskets or wire baskets clip underneath, hung so they swing free but don’t knock the wall. The bar still holds the towel you’re currently using; the baskets handle the rest. One footprint, two jobs: open air for the damp hand towel you just used, contained storage for the clean stack above it and a separate basket below for the dirty ones waiting for laundry day.
Wicker keeps the barnwood look warm, but wire reads more industrial and dries faster if your bathroom runs humid. Both materials come in the medium size that fits this setup without crowding a narrow wall.
Spray paint the bar if the finish is wrong, though an old bar with some patina already matches the rustic brief. The whole thing goes up in the time it takes the paint to dry, about an hour, and comes back down with no new holes to patch.


Package Dimensions: 10.13 L x 10.75 H x 11 W (inches)

KNOW YOUR SPACE BEFORE YOU BUY – LARGE TOWEL BAR DIMENSIONS: Basket measures 17 x 5.5 x 4" and full construction with towel bar measures 17.75"L x 5.5"W x 9.85"H — wall-mounted design fits bathrooms, powder rooms, kitchens, laundry rooms, and entryways without taking up counter or floor space
4. Wine Rack Towel Storage
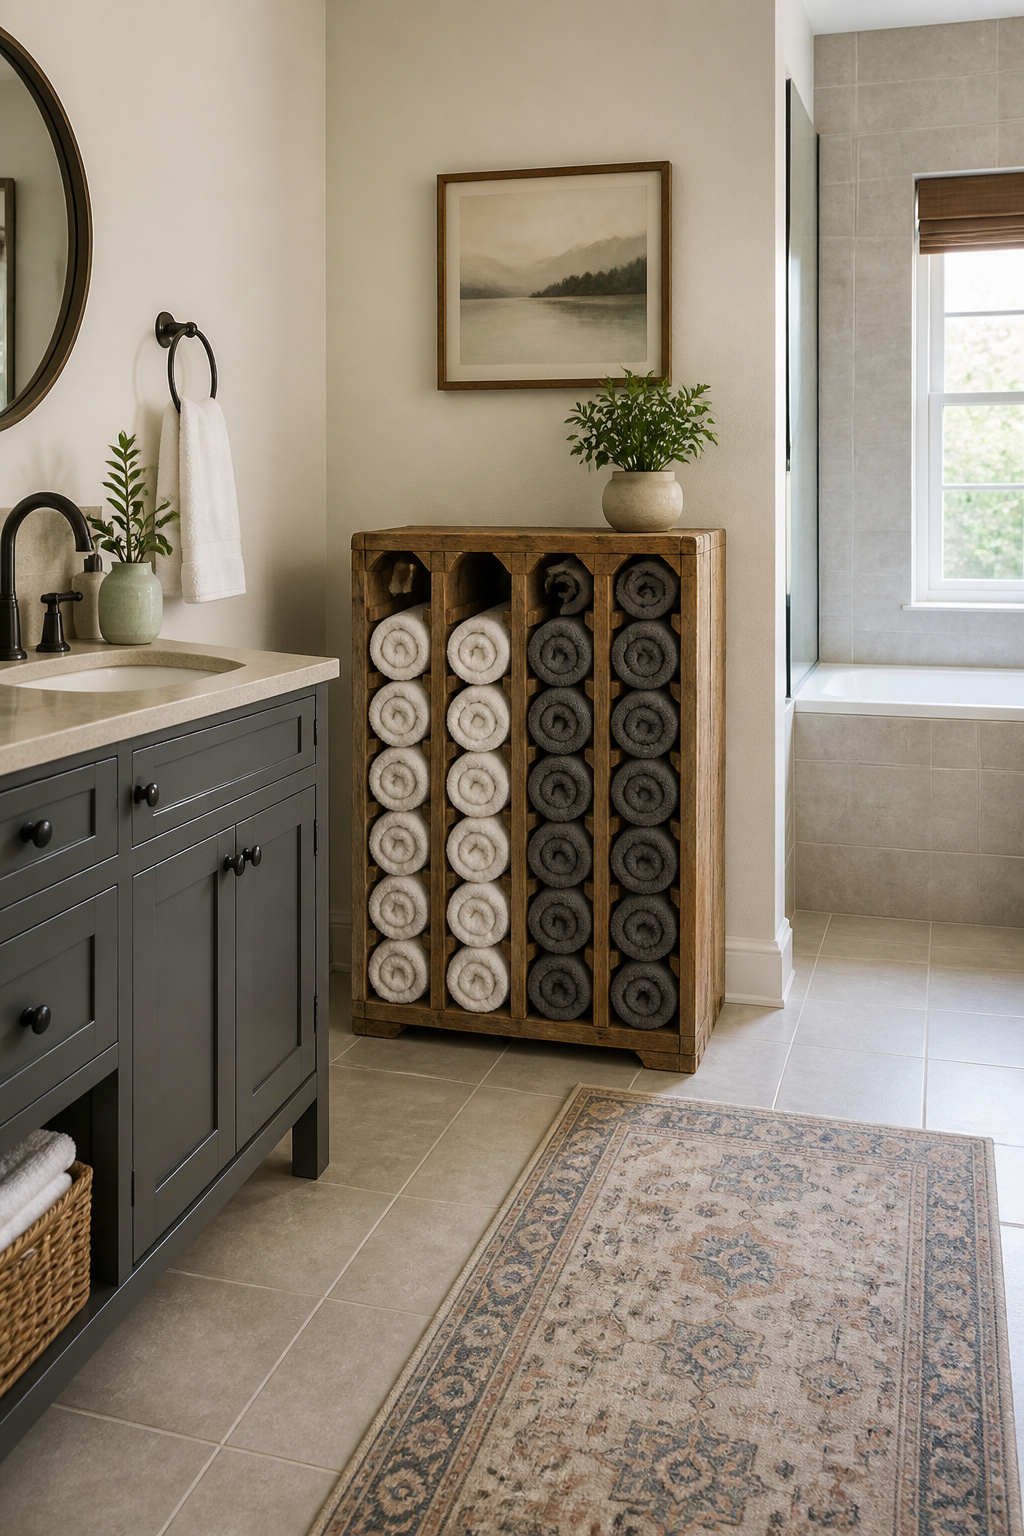
A wooden wine rack with vertical slots handles rolled hand towels better than it ever handled bottles. The spacing keeps each towel standing alone, so the whole thing reads as a display rather than a pile. I like the look of barnwood or heavily distressed pine for this, since the rough grain hides the wear that bathroom humidity eventually puts on anything finished.
Assign the left slots to clean towels and the right to used ones, or split by top and bottom rows. The physical separation means you are never guessing which towel is safe to dry your hands with. Rolled towels, not folded, are what make it feel like a spa moment rather than a storage fix. A tight roll about six inches in diameter sits securely in most standard slots and lets you pull one free without disturbing the rest.
If the rack you find has a back panel, leave it off so air moves through. Towels dry faster, and the shadow lines between slots stay sharper against the wall.
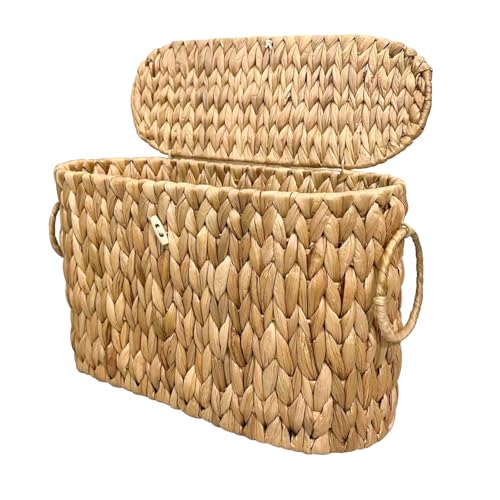
PERFECT SIZE FOR NARROW AREAS:Measuring 16.14" L x 6.69" W x 10.62" H, Coeusy toilet paper storage basket can easily hold 6 to 9 rolls of large or extra-large toilet paper rolls, providing you with plenty of storage space for your bathroom essentials.Perfect for snug corners in bathrooms or any other area where space is limited, it effortlessly blends into tight spots, providing convenient storage without sacrificing valuable floor space.

[Customizable Storage Layout] Free Standing Towel Rack with detachable U-shaped dividers gives you the flexibility to organize your space your way. Keep rolled towels neatly separated on top, or remove the dividers to create extra room for folded bath towels, extra toilet paper, skincare bottles, toiletries, baskets, or bathroom essentials. A smart towel organizer for bathroom designed for changing storage needs in apartments, guest bathrooms, or family homes

【Toilet Paper Storage】 The size of the efluky toilet paper basket is 16.92*6.69*14.37in. It is tall and narrow, with a stylish appearance. It can hold 9-12 rolls and is suitable for storing toilet paper rolls or accessories. It is easy to store and makes your bathroom or toilet more tidy and orderly.
5. Ladder Storage
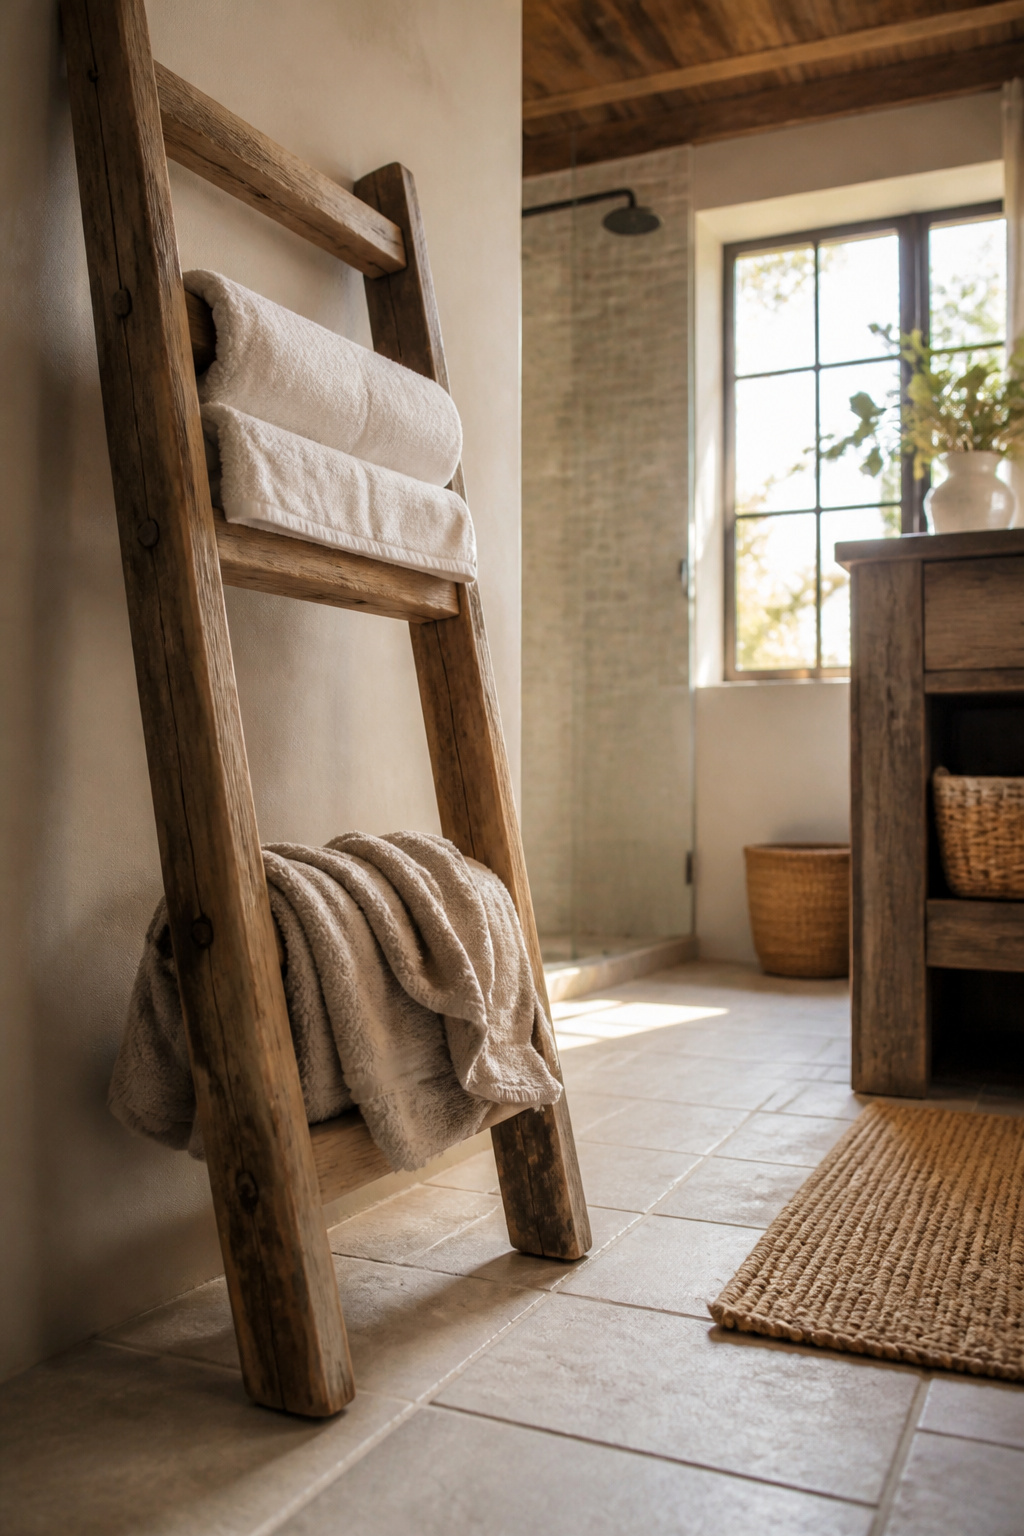
A weathered wooden ladder propped against bathroom tile does more than store towels; it sorts them without a single label. Higher rungs stay dry and hold the clean stack you grab after a shower. Lower rungs, closer to the floor’s humidity and splash, become the natural drop spot for used ones. The separation happens by height, not by bins, and guests figure out the system without asking.
Barnwood or any ladder you’ve aged yourself carries the same rough grain and soft graying as the baskets this project borrows from. That match matters in a small bathroom where too many competing finishes turn cluttered fast. A ladder with two or three rungs handles one person’s towels; four or five rungs let you split his and hers, or reserve a middle rung for hand towels.
Wall-mounting with a simple French cleat keeps the ladder from sliding on slick tile, though leaning works fine on textured floors or against a tub surround. The gap between rung and wall is barely two inches, so fold towels narrow or drape them over the front. Either way, the ladder’s silhouette stays visible, and the bathroom reads as decorated, not just organized.

Sturdy & Durable: This bath towel rack features a premium metal frame with reinforced joints to provide excellent stability, preventing wobbling or tipping. As a heavy-duty blanket rack, it is well-made for long-lasting use. The matte black powder coating resists scratches, rust, and moisture, making it a reliable towel holder stand for humid bathrooms.

Spacious 4-Bar Design: Each of the 4 bars on this freestanding towel rack is spaced to fit bath sheets, hand towels, and blankets without crowding. No more squeezing wet towels together - they stay separated with open space for air to move, helping everything dry faster between uses

Fit For Small Bathroom: Slim towel storage is a game-changer for cozy bathrooms, fitting snugly into apartments, dorms, and rentals. With its narrow design and tiered layout, the towel racks for bathroom freestanding makes the most of your vertical space. Keep towels within easy reach next to the shower or pool, so everyone can enjoy a more organized, stress-free bathing experience
6. Baskets on Shelves
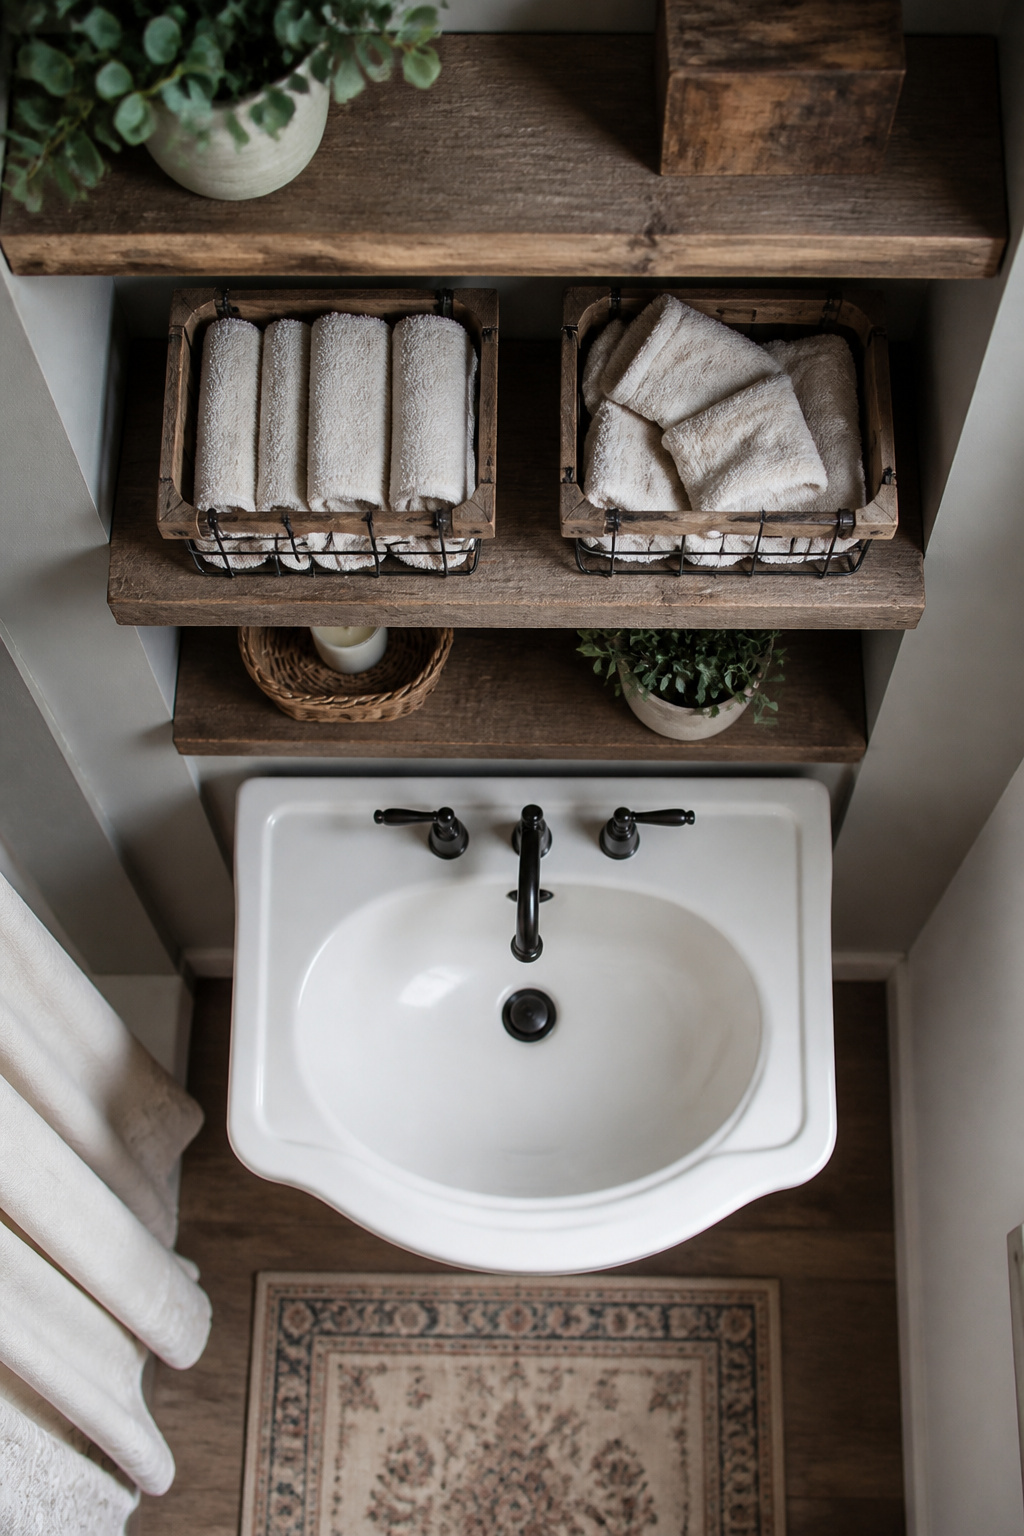
Open shelving in a bathroom leaves everything visible, which is exactly the problem labeled baskets solve. I started using two wire bins on the shelf above my toilet, one with a scrap of barnwood zip-tied to the front labeled "clean," the other marked "used." The wood tags cost nothing, pulled from a pallet I broke down last spring, and they keep the system readable at a glance.
Bathrooms with no wall space for hooks or hanging racks force you to think horizontally. My neighbor’s rental has a window where a towel bar would go and a pedestal sink with no cabinet, so her only real estate is a single floating shelf. Two small baskets, each with a barnwood rim I tacked around the lip with finishing nails, turn that shelf into a complete towel station. The wood trim makes mismatched thrifted baskets look intentional, not improvised.
The trick is sizing the baskets to your shelf depth. Ones that overhang by even an inch get bumped by elbows and knocked askew. Measure the shelf, then buy or build baskets half an inch shorter so they slide in without fighting the wall behind them.

𝗠𝗔𝗫𝗜𝗠𝗜𝗭𝗘 𝗬𝗢𝗨𝗥 𝗦𝗣𝗔𝗖𝗘: Transform small living areas like apartments or RVs with our compact, space-saving solution. It provides ample room for essentials and enhances your living environment with a stylish and functional design.

𝗠𝗔𝗫𝗜𝗠𝗜𝗭𝗘 𝗬𝗢𝗨𝗥 𝗦𝗣𝗔𝗖𝗘: Transform small living areas like apartments or RVs with our compact, space-saving solution. It provides ample room for essentials and enhances your living environment with a stylish and functional design.

𝗠𝗔𝗫𝗜𝗠𝗜𝗭𝗘 𝗬𝗢𝗨𝗥 𝗦𝗣𝗔𝗖𝗘: Transform small living areas like apartments or RVs with our compact, space-saving solution. It provides ample room for essentials and enhances your living environment with a stylish and functional design.
Materials and Tools
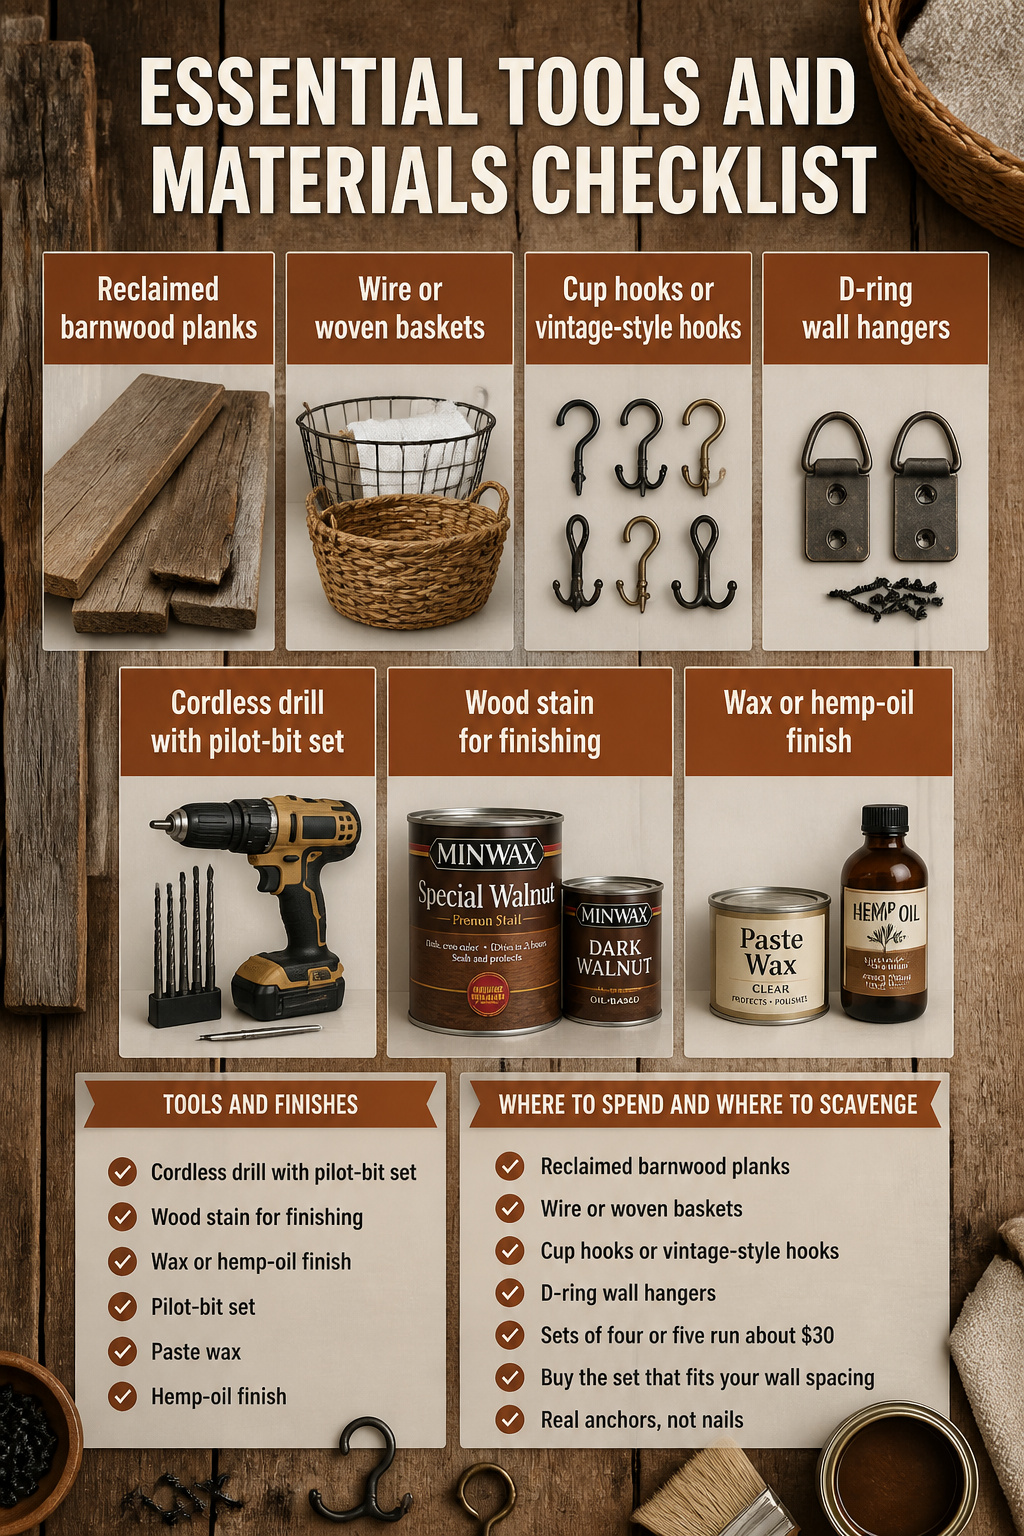
Most barnwood basket builds pull from the same small pile of supplies, so buying once means mixing and matching across projects all year.
Core materials that carry across every idea
- Reclaimed barnwood planks or new 1×6 boards cut to length; a 3-foot run handles a single rack, and most bathrooms need at least two
- Wire or woven organizing baskets in varied sizes; the open weave lets damp towels breathe so nothing mildews against the wall
- Cup hooks or vintage-style hooks; sets of four or five run about $30, with leftovers for a mini mudroom rack
- D-ring wall hangers rated for the loaded weight; plaster and drywall both need real anchors, not the nails that come free in the pack
Tools and finishes
- Cordless drill with a pilot-bit set; barnwood splits if you drive screws dry
- Wood stain to unify mismatched boards; Minwax Special Walnut is the color that keeps coming up, sometimes cut with Dark Walnut for depth
- Wax or hemp-oil finish over stain if the boards will see steam daily; paste wax works when budget is tight
Where to spend and where to scavenge
The wood is where personality lives, so reclaimed is worth the hunt. Hooks and baskets are interchangeable; buy the set that fits your wall spacing, not the one that matches a photo exactly.

Expand Your Storage with Tri-Functional Hooks: Three-way hooks designed for optimal storage and organization—hang coats, hats, bags, or even towels effortlessly. This versatile design lets you declutter your space while keeping essentials within easy reach

Unique Design--( It is protected by intellectual property right.): Overall size is 12.6"L x 5.2"H. The unique design "Towels" lettering of this towel rack is made of wood embossed and creates a rustic stylish look, fits any bathroom decor or home style to your space! (Please note the size while ording)

HANDCRAFTED SHABBY CHIC DESIGN: This Handcrafted Rustic Entryway Organizer is perfect for any home decor.
Cost and Time
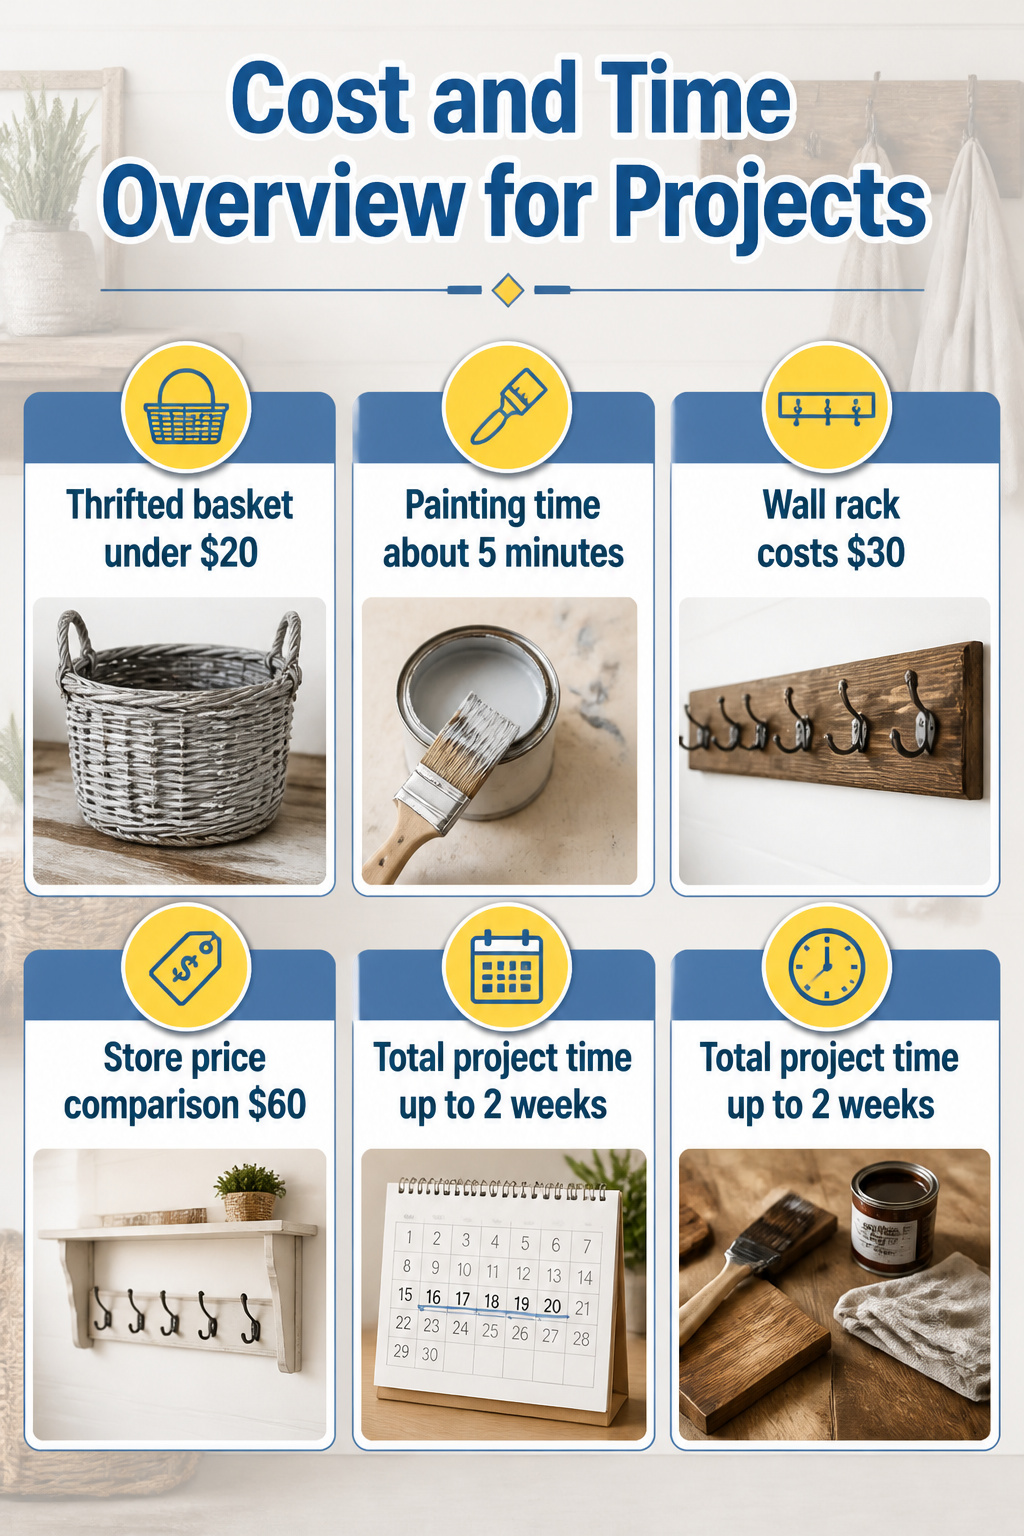
The fastest win in this whole list runs under $20 and about five minutes: a thrifted basket hit with leftover paint to fake that driftwood grey. The paint itself dries in an hour; the real clock-killer is finding a basket worth painting, not the painting.
For the wall-mounted rack, the math worked out to roughly $30 versus the $60 store price for something the same length. That thirty covered eight hooks and left two over for a mini mudroom project later. The wood and stain came from stock on hand, but even buying those fresh would not have pushed it past the store tag.
Where a full set of pieces drags out to two weeks, almost none of that span is building. Staining and drying eat the calendar: a coat, a day, a second coat, another day, then the sealer. Plan a weekend for assembly only after the boards have had their full sit. Rushing the dry time is the mistake that shows, and it shows in the streaks you will not sand out later.

STYLE: Wired for a world of opportunity, this collection of wire baskets offers styles ranging from ultra modern to timeless, and quirky to functional

Dimensions: 12.1" x 7.5" x 5.1"
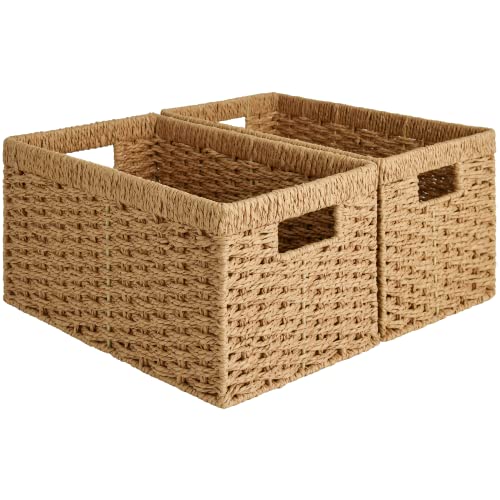
Handwoven Craftsmanship: Handwoven by skilled artisans with tight, even braiding, each pantry basket offers a neat, elegant look that showcases its high-quality craftsmanship.
Staining and Aging Wood
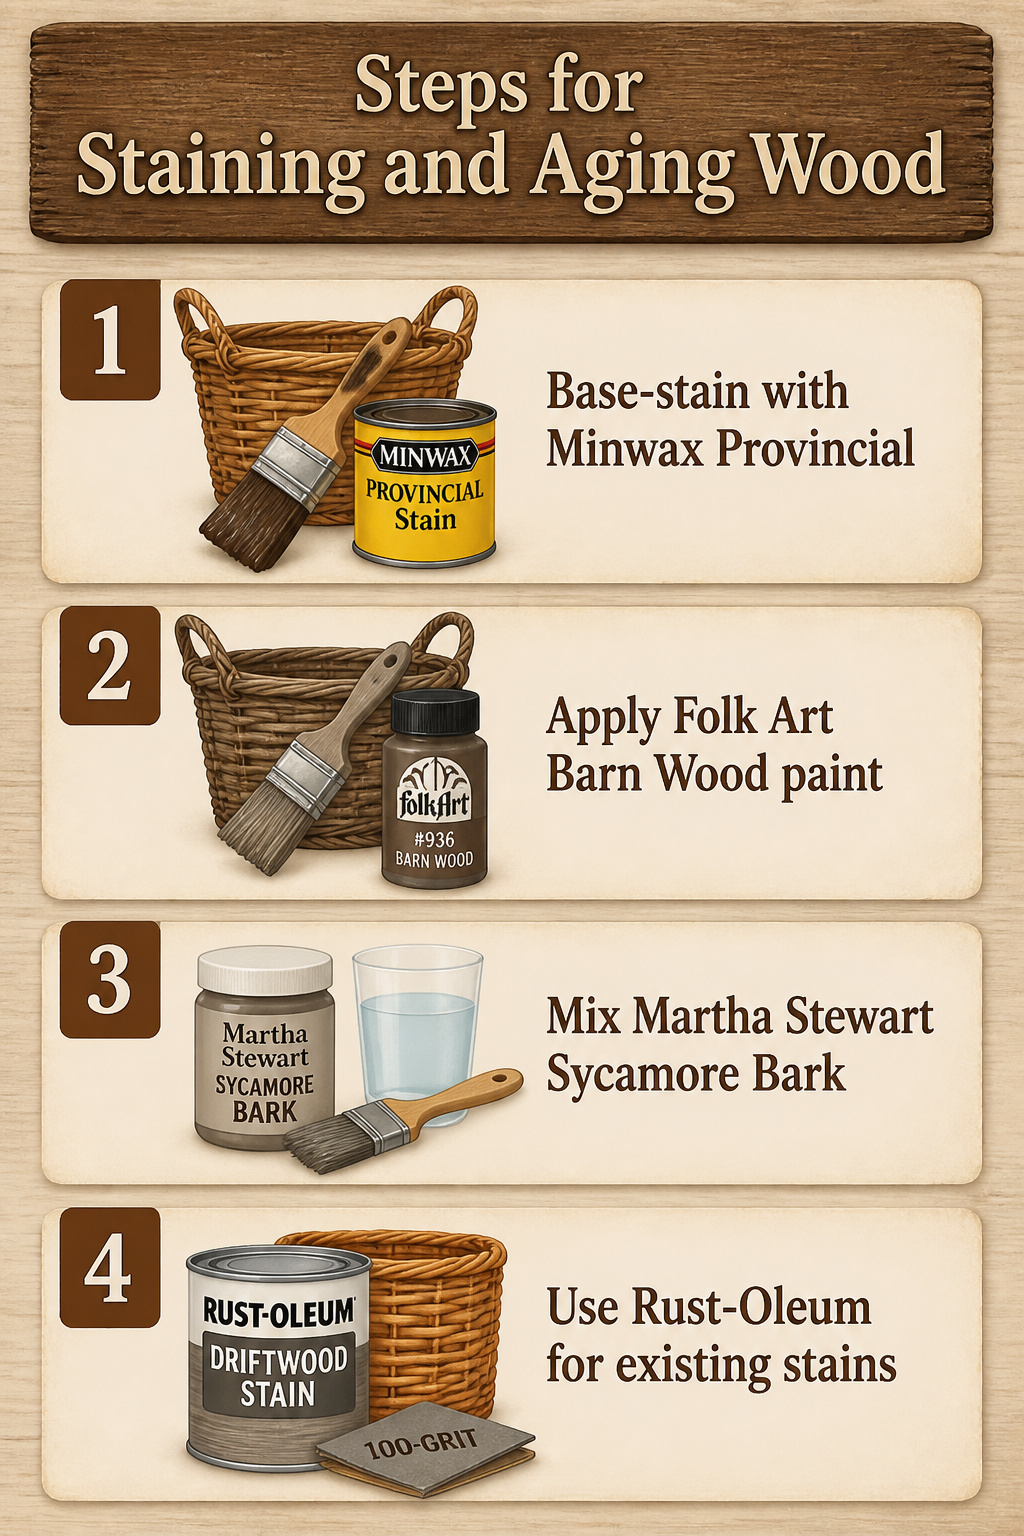
New wicker or pine baskets read too bright against real barnwood. The fix is a three-step driftwood finish that builds depth instead of painting over texture.
- Base-stain the whole piece with Minwax Provincial. A cheap brush works fine; the goal is consistent tone, not perfection. Let it dry fully.
- Brush Folk Art #936 Barn Wood over the stain using a stiff brush, then work it into crevices with a smaller one. Once dry, take a nylon scrub brush and drag hard across the surface in long horizontal strokes. This exposes underlayers and scratches the reeds in ways sandpaper cannot.
- Mix Martha Stewart Sycamore Bark paint 50/50 with water. Brush over everything, wipe gently with a paper towel, then drag a dry brush through the wet wash to leave striation marks. Let dry.
For baskets with an existing orange stain, skip the paints and try Rust-Oleum Driftwood Stain over 100-grit sanding. If the color still fights your bathroom, mix stains to match: Provincial warms toward existing woodwork; adding a touch of Weathered Grey cools it toward tile with blue undertones.

2 Different Sizes - Large: 14" x 6.2" x 3.55", Small: 13" x 5.1" x 3.15" (L x W x H)

Size: 12W x 6.5D x 5.25H" – This mini basket is the perfect shallow basket for organizing small spaces or creating cute gift baskets empty to fill with your favorite items.

Double-layer Shower Banging Basket:2x suction cups, 1x double layered shower caddy basket. The upgraded double-layer bathroom hanging caddy has a larger capacity and wider applicability. This 360-degree rotatable shower caddy can be hung on doors, showerheads, towel racks, or curtain rods. It perfectly stores body wash, shampoo, conditioner, facial cleanser, razor, sponge, and towels, making your bathing environment neater.
Sizing and Placement
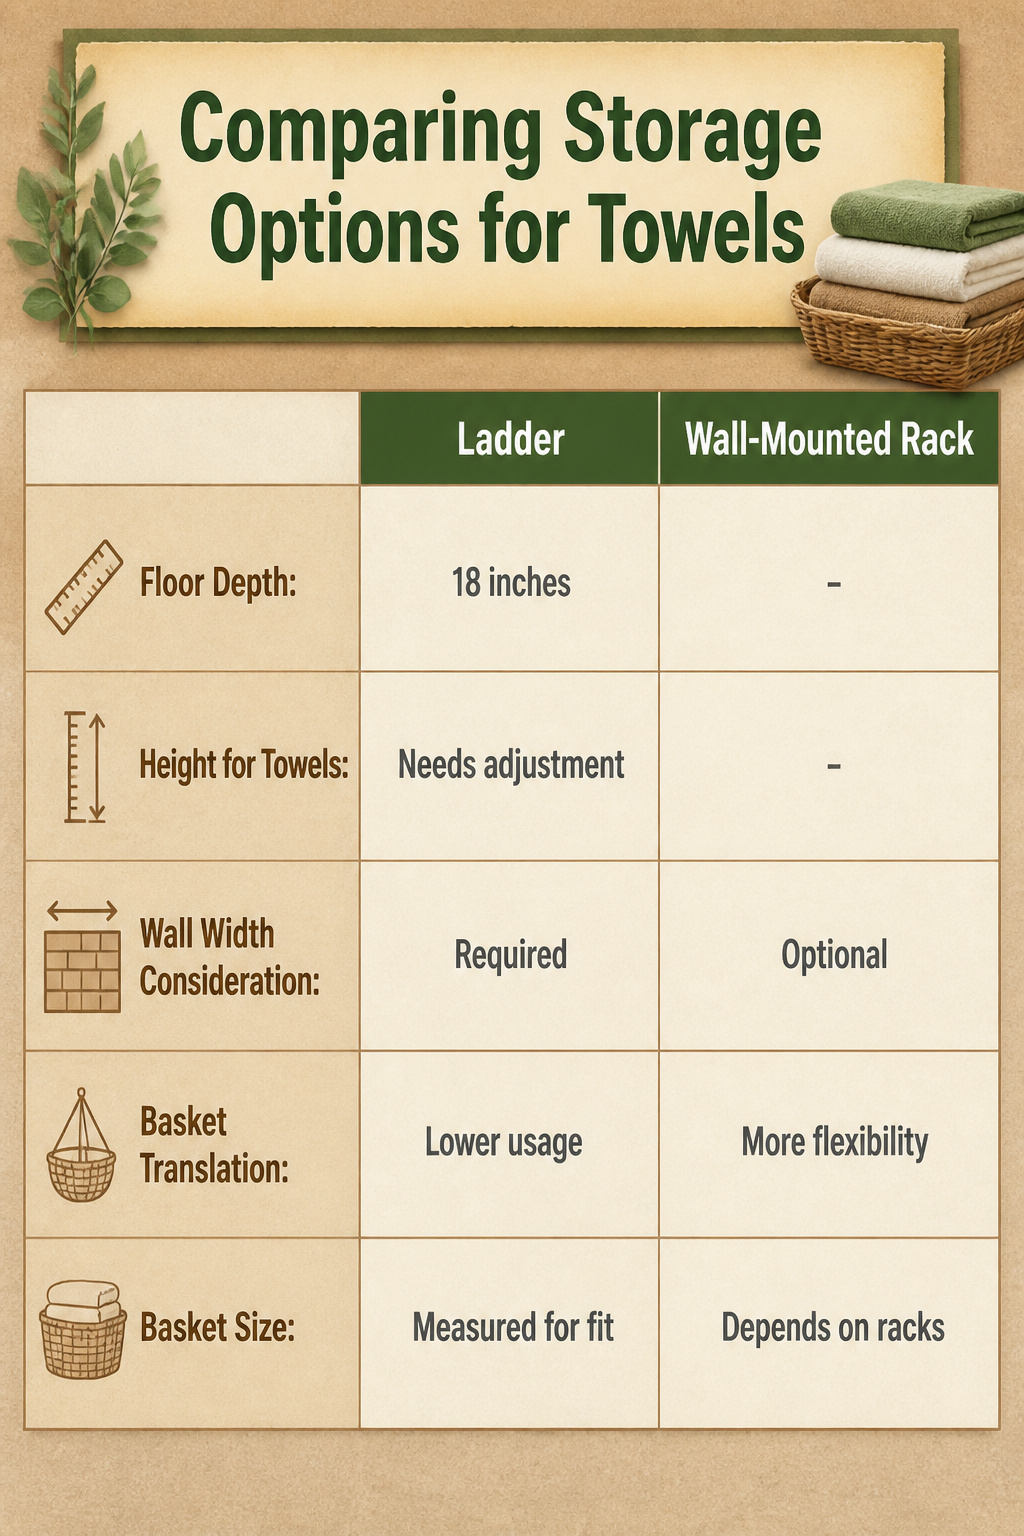
A ladder leaning against the wall needs about 18 inches of floor depth and a surface tall enough that the towels do not drag. I learned this the hard way in a 6 by 6 foot entryway where every inch of floor space mattered; the ladder I tried blocked the door swing and had to move to the guest bath. Wall-mounted racks are more forgiving for renters, though you still need to know your wall width before cutting any barnwood. For hanging baskets, ceiling height sets the limit: a basket hung too low clips shoulders, and one too high becomes storage you never use. Shelf storage is simpler but still demands you measure your folded towel stack first. The sources offer general ideas, not basket dimensions, so a bath towel folded in thirds might sit in a 12-inch deep basket or need 16 inches. Take the tape measure to your actual towels before you buy wood or brackets.

Multi-Purpose Application: This freestanding towel rack measures 16.5"L x 9.4"W x 31.5"H, providing additional storage without sacrificing space. Perfect for bathrooms, living rooms, bedrooms, laundry rooms, kitchens, and more. Say goodbye to clutter and easily access your daily necessities

[OPTIMIZED AIRFLOW FOR FASTER DRYING] Tired of damp towels that overlap and take forever to dry? Our standing towel rack features an innovative 3-tier descending height design. This precise spacing ensures wet and dry towels hang separately without touching, promoting natural 360-degree air circulation to significantly speed up the drying process and keep your towels fresh.

Made in the USA
Frequently Asked Questions
What materials do I need for a DIY towel rack?
You will need a 1×6 board cut to length, cup hooks or vintage-style hooks, a cordless drill with pilot bits, and D-ring wall hangers rated for the loaded weight. Reclaimed barnwood planks or new boards both work, and a wood stain such as Minwax Provincial helps unify the finish. Plaster and drywall both need real anchors, not the nails that come free in the pack.
How do you creatively keep your bathroom well stocked and organized?
A towel bar with clip-on baskets turns one fixture into a dual-purpose station for both display and storage. The bar holds the towel in current use, while baskets below handle clean and dirty separation. It is a simple and chic way to organize and hold must-have bathroom products.
How can I make my baskets look rustic?
Base-stain the piece with Minwax Provincial, then brush on Folk Art #936 Barn Wood and scrub across the surface with a nylon brush to expose underlayers. Finish with a 50/50 mix of Martha Stewart Sycamore Bark paint and water, wiped gently and dragged with a dry brush for striation marks.





