
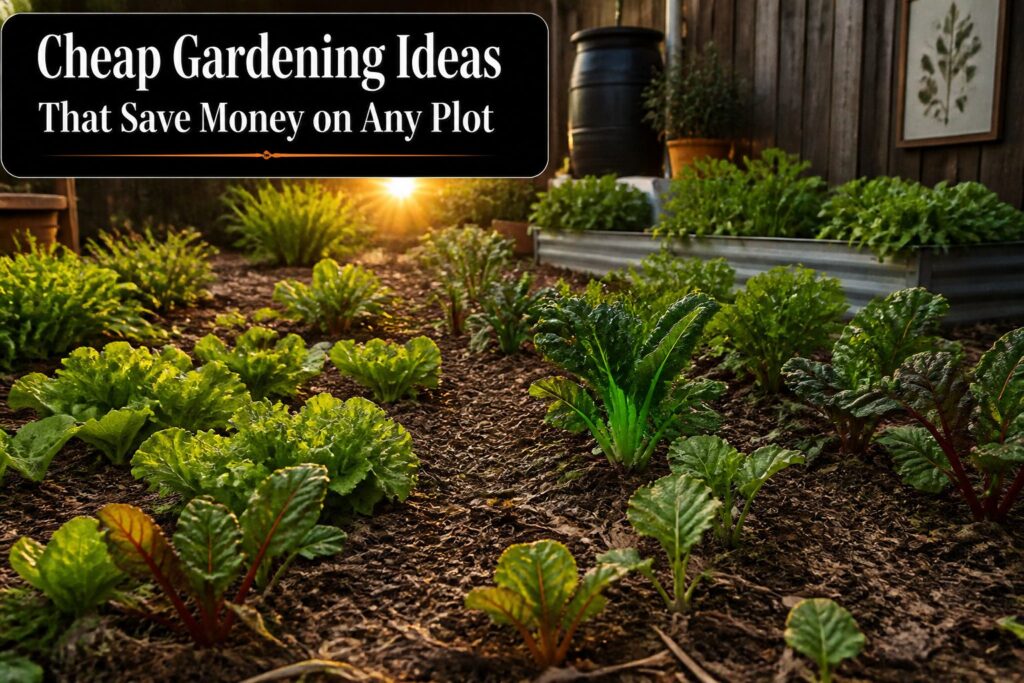
The real savings in a garden come from timing and material choice more than from any single technique.
A packet of tomato seeds costs a few dollars and holds up to 300 plants, while a single nursery seedling costs more for just one shot.
Whether you build beds from reclaimed cedar or collect rainwater in a food-grade drum, the method that fits depends on whether you own the plot or sign a lease.
1. Use Seeds Instead of Seedlings
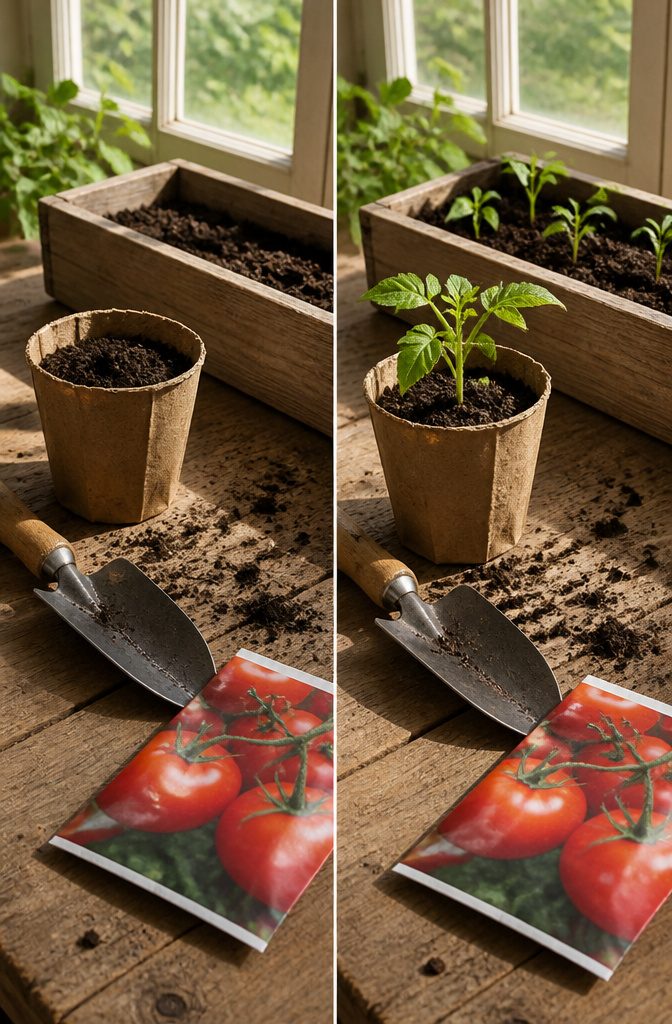
A packet of tomato seeds runs a few dollars and holds anywhere from 10 to 300 chances, while a single seedling costs more and gives you one shot.
Start from seeds and you cut the biggest line item in a garden budget, because the more prep work the nursery does, the more you pay for the same plant.
Tomatoes, peppers, and leafy greens all make sense to sow yourself; they germinate reliably and the savings stack fast when you need a dozen plants or more.
Timing splits into two paths. For crops that need a head start, like tomatoes and peppers, I start seeds indoors six to eight weeks before the last frost date.
Cool-season crops such as lettuce, peas, and radishes go straight into the ground once soil can be worked, no indoor setup required.
A seed packet also opens the option of seed saving at season’s end, which stretches that initial purchase across years if you learn the basics.
2. DIY Raised Garden Beds
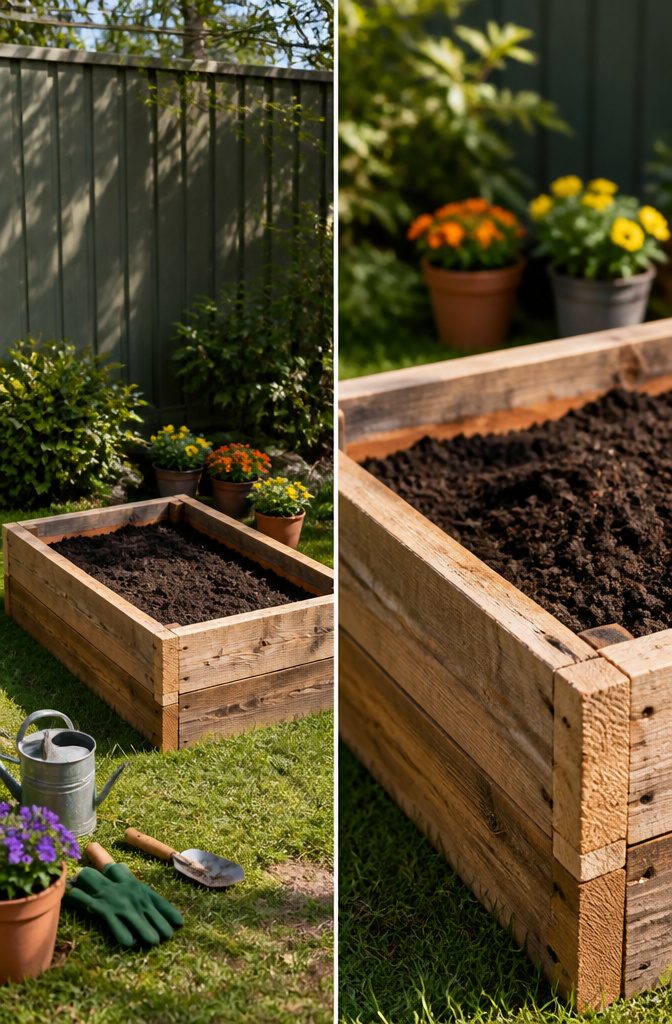
Raised beds beat amending bad soil hands down, and building them yourself keeps the cost in check.
Reclaimed wood is the first place I’d look: cedar fence boards run cheap at salvage yards, and readers routinely report assembling 2-by-3-foot boxes for the price of a few galvanized nails and screws.
Just avoid treated pine. The chemicals leach, and that’s not a corner worth cutting for something you plan to eat from.
Concrete blocks are another solid path if wood isn’t turning up free. They’re heavy, but that weight works in your favor: no anchoring, no warping, and the hollow cores hold extra soil or even trailing herbs.
Railway sleepers and large offcuts from a local mill work the same way, though you’ll want to confirm the wood wasn’t treated with anything you wouldn’t want near your tomatoes.
The real budget stretcher is keeping your eyes open in unlikely spots. Thrift stores, vintage markets, and construction site dumpsters have yielded scaffolding planks, old crates, and cut logs for readers who asked.
One person’s scrap is genuinely your garden bed; just drill drainage holes before you fill it. The limit is your willingness to haul it home, not your wallet.
3. Composting
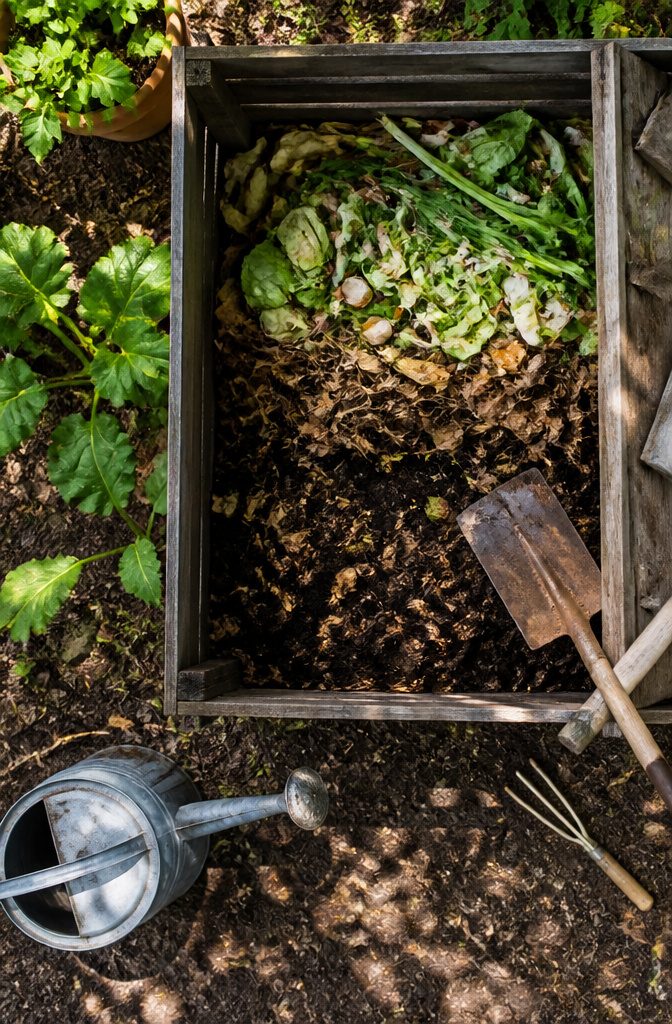
A compost pile starts with what you already toss: coffee grounds, vegetable peels, lawn clippings, dried leaves.
Layer them so fresh green material stays roughly balanced with twice as much dry brown, and turn the pile every few days so the bottom mixes in with the top.
The bin itself can be as simple as a lid-heavy container that keeps pests out and a shovel that lets you stir.
Meat, dairy, and fish belong in the trash, not the pile. Skip the compost activator; the scraps do the work for free.
Finished compost replaces bagged fertilizer and it does the job better. It holds moisture through long hot days, so you water less, and the nutrients it releases mean you buy fewer amendments over the season.
A pile needs a few months to break down, and turning it is labor you do not skip. For a weekend gardener, that effort still wins against the cost of store-bought soil and synthetic feeds.
4. Fabric Grow Bags
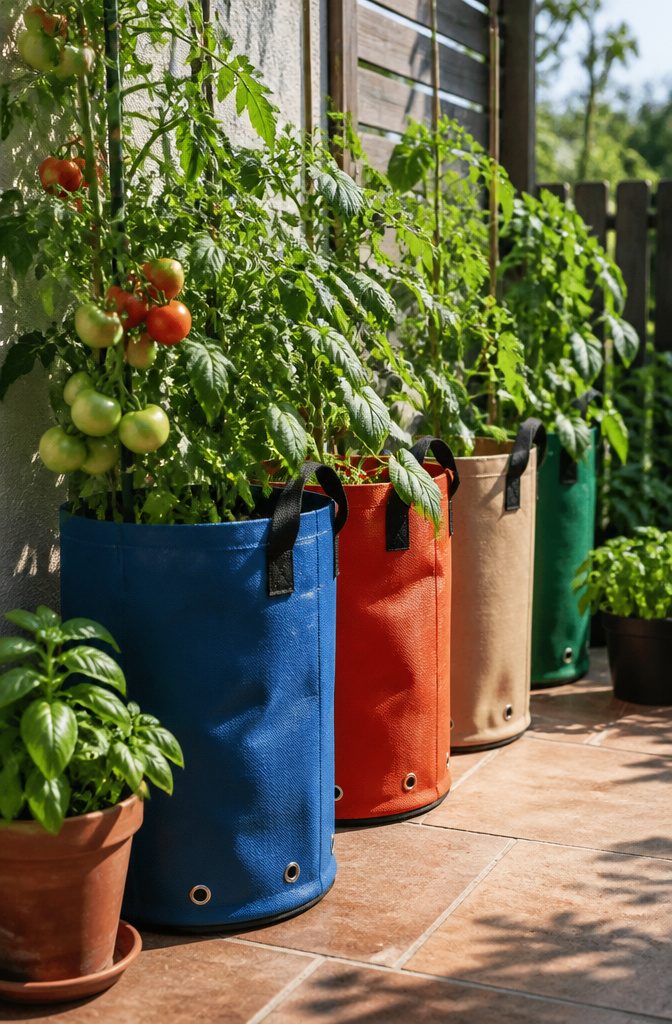
A 50-inch diameter fabric grow bag holds roughly 400 quarts of soil, which translates to about 13.7 cubic feet. That is enough depth and volume for full-size potatoes, string beans, or tomatoes without the permanent footprint of a raised bed.
For renters or anyone working a patio, deck, or balcony, the advantage is mobility.
These bags come up for the season, go flat for storage, and move with you when the lease ends. Permanent beds tie you to the property and often require building materials you cannot take along.
Breathable, BPA-free fabric with built-in drainage matters more than the diameter. Solid plastic traps moisture and rots roots; the fabric lets air reach the sides and excess water escape.
That same breathability means the soil dries faster than it would in ground-level dirt, so vegetables with similar watering needs pair better together.
Potatoes and string beans can share a bag only if you section them, since potatoes want deeper, less frequent soaking than beans.
I would skip the idea that grow bags look temporary or cheap. A full bag with healthy plants reads as intentional garden space, and the savings over lumber or metal edging are real.
Fabric softens and tears after a few seasons of UV and handling, while cedar beds age for years. For a weekend setup under a hundred dollars that moves when you do, that trade feels fair.
5. Vertical Gardening
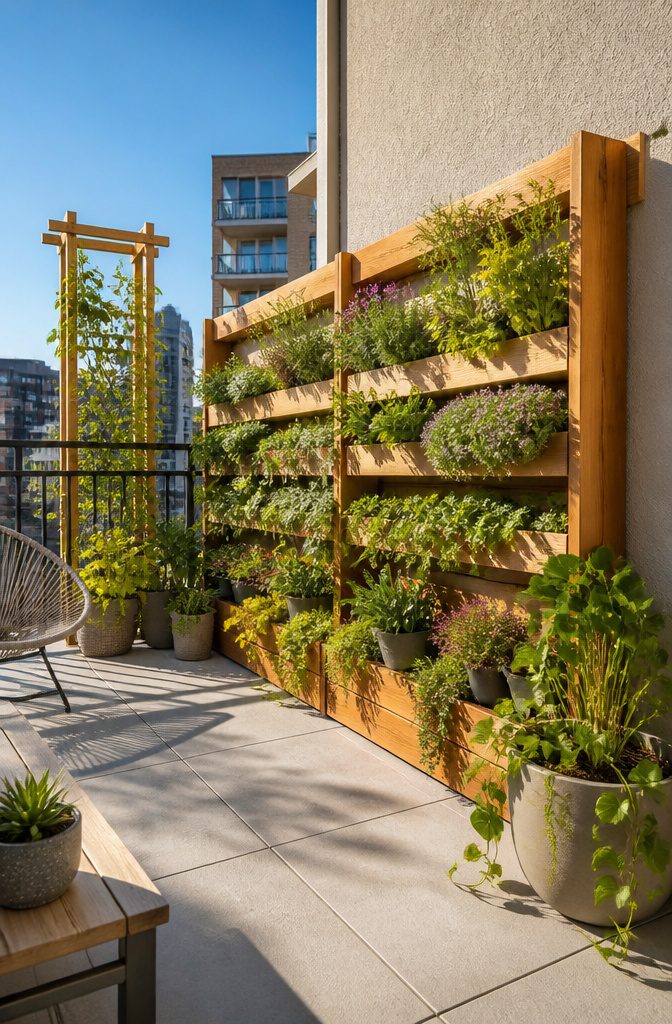
A wooden raised herb wall does double duty as privacy fence and pest deterrent, freeing up deck space while keeping rabbits and raccoons from midnight snacking.
Wood-framed structures stay stable indoors or out, while plastic framed units wobble until the dirt goes in.
Fabric pocket systems suit unused balcony walls best, though the material determines whether you’re tending annuals for a single season or building something permanent.
Placement decides whether vertical gardening saves your plot or wastes it. Morning sun hits east-facing walls for leafy herbs and lettuce; afternoon exposure on the south side handles tomatoes and peppers that need the heat.
A fence line trellis wants the same light audit you’d give ground beds, because shadow cast by the structure itself can halve your growing hours.
Ivy covers ugly masonry for nearly nothing once established, but the density that blocks neighbors also traps moisture against siding.
That living insulation cools walls in summer and warms them in winter, yet the same grip that holds brick will pry apart wood trim.
For renters, the pocket fabric systems move with you; for first-home owners fixing to stay, wood-framed beds built against your own fence pay back over years rather than seasons.
6. Plant Swaps
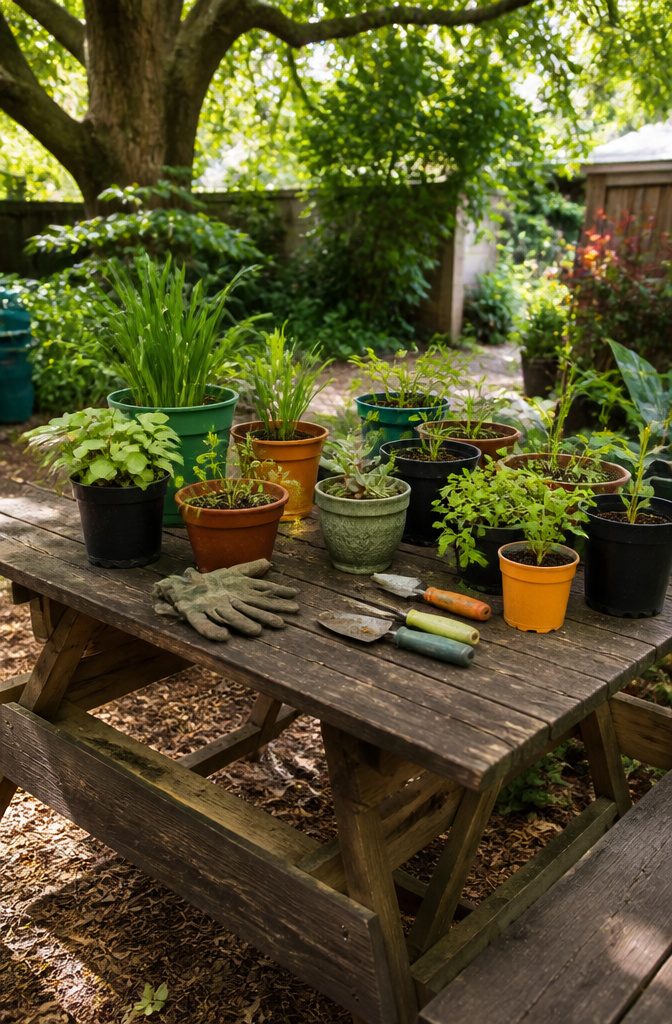
The best plant material for a swap is the stuff already proving it can survive your local conditions.
Neighbors dividing their daylilies or passing along tomato seedlings hardened off in the same zip code are giving you plants that skip the adjustment shock and the replacement cost.
Facebook groups for your neighborhood, a local Buy Nothing group, or an allotment board are the usual places these swaps get organized. I have seen them work with as few as four gardeners and a picnic table.
What to bring is simple: clean pots, labeled plants, and a rough note on sun and water needs.
A quick rinse of roots and a check for aphids or odd spots keeps you from becoming the person who traded mealybugs around the block.
If you are starting the swap yourself, set one rule that protects everyone: no running bamboo, no mint in bare-root clumps, nothing on your state’s invasive species list. You wait longer for results.
You will not always find the variety you wanted, and you may come home with six pots of the same sedum your grandmother grew. That is still six free plants that already like your soil.
7. Natural Pest Control
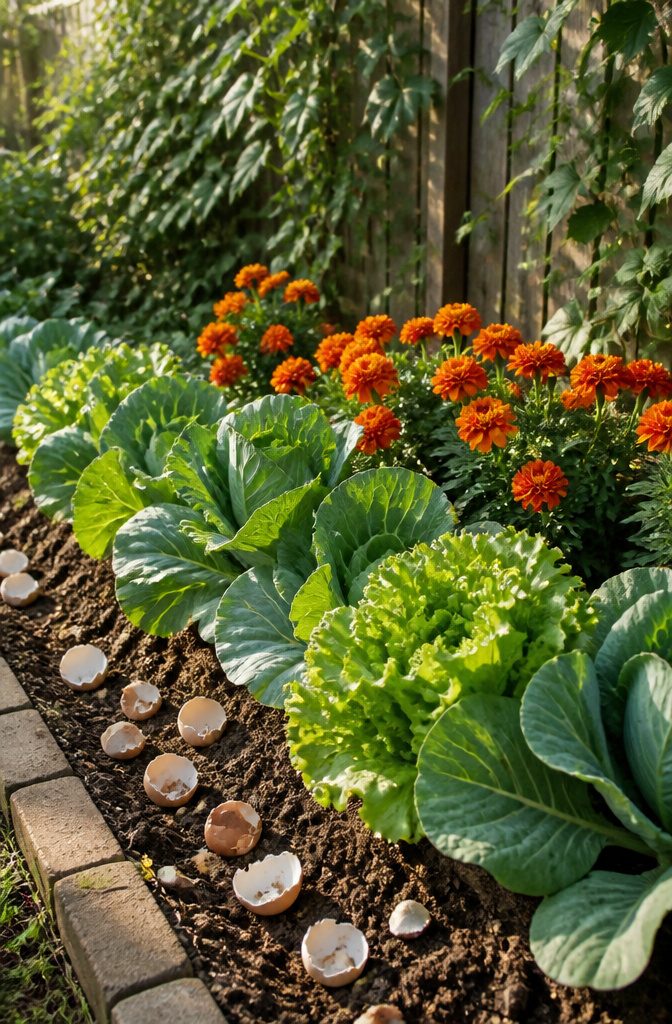
Chemical pest control runs the bill up fast and leaves residue on food plants you actually intend to eat. Manual methods cost nothing beyond time, and companion planting fills space that would otherwise sit empty.
Marigolds planted near tomatoes repel whiteflies and aphids. Basil beside peppers confuses thrips and hornworms.
Nasturtiums draw aphids away from squash and beans, acting as a sacrificial crop you pull and discard rather than spray. These pairings work because the scent compounds mask what pests use to locate their target.
Crushed eggshells scattered on soil around lettuce or cabbage add lime while deterring slugs and soft-bodied crawlers. Sharp edges cut without poison, and the shells break down into the same calcium source bagged fertilizer sells.
Weak plants spread trouble faster than healthy ones resist it.
Pulling a single infested stem beats treating a whole row two weeks later. The twenty minutes of evening patrol saves the thirty dollars of organic spray.
I skip row-wide treatments entirely now. Spot removal and strategic pairing handle ninety percent of pressure in a typical season, and the garden still looks full because the companions fill visual gaps while they work.
8. Repurpose Household Items
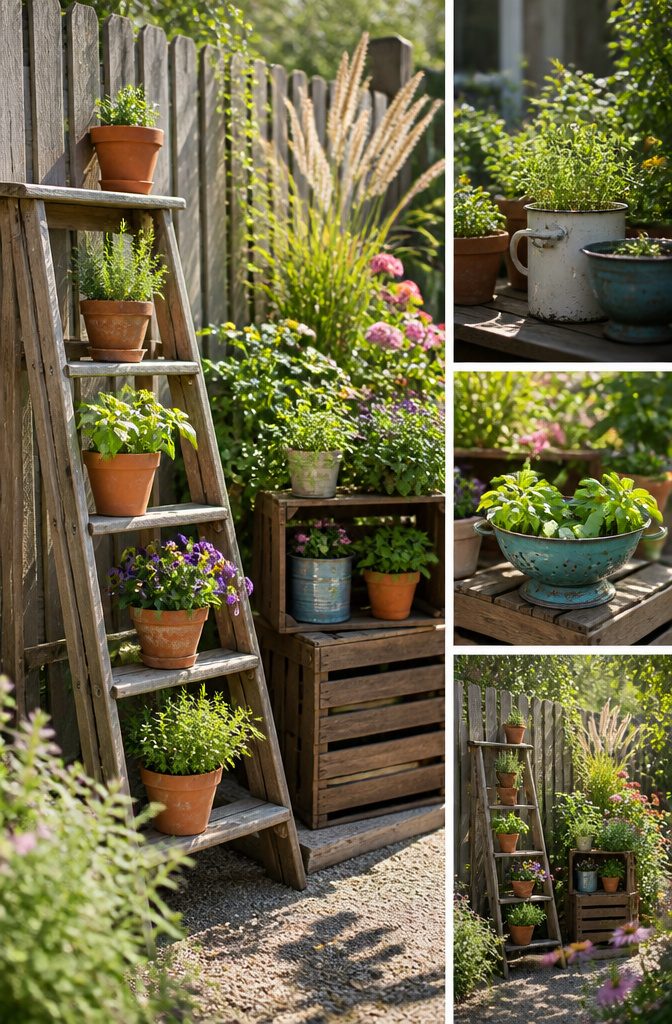
Old tires, wooden crates, ladders, and even kettledrums or chimney pots can become planters or raised beds with drainage holes drilled in the bottom.
The material matters more than the shape. Tires work for flowers, though I’d keep food crops out of them; the rubber chemistry gives me pause even when sources disagree.
Wooden crates and ladders give that rustic look Pinterest favors, but untreated wood rots fast outdoors. If the crate came from a grocery store or the ladder from a garage sale, expect two to three seasons before the legs soften.
Scaffolding planks and cut logs last longer than crate slats because of the thickness. Treated pine is the one to avoid: the chemicals leach, and that rule holds whether you’re growing tomatoes or tulips.
Thrift stores and vintage markets are where I look first. One person’s dust bin is another person’s potato planter, and the price beats any garden center.
The real limit is weight. A tire full of wet soil is not moving once you fill it.
Place it before you plant it. Same for a ladder loaded with terracotta pots: the center of gravity shifts, and a gusty afternoon can tip the whole arrangement.
Anchor it or lean it against a wall you already own, not the one your landlord will charge you for.
9. Bulk Soil and Mulch
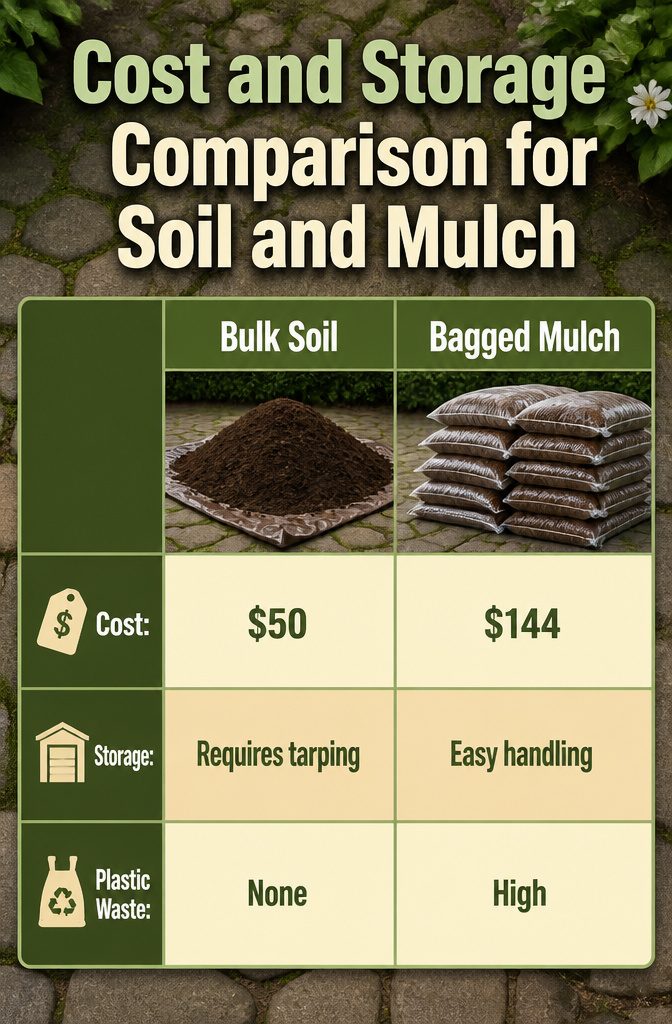
A cubic yard of mulch runs about $50 bulk against up to $144 in bags for the same volume, since you would need eighteen 2-cubic-foot bags at roughly $8 each to match one bulk yard.
That gap is wide enough to cover delivery and still leave savings, which is why I only buy bagged when I need under half a yard or the pile has nowhere to sit.
Storage is the real limit. Bulk soil or mulch needs a tarped spot on pavement or a sheet of plywood, ideally somewhere you can back a wheelbarrow straight up to it.
Without that, the savings evaporate into labor and mess. For renters especially, the math only works if your landlord is fine with a temporary mound, or if you can split a delivery with a neighbor and move it fast.
The plastic waste is worth noting too, though it is secondary.
Eighteen bags is a lot of torn polyethylene to drag to recycling, if your center even takes it. Bulk skips that entirely, which matters on a longer timeline if you are touching up beds yearly.
My call: order bulk the moment you need a full cubic yard or more, and schedule delivery for a day you can spend moving it.
The price difference pays for a borrowed truck rental or a pizza for whoever helps you shovel.
10. Rainwater Harvesting
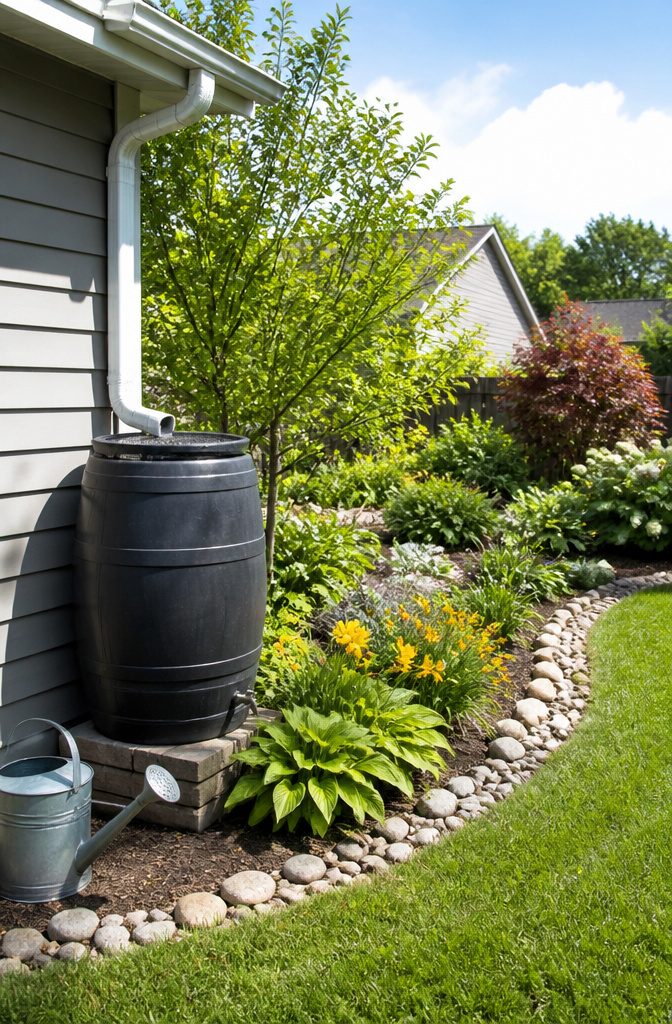
A single 55-gallon rain barrel positioned under a downspout collects enough runoff to handle most hand-watering through a typical growing season.
I have seen setups that connect soaker hoses directly to the barrel, running them underground through flower beds so the water seeps to roots with almost no effort.
That approach works for established plantings, but seedlings and containers still need a can or a hose for targeted soaking.
Cover the barrel with tight mesh or a sealed lid with only a small intake hole.
Open water is a mosquito nursery within about a week in summer, and a screen fine enough to block them also keeps leaves and debris from souring the supply.
For renter plots or small yards, two or three matching food-grade drums work as well as a commercial barrel at a fraction of the cost.
The limit is gravity: a barrel sits low, so it cannot run a sprinkler or reach hanging baskets without a small pump.
I would not bother with one unless the garden sits on enough slope to let a soaker hose run downhill.
The real savings show up in July and August, when daily watering can double a utility bill and the rain you caught in spring still sits there, free.
Seasonal Planting
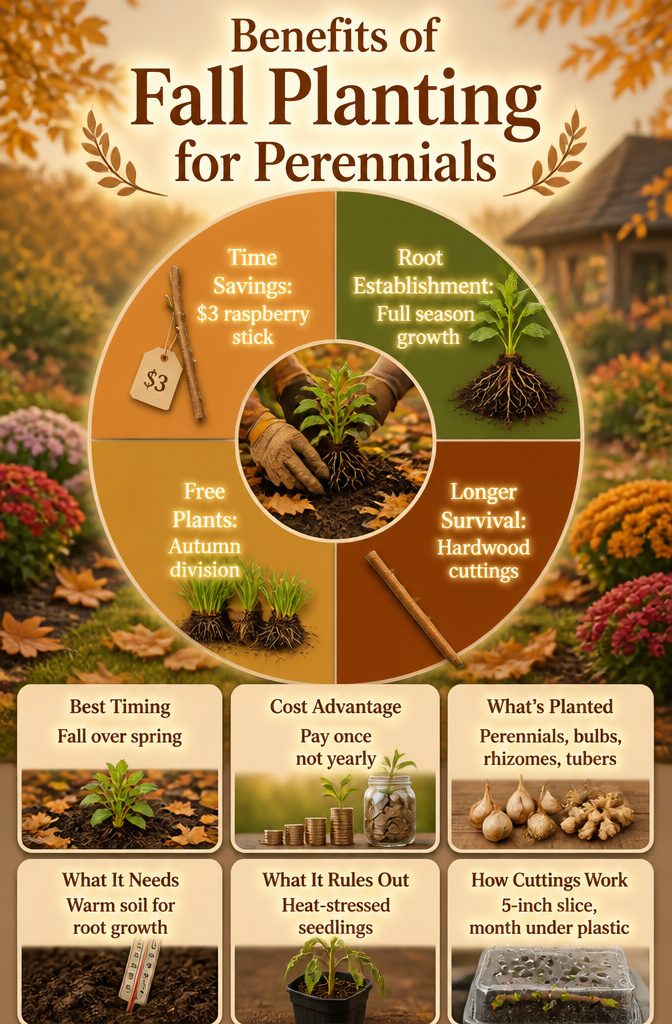
Planting a $3 black raspberry stick in fall instead of spring is the kind of timing decision that pays out pints of berries every June while your neighbor replaces their heat-stressed seedlings.
Fall planting gives trees and perennials a full season to establish roots before the next summer’s heat arrives, which matters more than the size of the nursery pot you bring home.
The soil stays warm enough for root growth long after top growth has stopped, so energy goes underground instead of into leaves that immediately wilt.
For clump-forming perennials, rhizomes, bulbs, and tubers, autumn division does two jobs at once: you get free plants for next spring’s gaps, and the parent clump stays healthy instead of turning congested after a few years.
Softwood cuttings from spring growth root faster but fail more often; hardwood cuttings taken between fall and winter take longer but survive at higher rates.
I take more cuttings than I need and expect some loss, because the ones that make it cost nothing but a 5-inch diagonal slice at a leaf node and a month under ventilated plastic.
Annuals tempt at the garden center, but they are a recurring bill. Perennials pay once and compound.
Native Plants
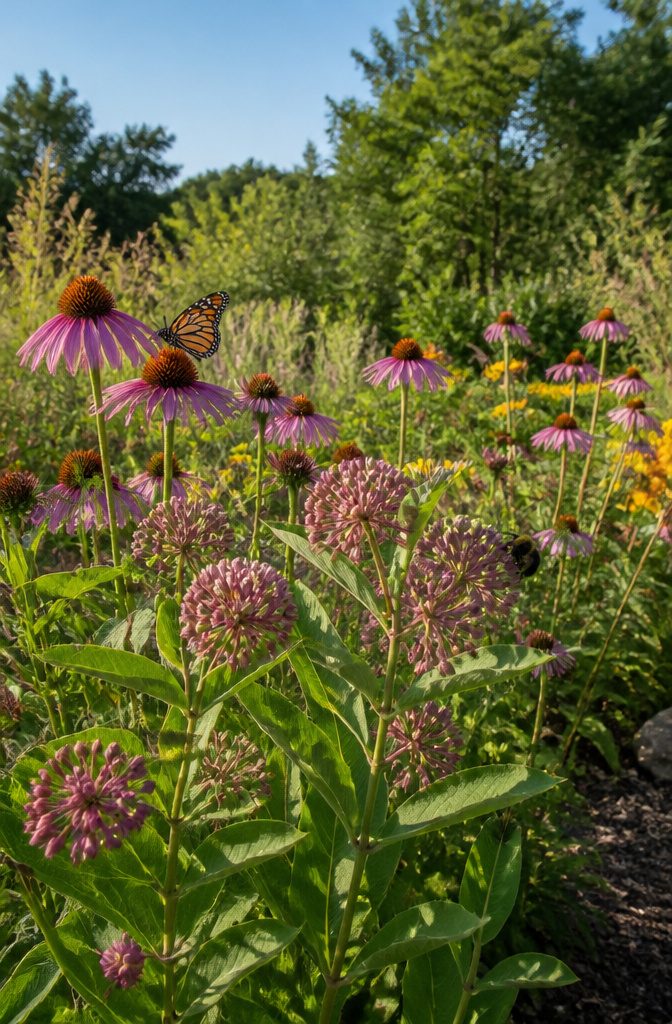
The plants that survive on rainfall alone in your zip code are the ones that keep water bills from climbing all season.
I start by checking a regional native plant society or a county extension database; either one lists species by soil type and sun exposure without pushing a single catalog.
The markup at boutique nurseries can run steep, so I look for local plant swaps and neighborhood Freecycle groups where gardeners trade divisions and extra seedlings for nothing.
Facebook hosts most of these communities now, and a post offering a few of your own cuttings usually brings offers in return.
If I do buy, I skip the specialty growers and ask at the regular garden center whether they stock a regional supplier; the tags often say "native" but the price stays in the same bin as the rest.
A patch of local milkweed or coneflower needs no sprinkler timer and no chemical boost to outlast a summer drought, and the pollinators it draws are a side benefit I did not have to budget for.
Maintenance That Saves Money
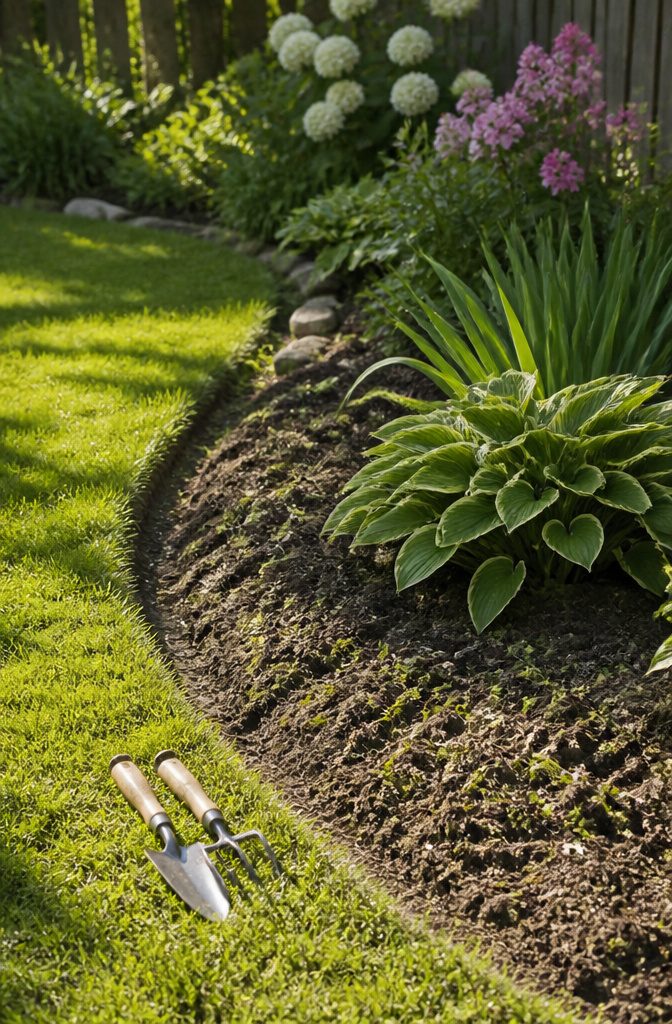
The real money in cheap gardening ideas is not in what you plant but in what you prevent. Weeding, mowing, and pruning done on schedule costs nothing but an hour and keeps you from buying replacements later.
A lawn left too long between cuts thins out, invites weeds, and eventually needs reseeding or sod that blows a weekend budget in one swipe.
The same plot mowed often enough, watered at the right time of day, and aerated when the soil compacts stays thick enough to crowd out problems on its own.
Timing matters more than effort. Pull weeds after rain when the roots release easy, prune shrubs before growth starts so the wound closes fast, and sharpen blades every season so cuts heal clean instead of tearing.
Ragged cuts are entry points for disease that kills the branch you meant to save. A file and ten minutes beats a replacement plant every time.
Tools that last are the ones you maintain, not the ones you upgrade. Clean the soil off after use, oil the pivot, and keep edges sharp.
The multitaskers are worth owning; the single-purpose gadgets are not. A hand pruner, a hoe, and a mower with a sharp blade handle most of what a weekend plot demands.
DIY Water Features
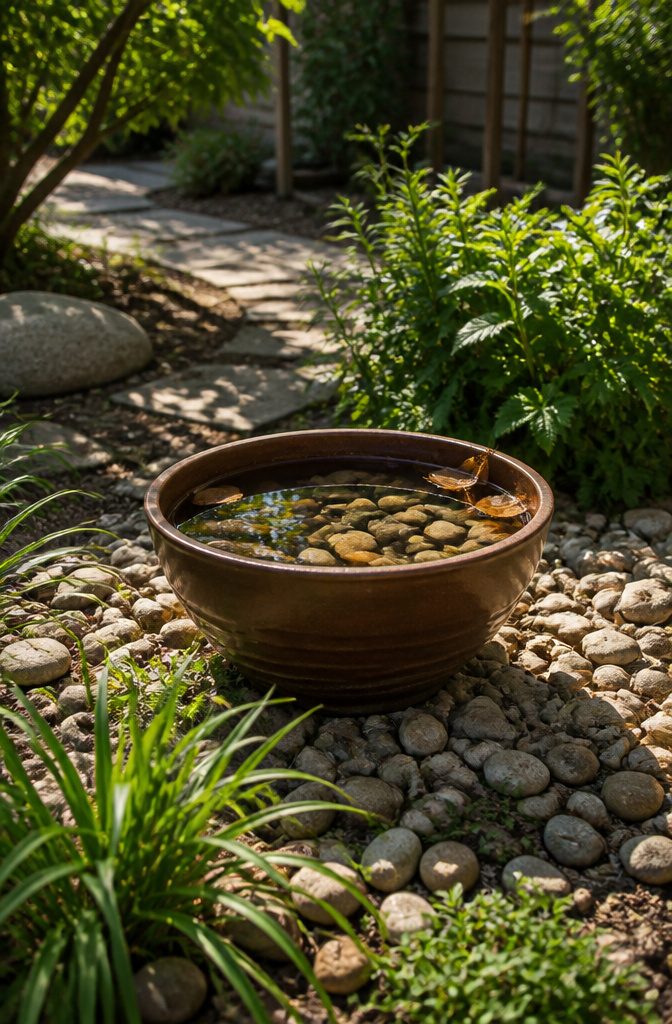
A water feature does not need a pump to be worth building.
A simple bird bath or small still pond gives you the reflective surface and the sense of calm that water provides, and it costs almost nothing beyond the vessel.
For a bird bath, any shallow container that holds water works.
Ceramic pots, the kind you already have sitting empty on a patio, will do the job if you seal the drainage hole. Pebbles dropped in the bottom give birds a place to stand and drink without drowning.
Depth matters here: an inch or two of water is plenty for songbirds, while anything deeper than four inches risks becoming a hazard unless you build in those stepping stones or a sloped edge.
Small ponds follow the same rule.
Add rocks and accents deep enough to give frogs and other wildlife a place to hide. A few inches at the shallow end graduating to maybe a foot at the deepest lets creatures enter and exit on their own terms.
No pump means no electricity, but it also means no moving water to oxygenate the surface. Without flow, the water turns stagnant.
Oxygenating plants are the fix. Drop in a few and they keep the algae from taking over.
Upkeep is the trade-off you accept for skipping the pump.
Still water needs checking every few days in summer; skim the surface, refresh what evaporates, and pull out leaves before they sink and rot. The time costs you, not the dollars.
Frequently Asked Questions
What is the cheapest way to start an outdoor vegetable garden?
A 50-inch fabric grow bag runs under $30–40 and holds roughly 400 quarts of soil, enough for full-size potatoes, tomatoes, or beans without tools, digging, or permanent construction.
It folds flat for winter storage and moves with you if you rent. The savings over lumber or metal raised beds are real, though the fabric will soften and tear after a few seasons of UV exposure.
Can you grow potatoes and string beans in the same container?
Only if you section them into separate areas, because potatoes want deeper, less frequent soaking than beans.
A fabric grow bag gives you enough volume for both, but their watering needs differ enough that mixing them freely risks one crop drowning or drying out. Group vegetables with similar thirst levels together instead.
How do I make my own compost?
Layer kitchen scraps and lawn clippings with about twice as much dry brown material like leaves, then turn the pile every few days so the bottom mixes upward.
The bin can be any lidded container that keeps pests out and a shovel that lets you stir; skip the compost activator and definitely keep meat, dairy, and fish out of the pile.
Finished compost replaces bagged fertilizer and holds moisture through hot stretches, so you water less over the season.
What are some DIY garden projects I can do on a budget?
Reclaimed cedar fence boards from salvage yards assemble into 2-by-3-foot raised beds for the price of nails and screws. Old crates, ladders, and scaffolding planks become planters once you drill drainage holes.
Concrete blocks work too, their hollow cores holding extra soil or trailing herbs. The real stretcher is keeping your eyes open at thrift stores, vintage markets, and construction sites where one person’s scrap becomes your garden bed.
What is the 70/30 rule in gardening?
Match green and brown compost materials at roughly a 1:2 ratio, not a 70/30 split.
What is the cheapest way to make a garden path?
Its focus stays on planting beds, containers, and soil rather than hardscaping between them.
What is the 5, 4, 3, 2, 1 gardening method?
The numbered guidance it does give relates to compost layering and seed-starting weeks before frost, not to a 5-4-3-2-1 planting formula.





