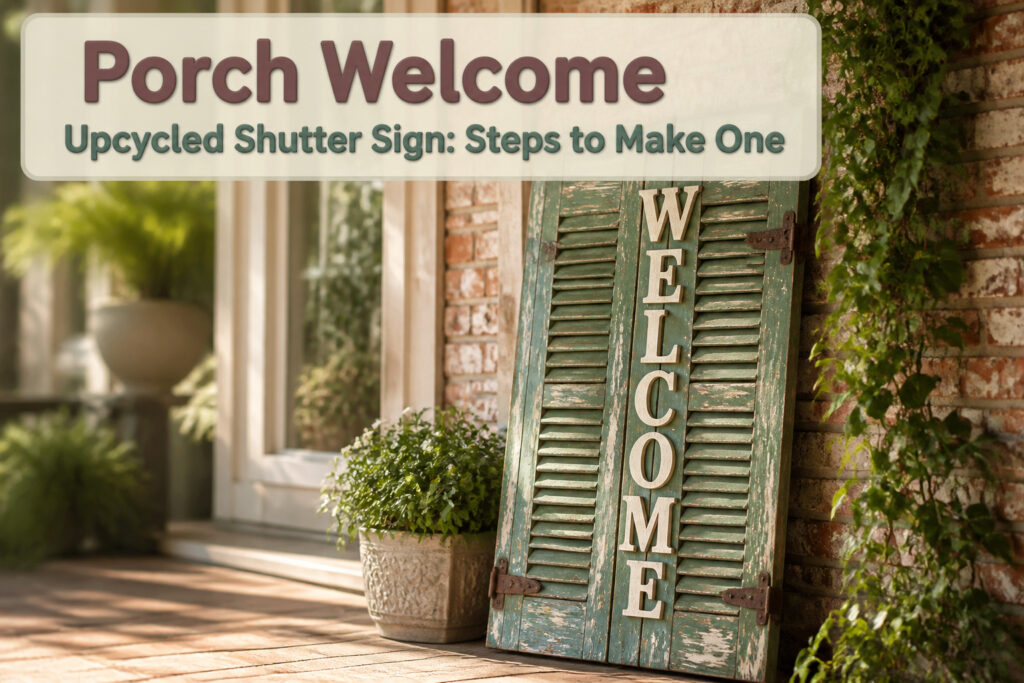
A porch welcome upcycled shutter sign is a salvaged wooden shutter painted and lettered to greet visitors at your door. The project only works if you start with real wood shutters from a junk shop, not the hollow plastic kind sold as decor. An $8 pair with chipped paint and hardware still attached gives you the weight and texture that reads as genuinely salvaged.
1. Gather the Shutter and Materials
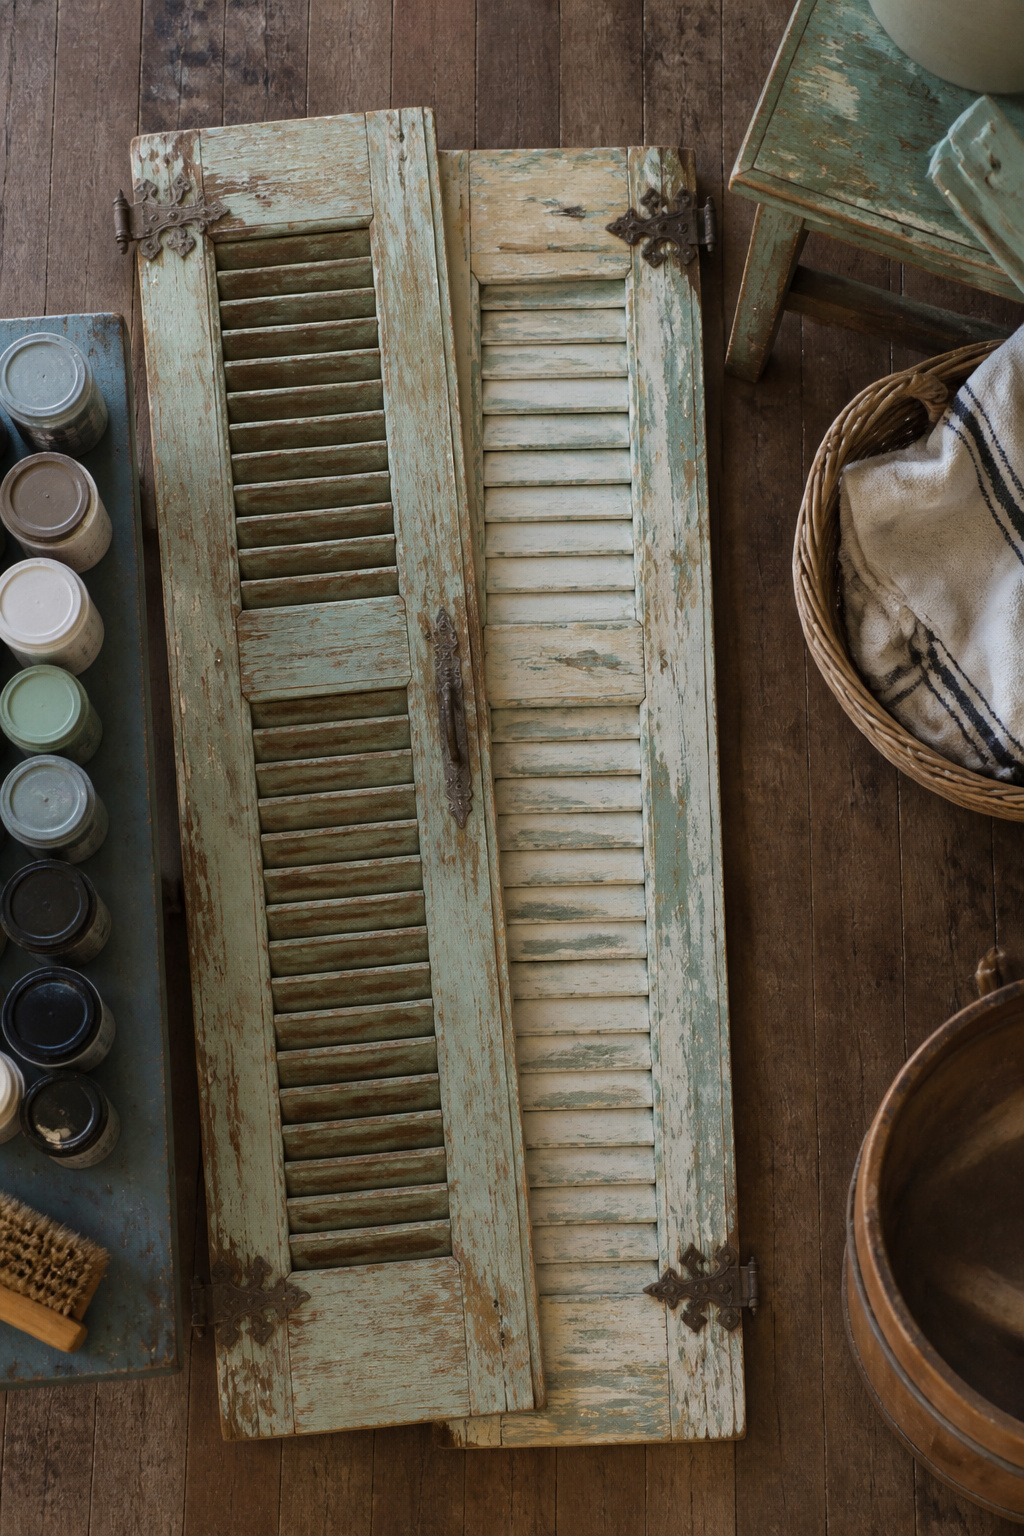
A pair of shutters for $8 at a junk shop is the kind of find that makes this project worth doing in the first place. Thrift stores, community exchanges, and weekend estate sales are where these show up, usually leaning against a back wall with hardware still attached. The weight and the chipped paint are what you want; they signal real wood and enough texture to read as something salvaged rather than bought new.
Chalk paint runs about $5 for the small jars that cover a project this size, and the matte finish suits the rough surface of old shutters without demanding the sanding prep that latex would. Dixie Belle Silk Chalk Mineral Paint is one line that carries a built-in primer and sealer, which saves a step if your sign will sit on a covered porch. For anything catching direct rain or sun, that same brand makes a tougher top coat worth adding.
Decorative elements are where the junk shop keeps paying off. Metal welcome signs, small faux floral pots, and other attachable pieces turn up for $5 or a couple of dollars more. The hunt is half the point: a red shutter and a matching metal sign found the same morning have a cohesion that buying separately rarely achieves.
2. Clean and Cut to Size
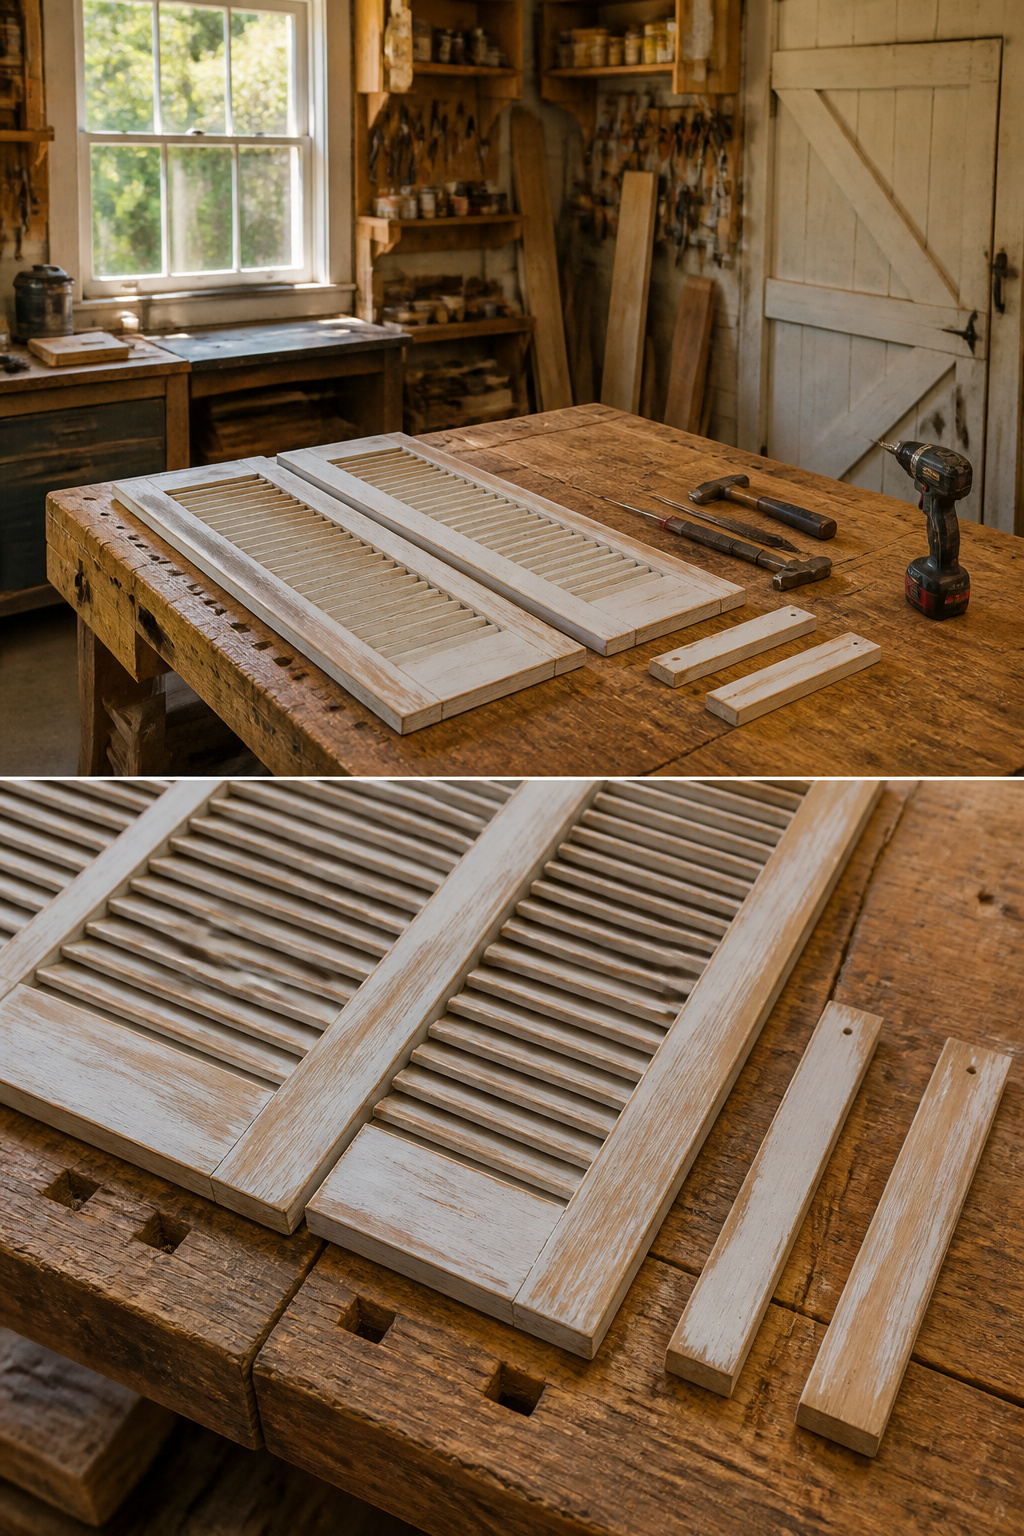
Most tutorials leave you guessing on length, but the boards that worked were cut at 31 inches long. Two shorter scraps, around 20 inches, get screwed to the back as braces so the whole thing holds square without showing hardware through the front.
I sand the cut ends and anywhere paint is flaking. Old shutters especially hide loose grit under layers of sun-baked finish, and glue grips better on bare wood. The braces go on the back with glue and screws driven from behind. Alternating the gothic cut of fence pickets gives the face that scalloped shutter look once it is all tightened up.
3. Apply the Base Coat
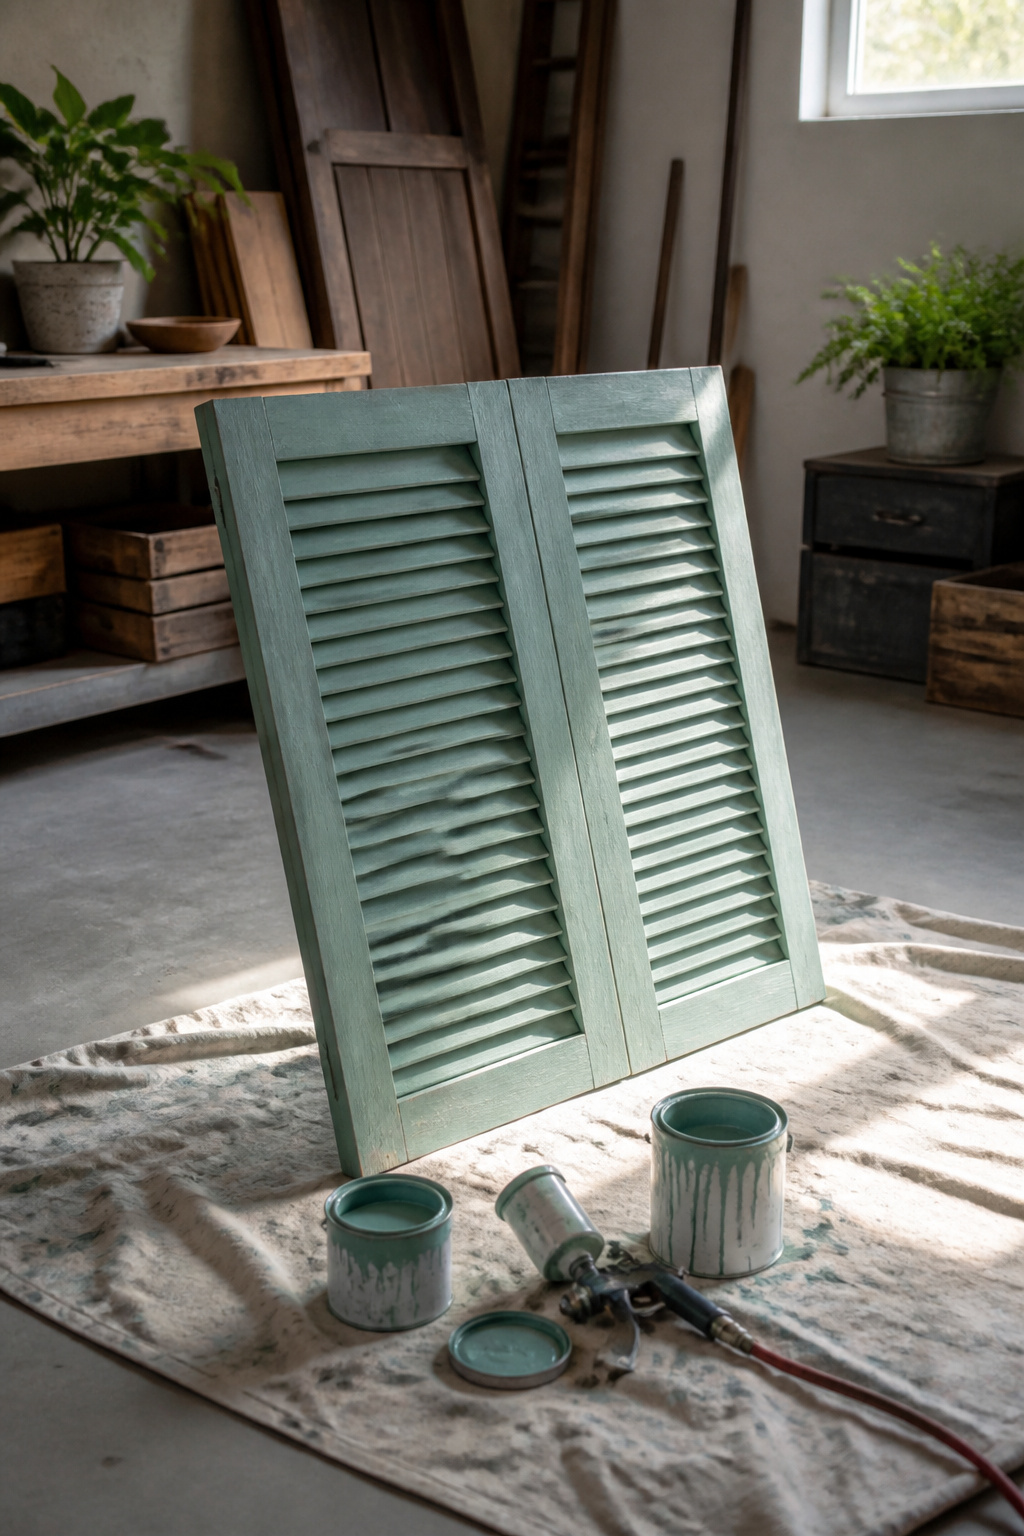
Chalk paint runs about $5 for a small jar, and that single purchase can cover a shutter this size with two coats to spare. The dry, matte surface it leaves behind pairs naturally with the rough texture of old wood, so two coats of chalk paint give you an authentically weathered base without any deliberate distressing.
Spray paint saves time on slatted shutters. A sprayer like the Homeright Finish Max lays down light, even coats that slip between the louvers without pooling underneath, something a brush tends to do no matter how careful you are. Two or three light passes beat one heavy coat every time; the paint dries faster, and you skip the drips that harden into ridges on the back side.
Acrylic works too, though it sits on the surface differently. It builds up faster and can look almost plastic if you lay it on thick, so thin it slightly or plan on more passes at a lighter weight.
Whatever you choose, let the piece dry fully between coats. A surface that feels cool to the touch still holds moisture underneath, and sealing over damp paint traps it there. Full curing matters more than the label’s dry-to-touch time.
4. Stencil or Freehand the Welcome Message
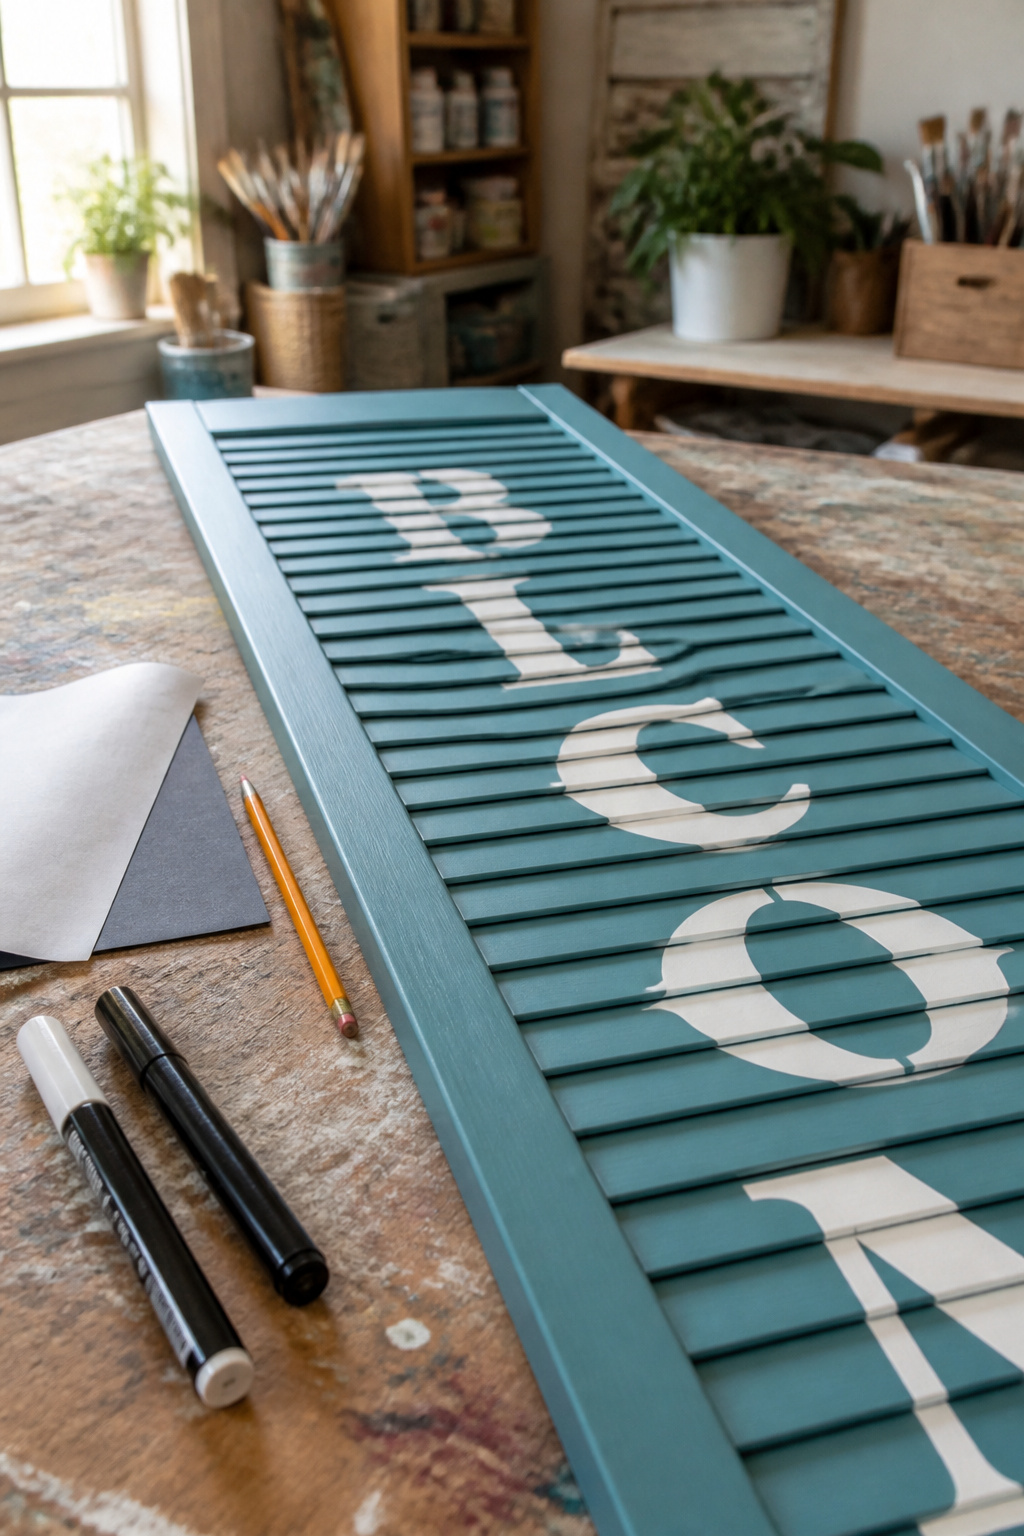
Few sources lay out the stencil step in any detail, which leaves most people guessing at the order of work. The method that actually gets the lettering onto the shutter clean and centered starts with a printed word in a font heavy enough to read from the sidewalk. I fold the paper to find its center, measure the shutter for its own center, and match the two before taping anything down. Transfer carbon paper goes between the printout and the wood; a pencil trace leaves a line that stays put while you paint.
Some skip the carbon paper entirely and shade the back of printed letters with pencil instead, then flip them face-up and trace the outline onto the shutter. Either approach works, though the carbon transfer saves the step of rubbing graphite by hand. Paint pens sharpen the edges once the base color is down, especially on the rough grain of old shutters. A contact-paper stencil cut on an electronic cutter or bought from a craft store is another path, though the weeding takes patience, the letters lift out after the whole sheet is stuck to the surface, and one slip ruins the spacing.
5. Add Flowers, Stars or Other Embellishments
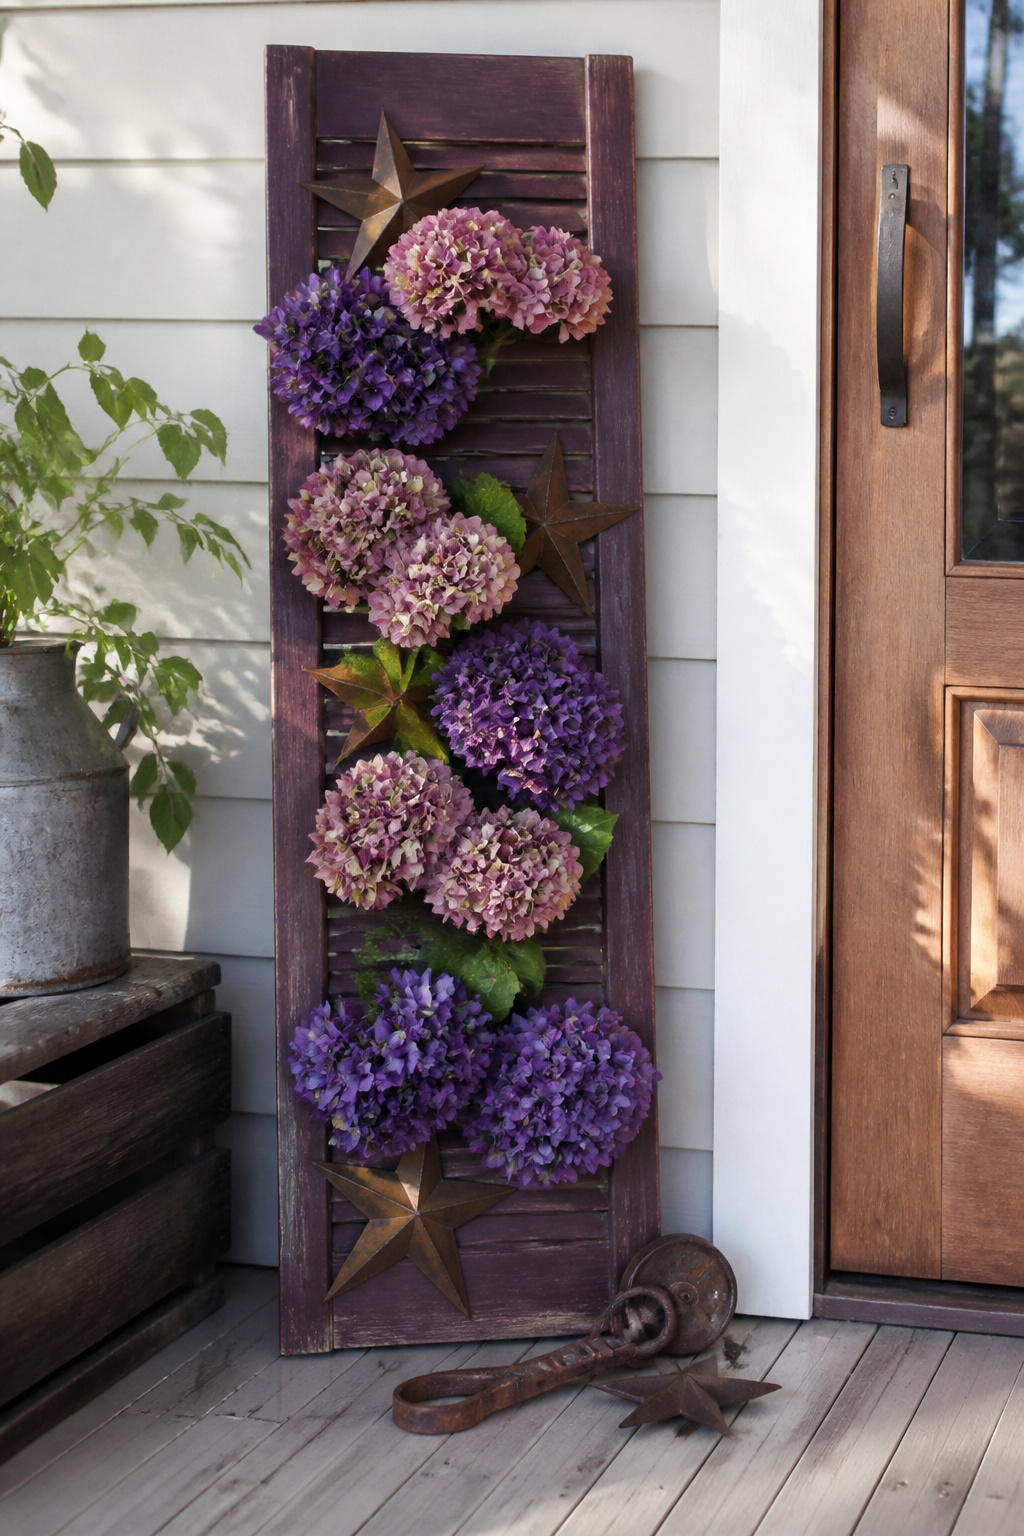
Faux hydrangeas wired to the slats read porch-ready in about ten minutes. Metal stars, a small salvaged sign, or a length of rusty hardware drilled into the top rail do the same. The shutter’s slatted frame does half the work: each gap is a ready-made slot for a zip-tie or a twist of floral wire, so nothing needs to glue up perfectly flat.
What distinguishes one sign from another is rarely the word "welcome"; it is the junk you bolt on after. A red, white, and blue scheme with stars reads patriotic through August. Turquoise accent pieces swap the whole mood for late summer without touching the base coat. I have seen shutters turned horizontal and dressed with nothing but a stenciled board and two hinges that looked like they came off a barn. The look holds because the pieces carry weight, literally and visually.
The only limit worth stating is weather exposure. Paper flowers and lightweight craft-store picks sag by September. Outdoor-rated faux stems, the kind sold for cemetery baskets, survive the same seasons your porch does. Spend the extra dollar per stem there; the backside of a shutter is not a place you want to repair twice a year.
6. Add a Hanger or Support
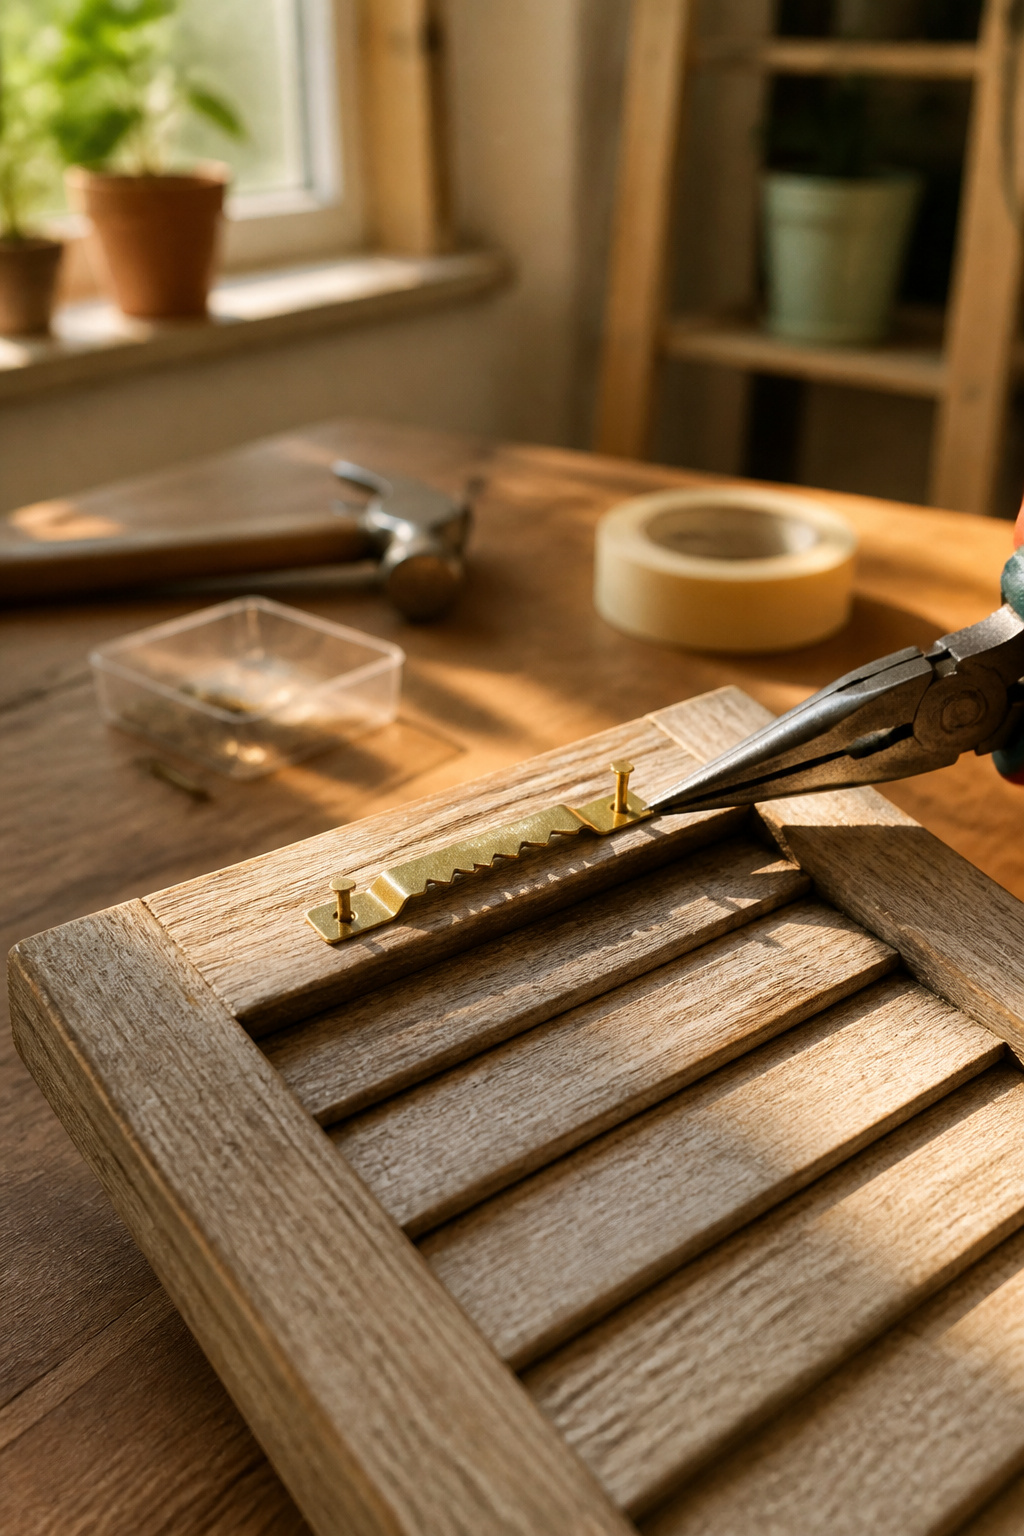
A sawtooth hanger is the simplest way to get an upcycled shutter sign level on a porch wall. The teeth bite into wall hooks or nails without fussing over exact placement, and the narrow back of most shutters leaves little room for anything bulkier. Needle-nose pliers save the actual installation: grip the tiny nail, tap it with a hammer, and your fingers stay out of the way. Once the point catches, the pliers come off and you finish by hand.
If the porch is covered, the sign can hang bare. Direct sun and rain call for a polyurethane clear coat first, then the hardware. Either way, the hanger goes on before the sign meets the porch, not after you are holding a painted piece and wondering where to grip it.
7. Place It on the Porch
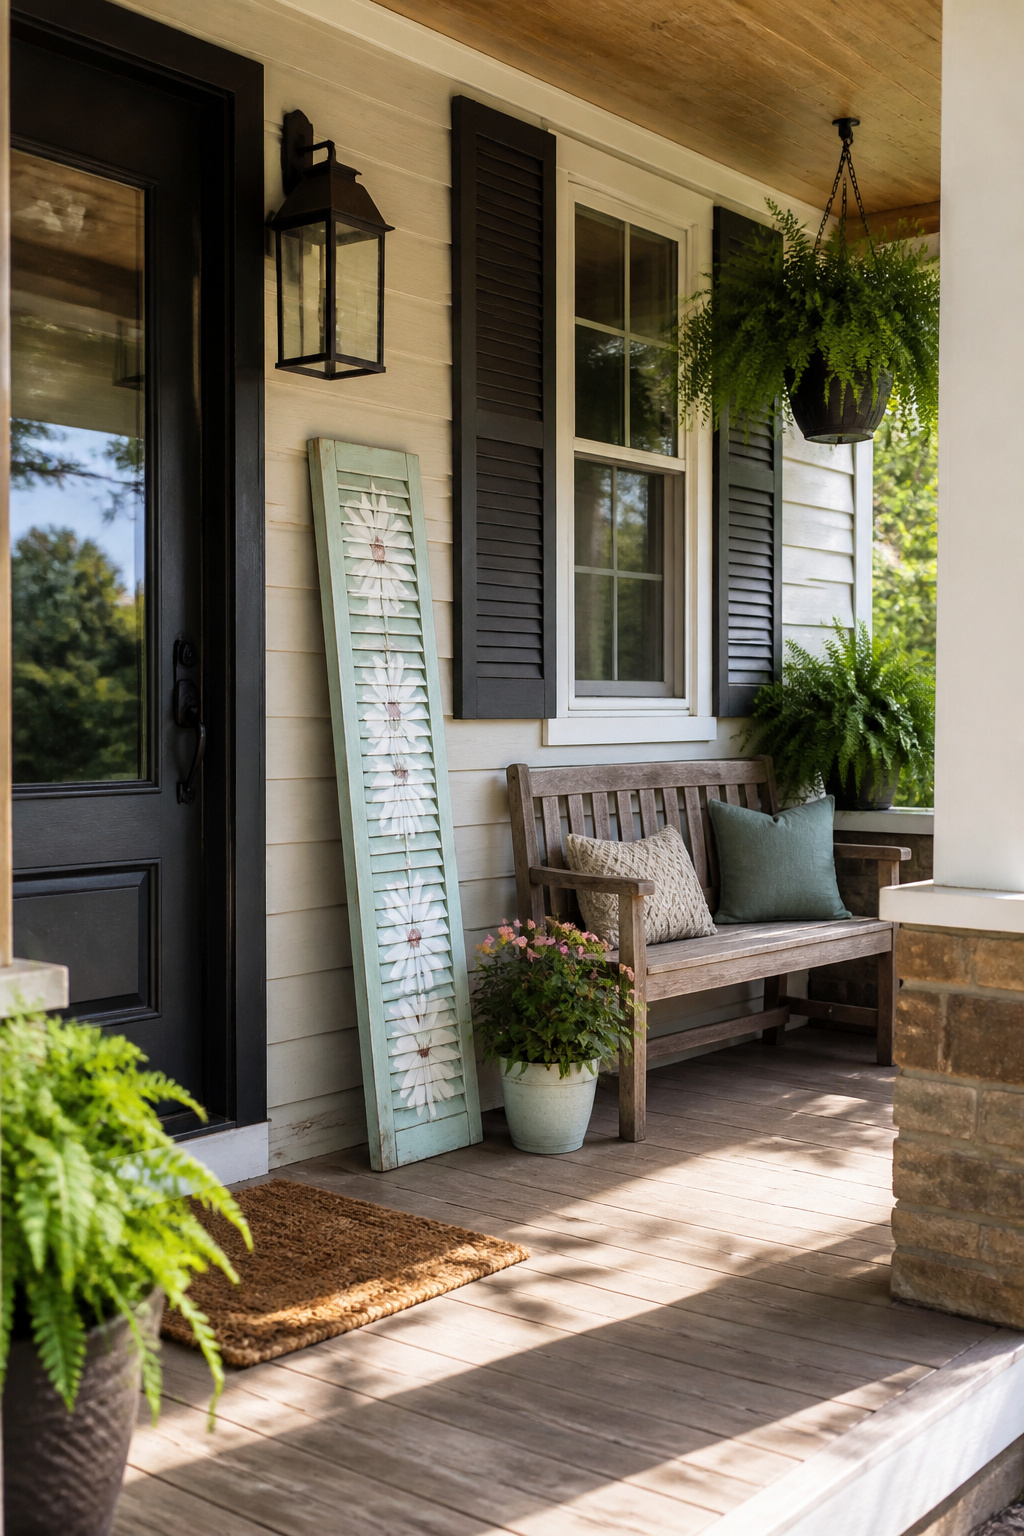
A finished shutter sign reads best at about six feet tall, the same rule of thumb used for porch privacy screens. That height catches the eye without crowding the door, and it clears most sight lines if you ever want to cluster a few shutters into a larger screen later.
Leaning the sign against the wall keeps it movable, which matters on a rental porch where drilling into siding can mean a fight with the landlord. A heavy wire hanger screwed to the top lets you hang it from a porch beam or a hook already in place, but you will want to check that bracket and screw weight against wind. My own covered front porch kept the sign out of direct rain, so I skipped the polyurethane clear top coat; if yours sits open to the elements, seal the surfaces before you decide how to display it.
Either way, place it where the light hits the message in the afternoon, not backlit into shadow.
Shutter Styles That Work
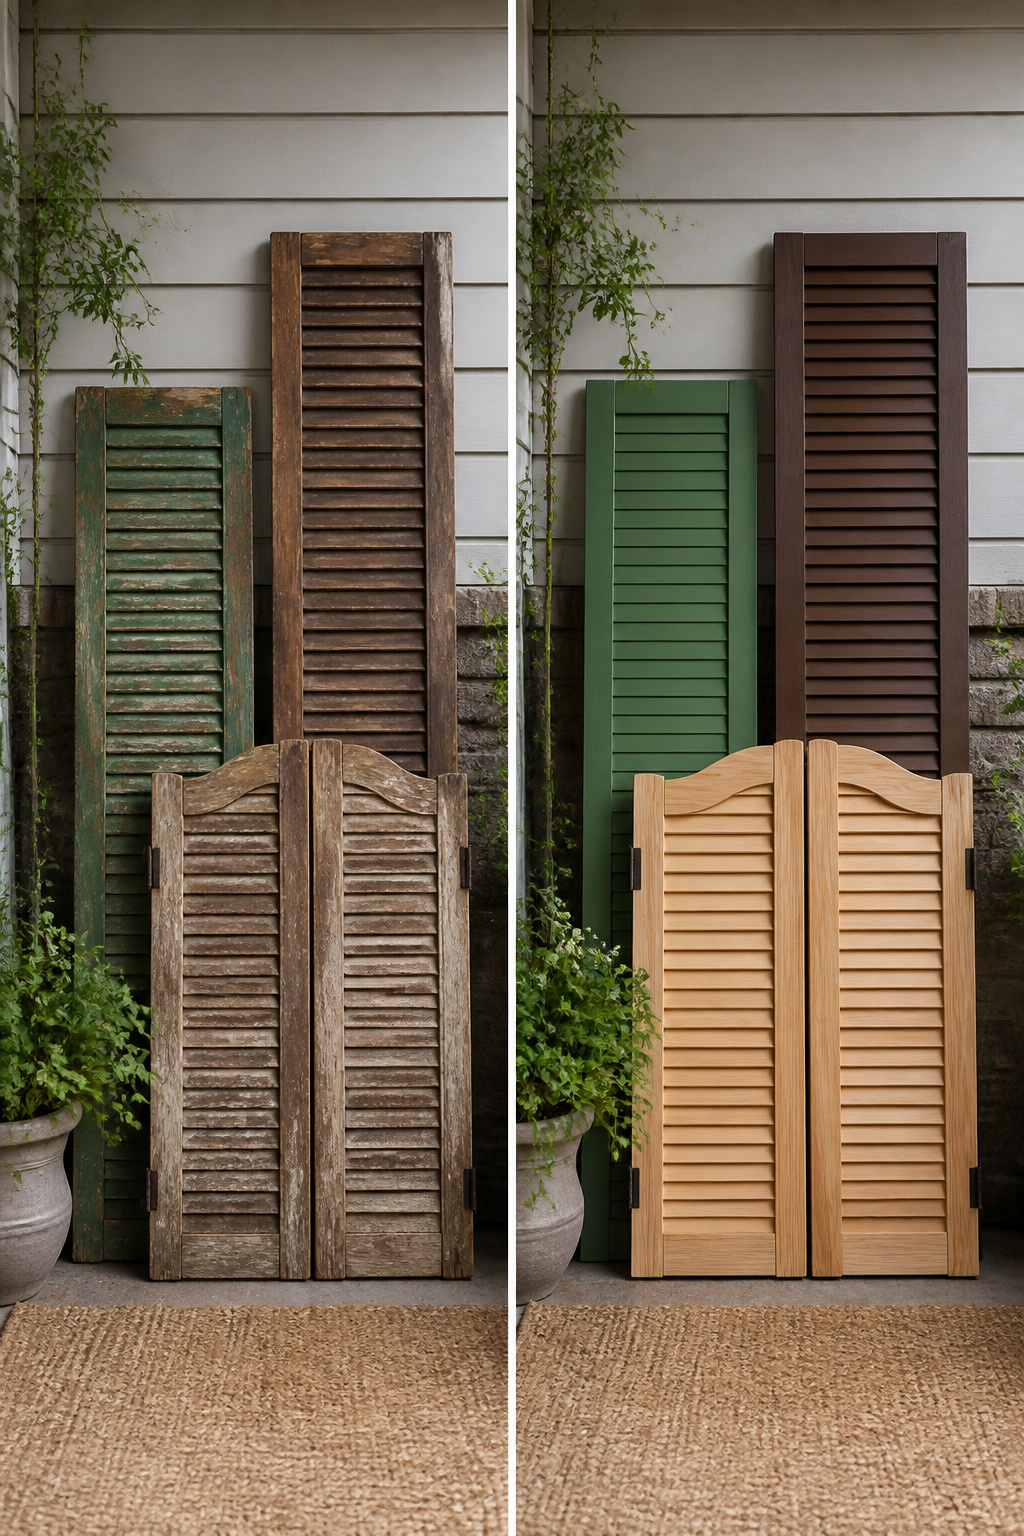
Bi-fold shutters split down the middle and open like a closet door, which leaves a seam right through your welcome message unless you plan around it. That seam becomes a feature if you center the word so the fold falls between two letters, but most people find it easier to pick a shutter that stays flat. Saloon-style shutters, the kind that hinge at top and bottom and leave a gap in the middle, give you two narrow boards instead of one wide canvas. They work best for vertical "WELCOME" lettering stacked in a tall column, or for two short words split across the pair.
Traditional louvered shutters with fixed slats are what most people picture, and they are the widest and sturdiest option for a horizontal sign. The flat strip running down the center, where the slats meet the frame, gives you a natural guide for keeping lettering straight. Width matters more than style here: a 12-inch shutter fits a single word in readable scale, while an 18-inch board leaves room for a painted vine or house number underneath. Any type works, but the character changes. Louvered reads farmhouse, saloon reads Southwest, bi-fold reads cottage if you leave the hinges visible and painted a contrast color.
Paint Types Compared
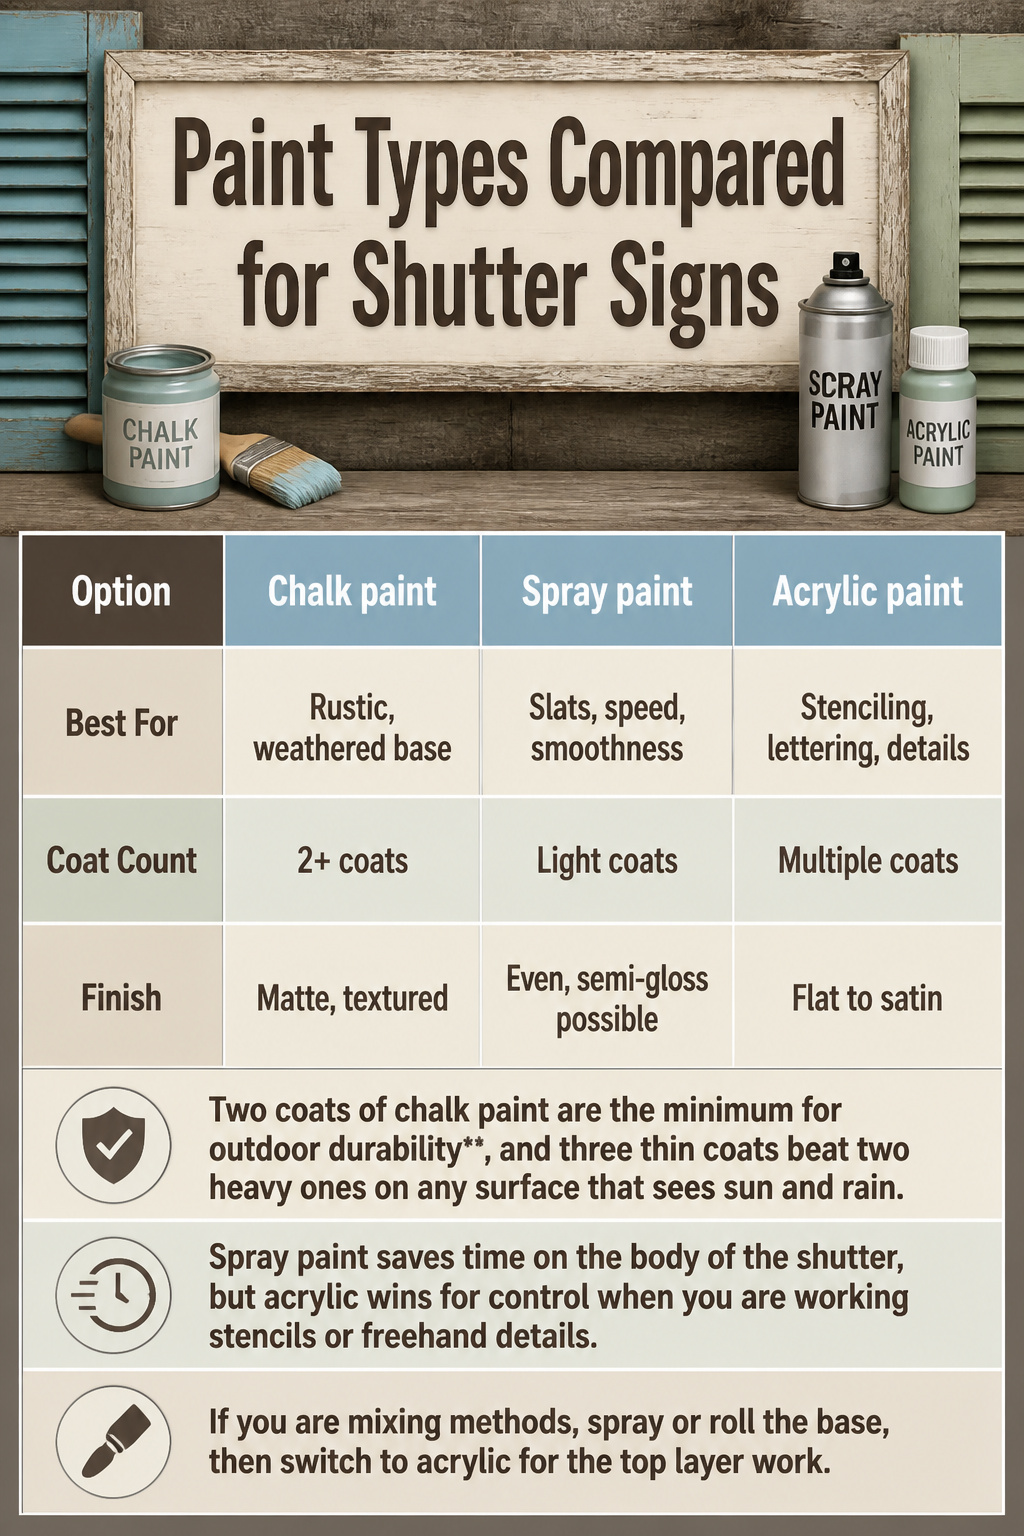
Chalk paint runs about $5 for a small can and gives that rustic, weathered look that pairs naturally with old shutters. The catch is it needs two coats to hold up outside, and even then it benefits from a sealer. Spray paint, used with something like a Homeright Finish Max, lays down fast across slats and dries to a smooth, even finish without the brush drips that collect on the back of louvered boards. Acrylic paint, the kind sold in small bottles for craft stashes, covers detail work and lettering at a lower per-color cost, though it takes more patience to build full coverage.
| Option | Best For | Coat Count | Finish |
|---|---|---|---|
| Chalk paint | Rustic, weathered base | 2+ coats | Matte, textured |
| Spray paint | Slats, speed, smoothness | Light coats | Even, semi-gloss possible |
| Acrylic paint | Stenciling, lettering, details | Multiple coats | Flat to satin |
Two coats of chalk paint are the minimum for outdoor durability, and three thin coats beat two heavy ones on any surface that sees sun and rain. Spray paint saves time on the body of the shutter, but acrylic wins for control when you are working stencils or freehand details. If you are mixing methods, spray or roll the base, then switch to acrylic for the top layer work.
What You Actually Need
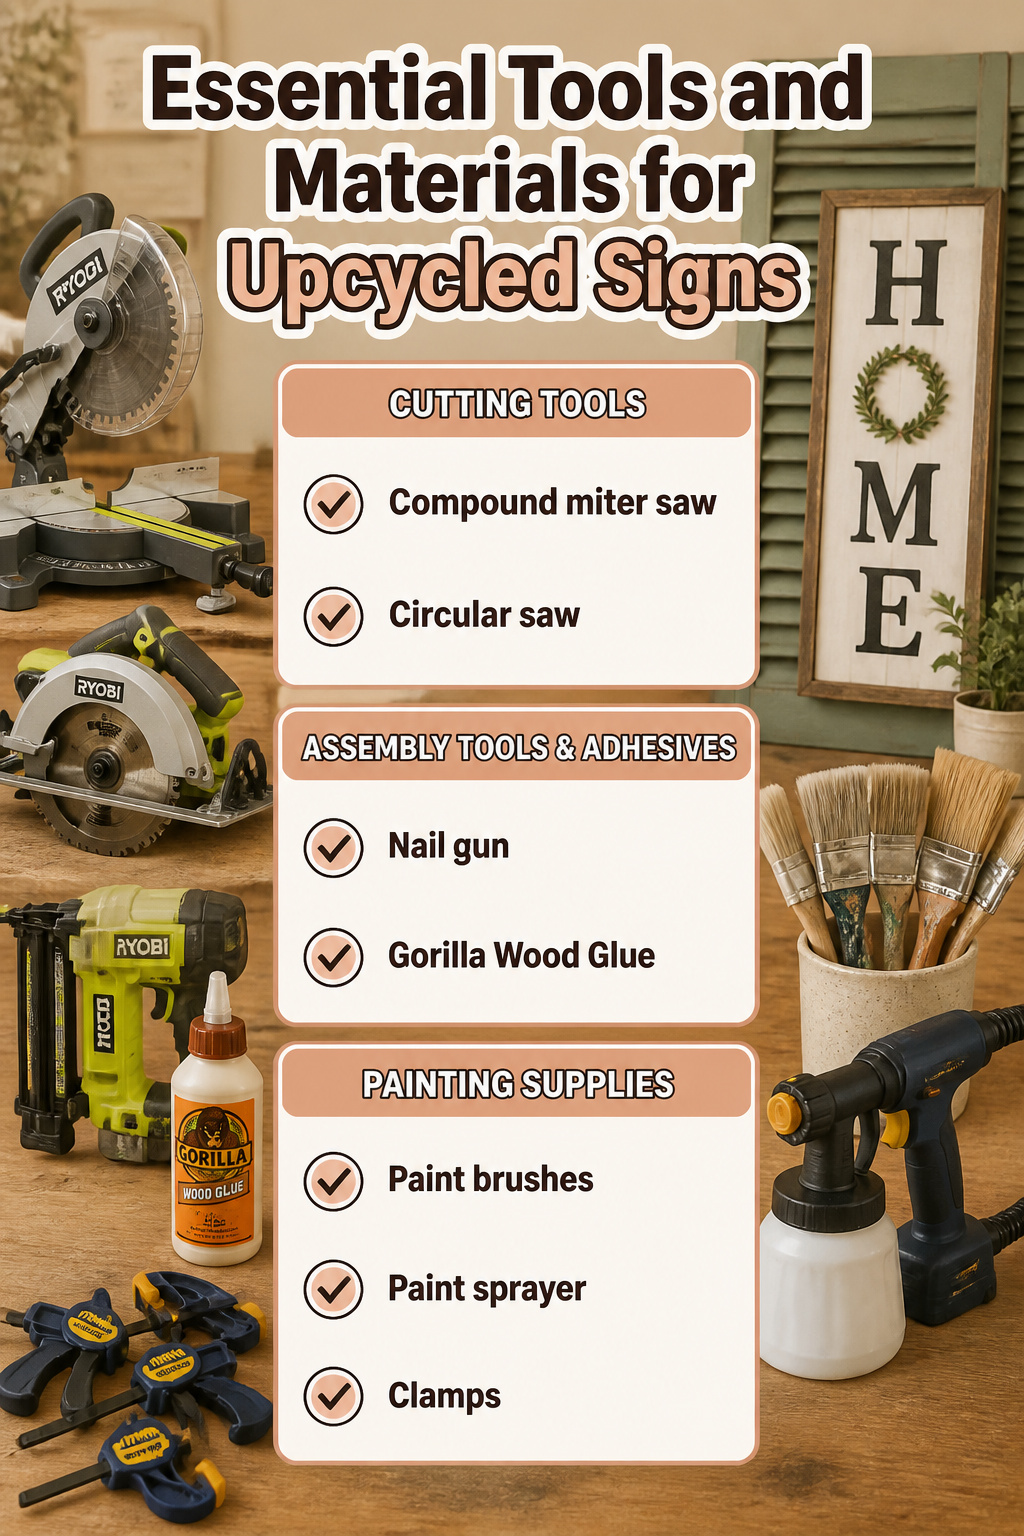
A compound miter saw handles the crosscuts on shutter slats, but the real workhorse for trimming the overall frame is a circular saw. One builder used a Ryobi model to cut curved ends straight; another had a piece fall and break mid-cut, then rebuilt the shutter one slat at a time. The circular saw earned its keep there too, trimming the overhang once the nail gun and Gorilla Wood Glue had done the assembly.
Paint application breaks into two camps. Brushes and rollers get the job done, especially with chalk paint that runs about $5 for enough to coat two layers. A sprayer saves time on slats with gaps, though it means taping off the porch and cleaning the nozzle after.
For assembly, the nail gun wins outright. Glue alone sags while it dries; clamps on a shutter-sized project are awkward. The Ryobi nail gun one builder mentions drove pins through slats into backing boards without splitting the old wood.
What sits in the box: the miter saw if you already own it, but not worth renting for one straight cut the circular saw can manage. The sprayer if you have twenty feet of porch to mask off; skip it for a single sign.
How Readers Personalize Their Signs
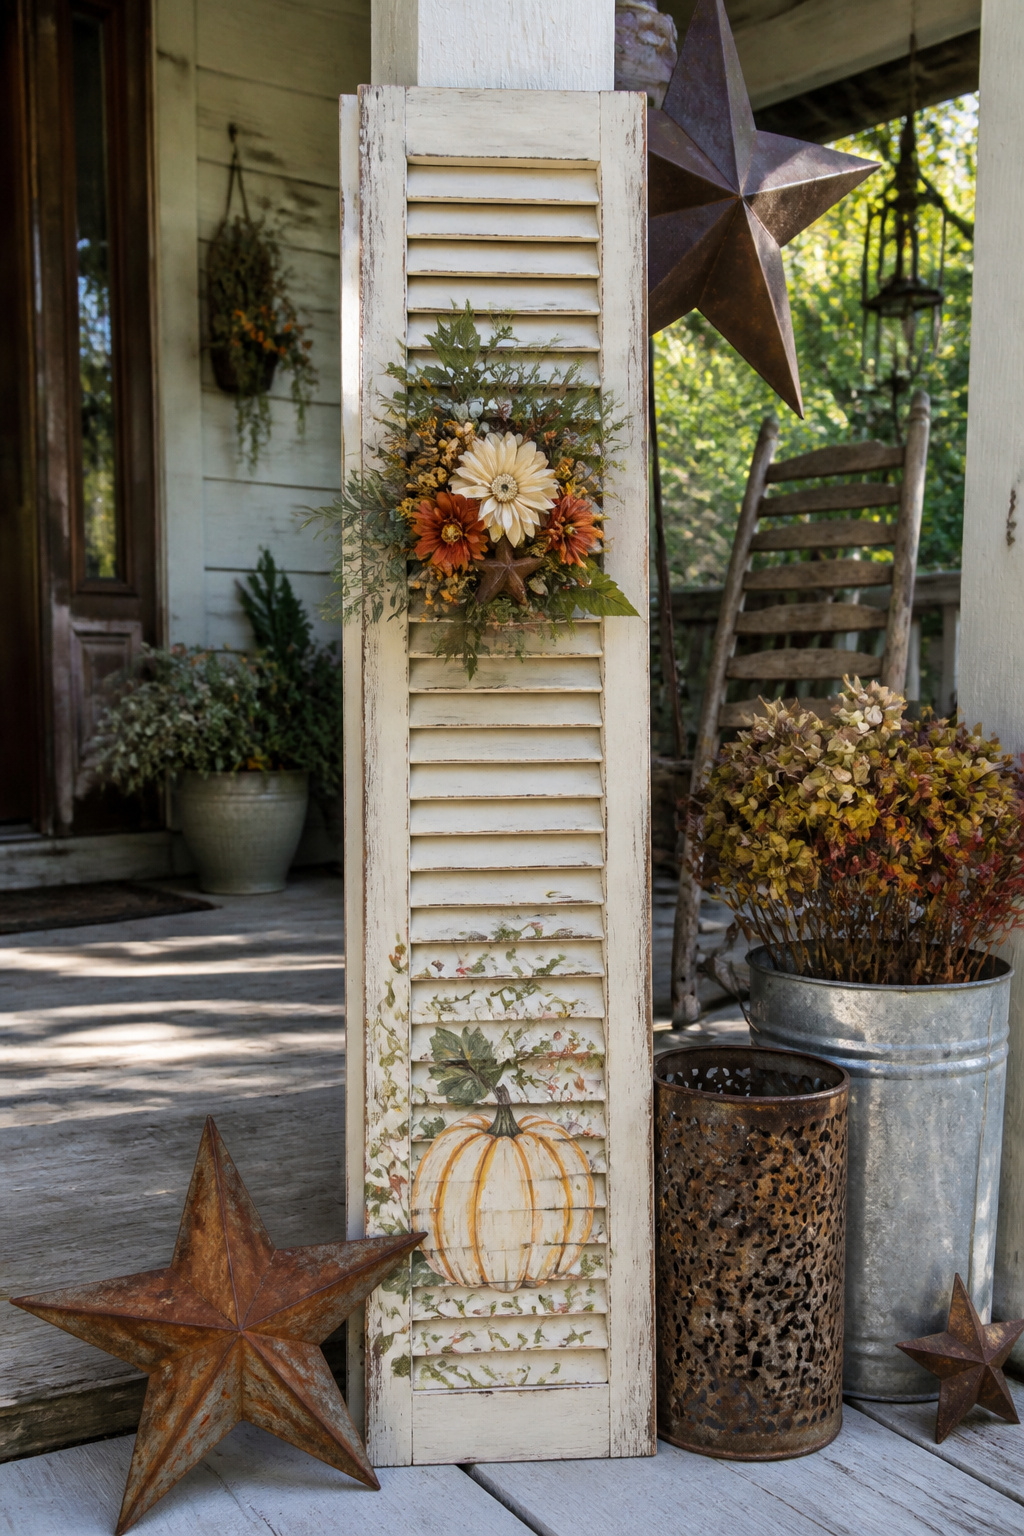
A stenciled "WELCOME" in 4-inch letters gets the job done, but the sign only starts to feel like yours once you move past the alphabet. Painted designs are the cheapest pivot: red and green with a poinsettia for December, bright florals when the porch needs waking up after winter. One approach I kept seeing was a dry-brushed white base over reclaimed fence boards, then scuffing the edges with a sanding sponge so the old color ghosts through. That costs nothing if the paint is already in your stash, and it reads as intentional rather than sloppy.
Metal accents are where a shutter sign pulls ahead of a flat board. A rusted star, a scrap of corrugated tin, a small horseshoe: these break up the rectangle and catch light differently through the day. Faux flowers are the faster seasonal swap. Wired blooms twist through the louvers without glue, so you can pull the sunflower in August and thread holly in by Thanksgiving. The trick is attaching nothing permanently; zip ties or floral wire through the slats let the sign evolve without drilling new holes each season.
Sources disagree on how finished to make it. One route leans into the craft-store look, tight and bright. The other leaves the wood rough, the stencil slightly off-register, the metal actually weathered. The second one ages better on a porch that sees rain and sun.
Frequently Asked Questions
What materials do I need to make a porch welcome sign?
You need a pair of old shutters, chalk paint (about $5 for a small jar), transfer carbon paper or a stencil for lettering, and decorative elements like metal signs or faux flowers (another $5 or so). A circular saw, nail gun, and wood glue handle the cutting and assembly. Needle-nose pliers help with hanging hardware.
How do I paint a shutter for a welcome sign?
Sand any flaking areas first, then apply two coats of chalk paint for a weathered base that needs no primer. A sprayer such as the Homeright Finish Max saves time on slatted shutters and avoids drips on the back. Let each coat dry fully before the next, and add a clear sealer if the sign will sit in direct sun or rain.
Can I use any type of shutter for this project?
Any type works, though each reads differently. Traditional louvered shutters give you the widest, sturdiest surface and a farmhouse feel. Saloon-style shutters suit tall vertical lettering. Bi-fold shutters can work if you plan around the center seam or leave the hinges visible for a cottage look.