
These builds range from a $20 picnic table to wall-mounted shelves and floor-standing racks, so the real divider is whether you have a wall to mount against or floor space to fill.
Wall-mounted projects like the folding drying rack and French-cleated wine rack disappear when they are not in use, while the Adirondack chairs and tiered plant stand claim ground you cannot get back.
1. Clothes Drying Rack
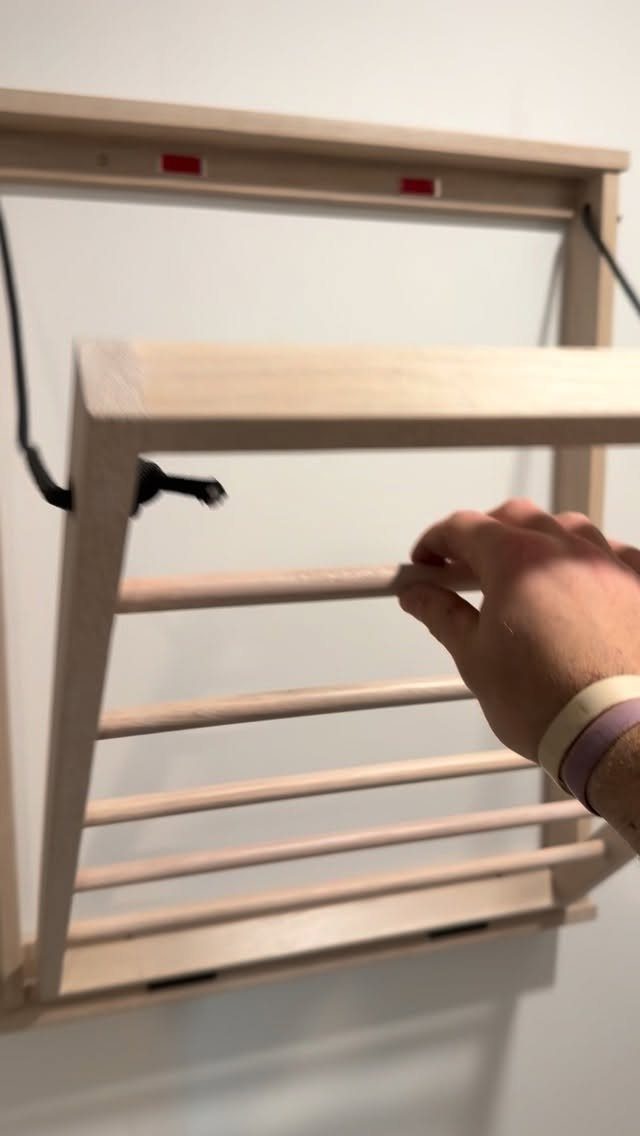
A wall-mounted folding rack gives you drying space that disappears when the laundry is done.
A wall-mounted rack that folds flat against the wall works best in a laundry nook or behind a door where floor space is tight. Dowel rungs let air move between shirts and towels without the bulk of a standing rack.
Pine or poplar boards and half-inch dowels are enough for the build, with a simple hinge at the wall and a catch to hold it closed.
I like the cord suspension because it keeps the folded profile slim against the wall.
2. Floating Wooden Shelves
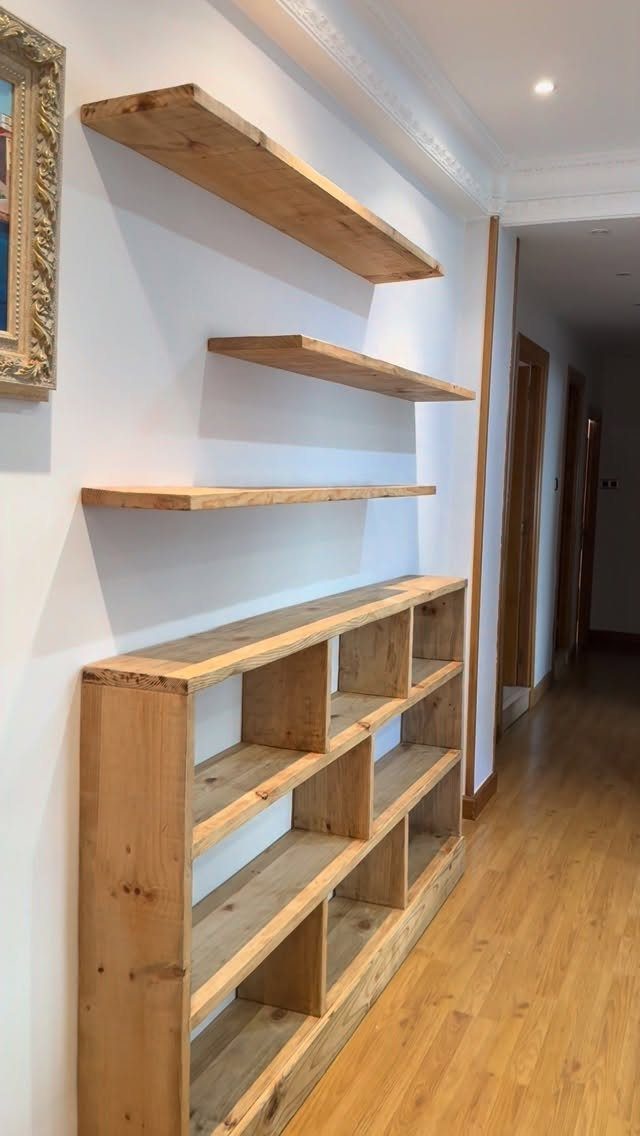
Floating shelves read clean because the bracket hides inside the board itself.
Three staggered lengths above a bookcase look best when you vary the depths too, with the lowest shelf deepest for books and the top one shallow for frames or a plant.
A hollow-core door cut down makes a lightweight shelf skin, or solid pine if you want to stain it.
A metal cleat or heavy-duty floating bracket sunk into studs holds the weight; drywall anchors will sag by spring. Shallow shelves work for display, deeper ones for everyday storage.
3. Wine Rack
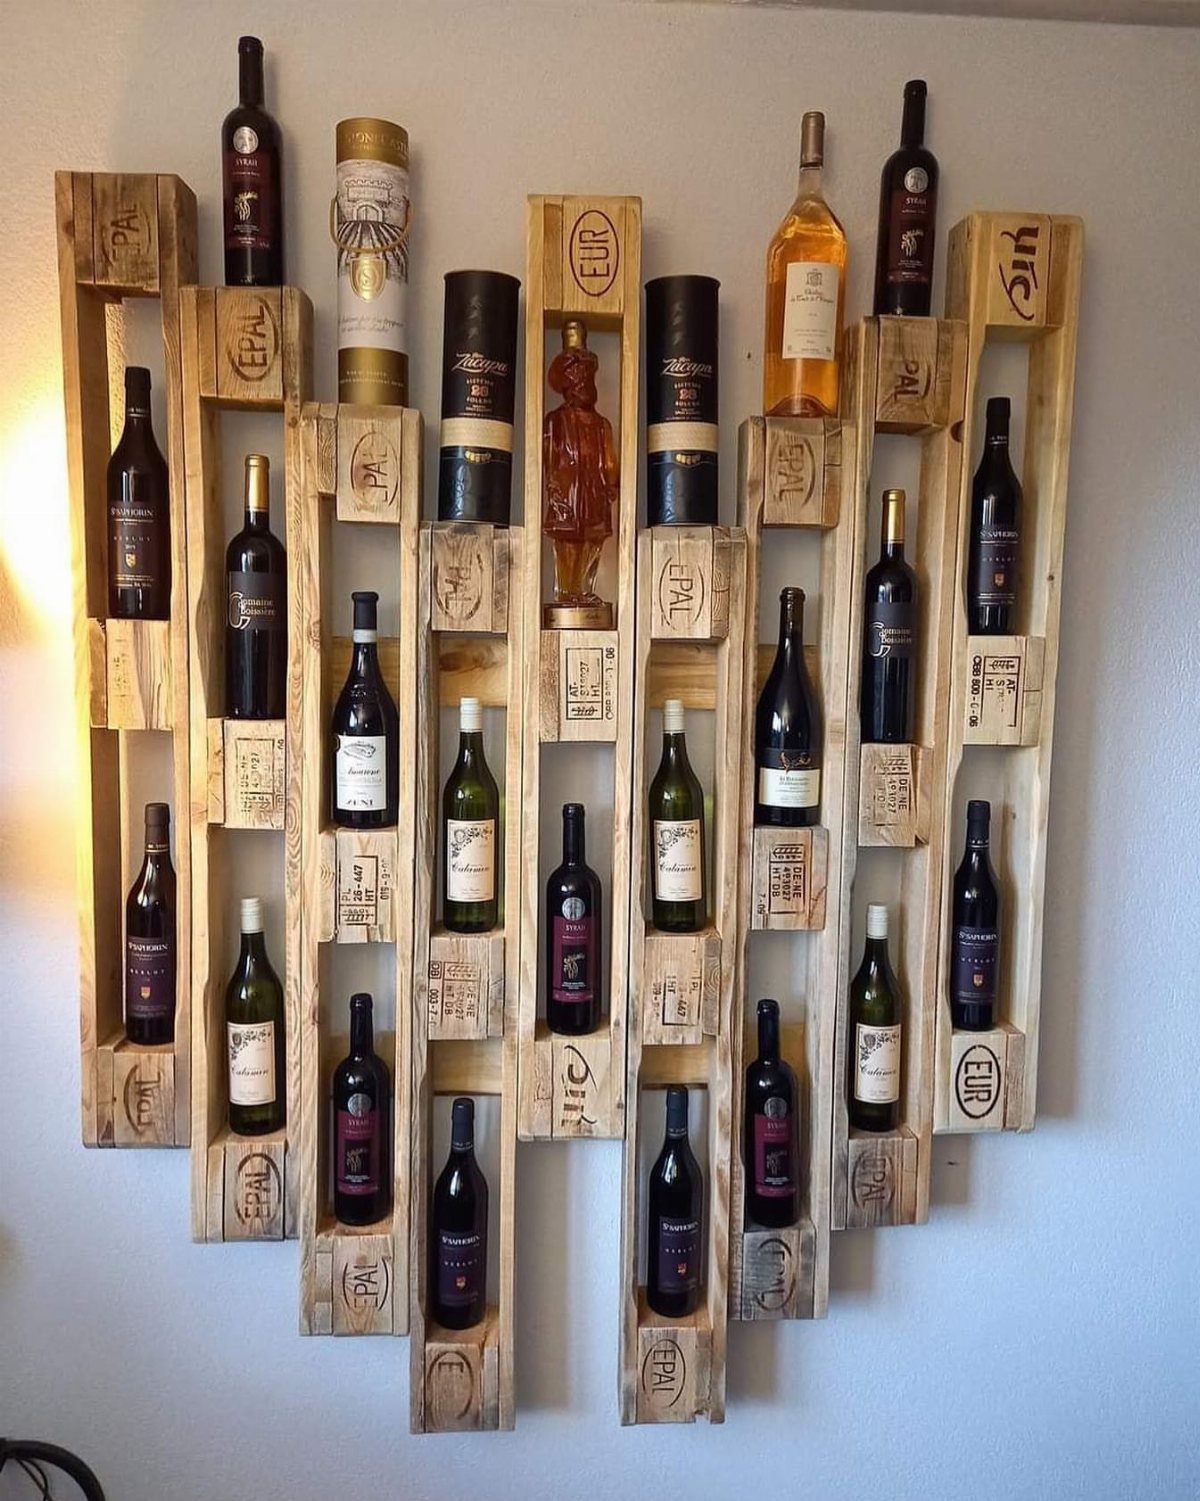
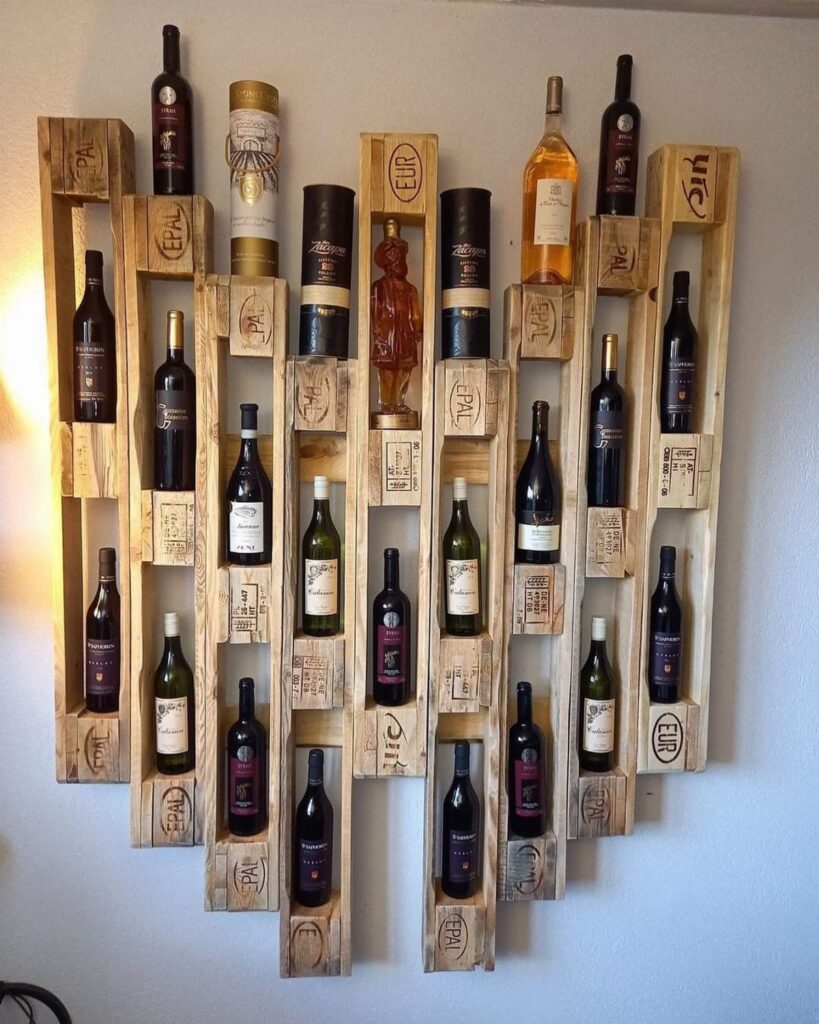
A pallet wine rack is the rare reclaimed project that does not overreach. EPAL-stamped slats already hold bottle necks in their gaps; cut the pallet to wall width and sand the edges enough to avoid splinters without losing the stamp.
I would leave the stamps visible; they read as factory marks, not decoration. 2 pallets give you enough wood for a long rack that holds a full case.
Mount with a French cleat or lag bolts into studs; a full rack weighs more than it looks. Dust settles on open labels, so I would keep this for bottles I plan to drink inside a year.
4. Easy Knife Block
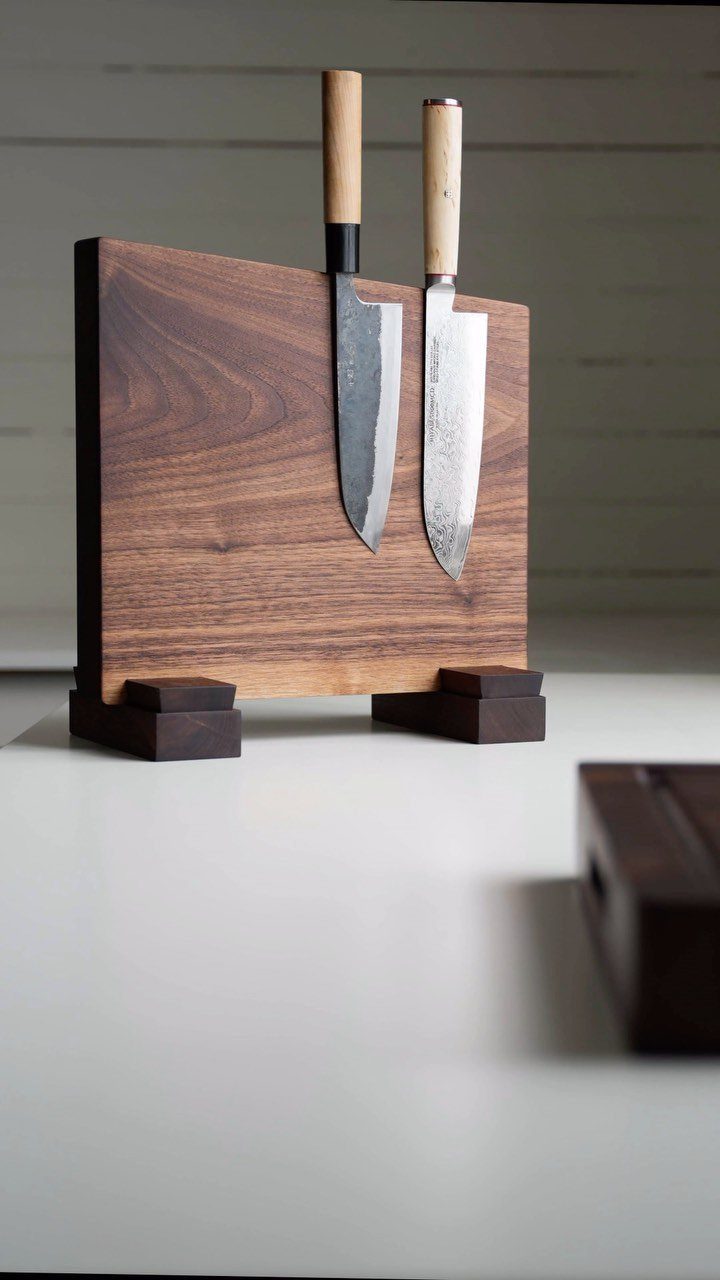
A magnetic knife block stands on feet and frees up drawer space without the slot-count limits of a traditional block.
Dark wood and 2 chef knives held upright; the magnet runs the full length inside, so any knife width works as long as the blade meets the surface.
I would use a hardwood like maple or walnut, thick enough that the magnet does not pull through; a half-inch recess on the back side hides the strip and keeps the face clean.
Finish with oil, not film finish, because knives nick polyurethane. The feet should be wide enough that a bumped counter does not tip it.
5. Adirondack Chairs
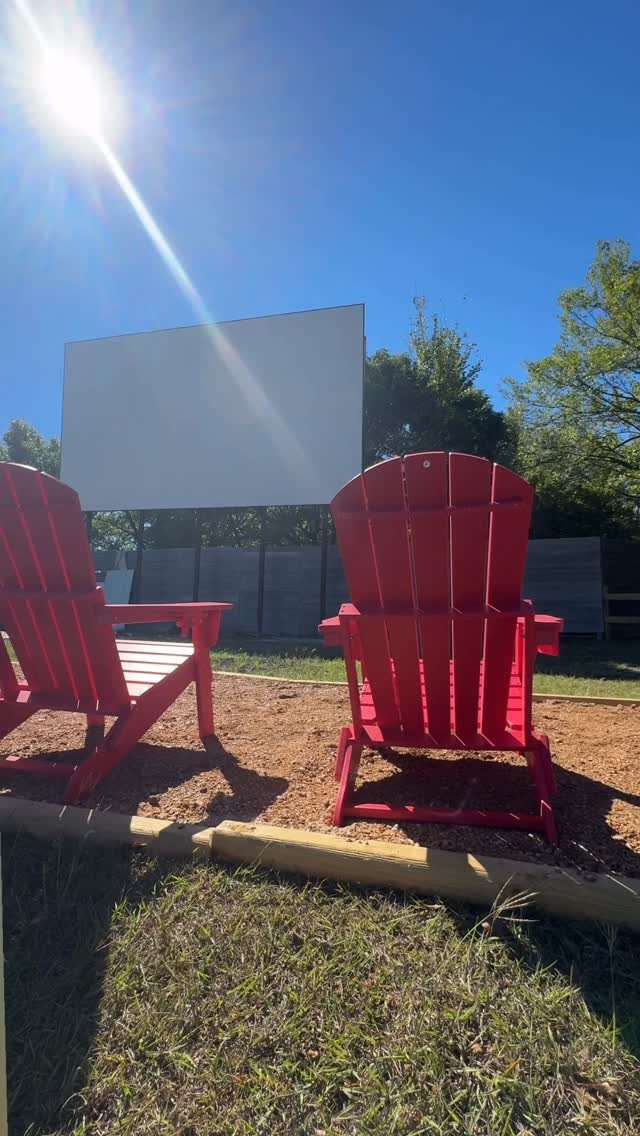
Adirondack chairs spread low and wide, and that posture matters more than the color. Cedar or white oak holds up for frames that sit outdoors year-round, pine only if they come inside for winter.
The seat slants back and the front legs are short, so the chair wants level ground; on gravel, I would add a small platform or choose a flatter spot.
The first chair takes a full Saturday to figure out the angles; the second goes faster once the cuts are dialed in.
The wide arms hold a drink can without a side table, which is why the shape caught on in the first place.
6. Easy Picnic Table
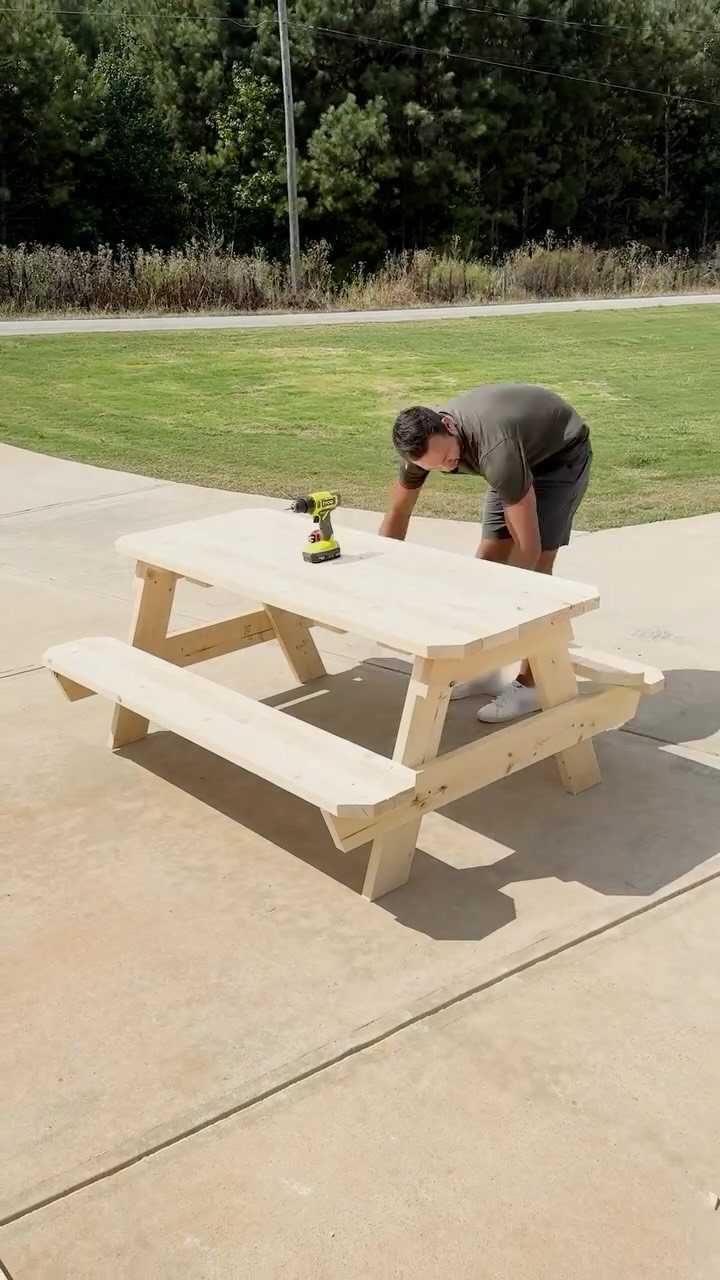
Dimensional lumber and a cordless drill are all it takes, and that is honest. The builder put $20 into the frame, which tells me they used 2x4s and 2x6s from a home center, not hardwood.
I would build the top from five 2x6s with gaps for drainage; cross-brace the legs with 2x4s set at an angle so the table does not rack.
The downside is weight: a full-size table built this way is heavy, so I would add handles or build it in 2 pieces if it needs to move.
Paint holds up better than stain on the legs, since grass stains the bottom every summer.
Combine five 2x4s, a handful of screws and a long afternoon to build a handsome and sturdy sitting spot for your deck or garden.
7. Wooden Pallet Crate
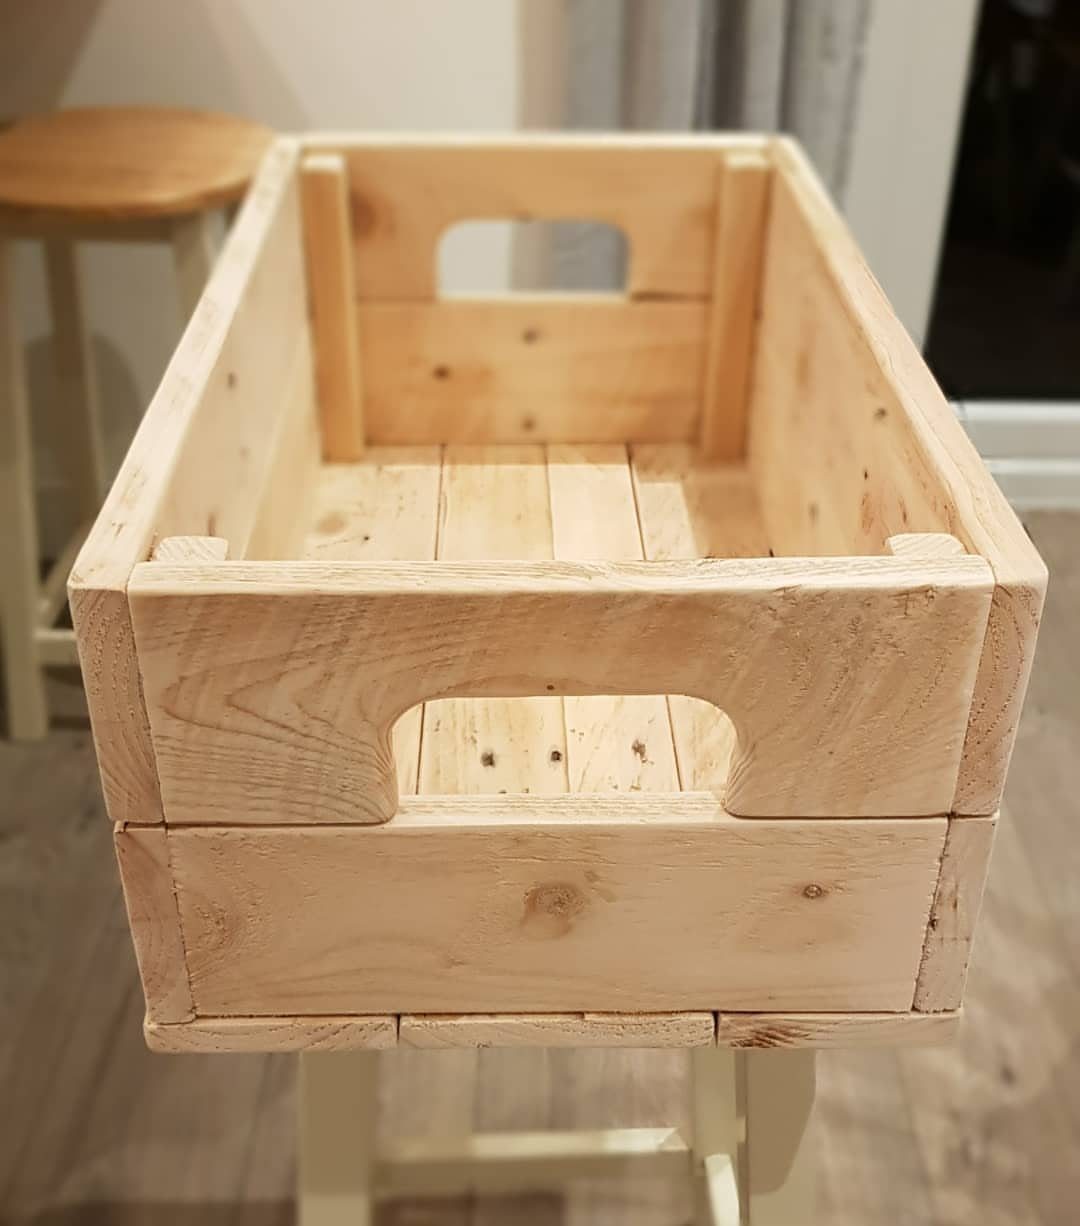
A wooden crate with cutout handles turns pallet slats into storage that stacks and carries. Pine or whitewood boards ripped to width work fine; half-inch stock keeps the weight reasonable.
I would cut the handles with a jigsaw and sand the inside curve smooth, since splinters gather right where fingers go. A crate this size holds records, towels, or pantry goods without dominating a shelf.
8. DIY Industrial Pipe Shelving
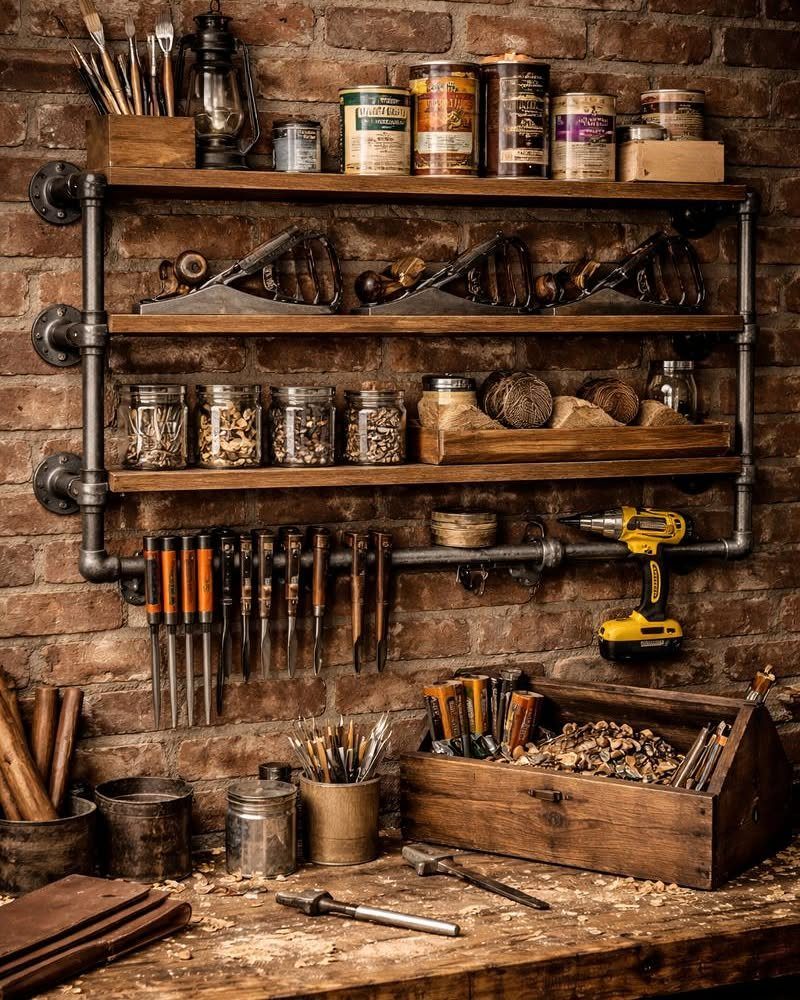
Black iron pipe and flanges bolted to studs give shelving that tolerates workshop abuse. The wood sits on threaded lengths you cut to height; level the pipes first, since the flanges hide nothing.
I would use common boards for the shelves and stain them dark to match the pipe, or leave them raw for contrast.
Black iron pipe and flanges bolted to studs give shelving that tolerates workshop abuse; on drywall, toggle bolts through the flange holes hold firm. The exposed hardware reads industrial, not temporary.
9. Wooden Plant Stand
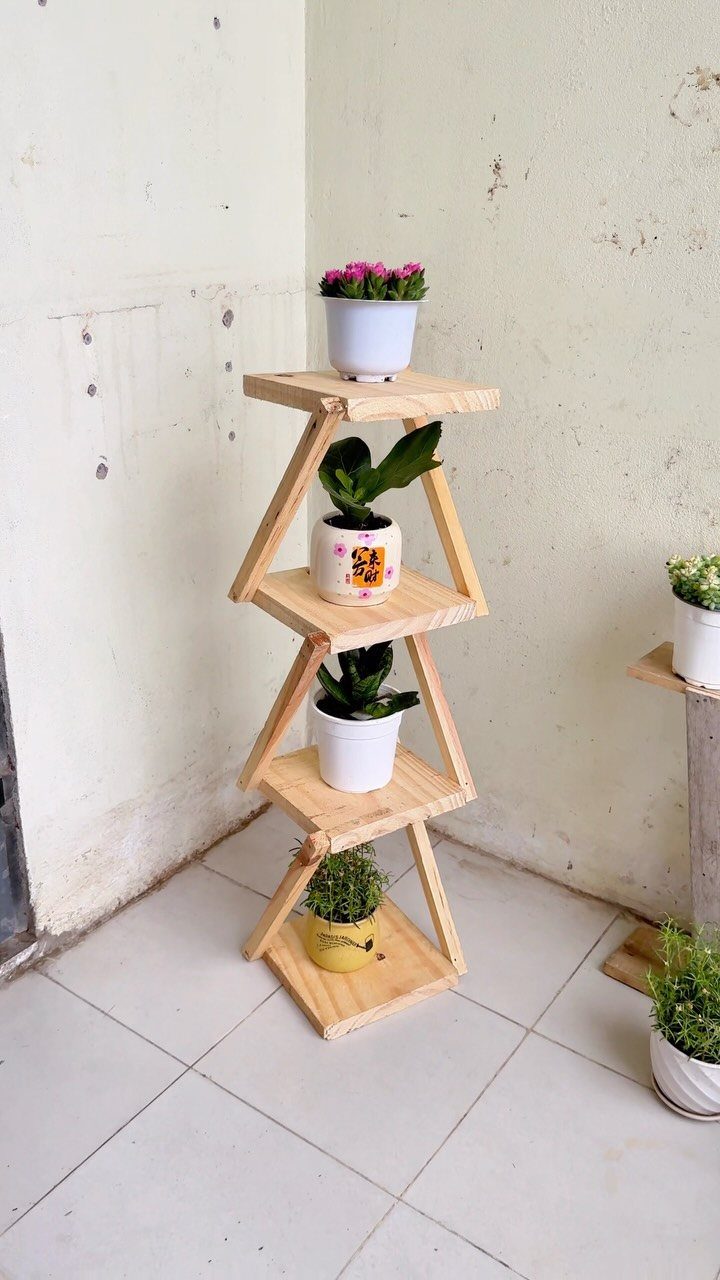
Angled legs on a tiered stand let each plant catch light from its own angle without crowding. Tiered shelves in light wood suit trailing pothos or upright succulents together; the narrow footprint fits a corner or beside a sofa.
I would build the legs from 1x2s with simple lap joints, shelves from 1x6s with a shallow lip to catch drips.
The height matters more than the width, a tall stand draws the eye up and fills vertical space a wide one would dominate.
10. DIY Mirror Frame

An arched frame with carved detail turns a plain mirror into something that reads custom-built.
The curve is the hard part; a router with a jig cuts the arc clean, or buy an arched top board and add the detail with chisels or a trim router.
I would use poplar for paint or oak for stain, both hold crisp edges.
The carving catches dust, so I would keep the detail shallow enough to wipe. Heavy mirrors need a French cleat, not picture wire; the weight wants two points on studs, not one.
11. Wooden Tool Trays
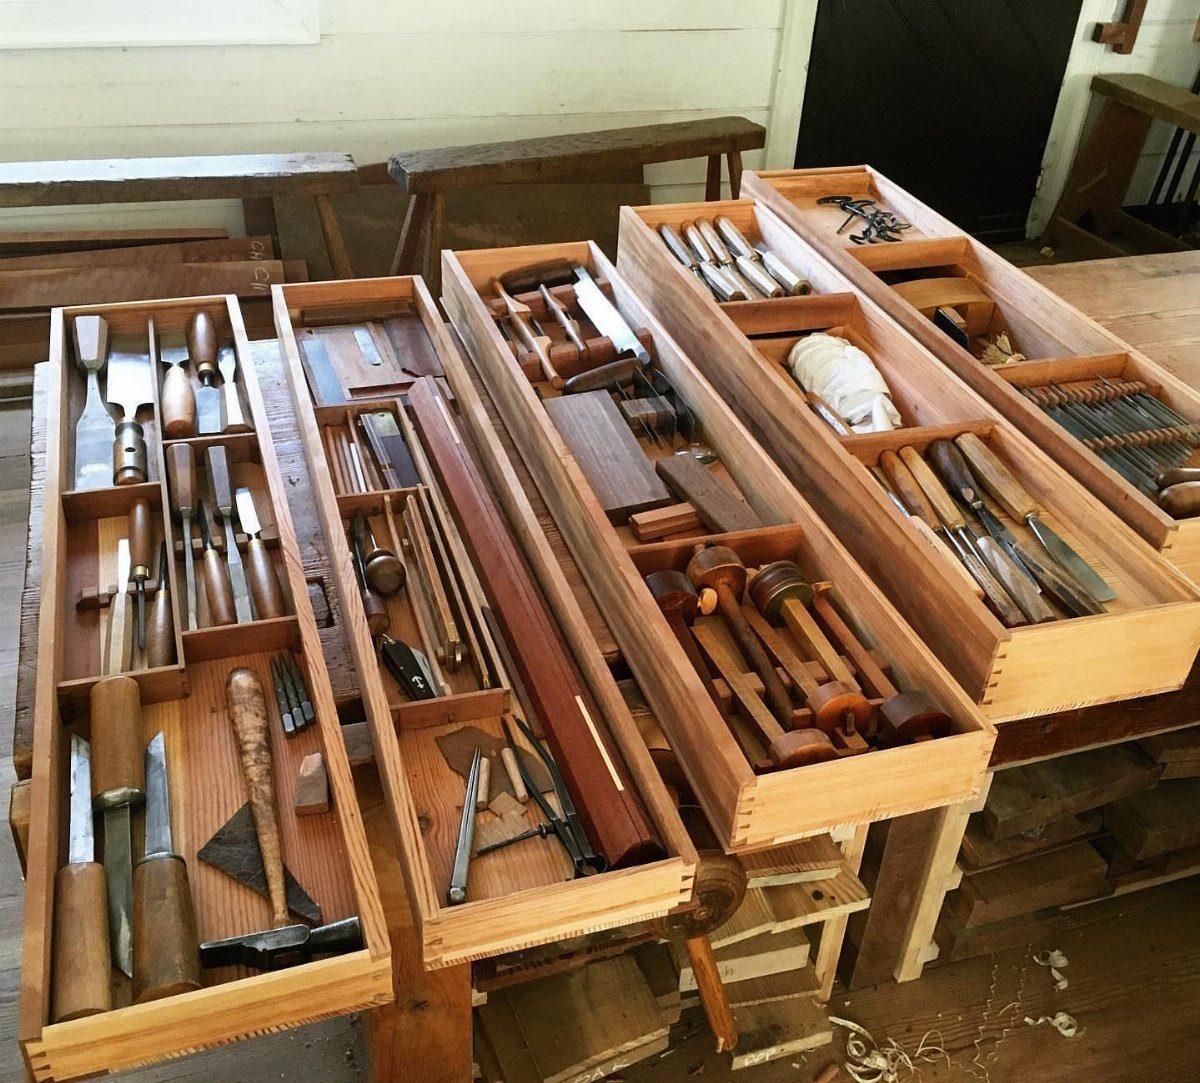
Long narrow trays keep chisels and gauges flat and visible, no digging through drawers. The width matters more than the length; a tray too wide lets tools roll and tangle.
I would rip 1x4s or 1x6s to width, box the ends, and leave the bottom raw or oiled so rust does not bloom. A shallow bevel on the top edge softens the grip without rounding it.
12. Workshop Storage Bin Rack
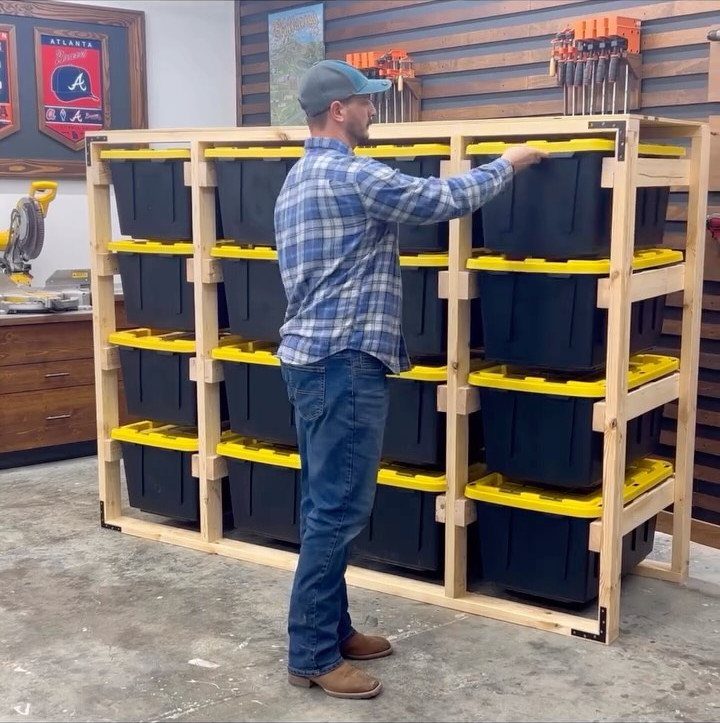
A full-height bin rack turns storage tubs into a wall system that stays organized.
I would build it against a wall for rigidity and leave the front open so labels face out. Size the unit to standard tubs before you cut anything; mixing brands means gaps or jams.
13. Tall Wood Shelving Unit
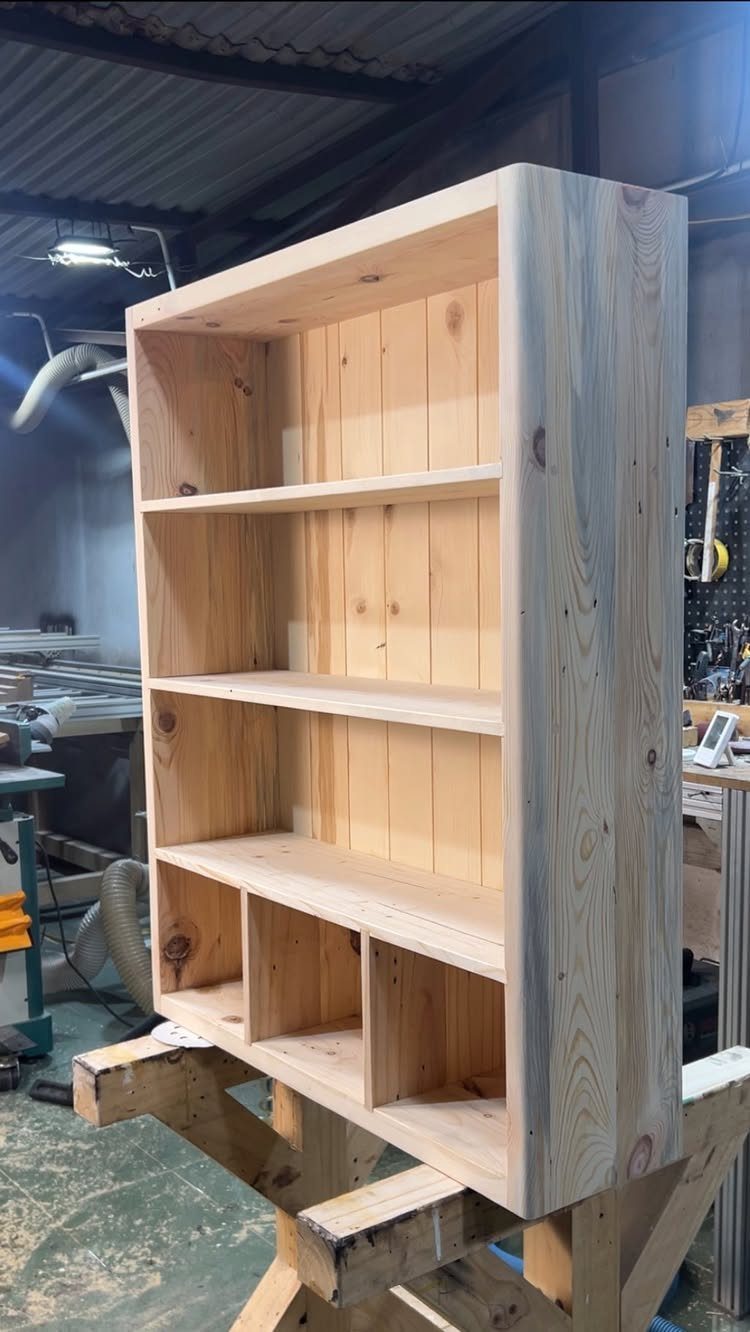
Vertical backing on a tall pine unit keeps books from tipping and tools from falling through. The cubby base is the detail that makes this more than generic shelving; it corrals small items that would vanish on open spans.
I would build the carcase from 3/4-inch pine plywood, with the back slats screwed on before the shelves go in so the edges stay hidden.
Sawhorses mean this one is still in progress, but the same build finishes fine with a simple baseboard or legs cut to height. Tall units rack sideways unless the back is rigid or you add a corner brace.
14. Metal and Wood Shelving Unit
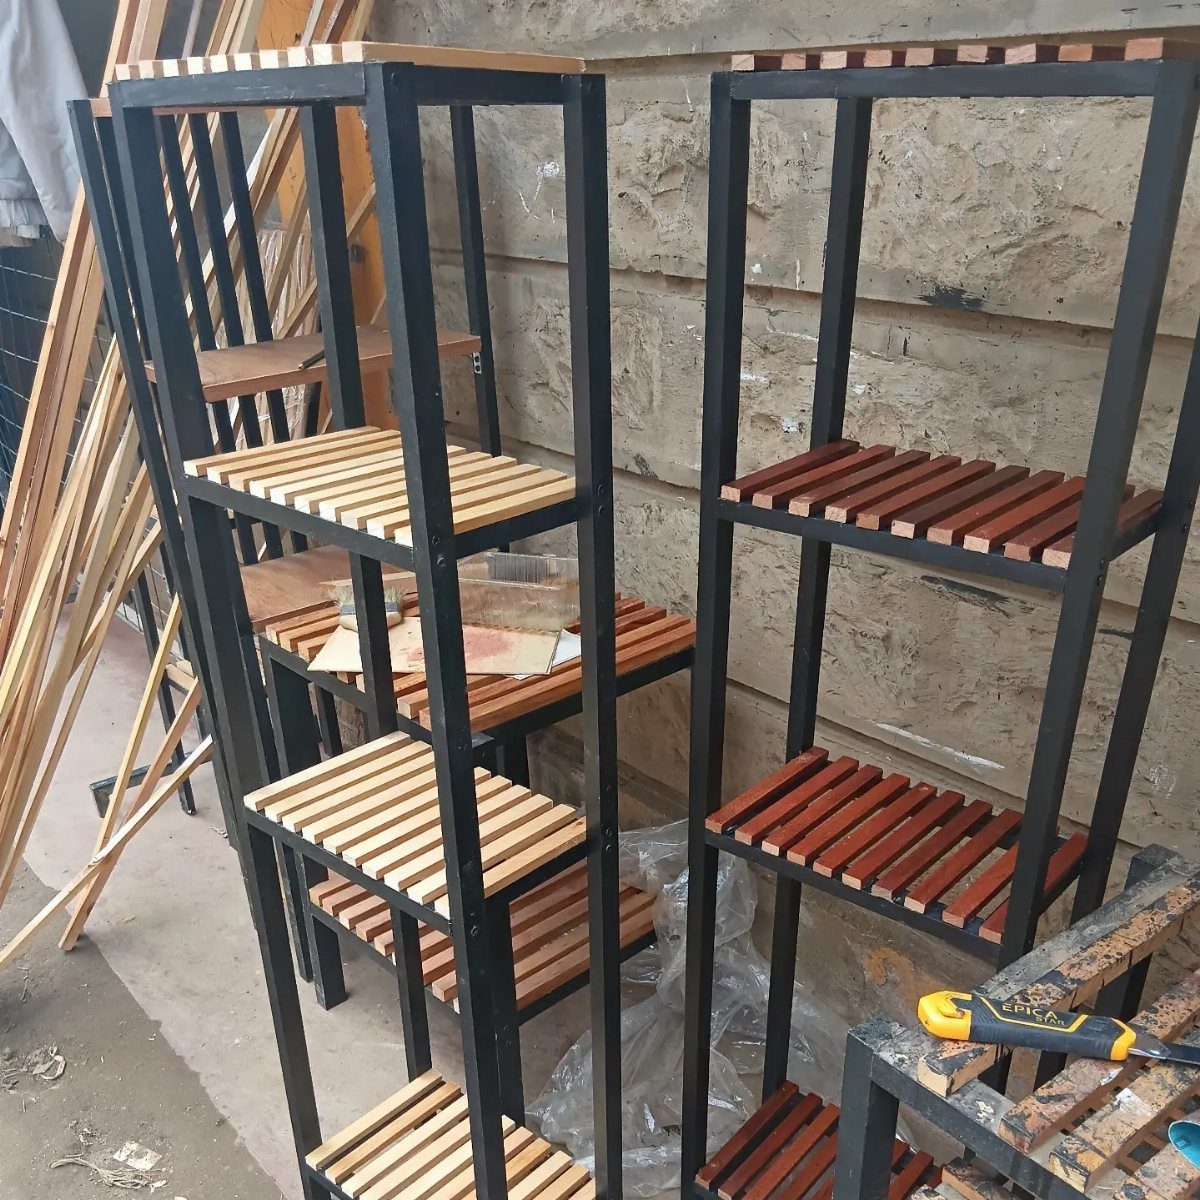
Black steel frames with slatted wood shelves read as outdoor storage because they are; the gaps let rain drain and air move so nothing mildews.
I would use pressure-treated 1x4s for the slats, spaced finger-width apart, and bolt the frames together rather than welding, since hardware stores cut threaded rod to length.
Stone walls carry the load, but freestanding units on soil need the legs sunk in concrete or cross-bracing kept low enough to catch a shin.
2 units side by side fill a wall with the kind of capacity that makes workshop clutter disappear, though open slats mean small parts need bins.
Woodworking on a Budget
The upfront cost of woodworking is where most people stall, and it is also the easiest part to cut.
A hand saw, a set of chisels, a mallet, and a sanding block handle most starting projects. Add a jack plane and you have a kit that Christopher Schwarz and generations before him built furniture with, shop or no shop.
Scrap wood from home center cutoff bins and construction site pallets cover material without the lumberyard bill. Reclaimed lumber carries marks and nail holes that read as history on a wine rack or crate, not flaw.
Local buy-nothing groups and community workshops share tools you use twice a year.
I would borrow a router for the mirror frame arc rather than own one that sits idle. The money saved on tools buys better stock when your eye sharpens enough to tell the difference.
Essential Tools for Beginners
A beginner’s tool list is short and buys time before you know what you actually need.
The hand saw does rough dimensioning; chisels clean joints the saw leaves square but rough.
A mallet drives the chisels without mushrooming their handles, and a jack plane flattens faces faster than sanding alone. The sanding block finishes where the plane stops.
I would buy these tools in person at a hardware store where you can feel the balance.
Cheap chisels with plastic handles work, but the steel in a mid-grade set holds an edge longer and cuts cleaner. A dull edge in pine is merely slow; in oak it is dangerous.
Power tools arrive later, if at all.
A cordless drill is the first addition for the picnic table and pipe shelving builds, but nothing above demands it. Learn to sharpen the plane iron and the chisels; that skill saves more time than any machine.
Upcycling and Repurposing Materials
An old ladder converted to shelving needs only the legs cut to height and the rungs reinforced for book weight. The triangular profile sits flat against a wall where standard shelving would project too far.
Pallets need inspection before they come home. Heat-treated boards carry an HT stamp and are safe for indoor projects; chemically treated ones do not belong near air you breathe.
The EPAL stamp on European pallets marks a specific construction standard, not treatment type, so I would still check for HT.
Reclaimed wood shrinks and swells on its own schedule. I would let pallet slats sit indoors a week before cutting, and leave expansion gaps in anything fitted tight like the wine rack.
Nail holes and saw marks stay visible or get filled; either choice is honest, but mixing them on the same piece looks accidental.
The ladder and pallet examples are starting points.
Door panels become tray bottoms, demolished fence boards become crate sides. The constraint forces invention, and the invention is usually better than the bought equivalent.
Frequently Asked Questions
What are some easy woodworking projects for beginners?
Wall-mounted clothes drying racks, floating wooden shelves, and simple wooden crates teach basic cuts and joints without demanding precision beyond a weekend’s practice.
The drying rack uses only pine boards and dowels with a single hinge; the crate is just box joints and a jigsaw cut for handles.
Beginner builds should leave room to recover from small mistakes; that tolerance matters more than perfect technique at first.
How can I do woodworking on a budget?
Start with hand tools and scrap wood. A hand saw, chisels, mallet, jack plane, and sanding block handle most beginning projects for less than one power tool, and home center cutoff bins plus heat-treated pallets supply material free.
What tools do I need to start woodworking?
The core hand toolkit covers rough cuts, joint cleaning, face flattening, and finishing without a single cord.
I would buy these in person to feel the balance; mid-grade chisels hold an edge longer than plastic-handled sets, and a sharp edge in oak is safer than a dull one.





