
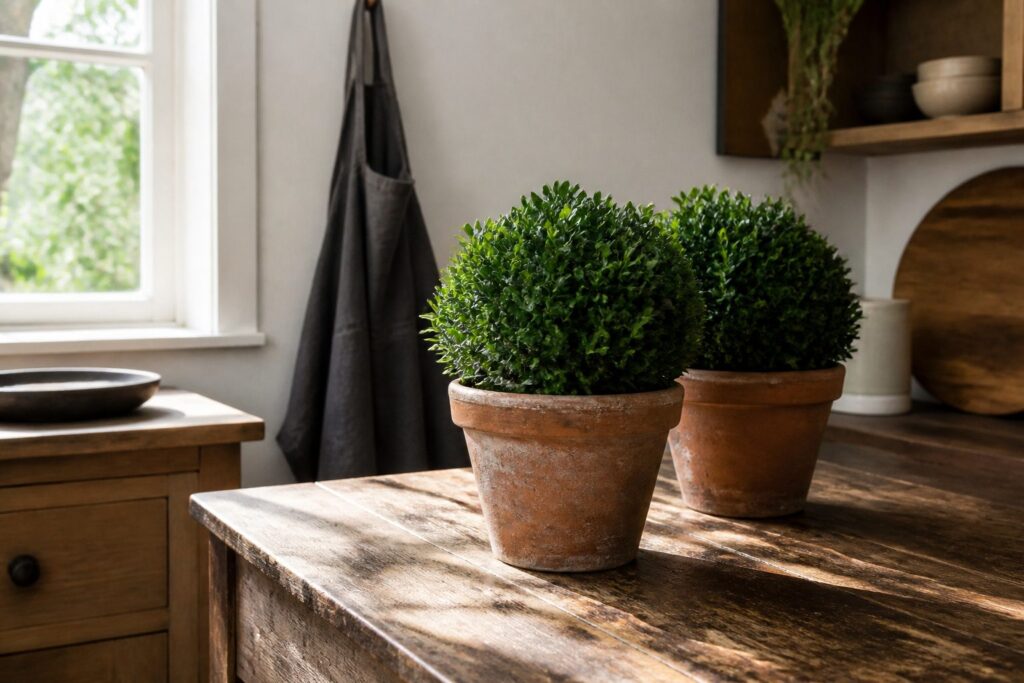
Boxwood grows well in pots, but only if the soil drains fast enough to keep roots from rotting.
The difference between a thriving plant and a drowned one is usually the potting mix: garden dirt turns into a coffin in a container, while a commercial mix built for containers lets water run through in seconds.
That single choice matters more than the size of the pot or the variety you plant.
1. Choose the Right Container
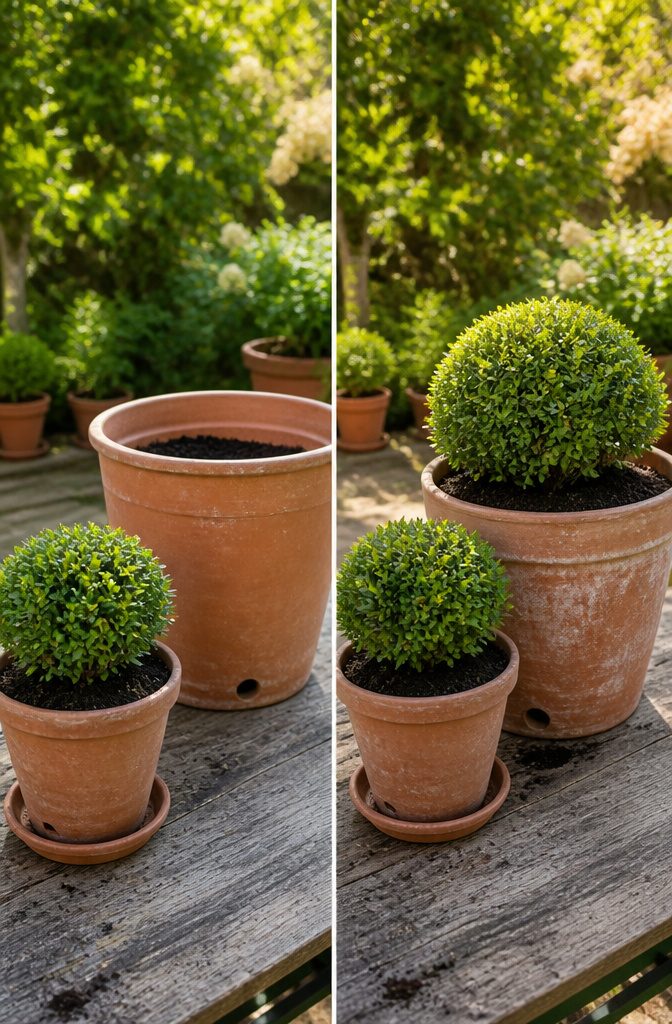
The container needs to be wider and taller than the root ball, though most sources stop short of saying by how much.
I go for a pot that leaves a few inches of clearance on every side, which usually means something in the 4–6 inch range above the current nursery container’s diameter.
That gives the roots room to expand without drowning the plant in unused soil that stays wet and cold.
Drainage holes are non-negotiable. Boxwood roots rot fast in standing water, so I skip any pot that sits in a saucer I can’t empty after rain.
Terracotta breathes well in summer but cracks once freeze-thaw cycles hit, so I only use it where winters stay mild.
For cold climates, concrete or brick holds up, and frost-proof resin or fiberglass is worth the slightly higher cost if you’re moving pots at all.
The heavier materials stay put in wind, which matters more than you’d think once the plant fills out.
2. Select the Right Soil
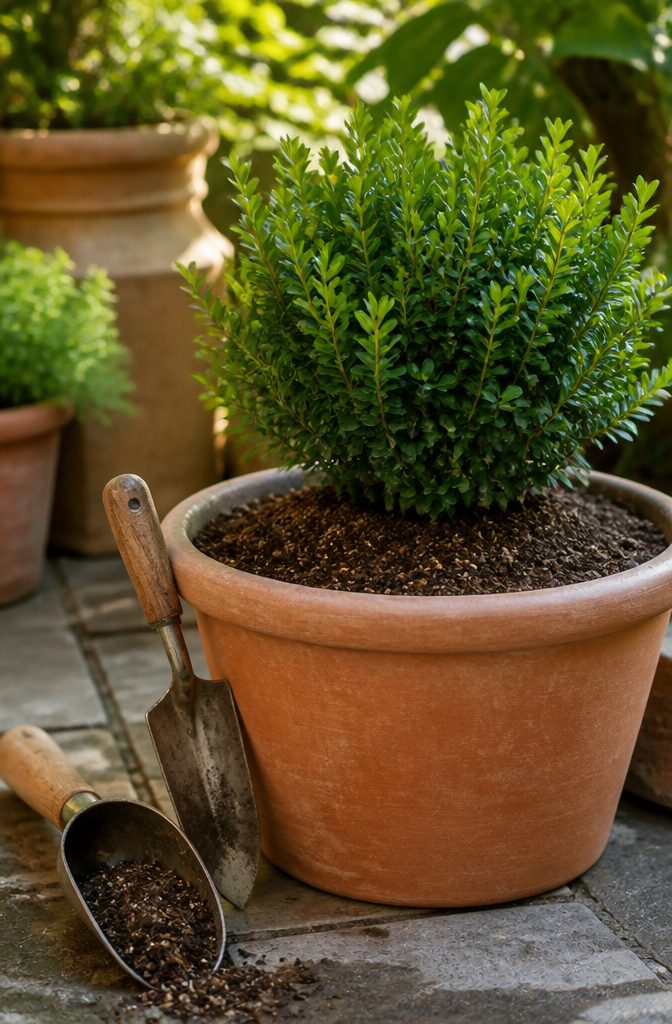
Boxwood roots rot fast in soil that holds water like a sponge, which is exactly what happens when you fill a container with garden dirt.
A commercial potting mix designed for containers leaves the weight behind; it is built to drain freely and let air reach the roots instead of compacting into a solid block after every rain.
"Too heavy" means the pore spaces collapse. Water sits where oxygen should be, and roots suffocate or invite disease.
Topsoil from the yard is the worst offender here, dense with clay and organic matter that behaves fine in open ground but turns into a coffin inside a pot.
The right mix stays loose enough that water runs through in seconds, not minutes, and the plant can handle the extra watering that container life demands without drowning between drinks.
I skip anything labeled garden soil or raised bed mix for this job.
Those formulas assume drainage through the bottom of a bed, not the confined loop of a pot. For boxwood in pots, the soil itself has to do the work.
3. Planting
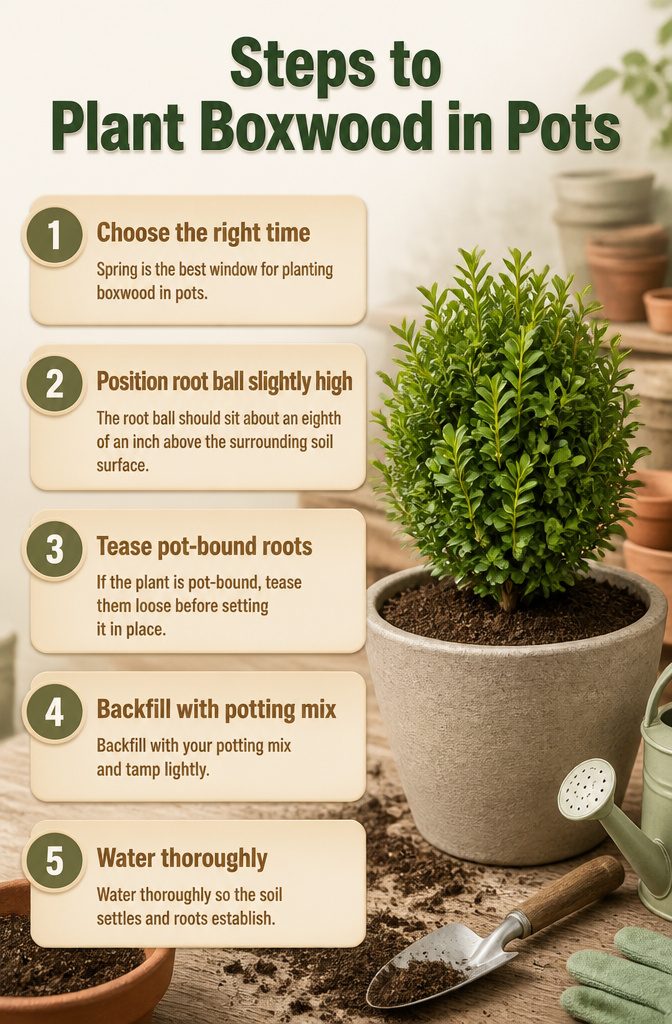
Spring is the best window for planting boxwood in pots, when cool soil and steady moisture let roots establish before summer heat arrives.
The root ball should sit about an eighth of an inch above the surrounding soil surface, not flush with it.
That slight lift matters more than it looks: boxwood roots stay shallow and rot fast if water pools against the crown. Letting the crown sit high gives excess moisture somewhere to drain away.
If the plant is pot-bound, with roots circling hard in the nursery container, tease them loose before setting it in place.
Breaking that circling pattern keeps roots from strangling themselves as the plant fills out. Backfill with your potting mix, tamp lightly to collapse air pockets without compacting, and water thoroughly.
The soil will settle some after that first soaking, which is why starting with the crown slightly high leaves it exactly where it needs to be.
4. Watering
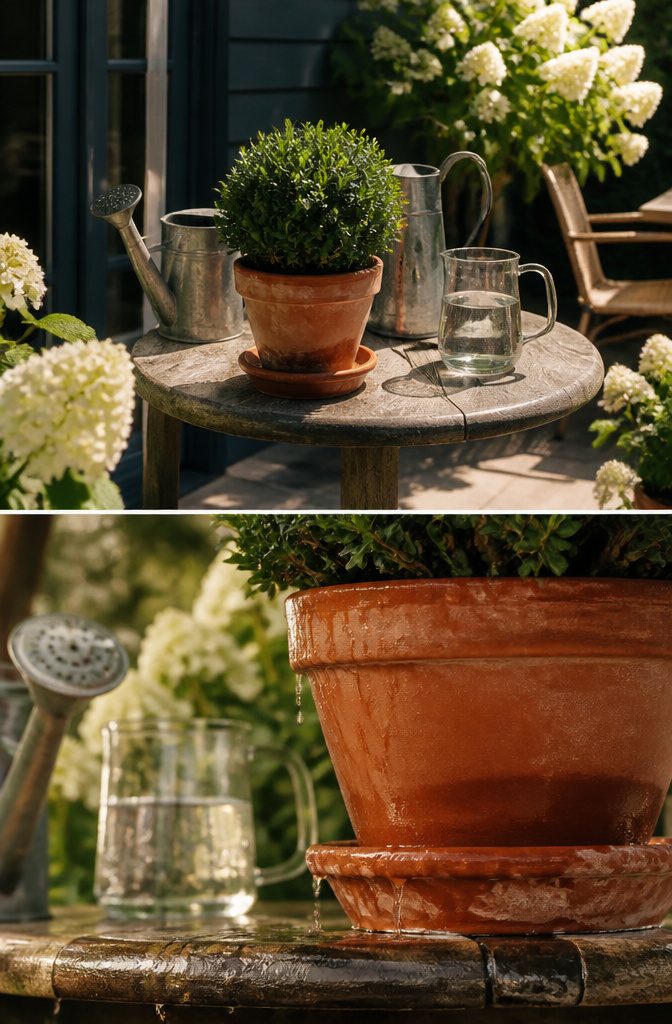
Pots dry out faster than ground soil, and terracotta pulls moisture away even quicker. That means a boxwood in a container needs more frequent attention than one in a garden bed, even though the plant itself is drought-tolerant once established.
I water until I see a slow drip from the drainage holes, about once a week in summer as a baseline. In hot or dry stretches, that schedule shifts to twice weekly or more.
The drip test matters because a heavy pour all at once just washes nutrients out the bottom.
A moderate, steady soak lets the root ball absorb what it needs without leaving the soil soggy. Boxwoods want consistent moisture, not wet feet.
Overwatering is the fast track to root rot and the fungal diseases that follow. I let the top inch go slightly dry between waterings, especially in the first year when the root system is still establishing.
Cut back in winter, but if the pot sits under an overhang and sees no rain or snow, it still needs an occasional drink.
5. Fertilizing
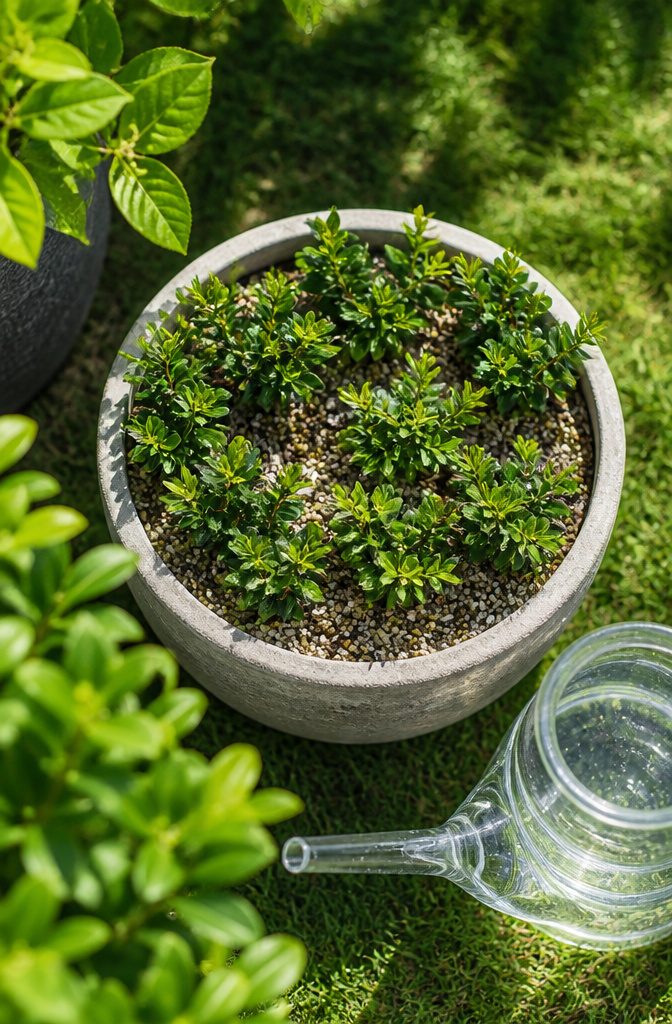
Boxwood in pots does best with one spring feeding of balanced, all-purpose fertilizer, timed just as new growth begins to push.
A balanced fertilizer carries nitrogen, phosphorus, and potassium in roughly equal measure, which keeps the plant from getting lopsided nutrition that forces weak, leggy shoots.
The shallow, wide root system that makes boxwood so suitable for containers also makes it vulnerable to over-feeding.
Those roots sit close to the surface, so a heavy hand concentrates salts right where the finest feeder roots live, and the damage shows up as browning edges you will mistake for sun scorch.
Apply the fertilizer across the full spread of the root zone, extending past the crown of the plant, and keep granules or liquid off the foliage and trunk.
Water it in well afterward so nothing sits in direct contact with the roots themselves.
6. Pruning
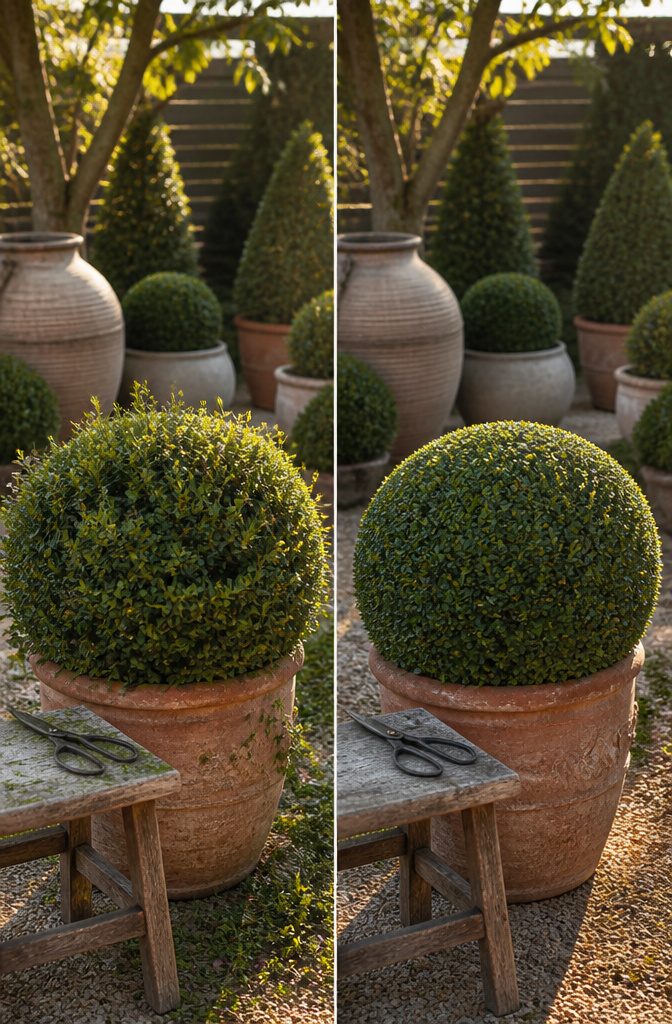
Light trimming keeps a potted boxwood looking deliberate rather than wild.
I remove broken or diseased branches the moment I spot them, since damaged wood is an open invitation to the fungi and bacteria that spread through tight container plantings faster than through garden soil.
The real divide is shearing versus thinning. Shearing, the rounded-lollipop approach, cuts indiscriminately across the outer surface.
It forces dense outer growth that shades the interior, weakens branches, and traps humidity where air should move. Those thousands of tiny wounds also create entry points for disease organisms.
Thinning takes longer but works with the plant’s structure: selective cuts deep into the canopy remove older branches entirely and let light reach the center. The shrub keeps its natural form, and the foliage stays healthy from the outside in.
For a weekend gardener with one or two pots, thinning is the method that wins.
Patience matters more than speed; the first few sessions look messier than a sheared dome. Within a season, though, the plant fills out on its own terms and needs less rescue work later.
7. Winter Care
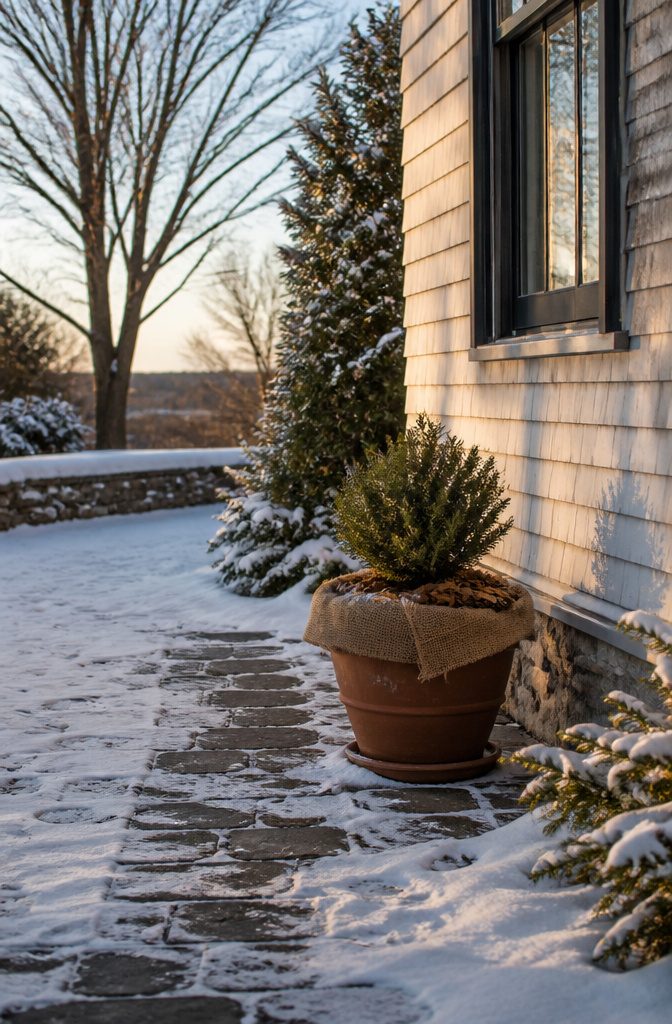
Bronzing turns boxwood foliage yellow-orange to reddish brown once cold winds, frost, and intense sun hit frozen leaves. The color shift is cosmetic damage, not disease, but a pot left exposed makes it hard to prevent.
Protection from winter winds matters most. A sheltered wall or fence line does more than any wrap, so I move my pots against the house on the windless side before the first hard freeze.
If the site stays open, burlap wrapped around the frame blocks the drying air without trapping moisture the way plastic would.
Some gardeners layer bubble wrap inside the planter itself to insulate roots, though I find that extra step trades a lot of labor for marginal gain when the pot is already up against masonry.
Watering before a freeze helps leaves hold moisture, and a 3-inch mulch layer over the soil insulates roots and slows evaporation through the coldest months.
Indoors is an option if you have the floor space and a dolly to roll the weight, but garages and covered porches usually give enough buffer without the sudden warmth that forces early, vulnerable growth.
8. Repotting
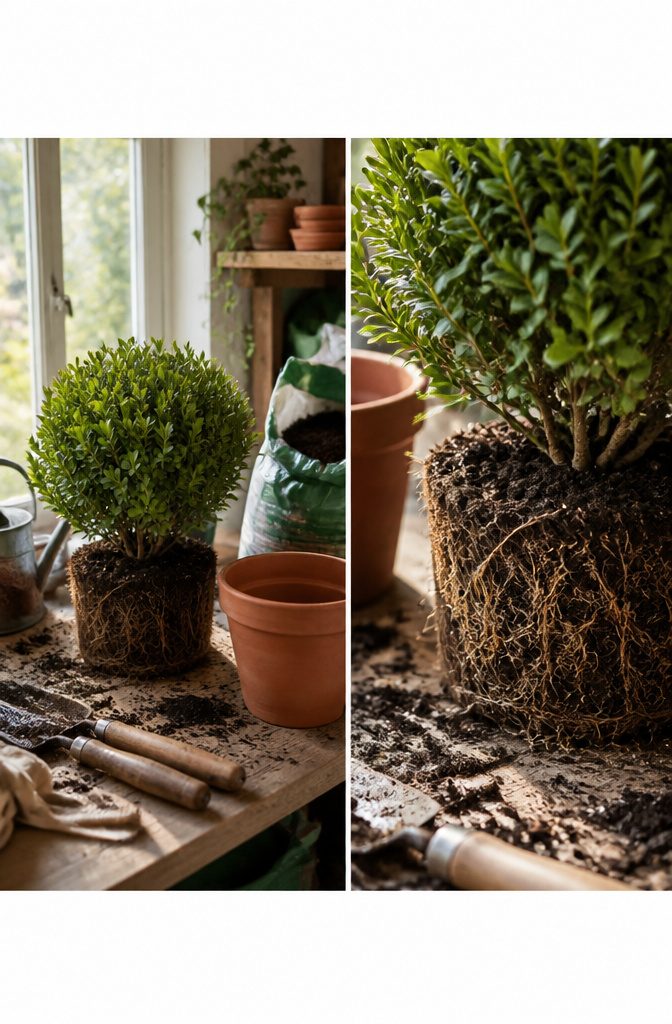
Boxwood roots exhaust their potting soil in about three years, which is the right interval to plan for even if the plant still looks fine.
Slow growth is the first reliable signal; most varieties add only 3 to 6 inches in a year, so when new shoots barely appear or the shrub seems stuck at the same size, the root ball has likely filled the container and nutrients have run low.
To repot, lift the plant and loosen the outer roots so they make contact with fresh medium rather than circling in a hard mass.
Replace the old soil entirely; potting mix breaks down and loses both structure and the nitrogen, phosphorus, and potassium the boxwood depends on. If the shrub has outgrown its space, move it to a container one to two sizes larger.
Gardeners who want to keep a dwarf specimen or topiary compact can stay in the same pot, but that means pruning the roots: cut into the root ball, remove enough mass to create space, and fill the gaps with fresh soil.
Either way, the fresh soil is what buys you another three years of health.
Boxwood Varieties for Containers
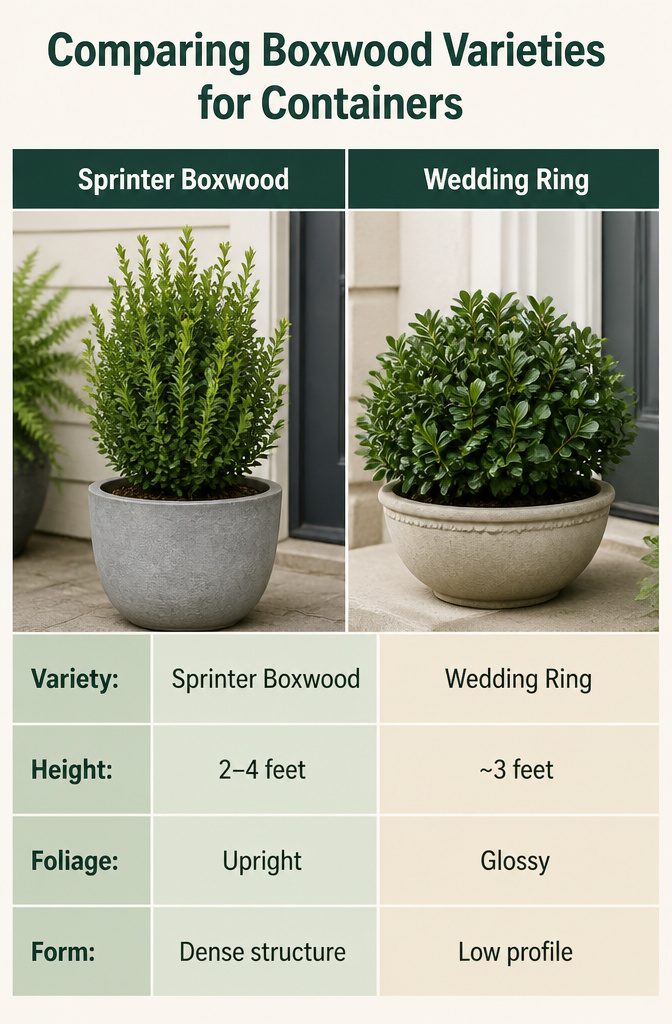
Not every boxwood behaves the same in a pot, and the varieties that stay compact save you from constant shearing or an early transplant.
Sprinter Boxwood (Buxus microphylla ‘Bulthouse’) tops my list for containers because it settles at 2–4 feet tall and wide, a range that fits most patios without outgrowing its space in a season.
The growth is upright enough to look structured but not so fast that you are chasing it with pruners every weekend.
Wedding Ring (B. microphylla var. koreana) offers something Sprinter does not: glossy foliage that catches light even on gray winter days.
It stays closer to 3 feet, which makes it the better choice if you are working with a smaller pot or want a lower profile under a windowsill or beside a door.
For pure shape without the work, Green Mound wins. This hybrid carries a natural rounded form, so the plant looks intentional even when you have not touched it with shears in months.
That matters in a container, where lopsided growth shows immediately and a tight clip can leave bald spots years to fill.
I would skip taller species like common Buxus sempervirens for all but the largest planters.
Their mature size fights the root restriction of a pot and turns winter protection into a chore. The three above give you the structure boxwoods are grown for, scaled to life in a container you can still lift.
Container Materials
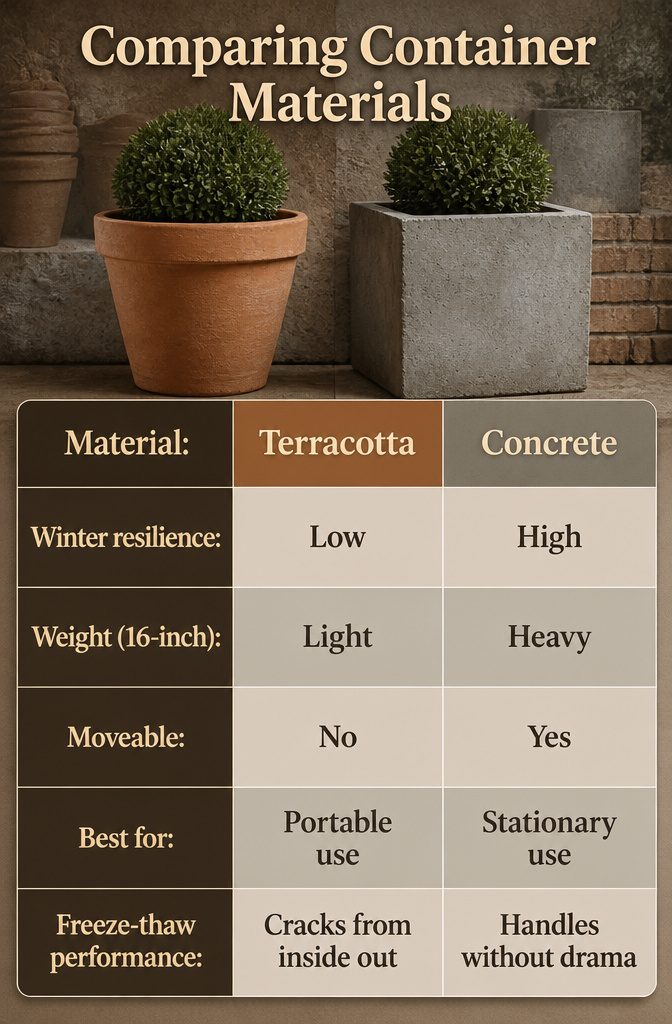
Terracotta looks right with boxwood, and I get why people reach for it first. The problem is winter.
Water gets into the pores, freezes, and the pot cracks from the inside out. If you are in any zone that sees hard freezes, terracotta stays reliable only if you move it under cover before the first frost.
That is already one job on your list that concrete or brick simply does not create. Concrete planters and brick boxes handle freeze-thaw without drama, and they stay put in wind that would send lighter pots tumbling.
Weight is the trade-off that actually decides this. A 16-inch concrete planter can run 80–100 pounds empty, which I cannot shift alone and probably neither can you.
If your plan involves wheeling the pot into a garage on a dolly, frost-proof resin or composite materials give you that option without the crack risk, though they will not anchor a tall topiary the way concrete does.
Match the material to whether you intend to move it.
Stationary and cold? Concrete wins.
Portable and cold? Frost-proof is the only category worth your money.
Common Boxwood Issues
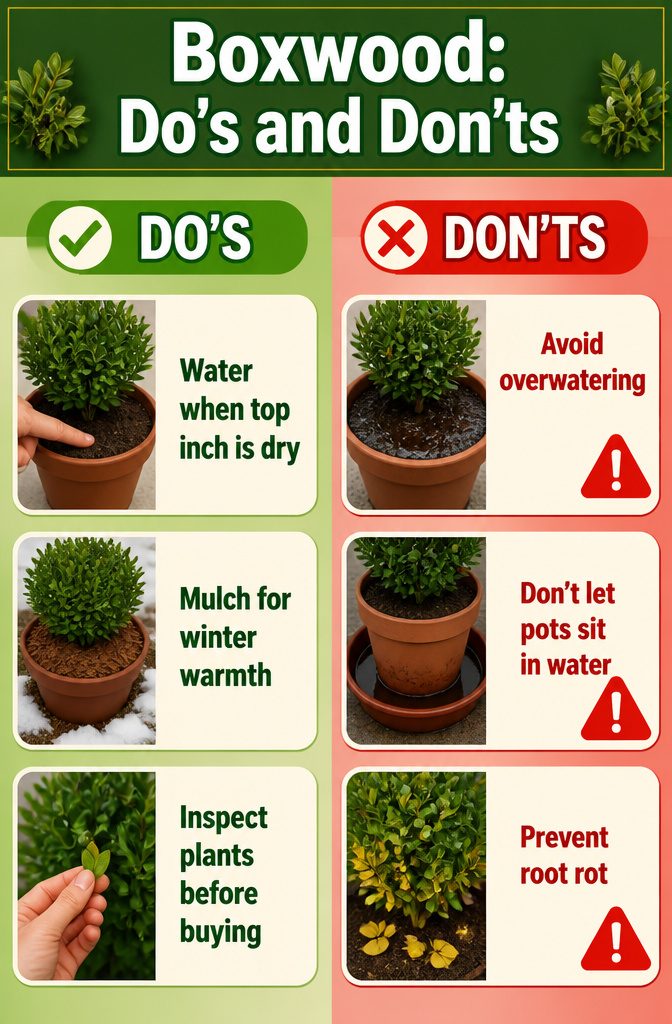
Three problems show up often enough in container boxwood that spotting them early saves the plant. Root rot from overwatering is the most common killer, and the first sign is yellowing leaves that the gardener often mistakes for underwatering.
The real cause is soggy soil, usually in a pot without drainage or on a saucer that traps water.
Once roots turn soft and brown, recovery is unlikely, so the fix is prevention: water only when the top inch dries, and never let the pot sit in standing water.
Winter burn turns foliage yellow-orange to reddish brown after cold winds, frost, or intense sun strip moisture the roots cannot replace.
Potted boxwood suffers more than in-ground plants because container roots freeze faster. A three-inch mulch layer over the soil insulates roots, and wrapping the pot interior with bubble wrap adds another buffer.
Burlap around the foliage breaks the wind. Watering before a freeze also helps, since hydrated tissue resists desiccation better than dry.
Leaf miner shows as yellow or brown blisters between the leaf surfaces, the tunnels of small fly larvae feeding inside. It weakens the plant over seasons rather than killing it outright.
Unlike root rot or winter burn, this is a pest issue, not a cultural one, so prevention means inspecting new plants before buying and removing mined leaves before adults emerge in spring.
Light and Placement
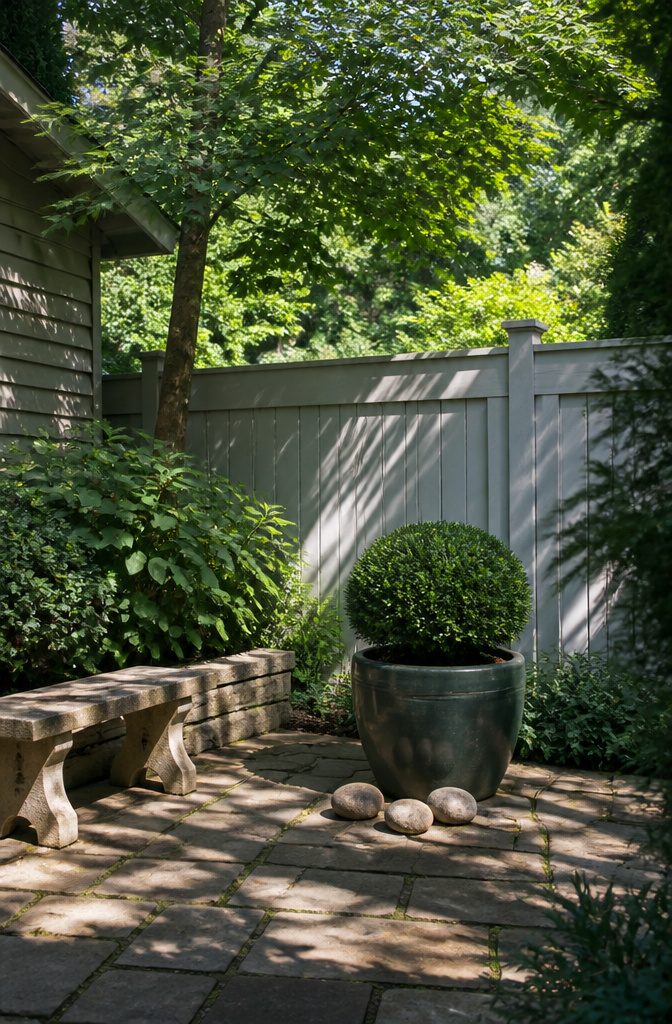
Wrong placement will undo every other step in this guide before you even buy soil. Boxwood in pots needs 4–6 hours of direct sun, but that light should land in morning or midday hours, not the baking afternoon kind.
Partial or dappled shade handles the rest of the day, and some wind shelter keeps the shallow root mass from drying out faster than you can water it.
The shrub survives in full shade, below four hours of light, yet the habit opens up and leaf color dulls.
For a container plant you want to keep dense and green, that is not a real option. Hardiness zones 5–9 cover most of the country, though a zone at the edge means watching winter wind exposure more carefully.
I treat this as pre-step planning, not a care stage.
A pot that sits on a west-facing balcony with no buffer, or under dense tree cover, sets you up for failure no matter how good your soil or watering discipline gets.
Scout the spot first. Move the empty container there and watch how the shadows cross it for a full day before you commit.
Shearing vs. Thinning
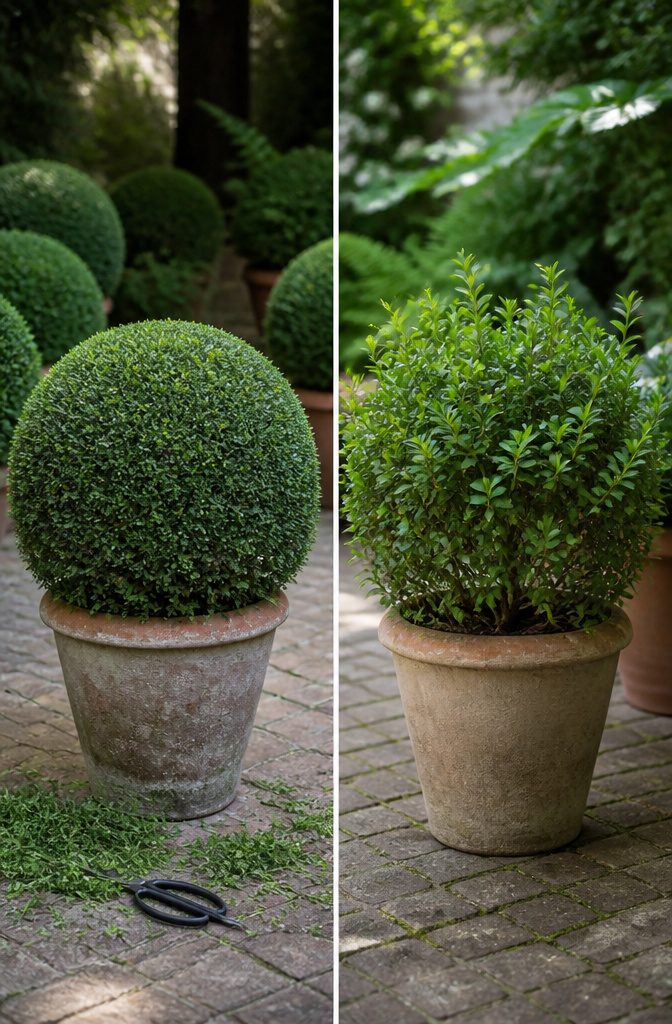
Shearing a boxwood into a neat round or cube feels satisfying for about a season. The outer layer grows thick and green, but that dense shell blocks light and air from reaching the interior.
Branches inside weaken, foliage drops, and the hollow center becomes a humid pocket where disease takes hold. Once that structure sets in, recovery means cutting deeper than the plant can handle.
Thinning takes longer and demands more judgment. I remove select branches throughout the shrub, cutting some of the oldest wood back to the main stem and clearing anything broken or diseased the moment I spot it.
Light reaches the center, air moves through, and the plant keeps its natural form without looking like a topiary reject.
Thinning wins for potted boxwood because the confined root system already stresses the plant. A sheared shell in a container compounds that stress with interior decline.
On a weekend timeline, thinning feels slower since you step back between cuts to assess. A plant that stays full and healthy for years beats one that looks sharp for a single season before declining.
I clear fallen debris from the branches when I finish, since trapped leaves hold moisture and invite the same problems shearing creates.
Frequently Asked Questions
How often do you need to water boxwoods?
Water until you see a slow drip from drainage holes, about once a week in summer as a baseline, shifting to twice weekly or more during hot or dry stretches.
Let the top inch go slightly dry between waterings, especially in the first year. Cut back in winter, but if the pot sits under an overhang with no rain or snow, give it an occasional drink.
What type of soil is best for boxwoods?
A commercial potting mix designed for containers is the right choice.
It drains freely and lets air reach the roots instead of compacting into a solid block after rain. Skip garden soil, topsoil, or raised bed mix, which are too heavy and hold water like a sponge in a confined pot.
When is the best time to plant boxwoods in containers?
Spring is the best window, when cool soil and steady moisture let roots establish before summer heat arrives.
Early fall also works in moderate temperatures, giving roots time to mature before winter. Wait until spring to fertilize any boxwood planted in autumn.
How do you protect boxwoods in winter?
Move pots against a sheltered wall or fence line before the first hard freeze. If the site stays open, wrap foliage with burlap to block drying wind without trapping moisture.
Add a 3-inch mulch layer over soil to insulate roots, and water before a freeze so leaves hold moisture. Bubble wrap inside the planter adds extra root insulation, though the gain is marginal when the pot already sits against masonry.
How often should boxwoods be repotted?
Plan to repot about every three years, even if the plant still looks fine. Slow growth is the first reliable signal that the root ball has filled the container and nutrients have run low.
When repotting, loosen outer roots, replace old soil entirely, and move to a container one to two sizes larger, or prune roots and refresh soil if keeping the same pot size.
Can boxwoods survive in pots?
Yes, boxwoods survive and thrive in pots with the right care.
Choose compact varieties like Sprinter, Wedding Ring, or Green Mound that stay 2–4 feet tall and wide, use fast-draining container potting mix, make sure the pot has drainage holes, and give them 4–6 hours of morning or midday sun.
Potted boxwoods need more frequent watering than in-ground plants but reward you with year-round structure and color.
What are the disadvantages of boxwoods?
Boxwoods in pots face root rot from overwatering or poor drainage, winter burn from cold winds and frozen roots, and leaf miner pest damage.
Their shallow, wide roots make them vulnerable to over-fertilizing, and taller varieties outgrow containers fast. Shearing for shape creates dense outer growth that traps humidity and weakens interior branches.
Which boxwood is best for containers?
Sprinter Boxwood tops the list at 2–4 feet tall and wide with upright, structured growth that does not need constant pruning. Wedding Ring stays closer to 3 feet with glossy foliage that catches winter light.
Green Mound carries a natural rounded form that looks intentional even without shearing. Skip taller common boxwood species for all but the largest planters.





