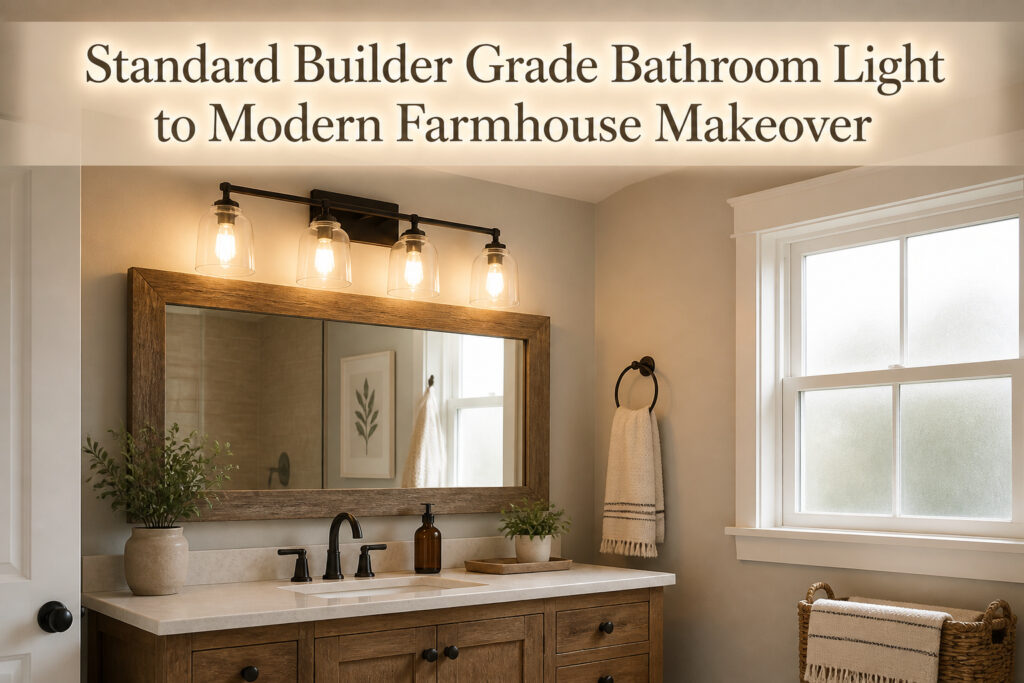
A standard builder-grade bathroom light to modern farmhouse makeover is the fastest way to shift a room’s entire mood without touching tile or paint. The catch is that the fixture swap only works if you pair it with paint that unifies what you cannot change, like beige tile or oak trim already in place. Sherwin Williams Agreeable Gray does that heavy lifting, and at $70 on sale, the Allen + Roth Hainsbrook fixture from Lowe’s lands well below what most people overspend on statement lighting.
Paint the Walls and Vanity
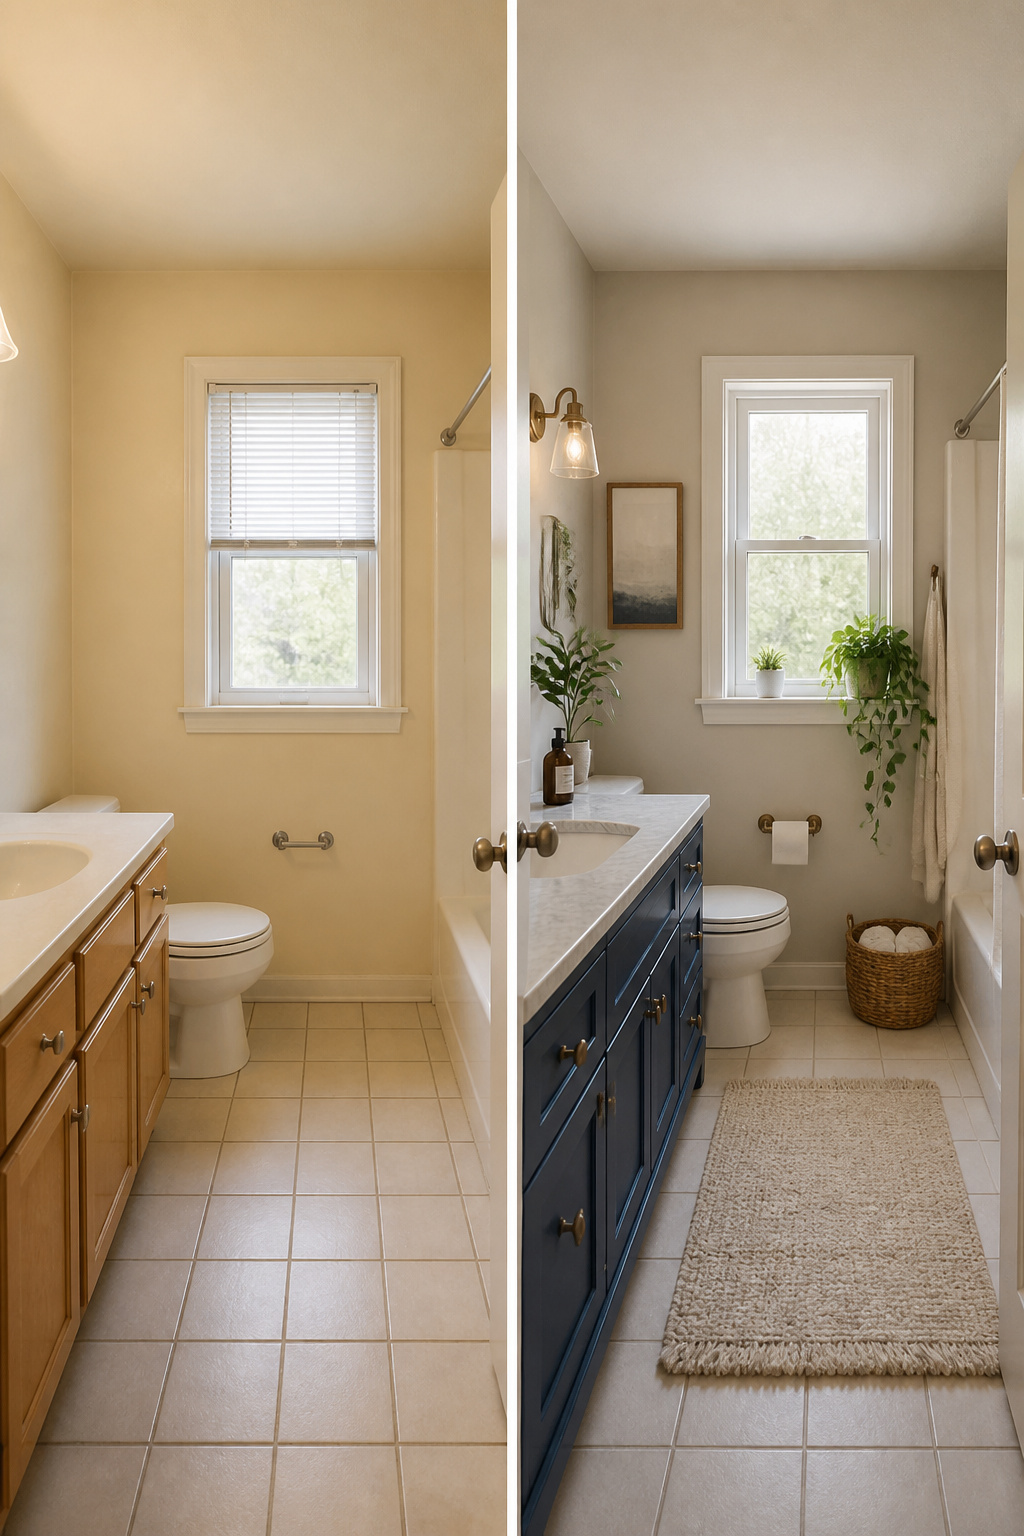
Paint does the heavy lifting in a builder-grade bathroom because it works with what is already there instead of fighting it. I have seen too many makeovers try to erase every original feature; the budget breaks and the room still looks off. The smarter play is paint that brightens and unifies.
Sherwin Williams Agreeable Gray is the warmer neutral I keep seeing in successful transformations. It bounces light around a small bathroom without reading sterile, and it plays nice with beige tile or oak trim that would look muddy against a cooler gray. For the vanity, Benjamin Moore Britannia Blue adds the depth that reads modern farmhouse, not beach house, because it carries enough gray in its base to stay grounded. If the room already has strong warm tones, PPG Palomino Gray is the bridge color, a warm greige that lets existing fixtures sit quietly instead of screaming dated.
Lighter shades on walls recede visually; the same eight-by-ten bathroom suddenly has breathing room. I paint ceilings the same color as walls when the trim is white, because the continuous line erases the boxy feel that builder-grade construction loves to impose. The vanity in a darker or contrasting shade becomes the intentional focal point, the one thing that looks chosen rather than inherited.
The limit is patience with prep. Scuff-sand the vanity, prime the laminate, and accept that two thin coats beat one thick one every time. Paint is cheap, but only if you do not have to redo it in a year.
Update Light Fixtures
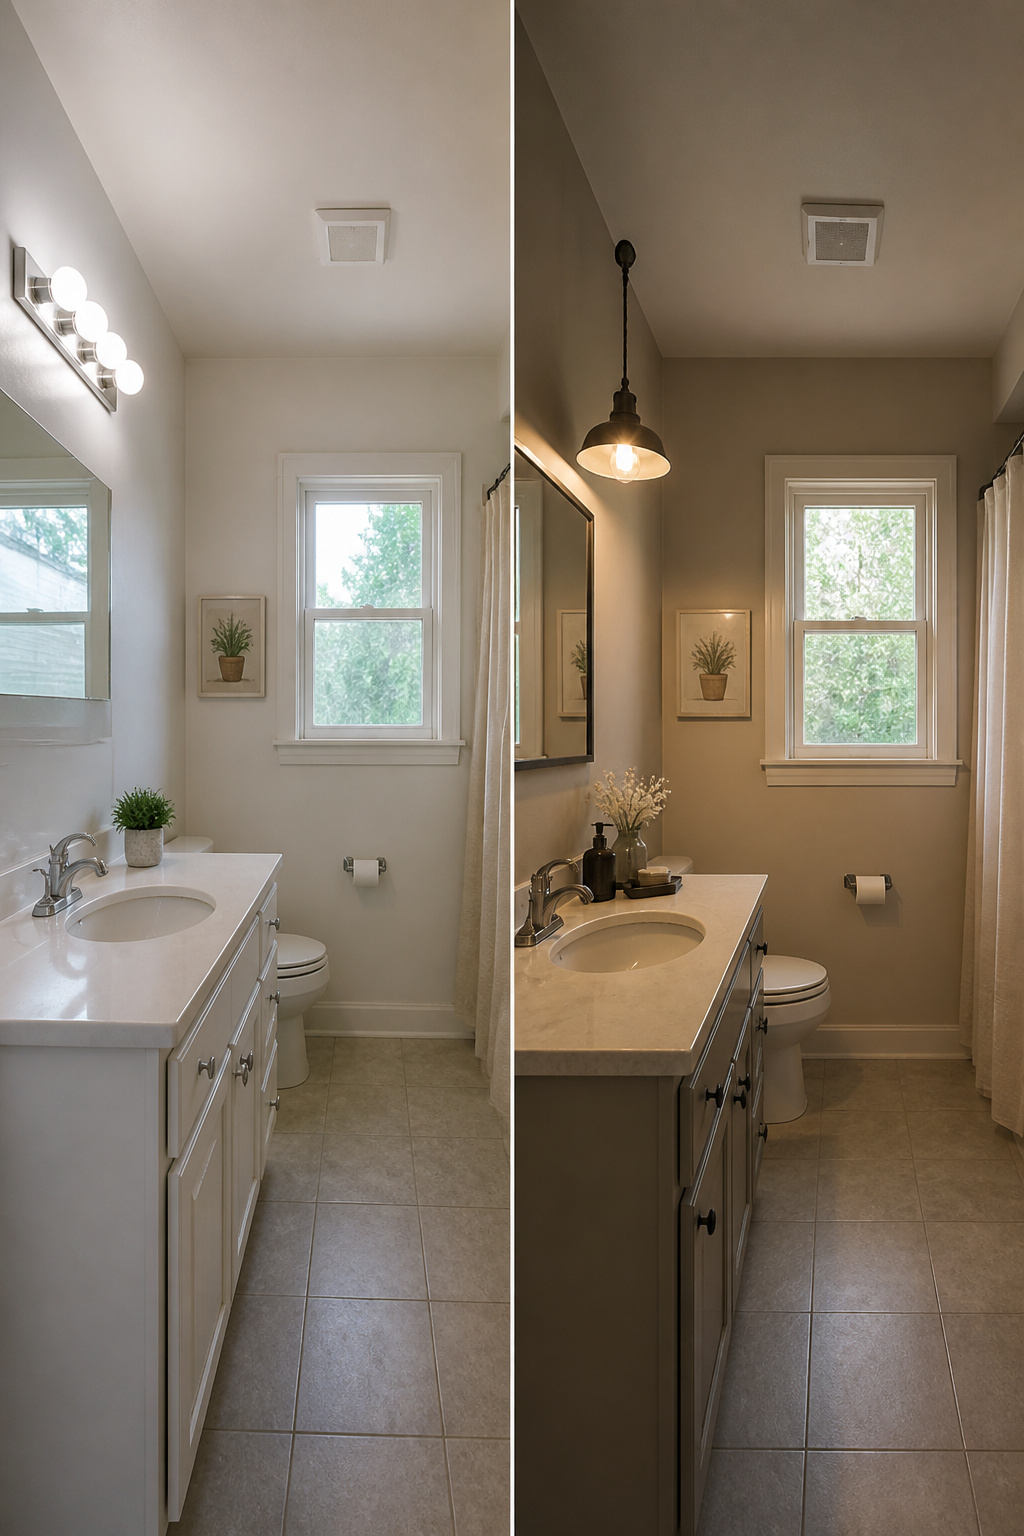
Builder-grade bathroom lighting usually means a strip of bulbs above the mirror, the kind that turns the room into a dressing room and not in a flattering way. Swapping it out is the fastest way to shift the whole mood toward farmhouse without touching tile or paint.
Pendant lights over the vanity, sconces flanking the mirror, or a single industrial fixture above it all read as intentional where the old bar read as leftover. Vintage pieces from estate sales or salvage yards fit the same look if the wiring checks out. Every option here stays under $100, which matters because the fixture is often the first thing a guest notices and the easiest place to overspend.
Cutting power at the breaker takes thirty seconds and saves the cost of an electrician. From there it is three wires, a mounting bracket, and a screwdriver. The hardest part is usually holding a heavy shade with one hand while twisting caps with the other, so a second set of hands helps. If the new base does not cover the old paint line, a quick ceiling-touch of the wall color fixes it before the install.
Replace or Frame Mirrors
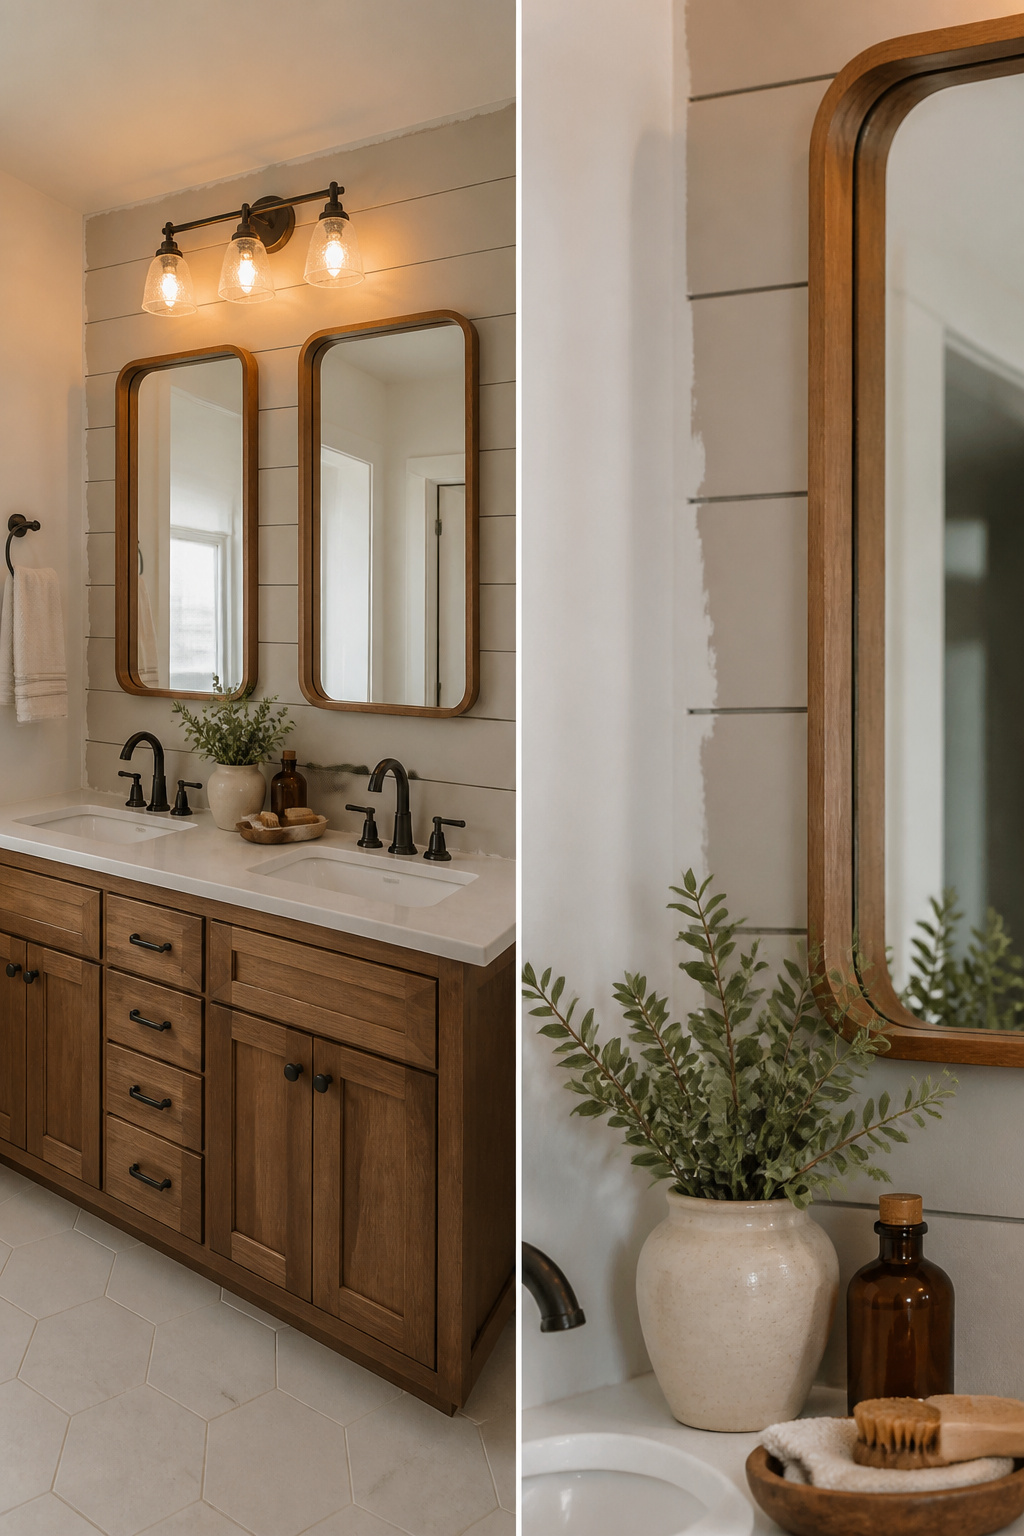
Builder-grade bathrooms almost always ship with one massive unframed mirror that stretches wall to wall above the vanity. It is functional, but it reads as leftover from a hotel corridor, and in a modern farmhouse scheme it fights every warm, textured choice you make.
Swapping it for two smaller framed mirrors changes the room completely. In my own search, wood-framed pairs from HomeGoods ran roughly what a single weekend dinner out costs, and the color of the wood against painted cabinetry gives the eye something to settle on. Hobby Lobby runs half-off mirror sales often enough that two matching pieces can land under $100 for the pair. The gap between them breaks that flat institutional plane and lets wall color or shiplap peek through.
If the mirror is glued and the removal feels risky, a DIY frame around the existing glass costs even less. One-inch or two-inch boards, stained or painted, get glued to a plywood backing and then to the mirror edge itself. The whole assembly hangs as one unit. Straight boards matter here: even hand-selected reclaimed lumber can bow enough to gap against glass, which is why some framers eventually pull the old mirror down and start fresh.
Either path, the shift from one slab to framed shapes is what sells the farmhouse look. The light fixture above now has objects to relate to instead of a blank sheet to compete with, and the room gains the layered, collected feel the style depends on.
Change Hardware
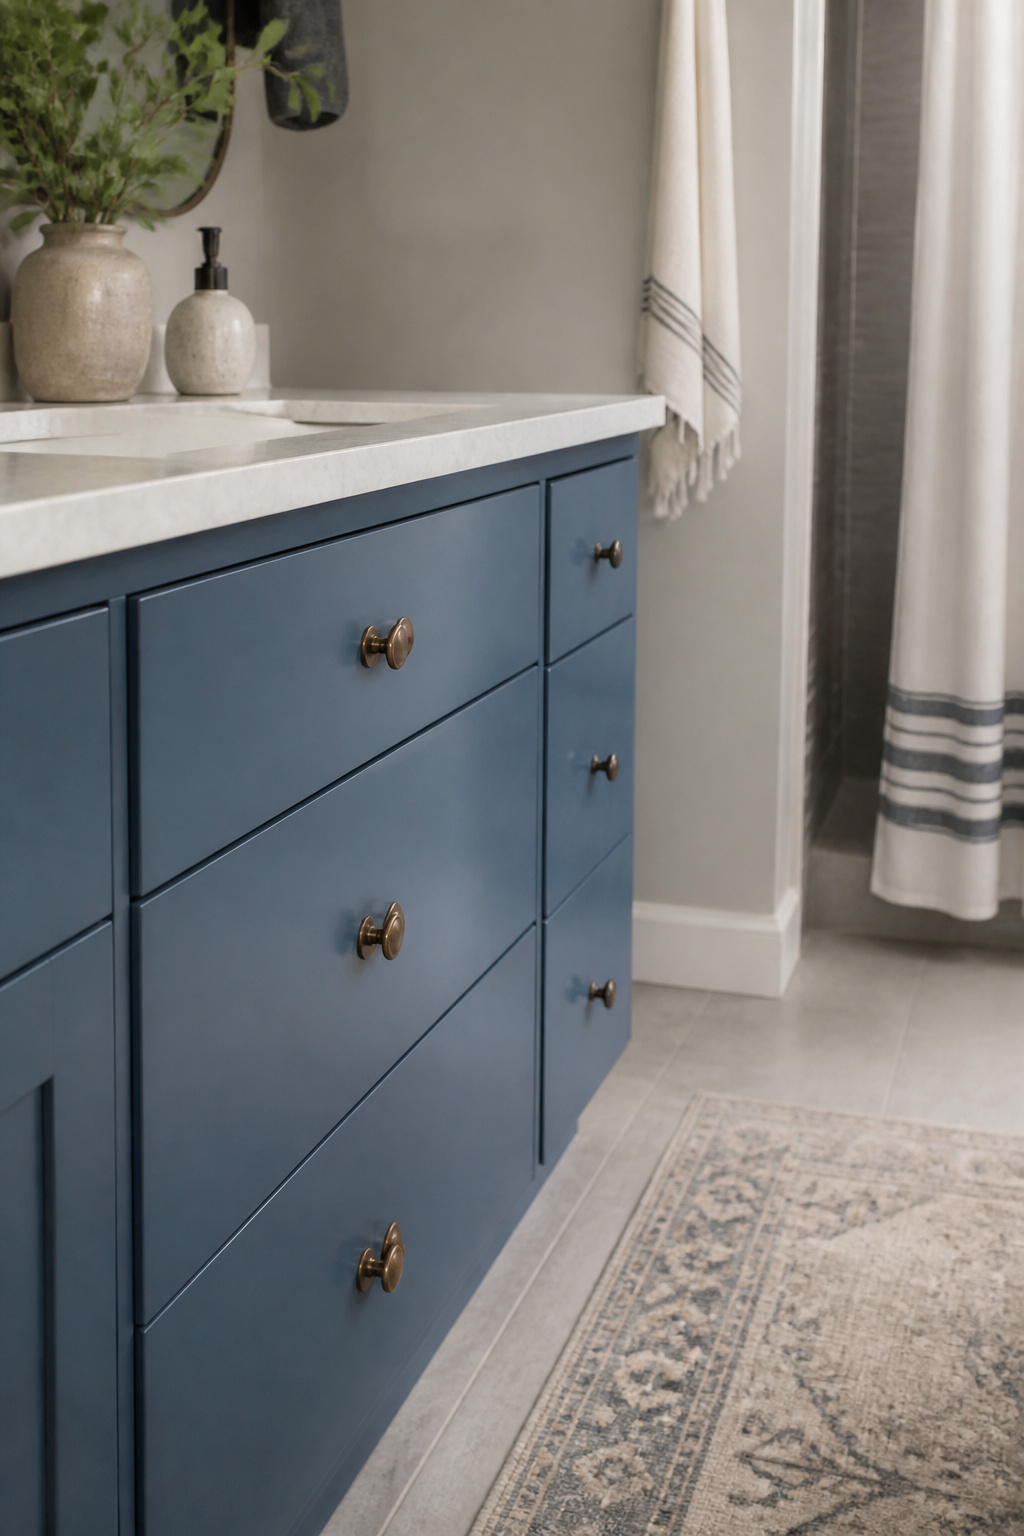
The builder-grade vanity in my last rental came with no hardware at all, just flat-front drawers that collected fingerprints. Swapping in vintage bronze knobs and black hammered knobs at about $18 for the set of knobs and handles changed the whole room’s temperature. I went with a Williamsburg style in vintage bronze for the main cabinets and found the slight variation in texture against a black hammered knob on the small drawer kept it from looking like a catalog page.
Rustic pulls on the lower drawers matter more than people expect. They give you something to grip that feels worn in already, and the dark finish does the daily work of hiding water spots. Where this ties the farmhouse look together is in the repetition: the same vintage bronze that sits on the cabinet fronts echoes in whatever light fixture or mirror hook you add later. One designer whose work I kept returning to mixes metal finishes deliberately, plumbing in one tone and hardware in another, but I found that keeping hardware consistent and letting the faucet or towel bar introduce a second finish is easier to manage on a weekend timeline without overthinking it.
Add Decorative Accessories
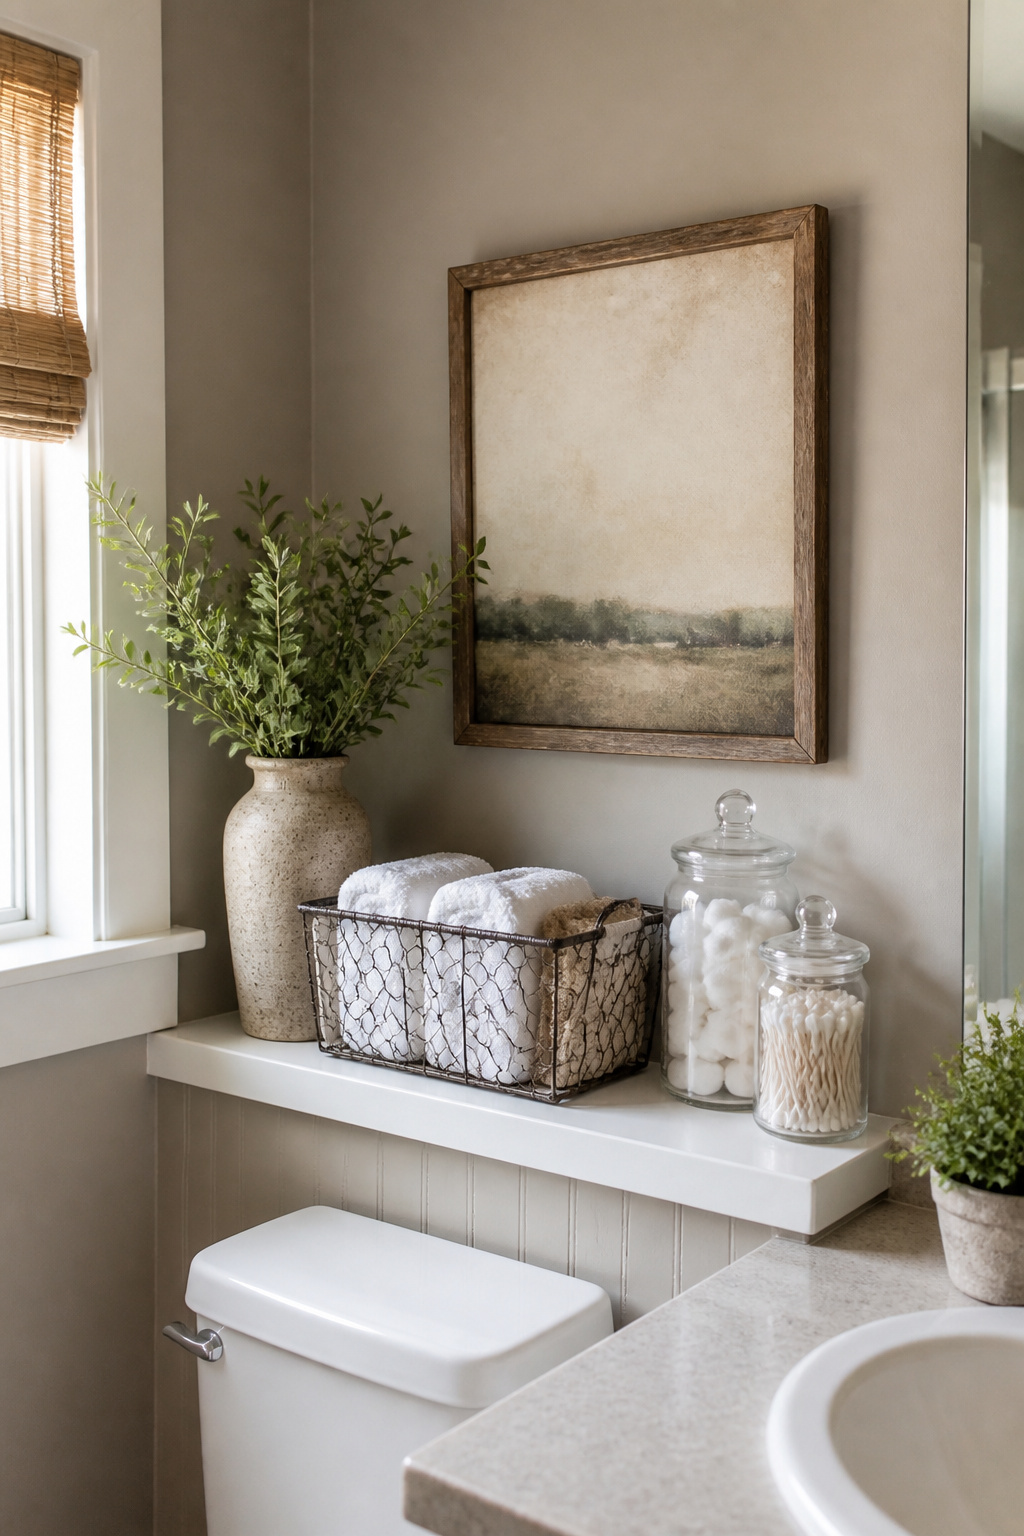
Baskets keep bathroom shelves from looking like a junk drawer that grew legs. I picked up a chicken wire basket from Walmart’s home section, the kind with enough gaps to read a label through but enough weave to hide the bottle shapes behind it. Cotton balls and Q-tips go into clear apothecary jars, the same trick that makes a dollar bag of cotton balls look intentional instead of leftover. The jar does the styling work so you don’t have to.
Rustic wall art fills the gaps without adding clutter. A wood-framed sign with printed lyrics, a galvanized bucket corralled in a corner: these are the pieces that make a bathroom feel gathered over weekends rather than decorated in one sweep. The brown apothecary bottle I spotted at HomeGoods started life as a Halloween decoration with a "poison" label; turned backward, it holds bath salts year-round. That kind of reuse is the whole point. Tiered baskets, glass jars, a row of wood hooks swapped for towel rings: each piece earns its spot by doing a job while it sits there.
Install Shelving
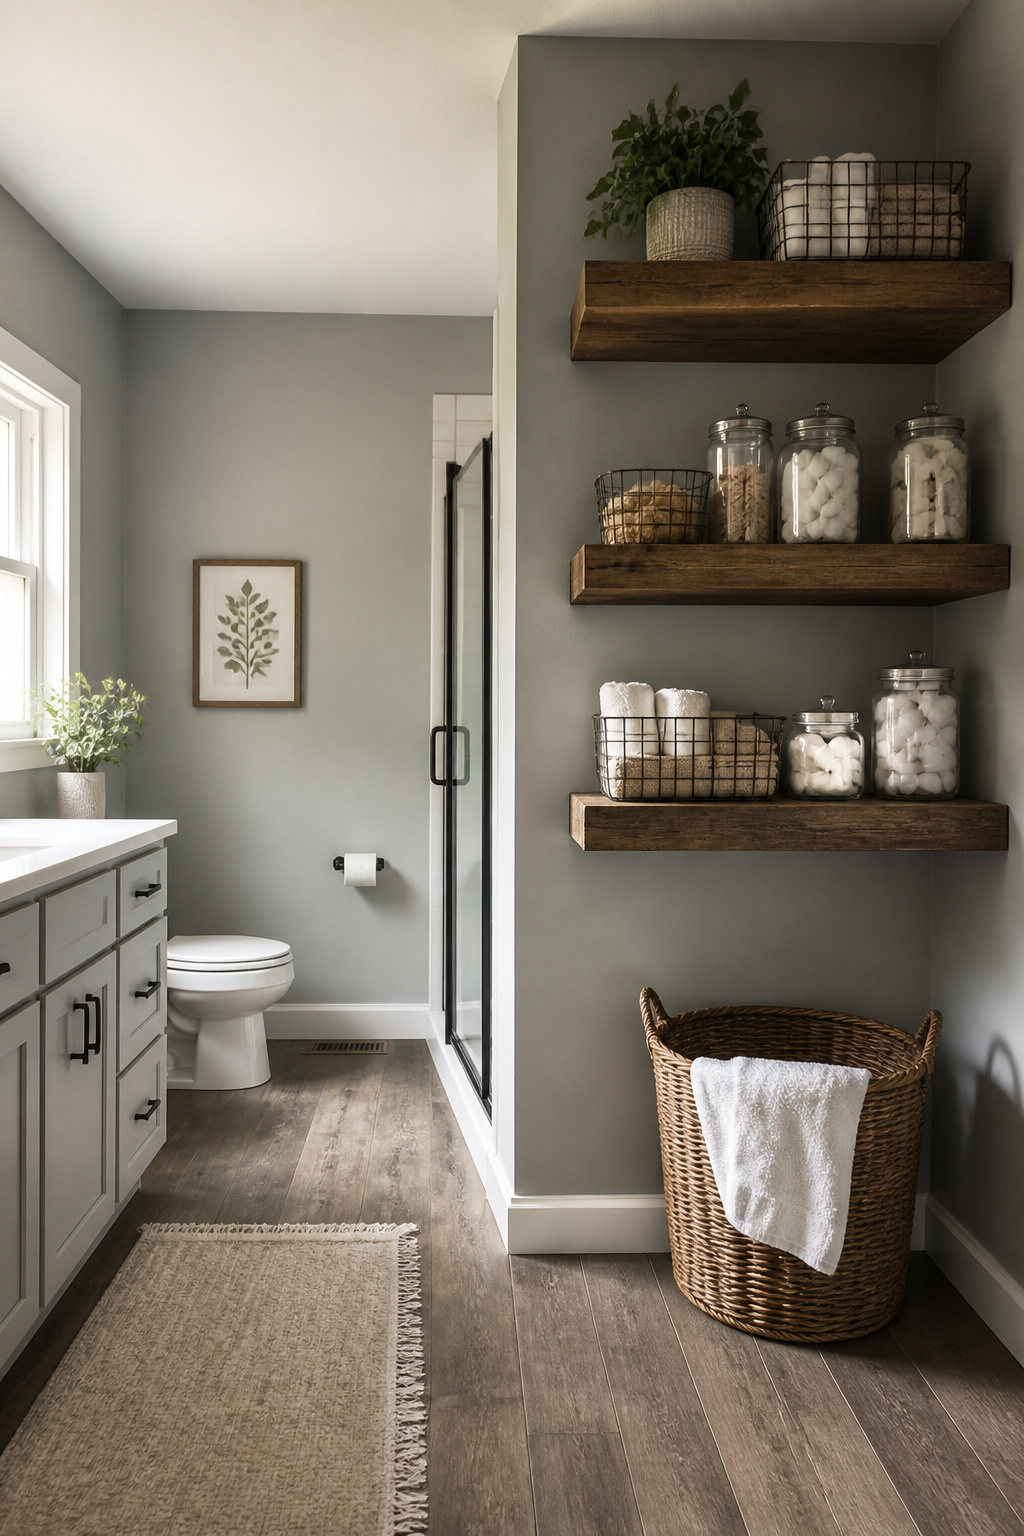
Rustic wood shelves bridge the gap between storage and style in a farmhouse bathroom. I built mine for about $15 using common pine boards and basic brackets, which beats any store-bought "farmhouse" shelf by a wide margin. The raw, unfinished look is the whole point: a coat of walnut stain, some deliberate roughing with a sander, and a matte sealant gives you that worn-in character without trying to look antique.
Open shelving keeps essentials visible and reachable, which matters more than it sounds when you’re half-awake reaching for cotton balls. Glass jars and wire baskets corral the small stuff so the display still reads intentional, not cluttered. The shelves also draw the eye up, which helps when you’re working with the standard low ceilings most builder-grade bathrooms stick you with.
Functionally, these shelves add square footage you didn’t have. A narrow bathroom with zero cabinet space suddenly holds towels, spare toiletries, and a few intentional objects that sell the farmhouse story. The trick is leaving breathing room: pack every inch and it looks like a pantry, not a styled space.
Wallpaper or Stenciling
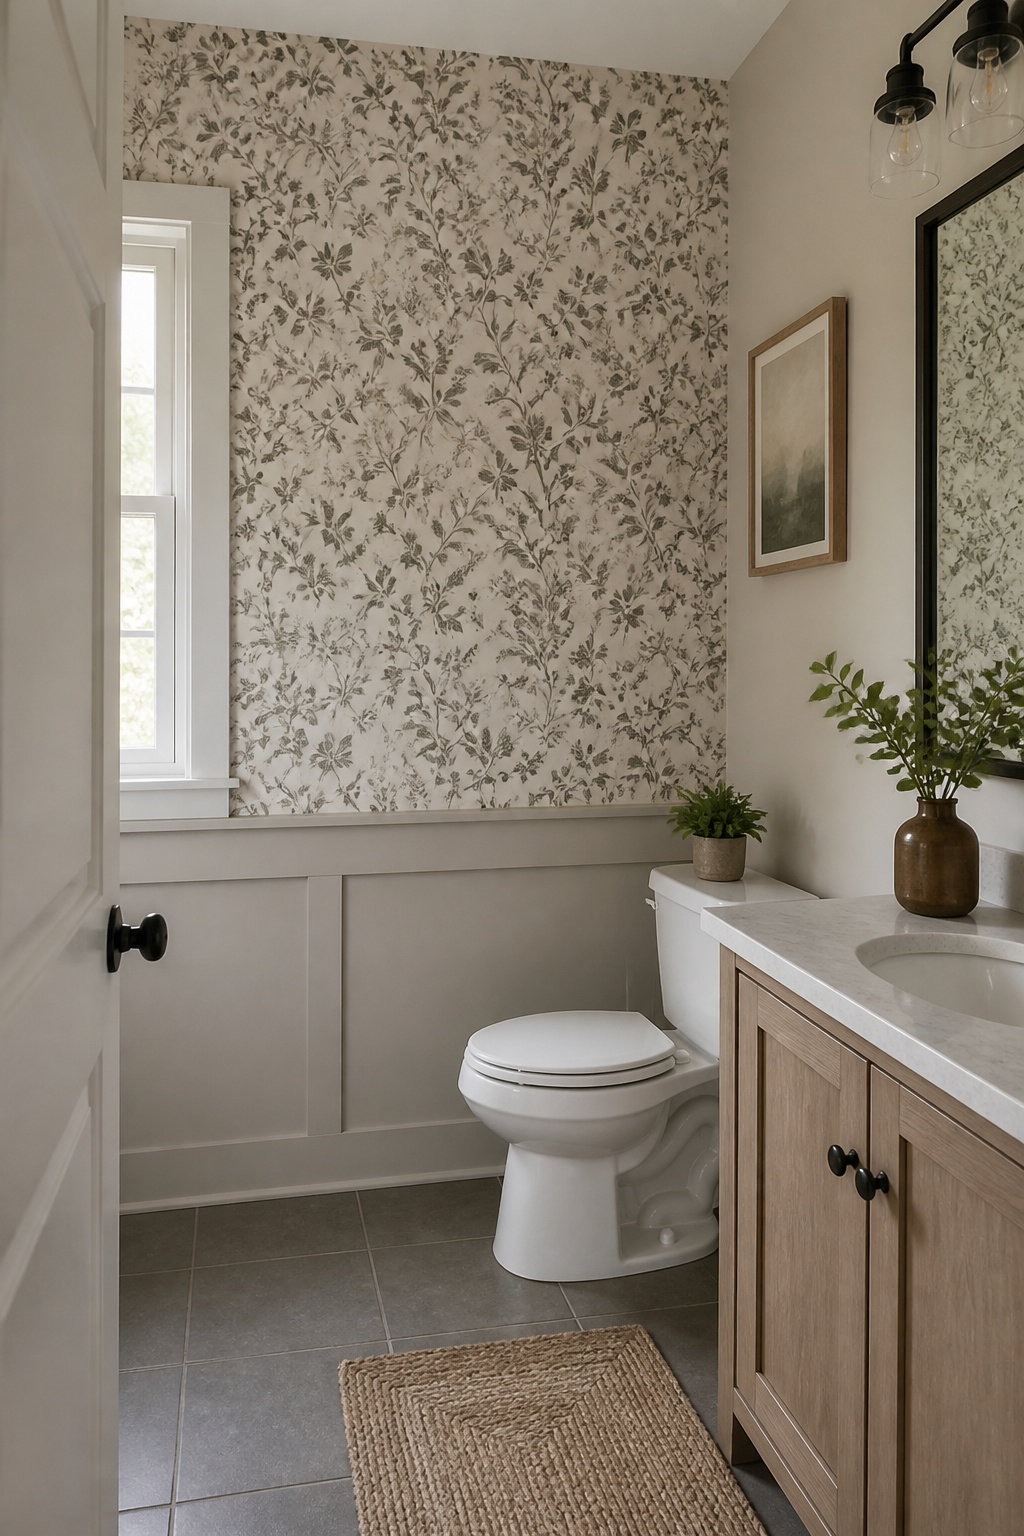
Wallpaper lands late in the sequence, after paint and fixtures are settled but before the final accessories go in. The ceiling and vanity wall already carry enough visual weight from the light swap and any mirror change, so the best remaining candidate is usually the wall opposite the door, or the upper third of all four walls if the room is small enough that full coverage won’t fight the fixtures.
A busy pattern forgives beginner mistakes. One install I read about ended with a mismatched seam dead center of the wall because the installer ran out of experience before running out of paper. The pattern was dense enough that the flaw disappears unless you’re hunting for it. That same density would overwhelm a large master bath, but in a half bath or powder room it reads as intentional farmhouse texture instead of clutter.
Stencils trade the seam risk for time. Same visual payoff, no matching problem, but the finish depends entirely on keeping the registration consistent across dozens of repeats. For a weekend project, wallpaper on one feature wall wins; stencils reward the rare bathroom with a spare afternoon and a patient hand.
What Builder Grade Means
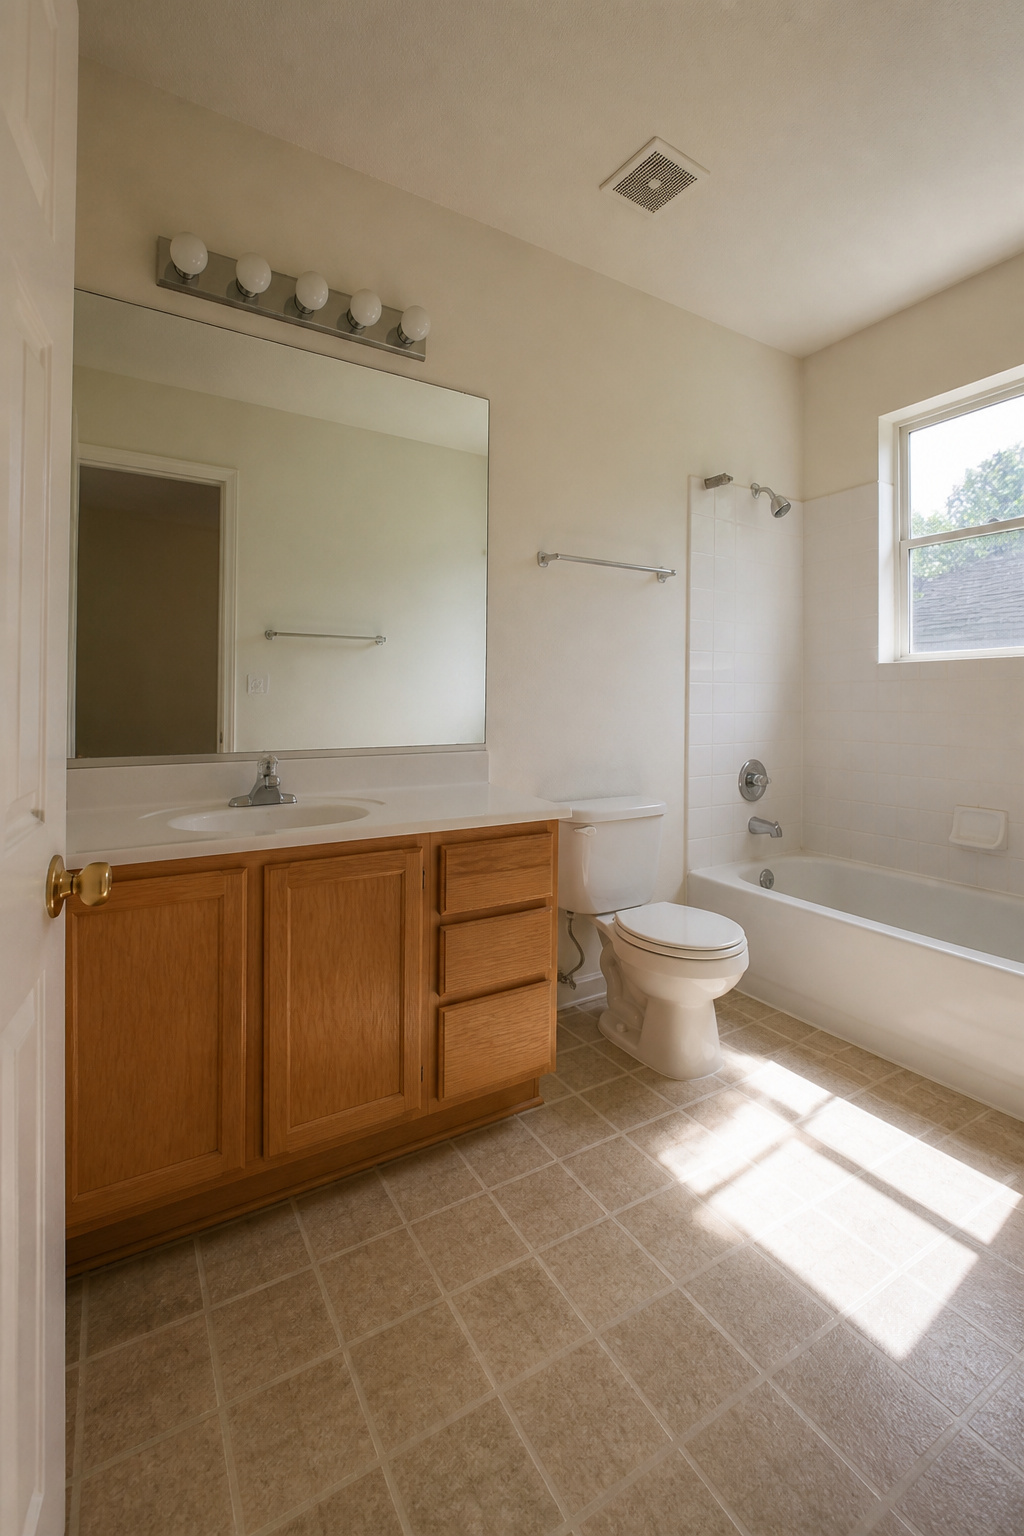
Builder-grade sits at the bottom of the material grading scale, below quality, custom, and ultra-custom tiers. The bathroom you’re starting from likely has the telltale signs: a basic light fixture with no personality, a mirror simply clipped to the wall, a honey oak or composite vanity, vinyl flooring, and those ubiquitous builder-white walls. Builders choose these materials because they keep construction costs down and pass inspection. MDF, particle board, plywood composites, and plastic veneers are standard fare, none of them selected to last decades. The fixture you want to replace probably cost the builder under twenty dollars and was chosen to cast light, not to cast a shadow worth looking at. That baseline is exactly what makes the modern farmhouse transformation possible: the structure is sound, the wiring is in place, and every choice ahead of you is an upgrade rather than a repair.
Farmhouse Style Elements
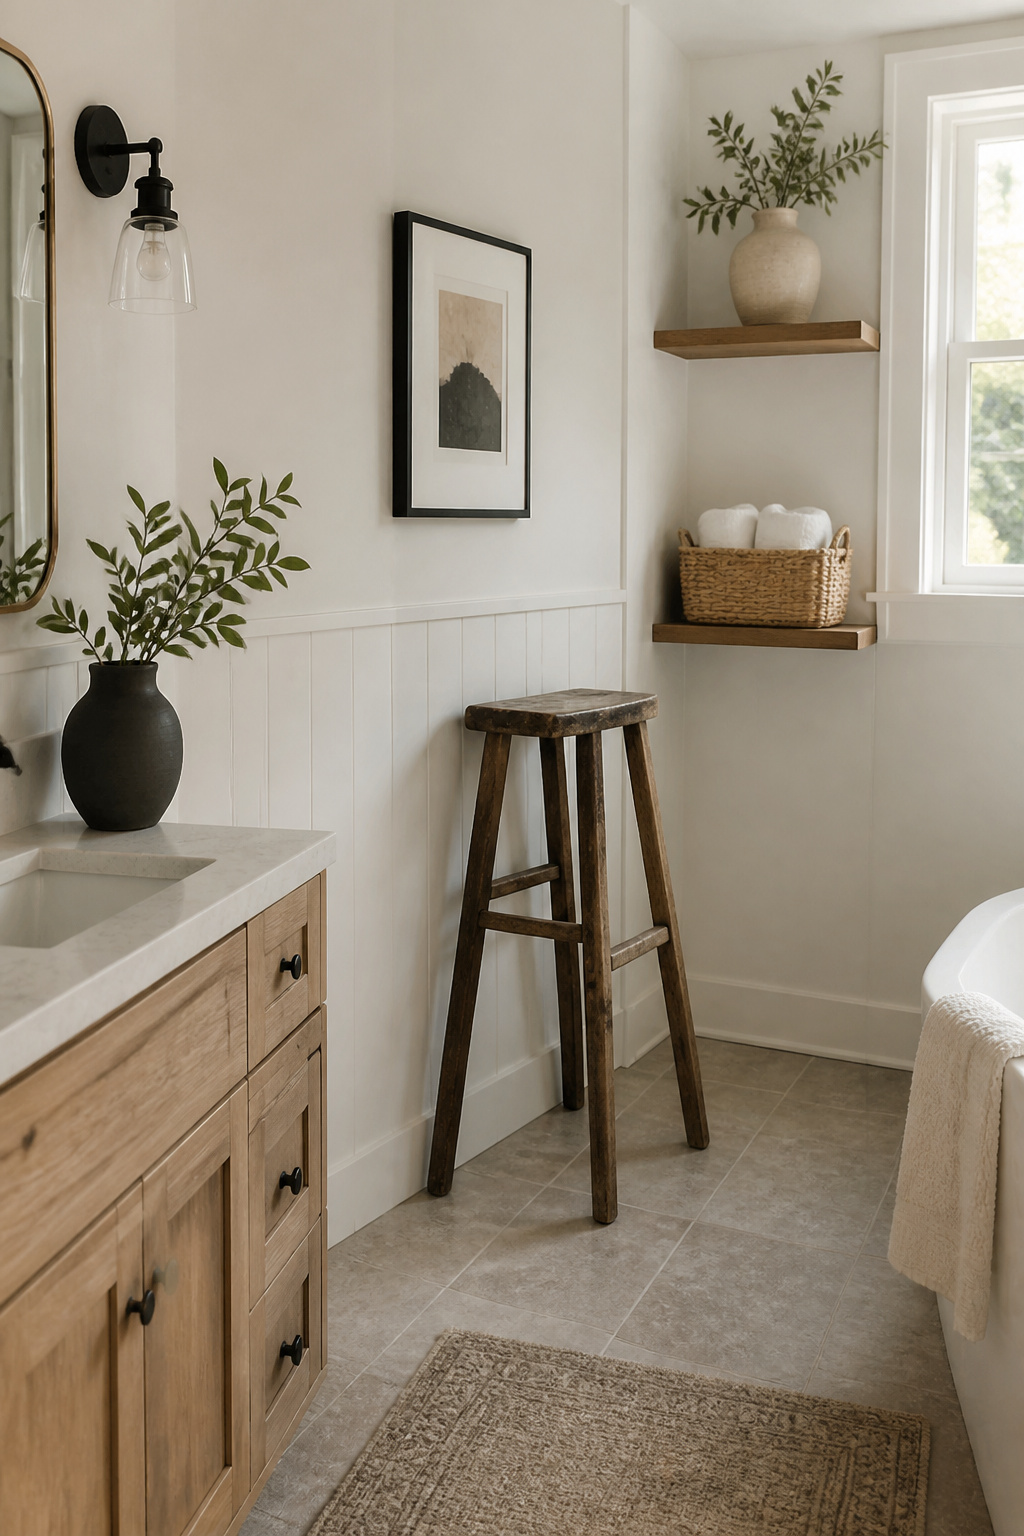
Modern farmhouse sits in a space that pure rustic and pure modern both miss. Rustic materials with clean edges are what signal it, not distressed wood piled on distressed wood. I noticed this when I started pulling apart what I liked in photos: a cast-iron hook on a smooth painted wall, a rough linen towel folded on a ledge with no bracket showing, matte black against warm white.
The difference from rustic is restraint. A farmhouse bathroom uses one weathered element, not a cabin’s worth. The difference from modern is warmth; the lines stay simple but the finishes soften. What tells a viewer "modern farmhouse" and not something else is the pairing: the vintage-inspired piece that looks found, set against the plain geometry of a builder-grade box. A schoolhouse light fixture, for instance, reads farmhouse only when the surrounding trim is pared back and the color palette stays quiet. Too many competing textures and the eye reads clutter, or a theme park version of country.
The cozy aesthetic comes from this balance, not from adding cozy items. One woven basket, one turned wood stool, one cross-back towel bar. The rest is breathing room.
Fixture Comparison
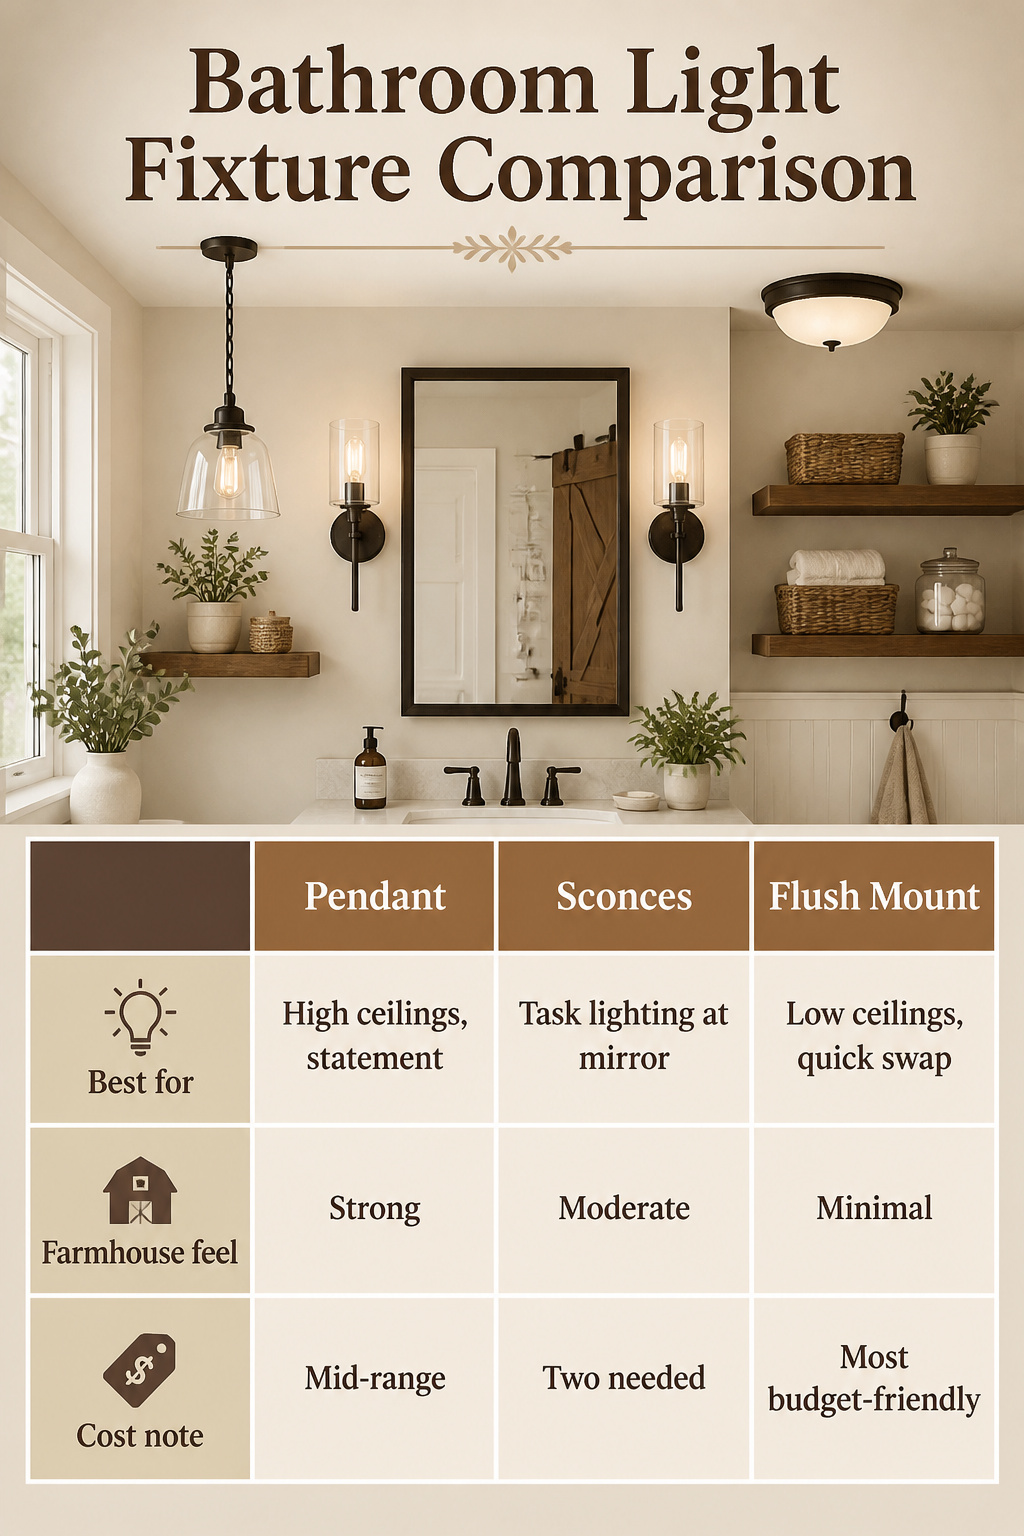
The light fixture decision usually comes down to ceiling height and what the mirror needs. Pendants add that farmhouse charm but only work where you have the headroom; sconces are the safer bet for task lighting at the vanity, and flush mounts keep things simple if you are not moving the electrical box. For mirrors, a framed piece in black or bronze ties the farmhouse look together fast, while unframed keeps the lines cleaner for small spaces.
| Pendant | Sconces | Flush Mount | |
|---|---|---|---|
| Best for | High ceilings, statement | Task lighting at mirror | Low ceilings, quick swap |
| Farmhouse feel | Strong | Moderate | Minimal |
| Cost note | Mid-range | Two needed | Most budget-friendly |
Hardware finishes break two ways. Vintage bronze and oil rubbed bronze run highest, and the cost stacks across every piece (faucet, shower trim, toilet lever, cabinet pulls). Black sits in the middle and pairs cleanly with nickel or chrome plumbing, which is the cheapest and easiest to clean. Polished chrome survives every trend cycle, so if you want to mix metals, keep the plumbing chrome and run black or bronze on lights and hardware. A third finish on the mirror frame works, but more than three starts to look busy.
Black fixtures with chrome plumbing is the combination that keeps the budget tight and the look consistent.
DIY Projects That Stretch the Budget
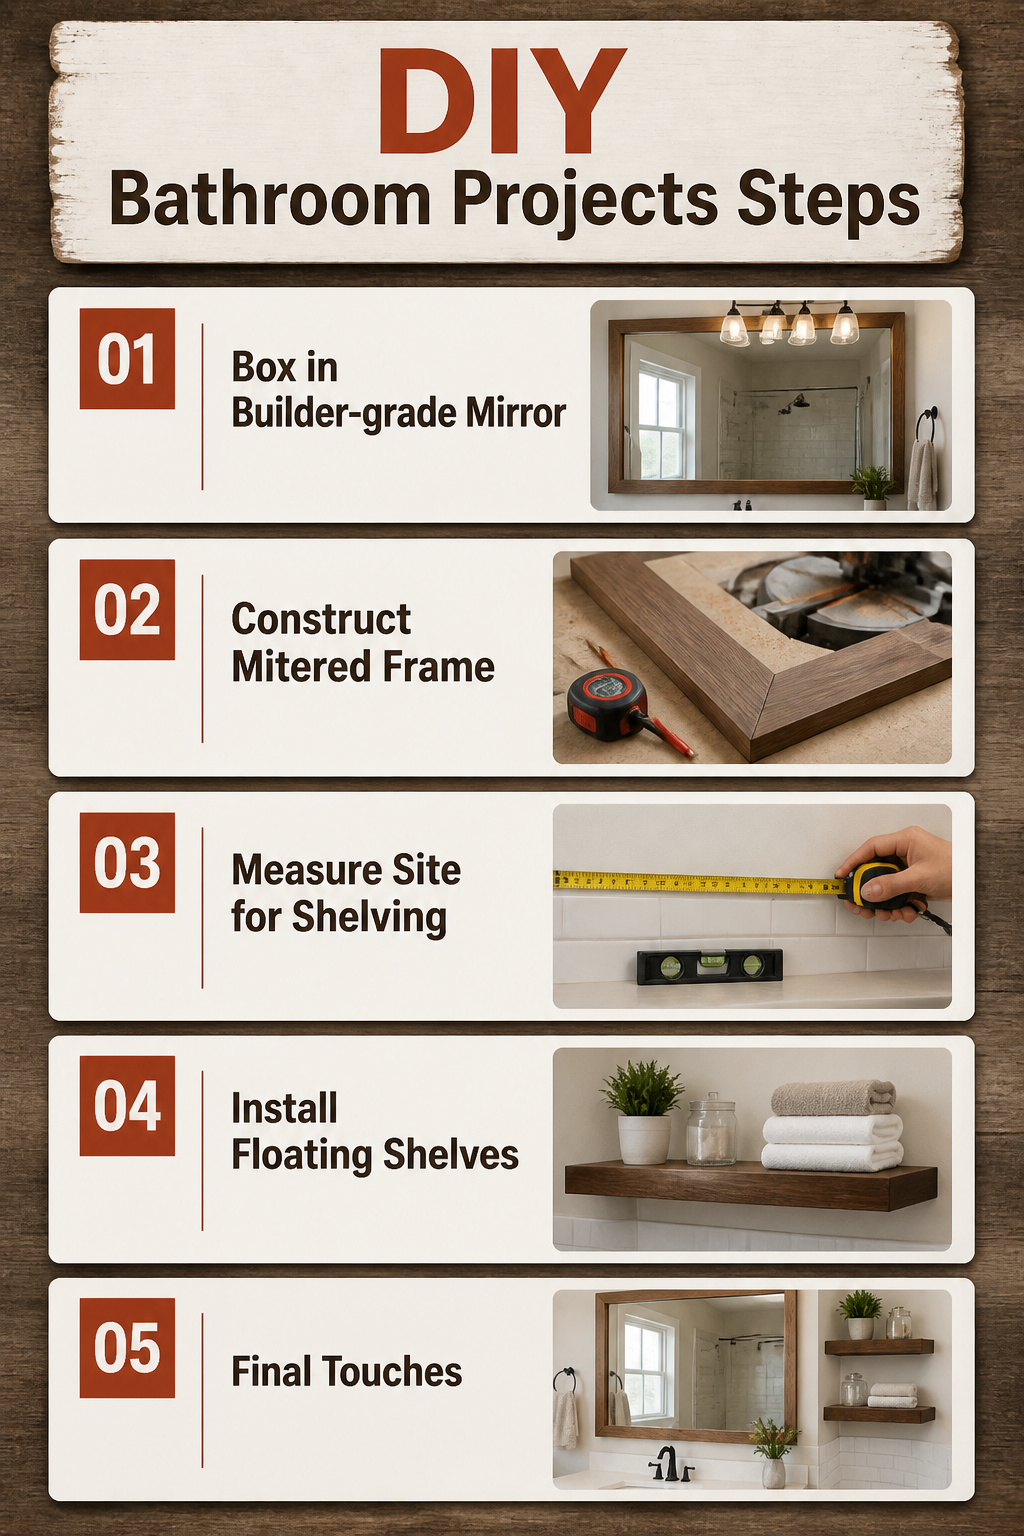
Framed mirrors and open shelving are where a bathroom makeover either saves real money or wastes a Saturday on something you could have bought for thirty dollars more. The mirror is usually the bigger payoff. A builder-grade unframed mirror spanning the full vanity can be boxed in with one-by lumber and a mitered frame for the cost of a takeout dinner, and the result reads as custom carpentry. Anne’s build-around frame on a large bathroom mirror cost almost nothing compared to the two hundred forty dollars or more you’d drop on a pair of wood-framed replacements. The frame wins if your mirror is glued flat to the wall and in good shape; replacement wins if the glass is pitted or the wall behind it needs work.
Shelving follows the opposite math. Bless’er House built theirs for fifteen dollars in lumber plus a can of Minwax Walnut stain, which sounds like a steal until you price the hour of leveling, drilling anchors into tile, and waiting for stain to cure before you can set a toothbrush on it. Ready-made floating shelves from a big-box store run twenty-five to forty dollars apiece and go up in twenty minutes. The DIY build only makes sense if you need an exact length to fit a weird nook, or if you already own the saw and the stud finder. Otherwise, buy the shelf and spend that Saturday on the mirror frame, where the labor actually pays.
What This Costs Start to Finish
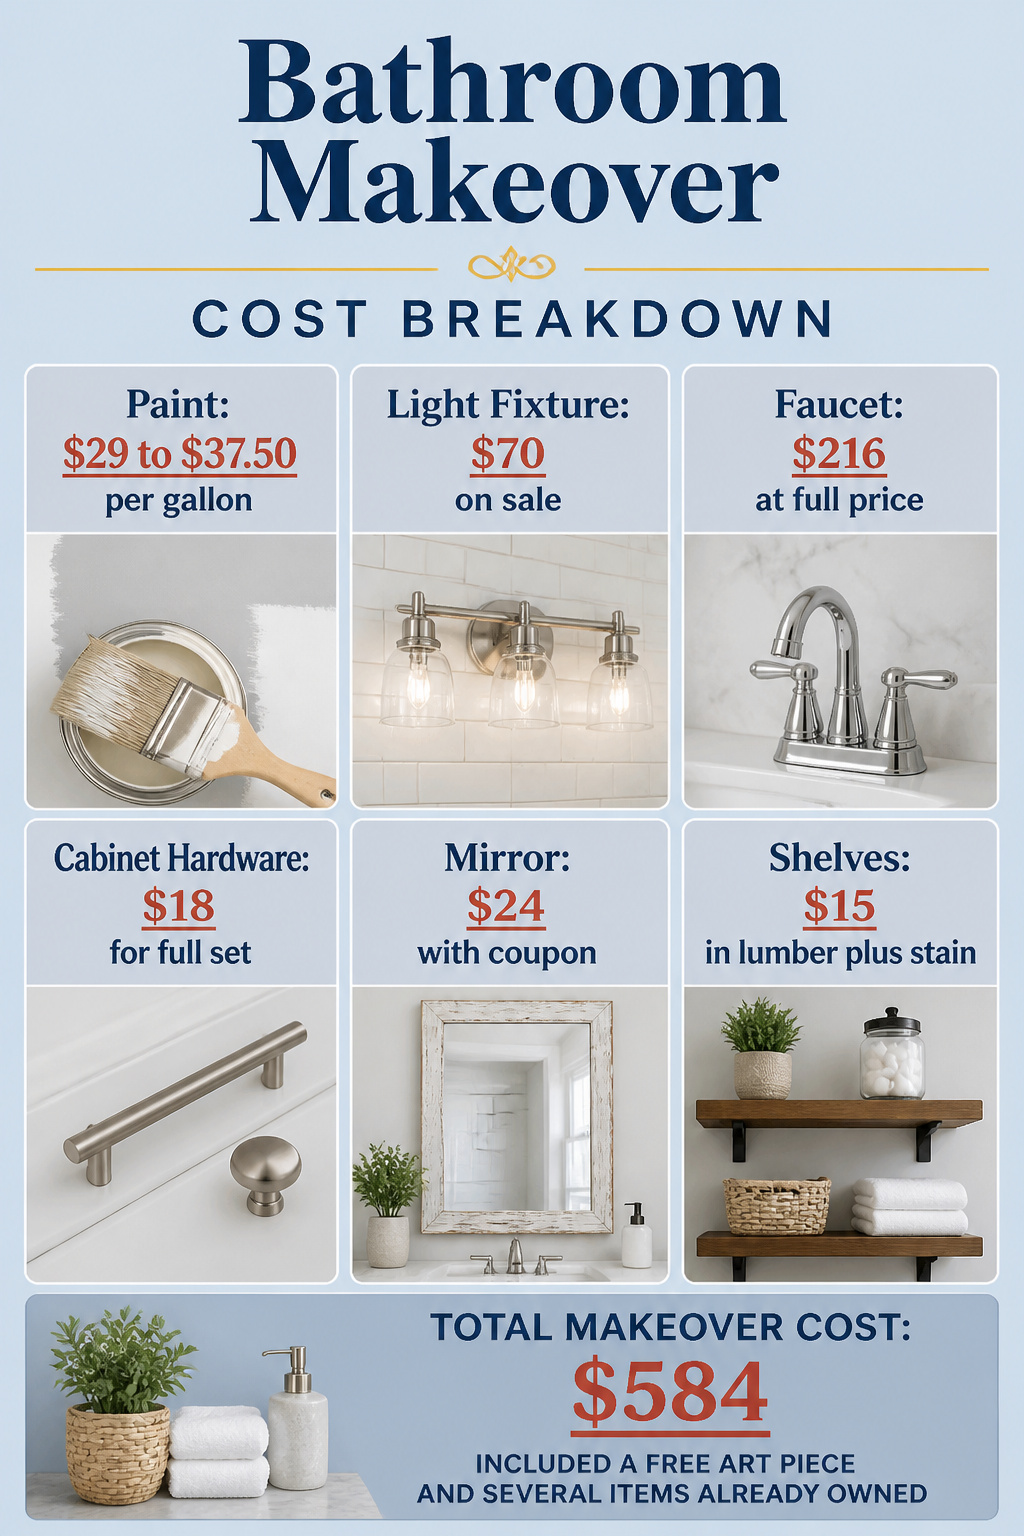
Paint runs about $29 to $37.50 per gallon depending on whether you are doing walls or cabinets, and that covers the whole room with one coat plus touch-ups. The light fixture itself, an Allen + Roth Hainsbrook from Lowe’s, landed at $70 on sale, which is the kind of number that makes or breaks a tight weekend budget. Faucets climb faster than most people expect: a Moen Vestige centerset runs $216 at full price, and chrome finishes stay the cheapest route if you are buying new rather than keeping what came with the house.
Cabinet hardware came in at $18 for the full set, but that was a 50% off Hobby Lobby score, so plan closer to $35 if you are walking in cold. The mirror, a distressed white driftwood style from Kirkland’s, cost $24 with a coupon. Shelves built from scratch ran $15 in lumber plus stain. Towel racks, bath mats, and the small stuff add another $50 to $75 if you are starting from zero. Altogether, one of these makeovers clocked in at $584, and that included a free art piece and several items already owned.
Frequently Asked Questions
What are some inexpensive ways to update a builder grade bathroom?
Paint the walls and vanity, swap out the light fixture for a farmhouse pendant or sconce, frame or replace the mirror, and change the cabinet hardware. Each of these can run under $100 and the whole room can be done in a weekend without touching tile or plumbing.
How can I make my bathroom look more modern?
Use a warmer neutral like Sherwin Williams Agreeable Gray on walls and a deeper blue-gray like Benjamin Moore Britannia Blue on the vanity. Replace the builder-grade light strip with a single industrial fixture or sconces, and swap the wall-to-wall mirror for two smaller framed pieces.
What colors are best for a farmhouse bathroom?
Warm neutrals like Agreeable Gray or Palomino Gray on walls keep beige tile and oak trim from looking muddy. For vanities, a blue-gray with enough depth, like Britannia Blue, reads modern farmhouse rather than coastal. White ceilings and trim keep the palette bright and airy.